Pipe Rail Hanging Organizer
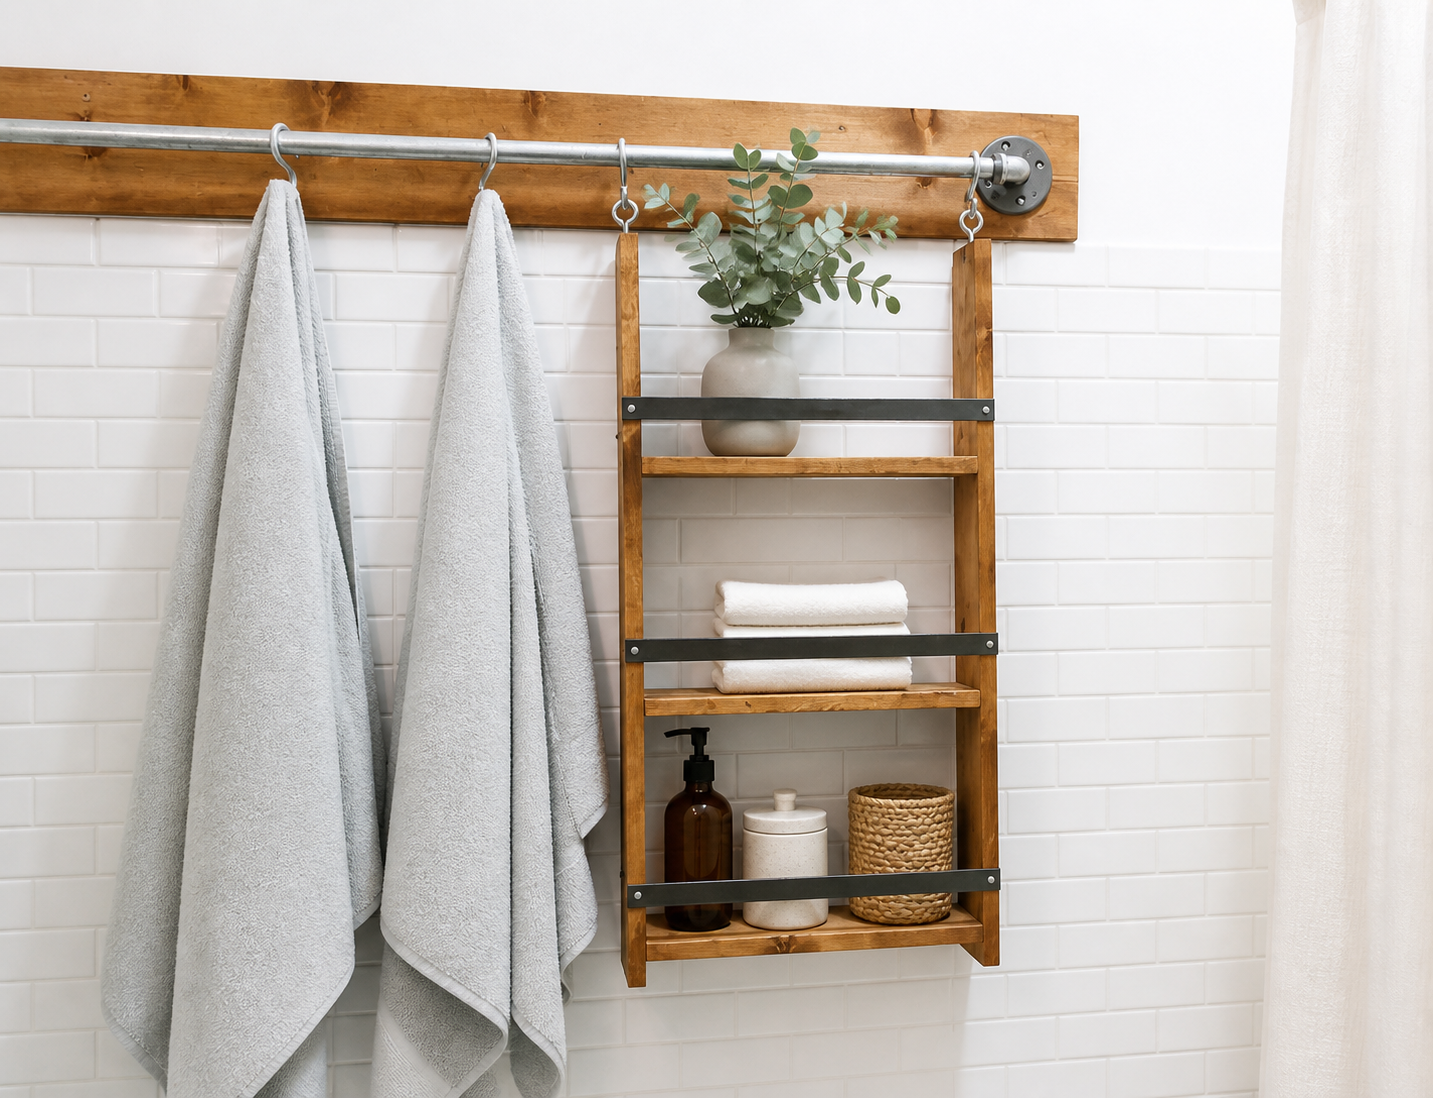
Build a flexible wall storage system with a galvanized pipe rail and a simple hanging wood organizer. This beginner-friendly DIY is a smart way to add towel hooks and open shelving without drilling multiple holes through tile—and the hanging components can be moved or changed as your storage needs evolve. A Flexible Wall Organizer for Small Spaces Small bathrooms need storage, but permanent built-ins are not always the best answer—especially when the walls are tiled. I wanted a system that could hold towels and everyday supplies while remaining easy to rearrange. The solution is a sturdy pipe rail mounted over a wood backer. S-hooks slide along the rail and can hold towels, baskets, or this easy-to-build three-tier hanging organizer. The organizer lifts off whenever you want to clean, refinish it, or swap it for another component. This project works well in bathrooms, laundry rooms, craft rooms, closets, offices, and entryways. Why You’ll Love This DIY Hanging Wall Organizer - Beginner-friendly construction with straight cuts and simple joinery - Adds open storage without a bulky cabinet - Movable S-hooks make the system easy to reconfigure - Wood backer helps distribute the load and reduces holes in the finished wall - Organizer can be removed or replaced without taking down the pipe rail - Easy to customize with paint, stain, or different shelf depths > Important: The pipe rail and wood backer must be securely fastened to wall studs or appropriate structural blocking. Do not rely on tile or drywall alone to support the system.
Specifications
| Project type | shelves |
|---|---|
| Room | Bathroom |
| Difficulty | Beginner Projects |
| Estimated cost | Under $20 |
Dimensions
Use the size-specific shopping and cut lists below.
Shopping List
- 1- 1x4 board, 8 feet long
- 1 - 48" long 3/4" x 1/8" plain steel bar
- I used 1-1/4" pocket hole screws for the entire project
- 2 - Eye Hooks
Pipe Rail Materials
Your exact pipe lengths and fittings will depend on the wall and layout. A typical installation may include:
1x6 wood backer board cut to fit the wall
3/4-inch metal pipe in the required lengths
3/4-inch floor flanges
3/4-inch elbows or street elbows
Additional tee, bushing, or corner fittings if the rail turns a corner
Heavy-duty S-hooks
Structural screws long enough to fasten the backer securely to wall studs
Screws for attaching the flanges to the wood backer
Dry-fit all pipe pieces before mounting the system. If the rail will be installed in a humid bathroom, clean and seal bare metal components with a clear protective coating rated for metal to help reduce surface rust.
Cut List
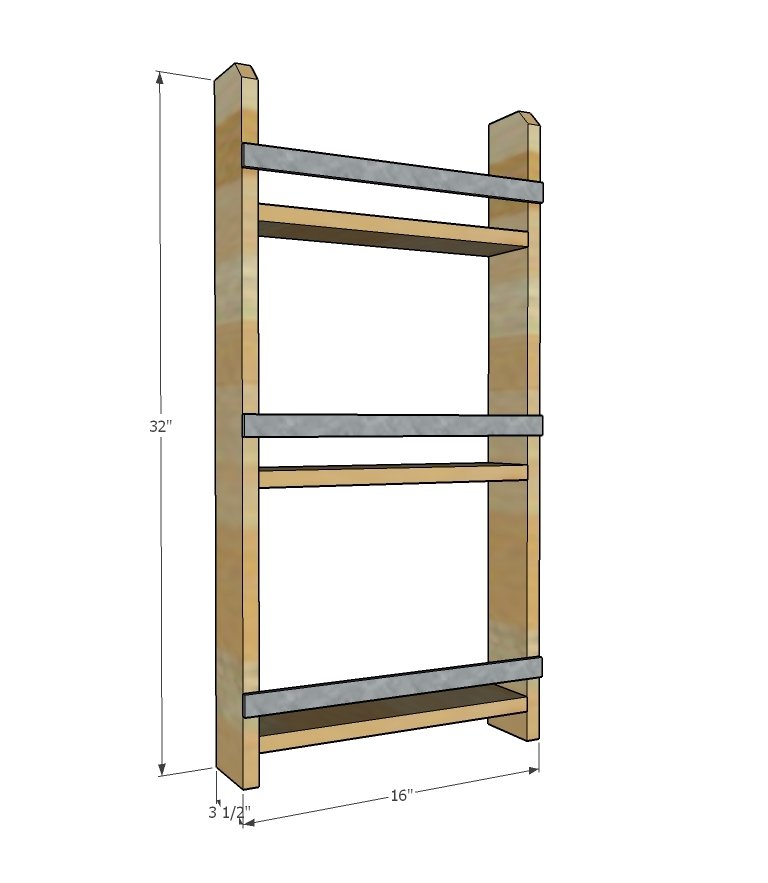
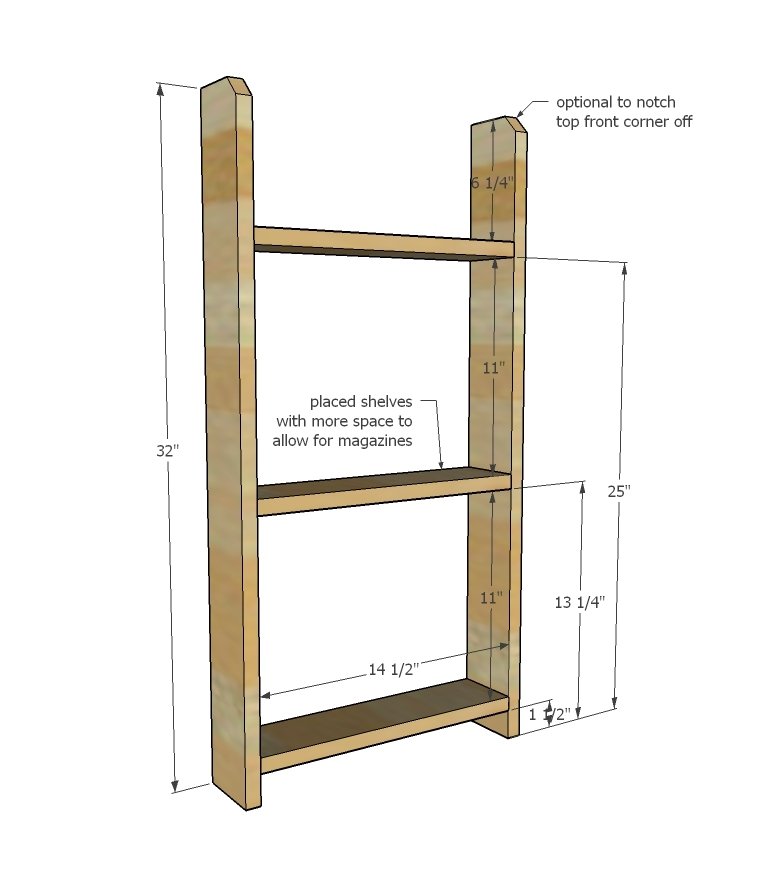
- 2 - 1x4 @ 32"
- 3 - 1x4 @ 14-1/2"
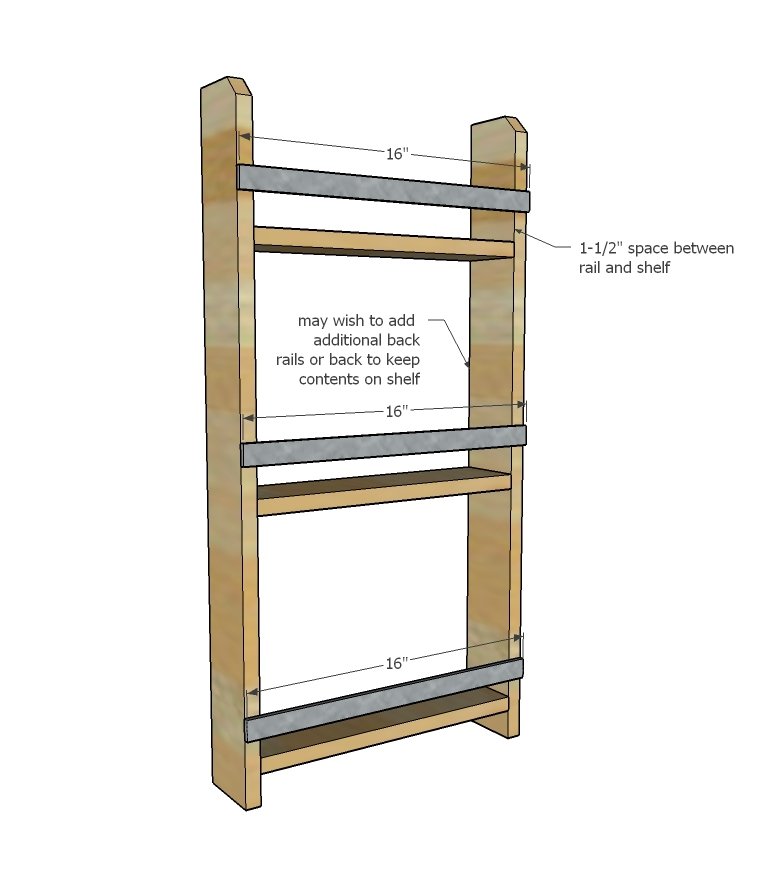
- 3 - metal pieces @ 16"
Tools
- measuring tape
- square
- pencil
- safety glasses
- hearing protection
- kreg-jig
- drill
- circular saw
Step-by-step Instructions
Step 1
Build the organizer by attaching the shelves to the sides. I used 3/4" pocket holes on the underside of the shelves, and attached with 1-1/4" pocket hole screws. You could also countersink screws from outside - I'd use 2" self tapping trim screws or similar.
Step 2
Cut the metal (check the video out, I show you how easy this is with a jigsaw) and attach with screws to the front. I use a 2x2 block to guide me when attaching (watch the video, it's all in there ) Then attach Eye hooks to the top - depending on your walls, you may wish to move the placement of the Eye Hooks at the top - by screwing in. Hang from your bar!
Finishing
Sand all surfaces, starting with a medium grit and finishing with fine. Wipe off the dust, fill any holes or gaps with wood filler, and sand smooth once dry. Apply primer if you're painting, then finish with your choice of paint or stain and seal with a durable clear topcoat. For outdoor projects, use exterior-rated primer, paint or stain, and sealer so the piece stands up to the weather.
Source (temporary): https://www.ana-white.com/woodworking-projects/diy-pipe-rail-hanging-organizer-easy-wall-storage-system