Stackable Water Bottle Storage Rack
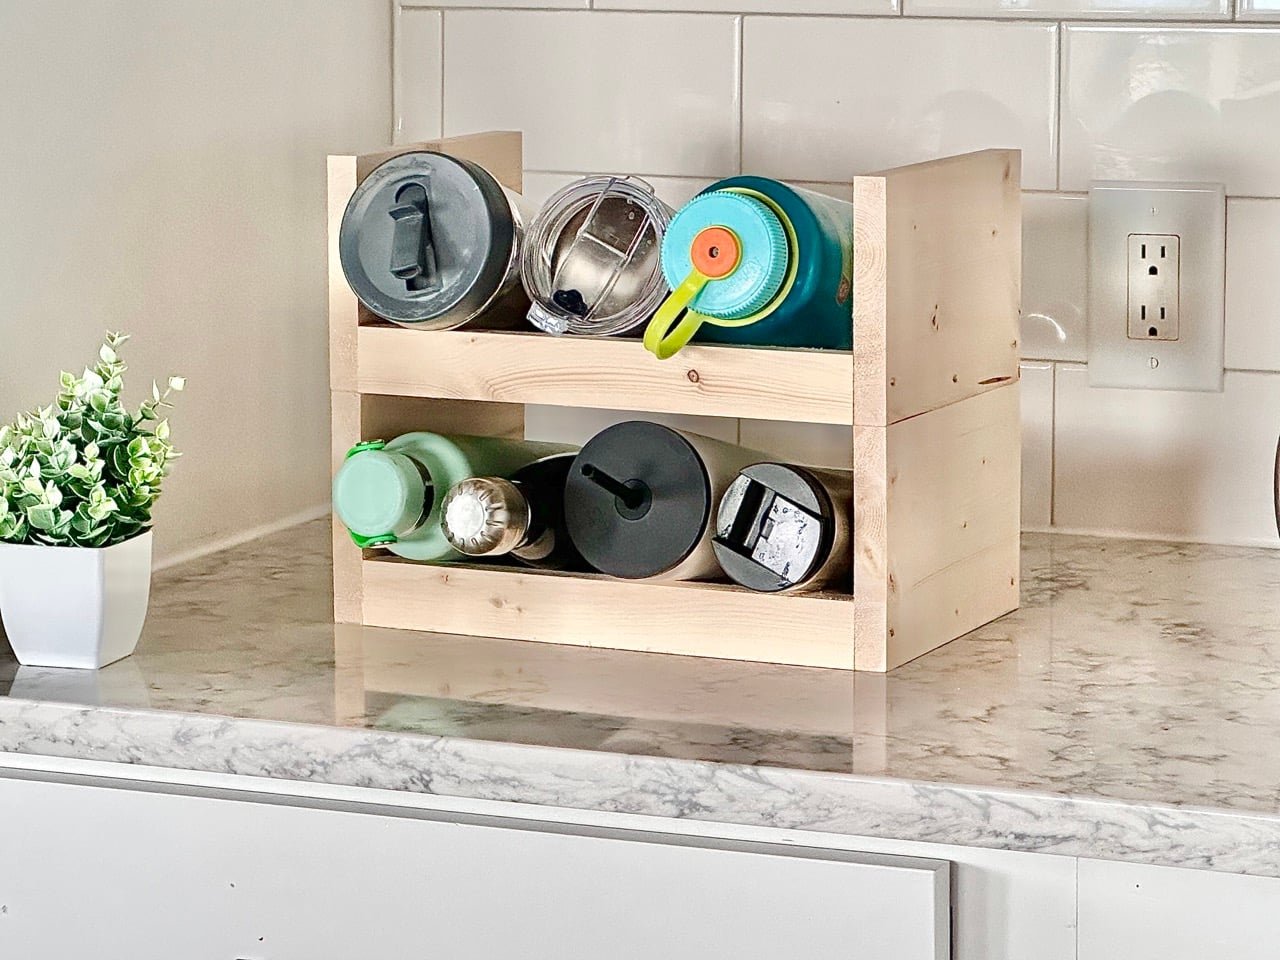
Tired of water bottles taking over your cabinets and counters? Build this easy DIY stackable water bottle rack! • Create as many tiers as you need — stack them up for bigger collections or keep it small for just a few favorites. • Enclosed sides help hide the mismatched colors and logos, so your kitchen looks clean and organized. • Designed to sit neatly on your countertop or tuck inside cabinets. • Perfect for families, athletes, and anyone who’s done playing bottle Tetris. Simple, customizable, and beginner-friendly — you’ll wonder why you didn’t build one sooner!
Specifications
| Project type | Kitchen Cabinet Plan, Accessories and Serving |
|---|---|
| Room | kitchen |
| Difficulty | Starter Projects |
| Estimated cost | Under $20 |
Dimensions
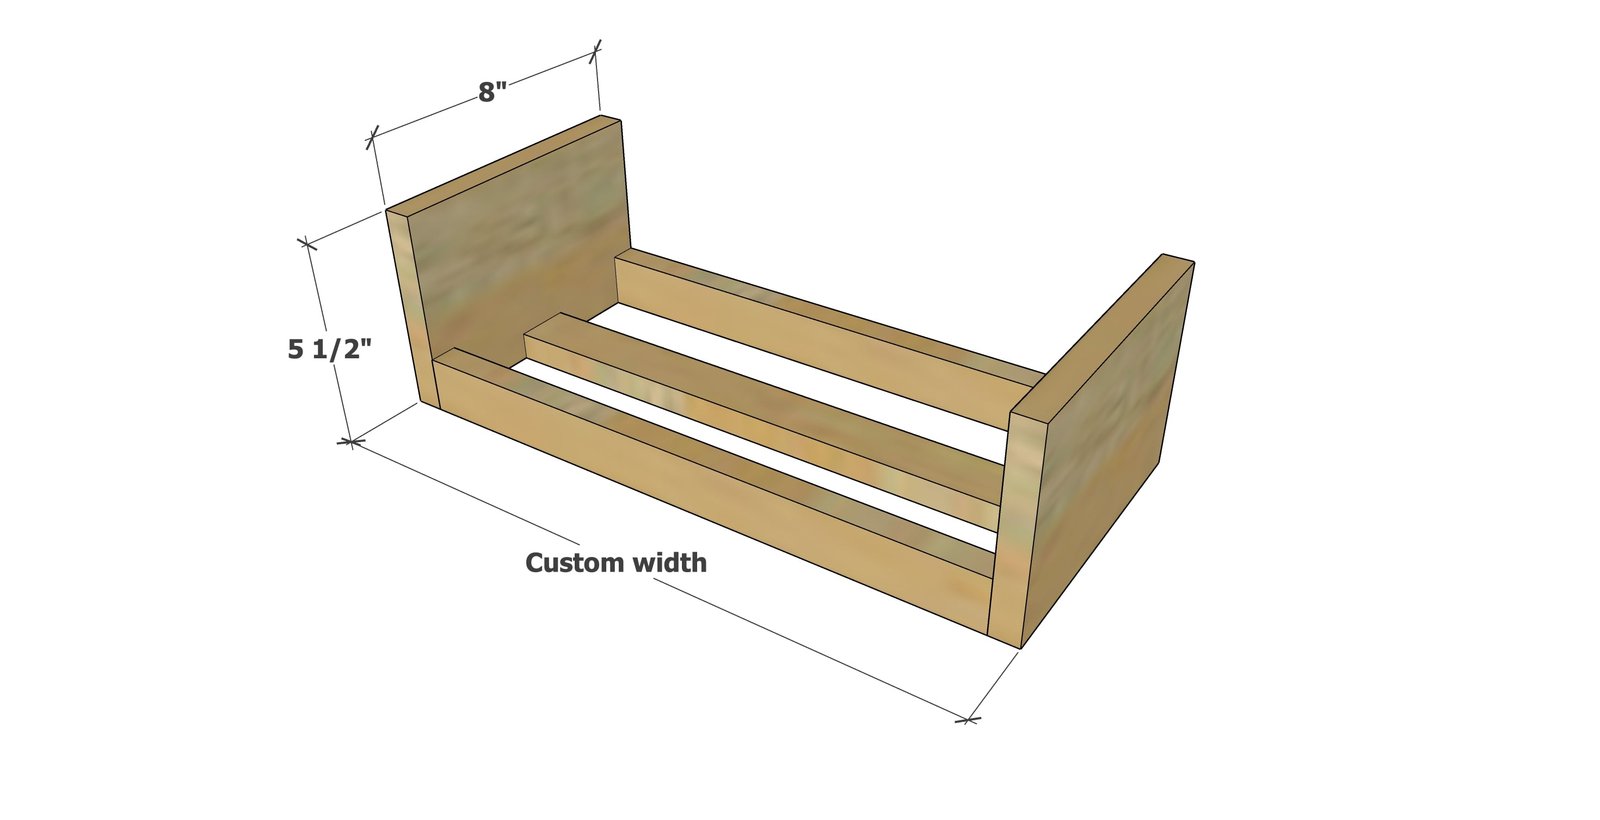
Use the size-specific shopping and cut lists below.
Shopping List
- 1x6 boards, 16" per water bottle storage rack
- 1x2 boards - you'll need three times the desired width of each rack
- 1-5/8" trim screws (6 per rack) or 1-1/4" brad nails and wood glue
- 120 grits sand paper or sanding block
- mounting tape or similar if stacking
- Paint or stain if desired
Cut List
Cut list is per 1 water bottle storage rack-
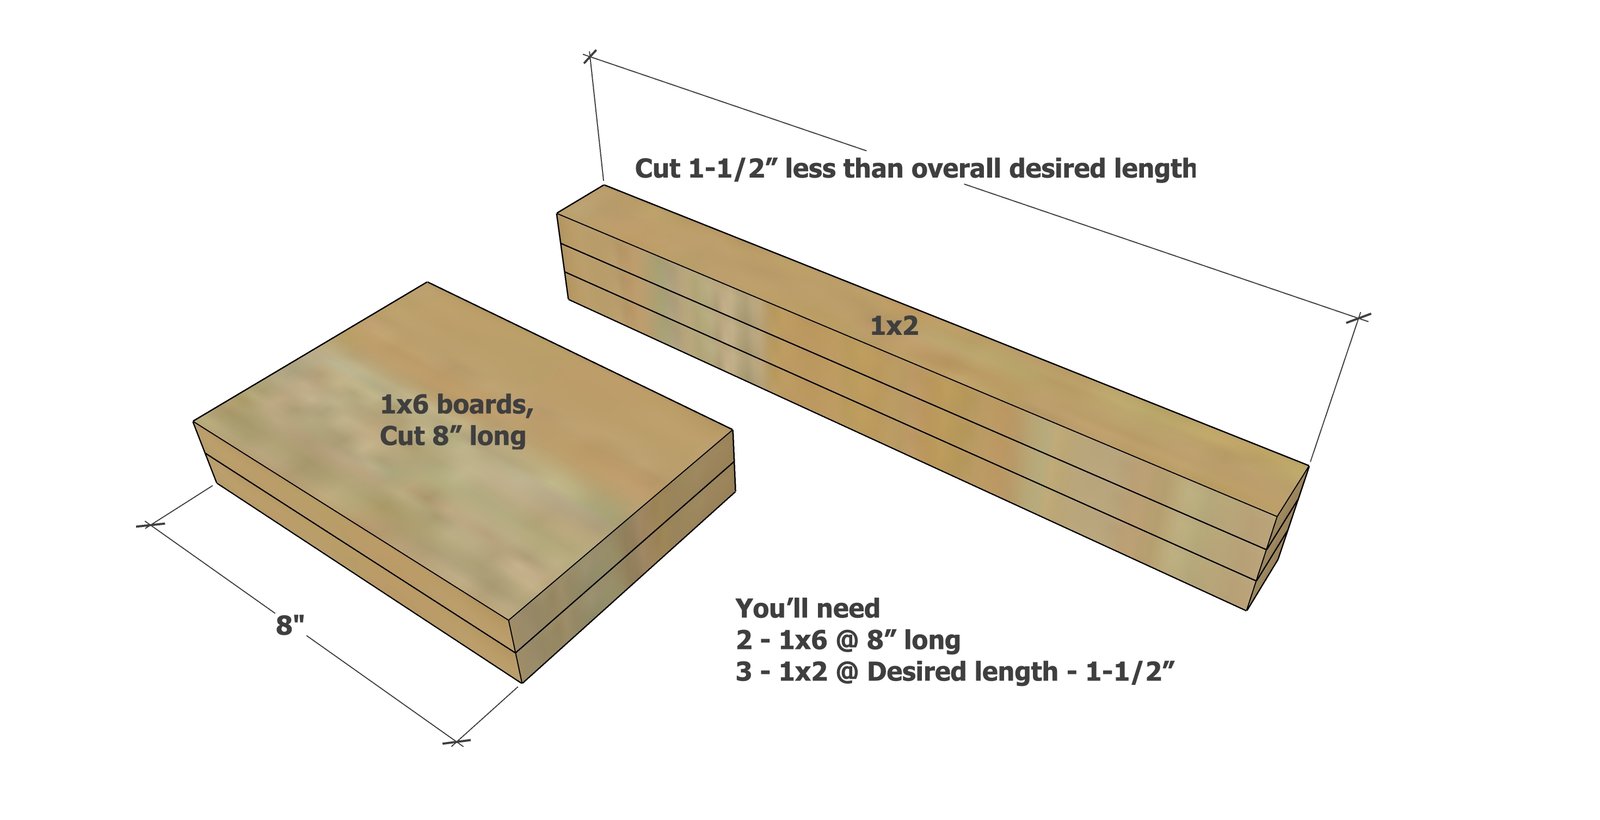
- 2 - 1x6 @ 8" long
- 3 - 1x2 @ Desired length of water bottle rack MINUS 1-1/2"
Tools
- measuring tape
- square
- pencil
- safety glasses
- drill
- circular saw
Step-by-step Instructions
Determine how long your water bottle organizer will be. Cut 1x2s to this length MINUS 1-1/2"
Per each water bottle rack, cut two 1x6 @ 8" long. How to cut? The easiest way is with a chop saw or miter saw. You can also use a circular saw or jigsaw. Sand the cut edges if rough with 120 grit sanding block.
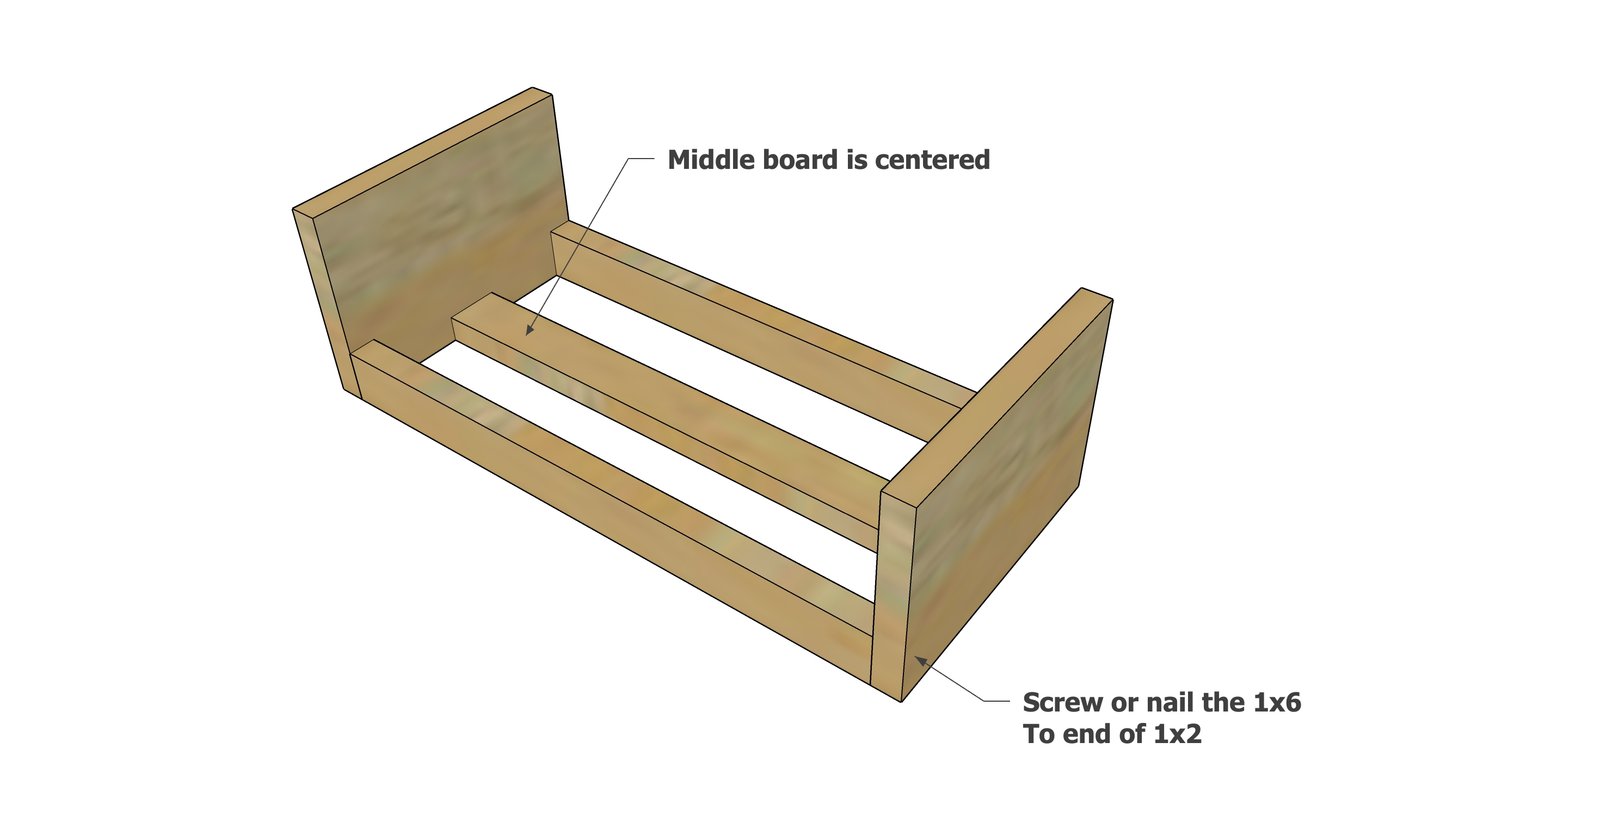
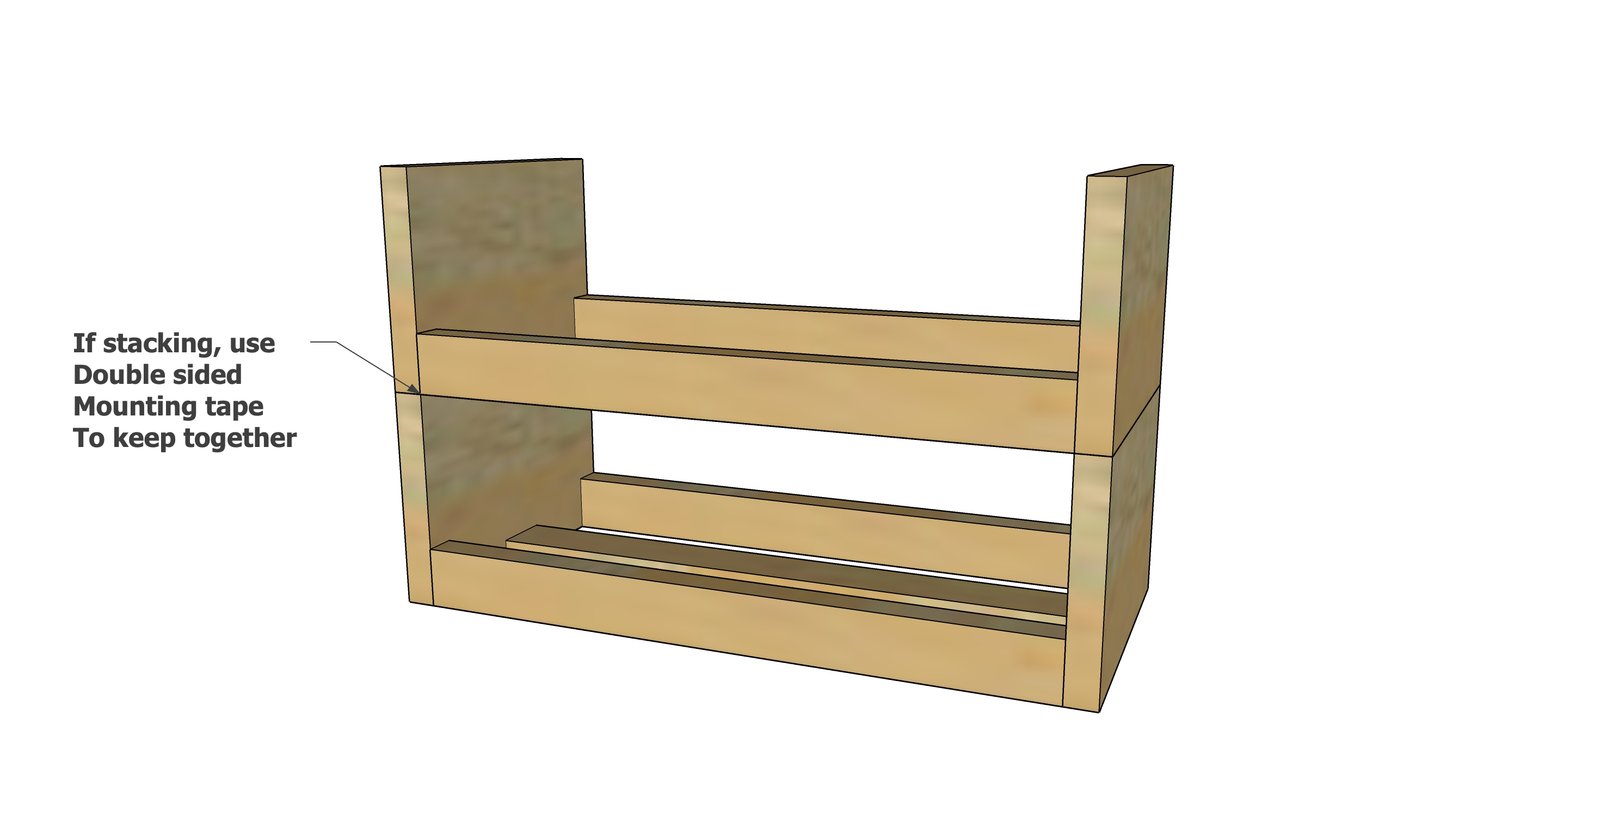
Build the water bottle storage rack by screwing or nailing the 1x6 pieces to the 1x2 pieces.
If screwing - one screw per joint is fine. If nailing, use glue and two nails per joint. Use an 18 gauge brad nailer. The outer 1x2 pieces are vertical, the center 1x2 piece is flat.
Step 3
If stacking, use mounting tape to hold multiple water bottle storage racks together.
Finishing
Sand all surfaces, starting with a medium grit and finishing with fine. Wipe off the dust, fill any holes or gaps with wood filler, and sand smooth once dry. Apply primer if you're painting, then finish with your choice of paint or stain and seal with a durable clear topcoat. For outdoor projects, use exterior-rated primer, paint or stain, and sealer so the piece stands up to the weather.
Source (temporary): https://www.ana-white.com/woodworking-projects/diy-stackable-water-bottle-storage-rack