Window Seat / Entryway Storage Bench from One Sheet of Plywood (!)
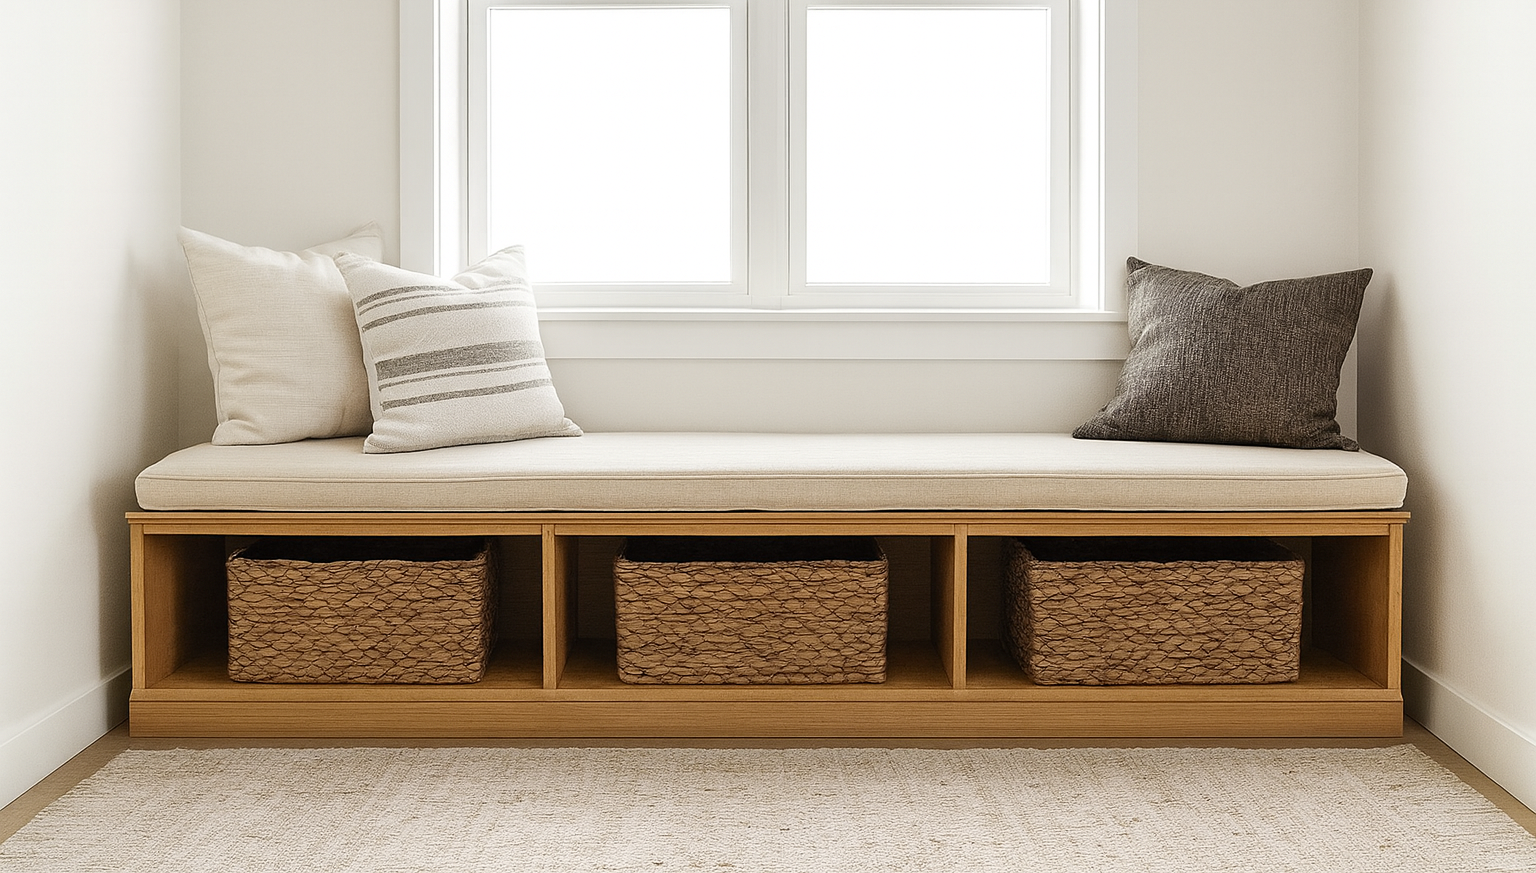
Build a beautiful and functional window seat or entryway storage bench with this simple woodworking project — made from just one sheet of plywood! This DIY bench is designed to maximize both seating and storage, making it a perfect fit for under a window, in a mudroom, or in an entryway. With, you’ll get everything you need to cut, assemble, and finish this bench — no guesswork required. The design features clean, modern farmhouse lines with open cubbies for baskets, a comfortable top for cushions, and the durability of plywood construction. Project Highlights: • Built from one sheet of plywood – budget-friendly & efficient • Sized for an 8-foot-long window seat or adaptable for smaller spaces • Provides hidden storage with cubbies for baskets, shoes, or blankets • Beginner-friendly woodworking project with step-by-step instructions • Perfect as a window seat, mudroom bench, or entryway bench Whether you’re new to woodworking or an experienced DIYer, this project is an affordable way to add custom furniture to your home. Download the today and start building your own DIY storage bench!
Specifications
| Project type | Bench |
|---|---|
| Room | Storage Solutions |
| Style | Cottage Style Furniture Plans |
| Difficulty | Intermediate |
| Estimated cost | $50 - $100 |
Dimensions
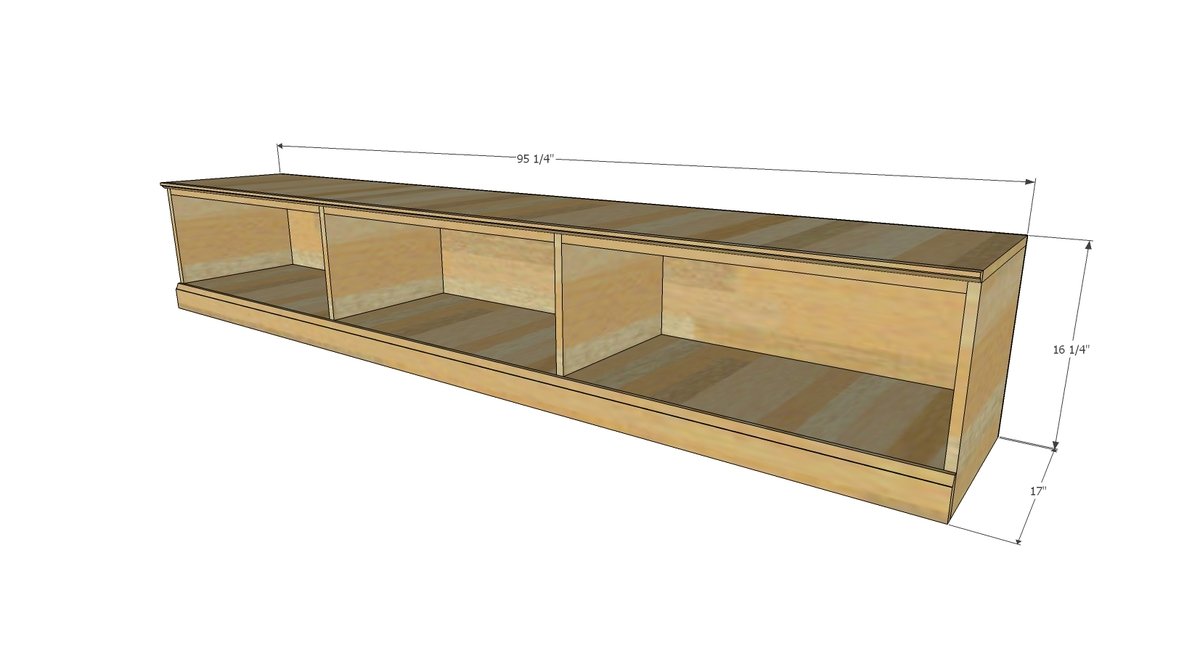
Use the size-specific shopping and cut lists below.
Shopping List
- 1 sheet of 3/4" plywood ripped into three strips, 15-3/4" wide x 8 feet long (use AC or better plywood, hardwood birch, maple, oak or MDF)
- 1 - 1x2 @ 8 feet long
- 1 - 3-1/4" base moulding, 8 feet long
- 1 - 3/4" cove moulding, 8 feet long
- 1 - 1/4" plywood or hardboard panel for back
Cut List
- 1 - 3/4" plywood @ 15-3/4" x 95-1/4" (top)
- 4 - 3/4" plywood @ 15-3/4" x 15-1/2" (dividers)
- 3 - 1x2 @ 30-3/4" (top support trim)
- 3 - 3/4" plywood @ 15-3/4" x 30-3/4" (shelves)
- 1 - 1/4" plywood @ 95-1/4" x 16-1/4" (back)
- 1 - 3-1/4" base moulding @ 95-1/4" (trim)
- 1 - 3/4" cove moulding @ 95-1/4" (top cove)
Tools
- measuring tape
- square
- pencil
- safety glasses
- hearing protection
- kreg-jig
- drill
- table saw
- nailer
- sander
Step-by-step Instructions
Step 1
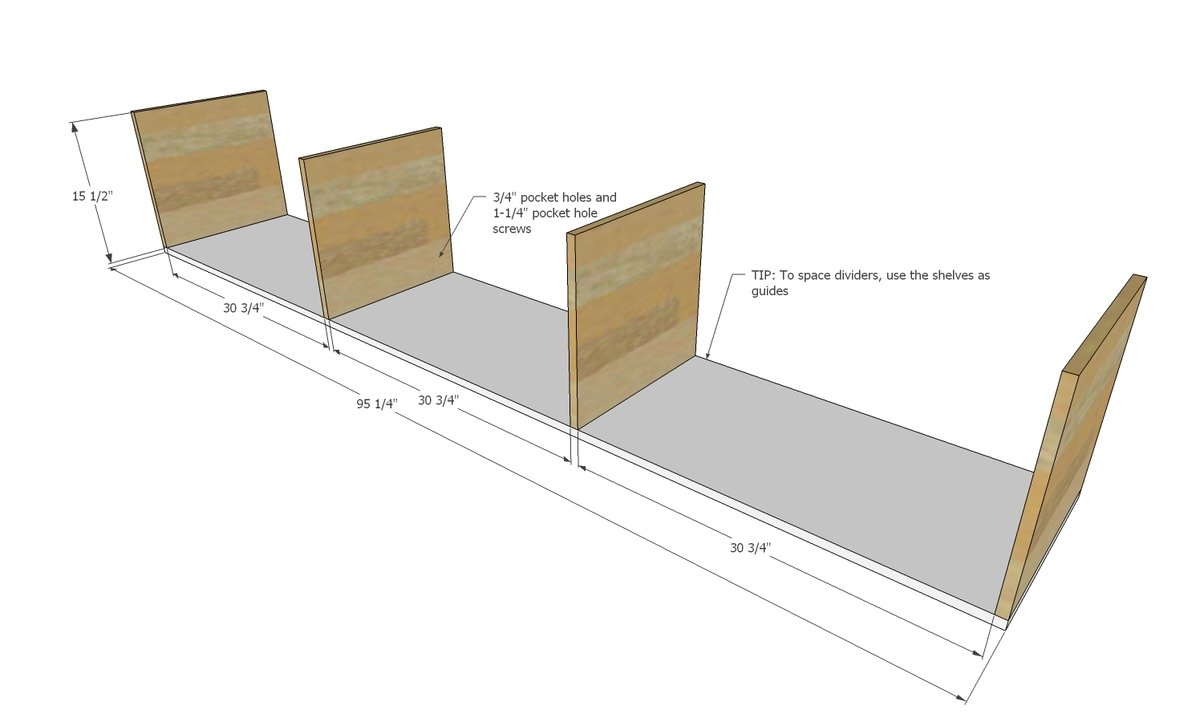
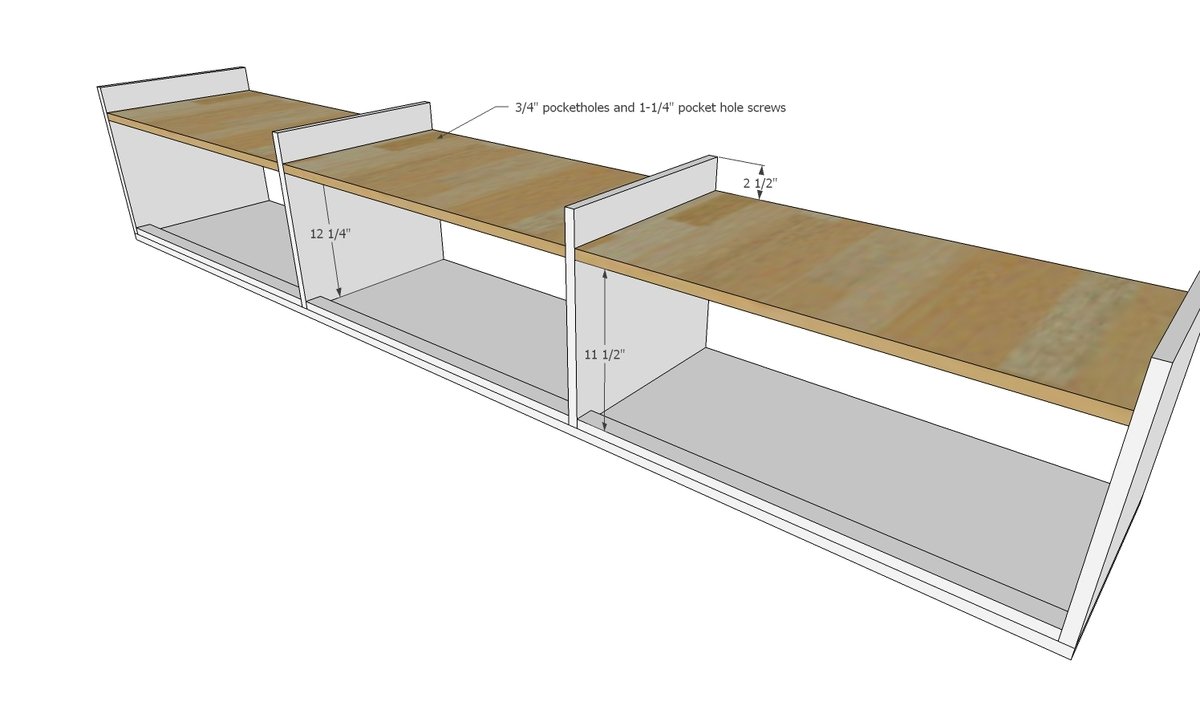
Drill three 3/4" pocket holes along the top edge of all of the dividers. Attach with glue and 1-1/4" pocket holes to the underside of the top. You can use the 1x2s or shelf pieces (cut to length) as spacers to help guide the placement of the middle dividers.
Step 2
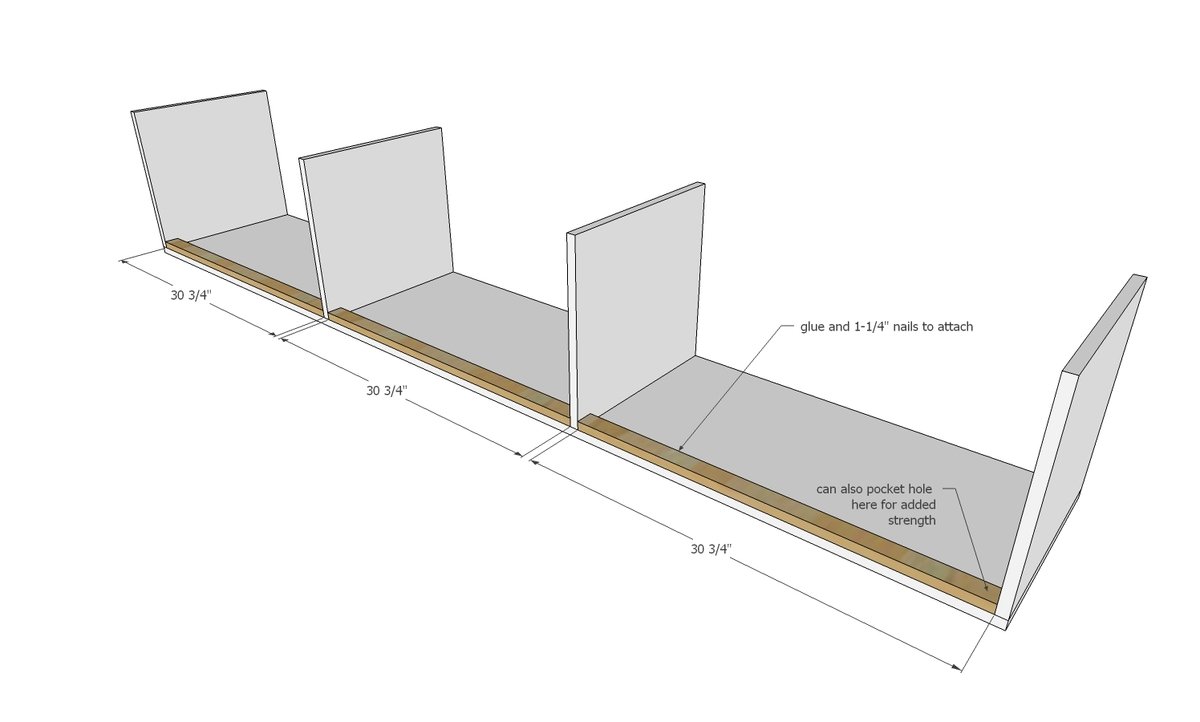
Glue and nail the 1x2 trim to the underside of the top with 1-1/4" brad nails.
Step 3
Drill 3/4" pocket holes on both ends of each of the shelf boards, three per end. Attach with 1-1/4" pocket hole screws and glue. Scrap wood pieces cut to 12-1/4" long can be used as spacers to help guide shelf placement.
Step 4
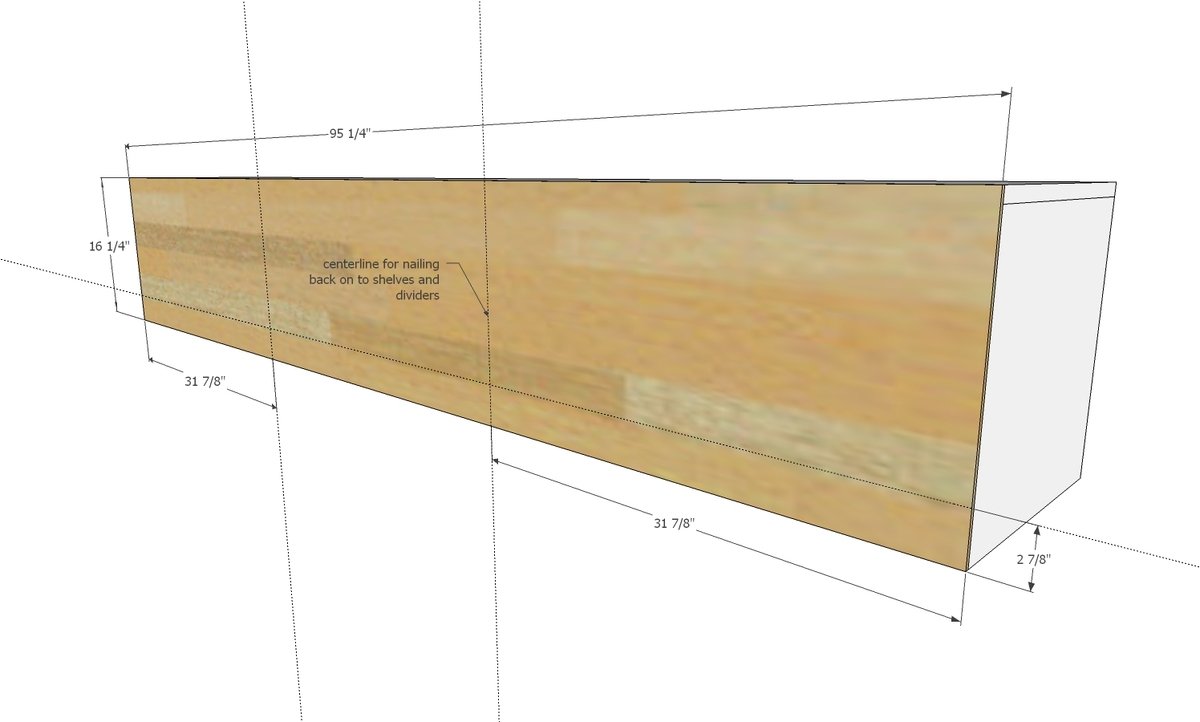
Attach back with glue and 3/4" nails or staples (preferred but not essential). Attach to all fixed shelves and dividers.
Step 5
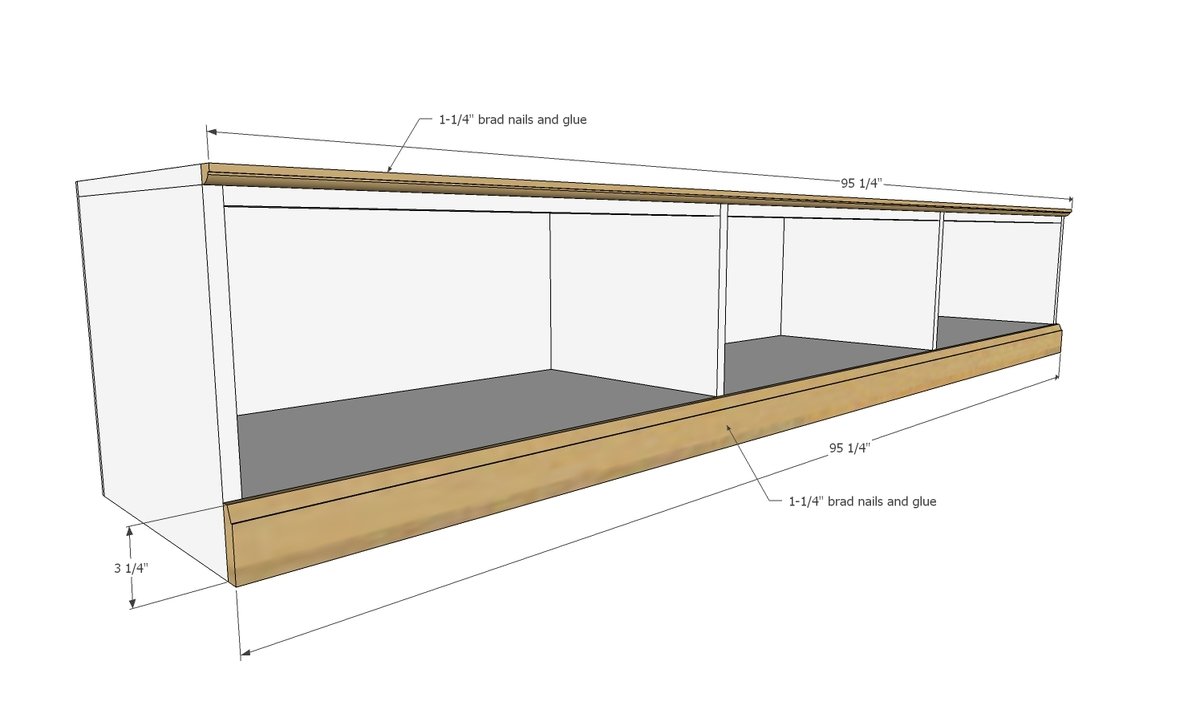
Attach trim pieces to the front with brad nails and wood glue.
Finishing
Sand all surfaces, starting with a medium grit and finishing with fine. Wipe off the dust, fill any holes or gaps with wood filler, and sand smooth once dry. Apply primer if you're painting, then finish with your choice of paint or stain and seal with a durable clear topcoat. For outdoor projects, use exterior-rated primer, paint or stain, and sealer so the piece stands up to the weather.
Source (temporary): https://www.ana-white.com/woodworking-projects/diy-window-seat-entryway-storage-bench-one-sheet-plywood-free-plans