Wood Pumpkin Treat Holder
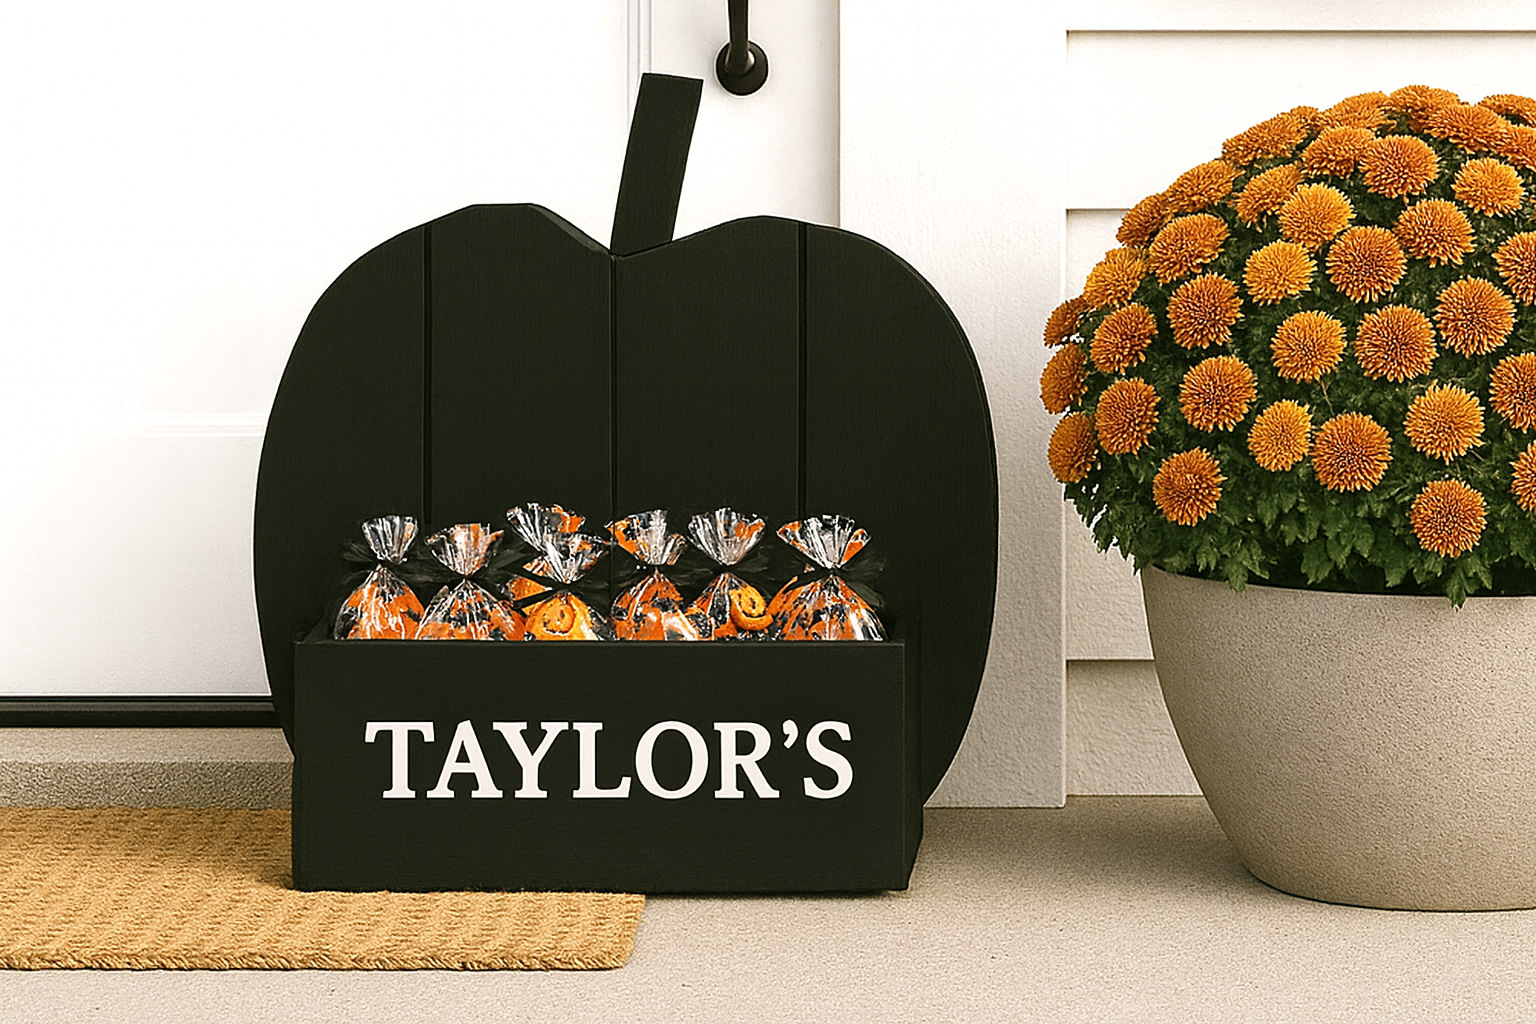
DIY Pumpkin Treat Holder – The Perfect Fall Wood Craft! Create a charming and functional pumpkin-shaped treat holder with this easy DIY woodworking project. Perfect for fall décor, Halloween parties, or Thanksgiving tables, this beginner-friendly build adds rustic farmhouse flair while holding your favorite candies or goodies. A fun weekend craft that’s both festive and practical!
Specifications
| Project type | Home Decor |
|---|---|
| Room | Entryway and Mudroom |
| Style | Cottage Style Furniture Plans |
| Difficulty | Starter Projects |
| Estimated cost | Under $20 |
Dimensions
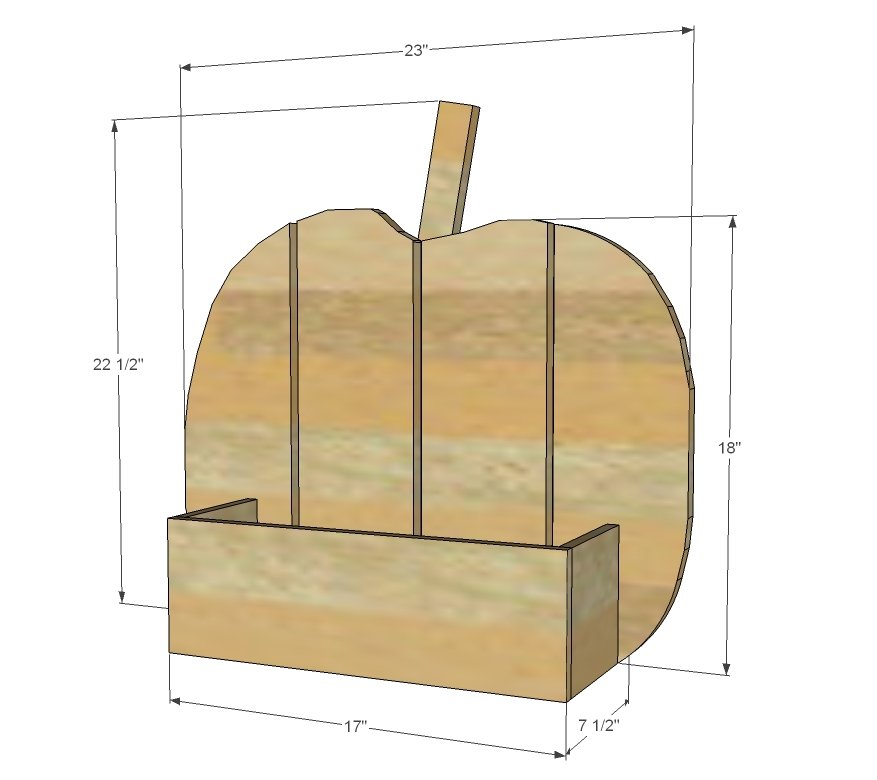
Use the size-specific shopping and cut lists below.
Shopping List
- 2 - Cedar fence pickets, 5-1/2" wide x 6 feet long OR 1x6 whitewood boards OR similar pallet wood
- 1 - 1x2 @ 4 feet long
- 1" brad nails or staples or hot glue
Cut List
PUMPKIN
4 – cedar fence pickets cut into 18” long pieces (fit all four on one fence picket, can be shorter or longer)
2 – 1x2 @ 20” long
1 – 1x2 @ 8” long (length can be flexible to use up scrap wood)
FRONT BOX
1 – cedar fence picket @17” long
2 – cedar fence pickets @ 5-1/2” long
1 – cedar fence picket @ 16” long
Tools
- measuring tape
- pencil
- safety glasses
- jigsaw
Step-by-step Instructions
Step 1
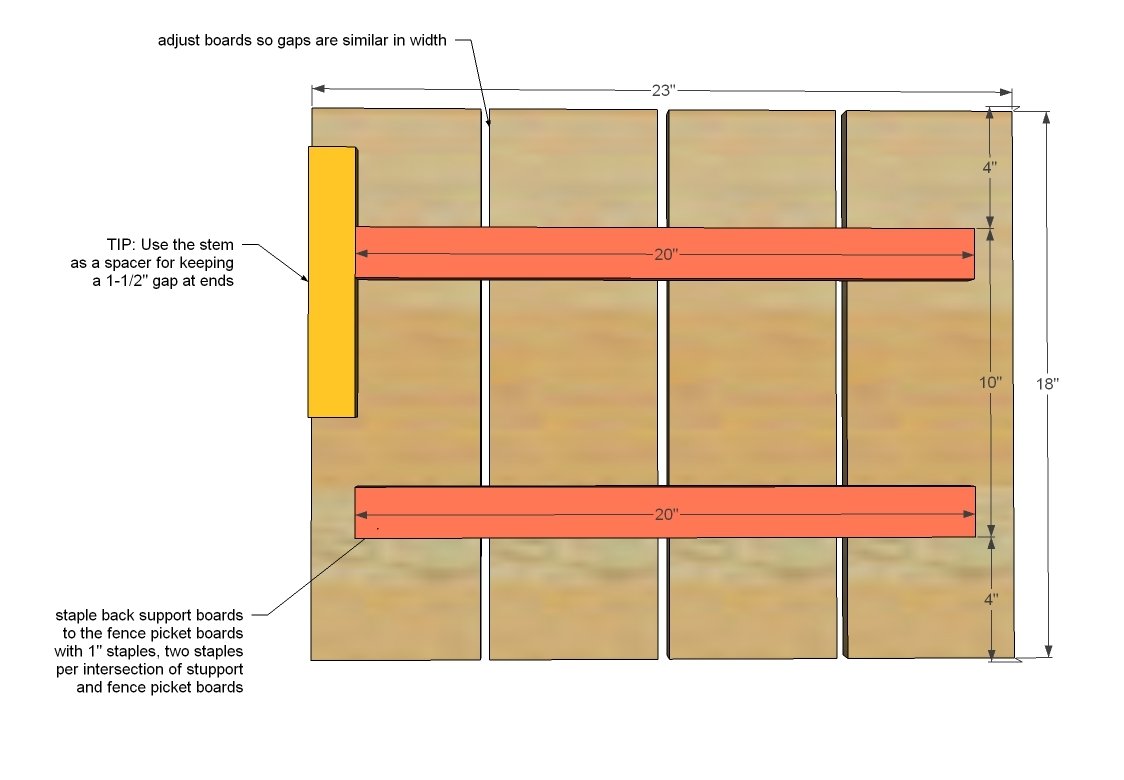
Lay the four fence pickets on the worksurface, so overall width is about 23”. Place 20” long 1x2s on top, with about 1-1/2” gap on either end. TIP: Use the stem (stem is 1-1/2” in width) as a guide. Use wood glue and two 1” staples per overlap of 1x2 and each cedar fence picket to secure 1x2s to the fence pickets.
Step 2
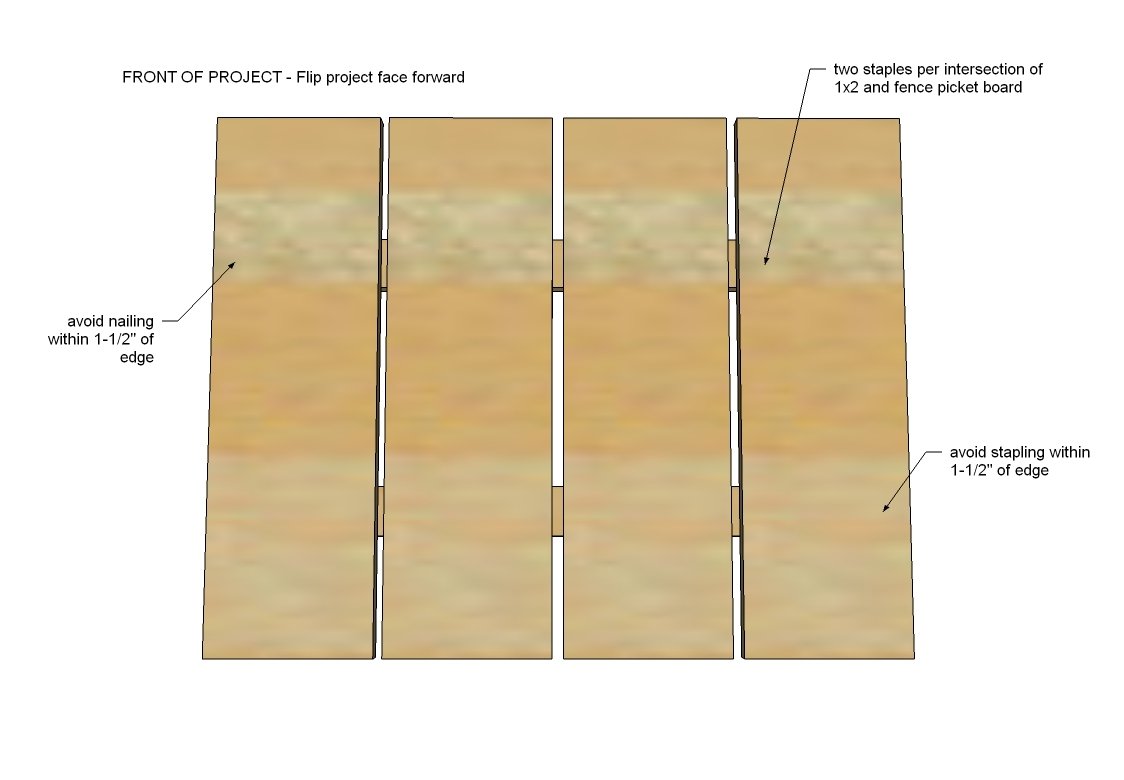
Flip the project over. Add additional two staples per overlap of fence picket and 1x2 to secure fence pickets from front to 1x2 supports. Do not staple within 1” of the edges, as there is no 1x2 backing here. TIP: Use the step piece as a guide.
Step 3
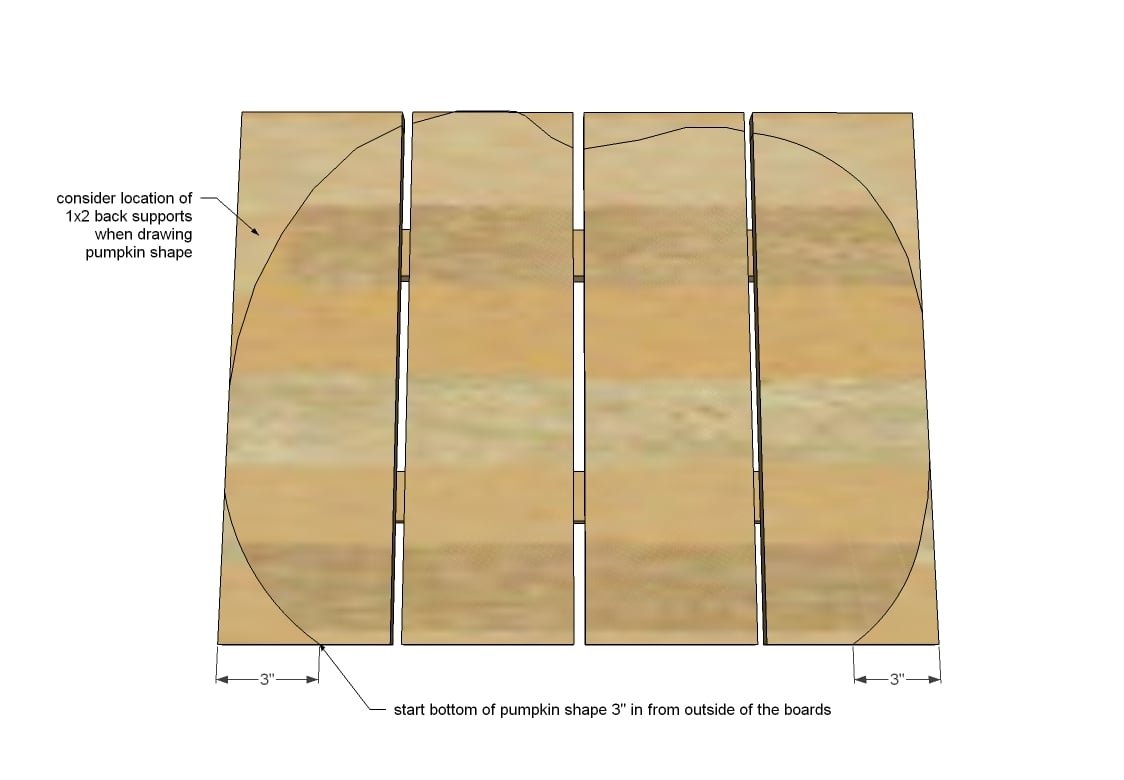
Starting 3” out at the bottom edges, draw a pumpkin shape on the front of the cedar boards. Avoid drawing so that the 1x2 supports will be crossed. Keep the shape organic and unqiue. Pumpkins generally are “bottom heavy” so consider a smaller rounding on the bottom and larger rounding on top.
Step 4
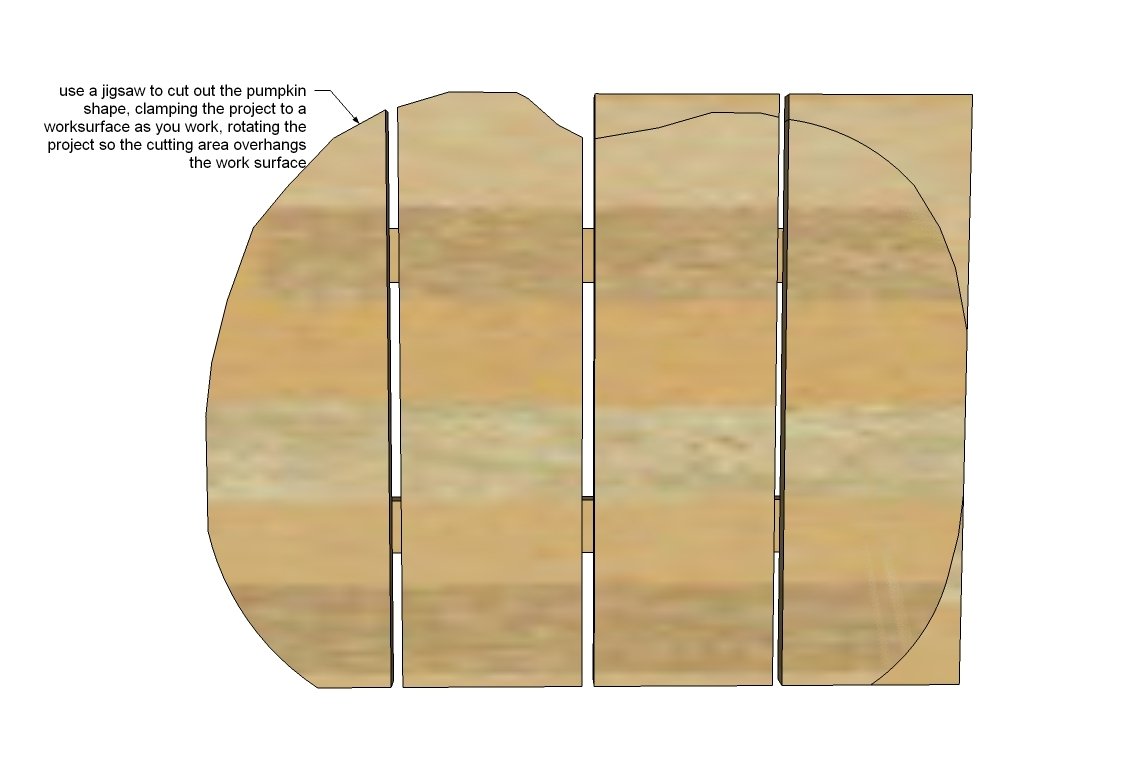
Position project so area to be cut out overhangs work surface to allow jigsaw blade to cut freely. Secure the project to the worksurface with two clamps. Test to make sure project is secure. Cut out following pumpkin shape with jigsaw. Remove clamps and reposition and reclamp to cut full pumpkin shape out.
Step 5
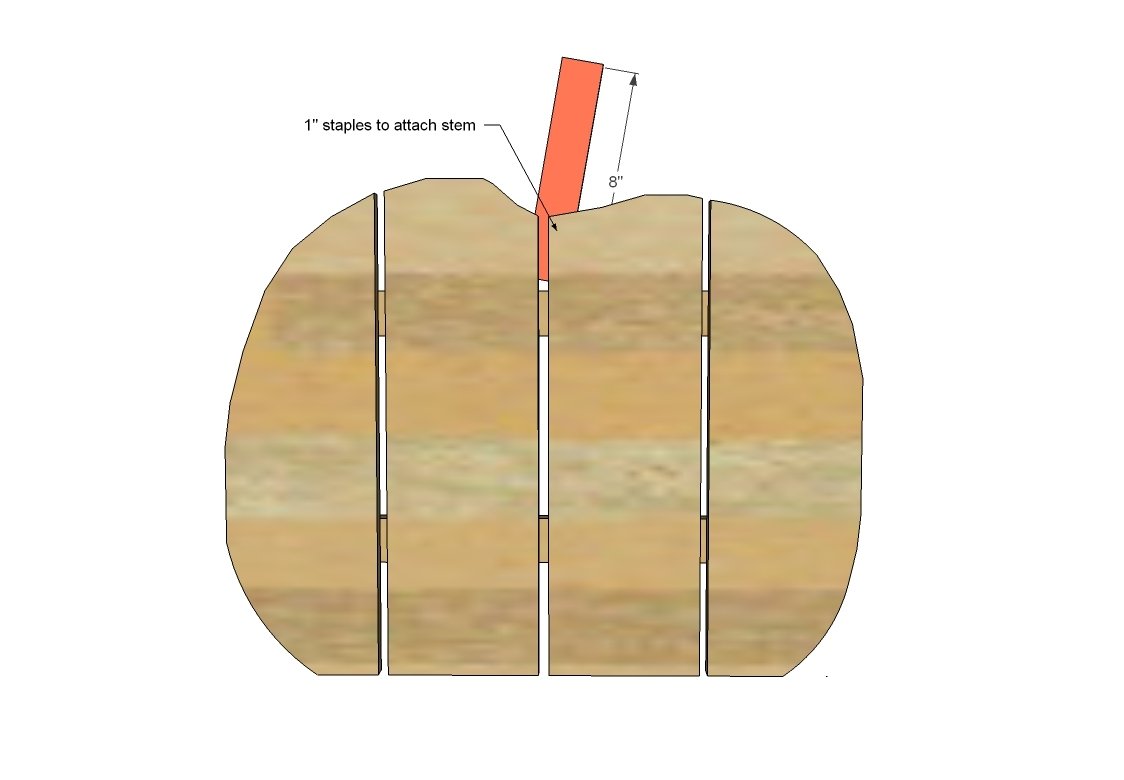
Attach stem to the back of the pumpkin cutout.
Step 6
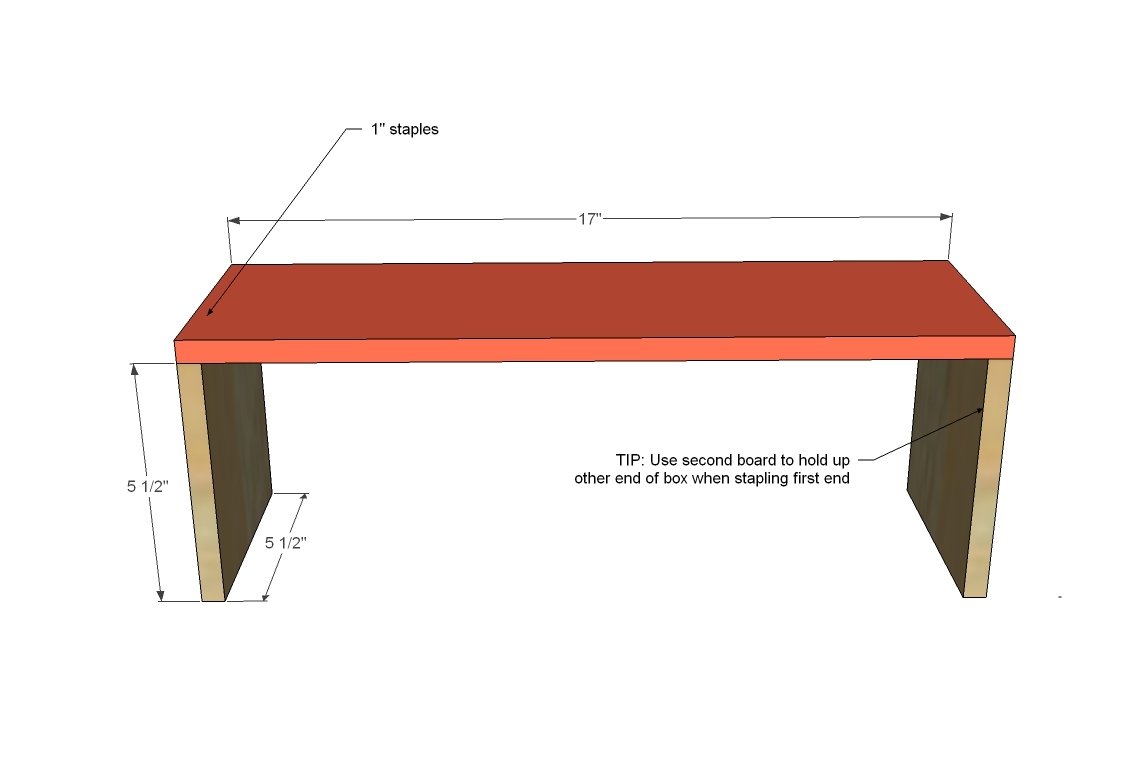
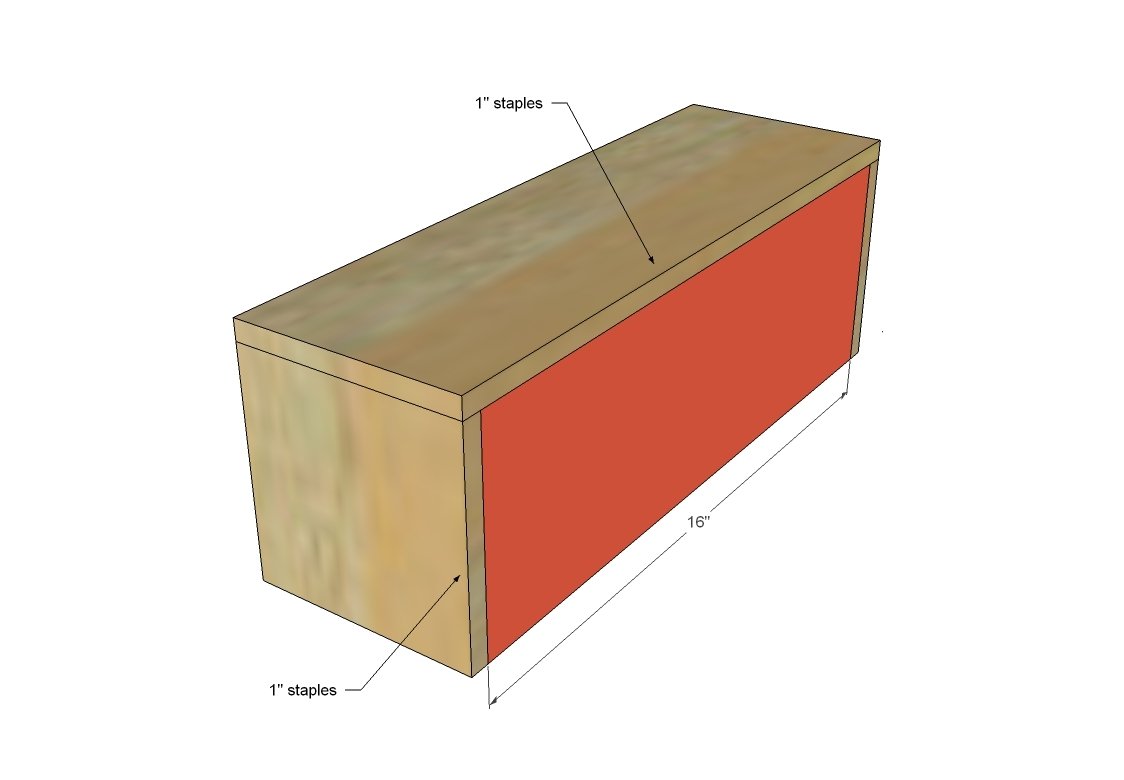
Use glue and 1” staples to attach front of box to the sides of the box.
Step 7
Apply glue along three edges of bottom of box. Place bottom of box inside front and sides. Staple in place along side and front edges with 1” staples.
Step 8
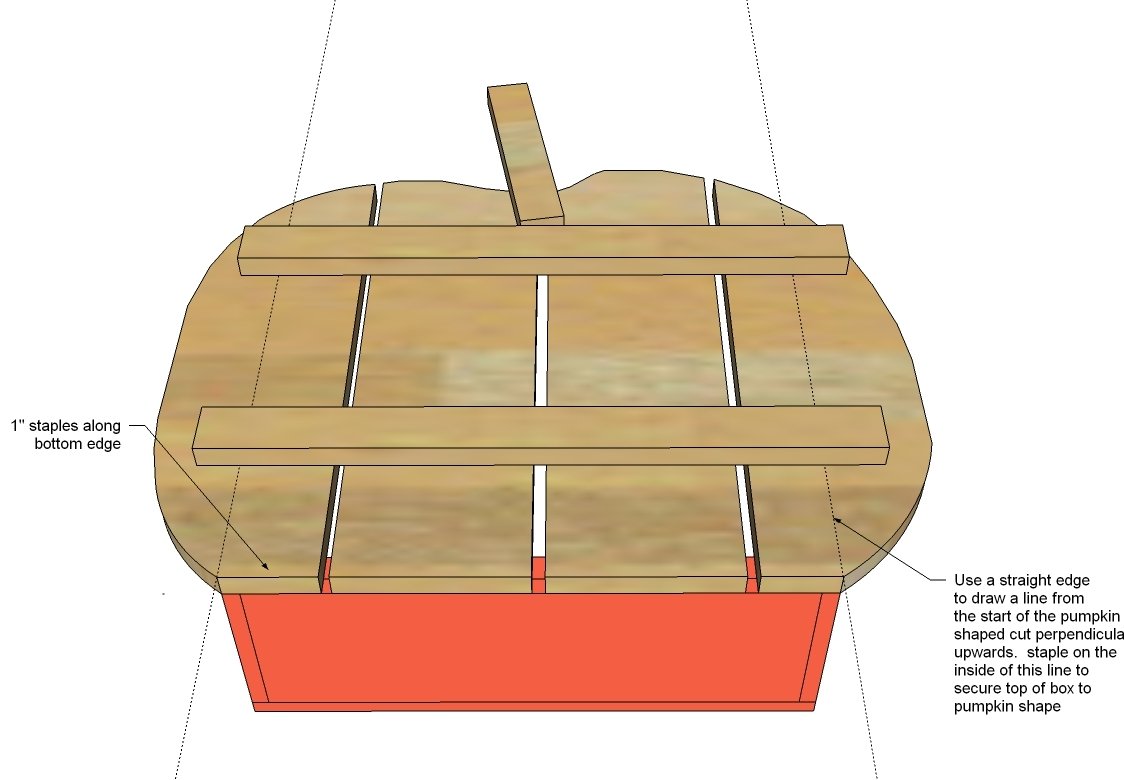
Place box open side up on worksurface. Apply glue along top edges. Place pumpkin on top, aligning bottom edge, and the start of the pumpkin shaped cut with the outside corners of the box. Use 1” staples to secure bottom of pumpkin to bottom of box. Use a straight edge to guide you when stapling the pumpkin to the sides of the box.
Finishing
Sand all surfaces, starting with a medium grit and finishing with fine. Wipe off the dust, fill any holes or gaps with wood filler, and sand smooth once dry. Apply primer if you're painting, then finish with your choice of paint or stain and seal with a durable clear topcoat. For outdoor projects, use exterior-rated primer, paint or stain, and sealer so the piece stands up to the weather.
Source (temporary): https://www.ana-white.com/woodworking-projects/diy-wood-pumpkin-treat-holder