X End Table
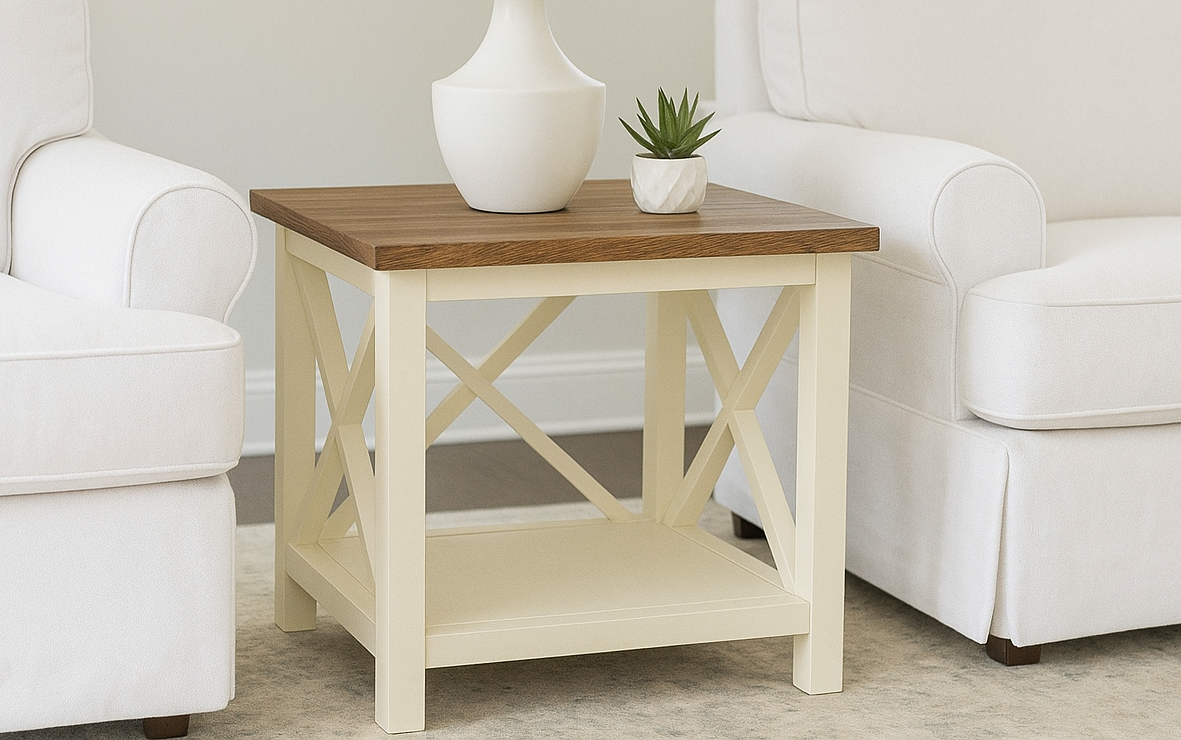
Build your own stylish X end table with! This rustic farmhouse side table is easy to make with basic tools and standard lumber. The simple X-brace design adds charm and strength, making it perfect for living rooms, bedrooms, or even as a nightstand. With step-by-step instructions, diagrams, and a complete cut list, you’ll be able to create a professional-looking piece at a fraction of the store-bought price. Whether you’re a beginner or experienced DIYer, this project is budget-friendly, beginner-friendly, and built to last.
Specifications
| Project type | Nightstands |
|---|---|
| Room | living room |
| Style | Cottage Style Furniture Plans |
| Difficulty | Intermediate |
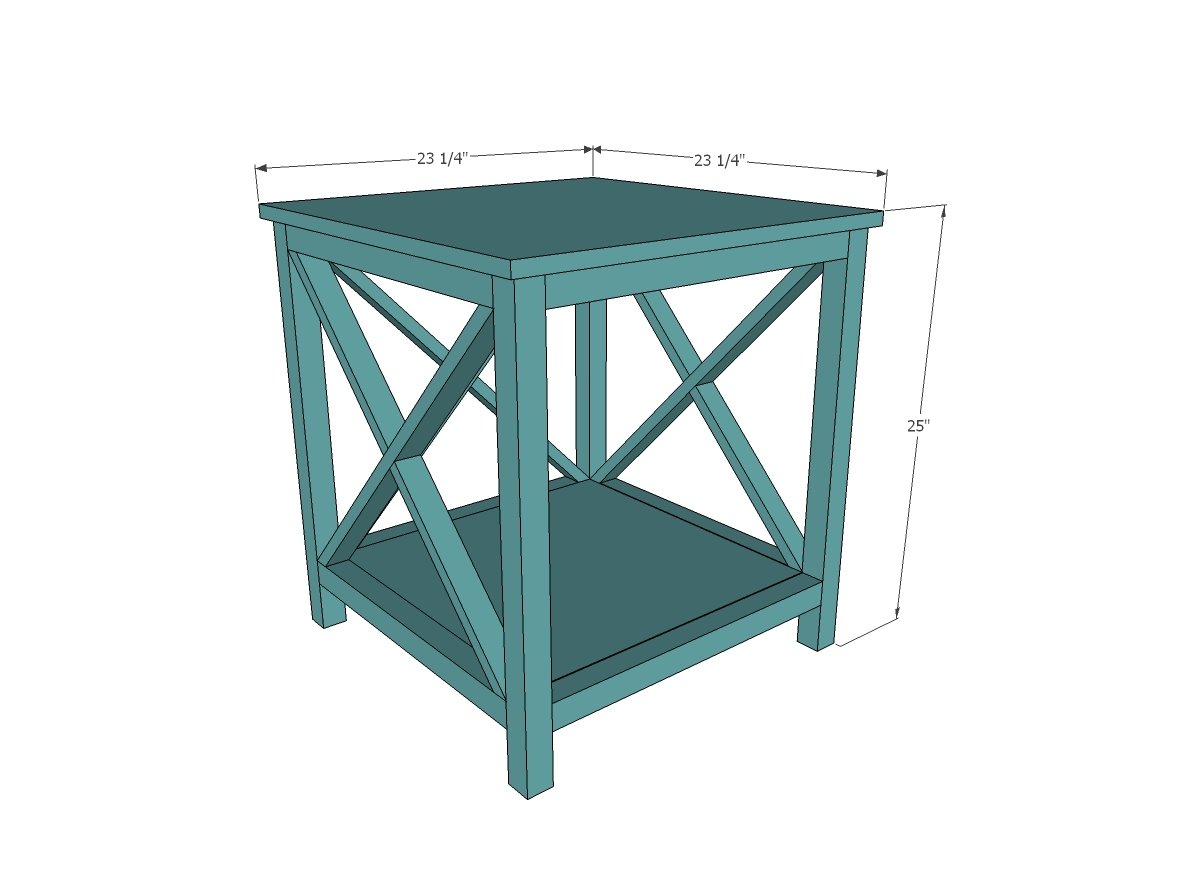
Dimensions
Use the size-specific shopping and cut lists below.
Shopping List
- 1 - 24" x 48" sheet of 3/4" plywood or MDF
- 3 - 2x2 @ 8 feet long
- 2 - 1x2 @ 8 feet long
Cut List
4 - 2x2 @ 24-1/4"
8 - 2x2 @ 19-1/4"
1 - 3/4" plywood @ 19-1/4" x 19-1/4"
6 - 1x2 @ 25-3/4" (both ends cut parallel to each other at 45 degrees off square, long point to short point measurement)
1 - 3/4" plywood @ 23-1/4" x 23-1/4"
Tools
- kreg-jig
- drill
- circular saw
- compound miter saw
- nailer
Step-by-step Instructions
Step 1
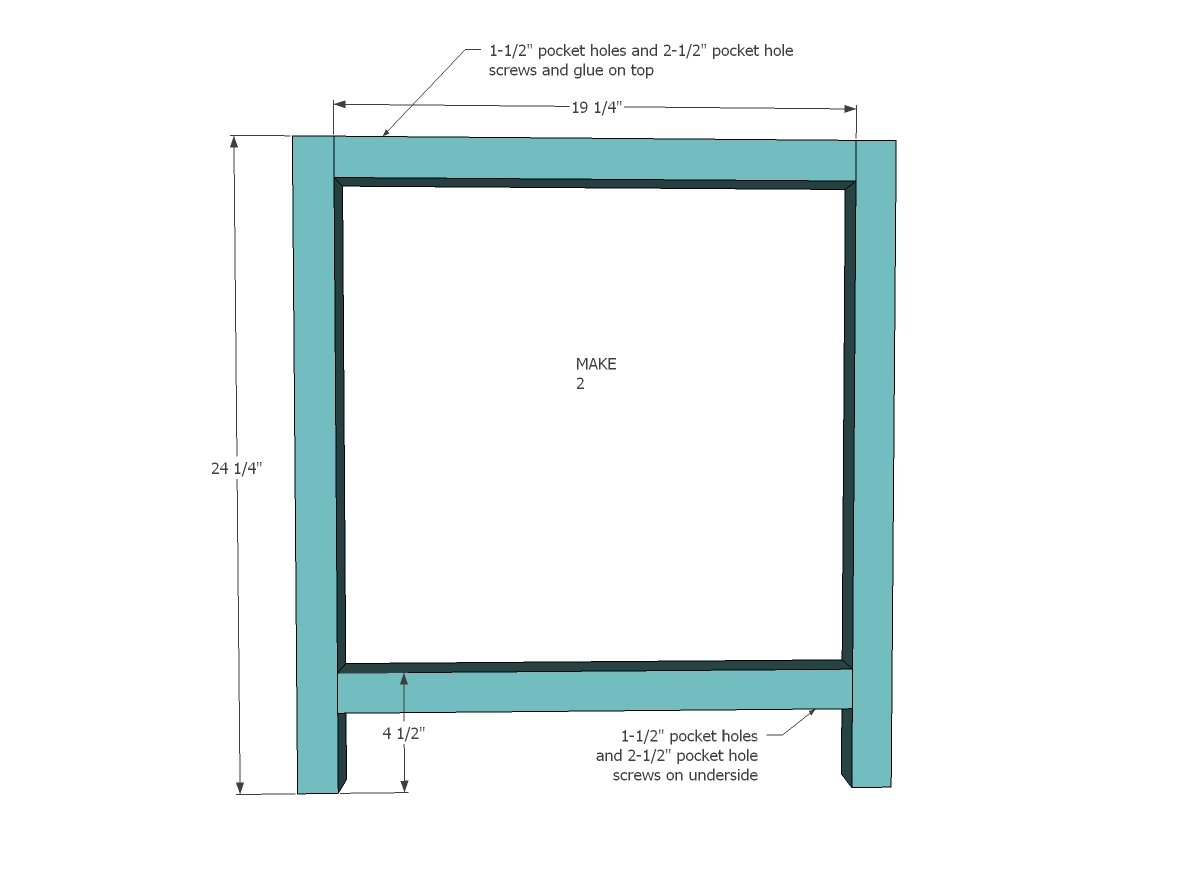
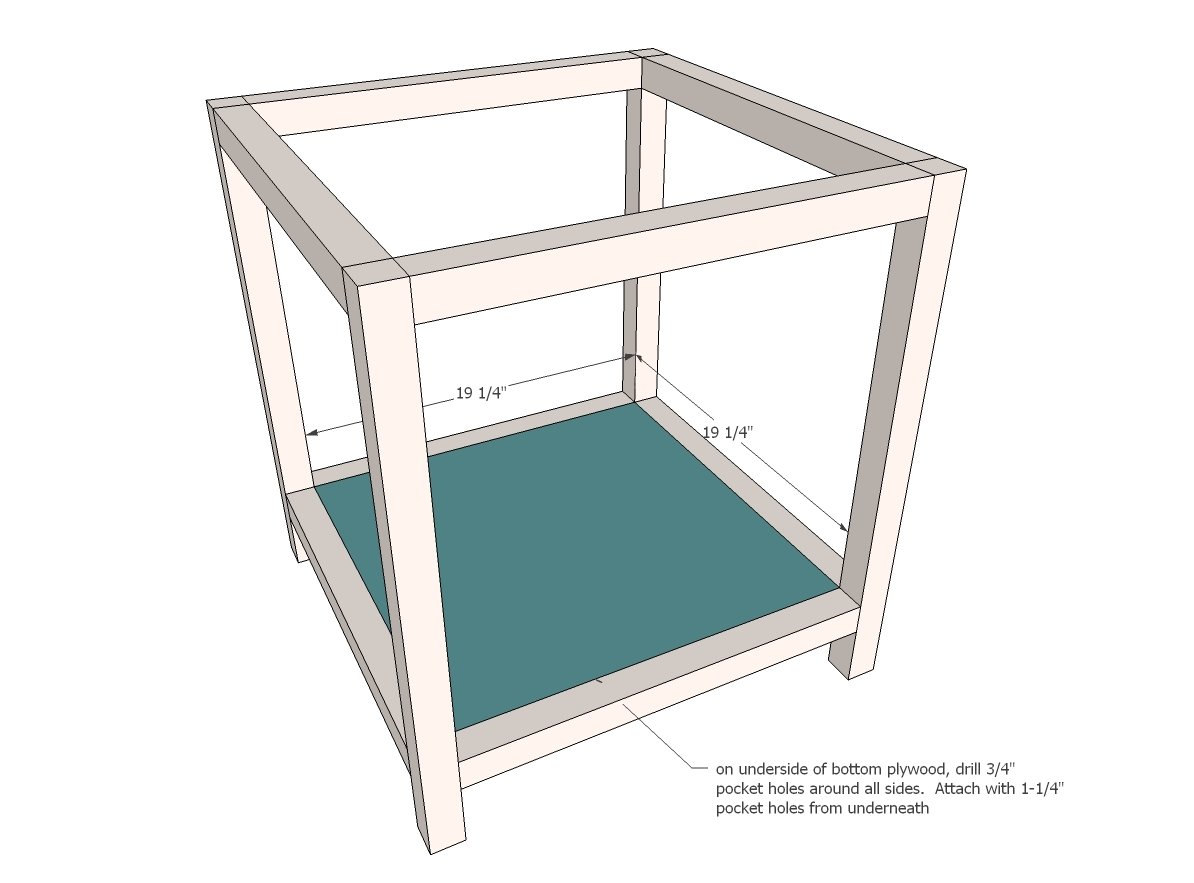
Build two of the side frames with 2x2s, recommended is 1-1/2" pocket holes and 2-1/2" pocket hole screws, place on top to be hidden by the top in later steps, place the bottom pocket hole on the bottom so it's hidden when face up.
Step 2
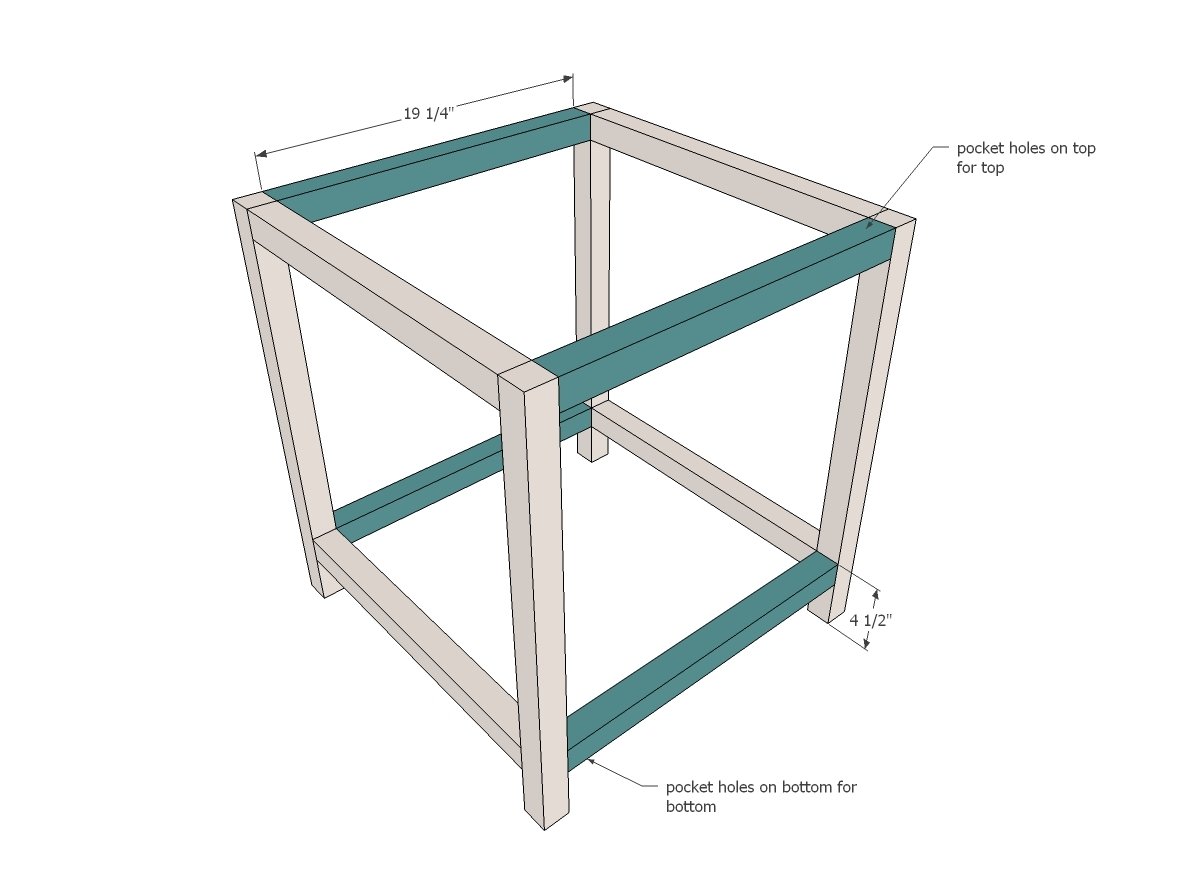
Repeat with pocket holes to create the frame, hiding the pocket holes.
Step 3
Cut the plywood panels with a Kreg Rip Cut and circular saw or a table saw. Cuts must be very precise. Attach plywood inset on the bottom frame with 3/4" pocket holes and 1-1/4" pocket hole screws.
Step 4
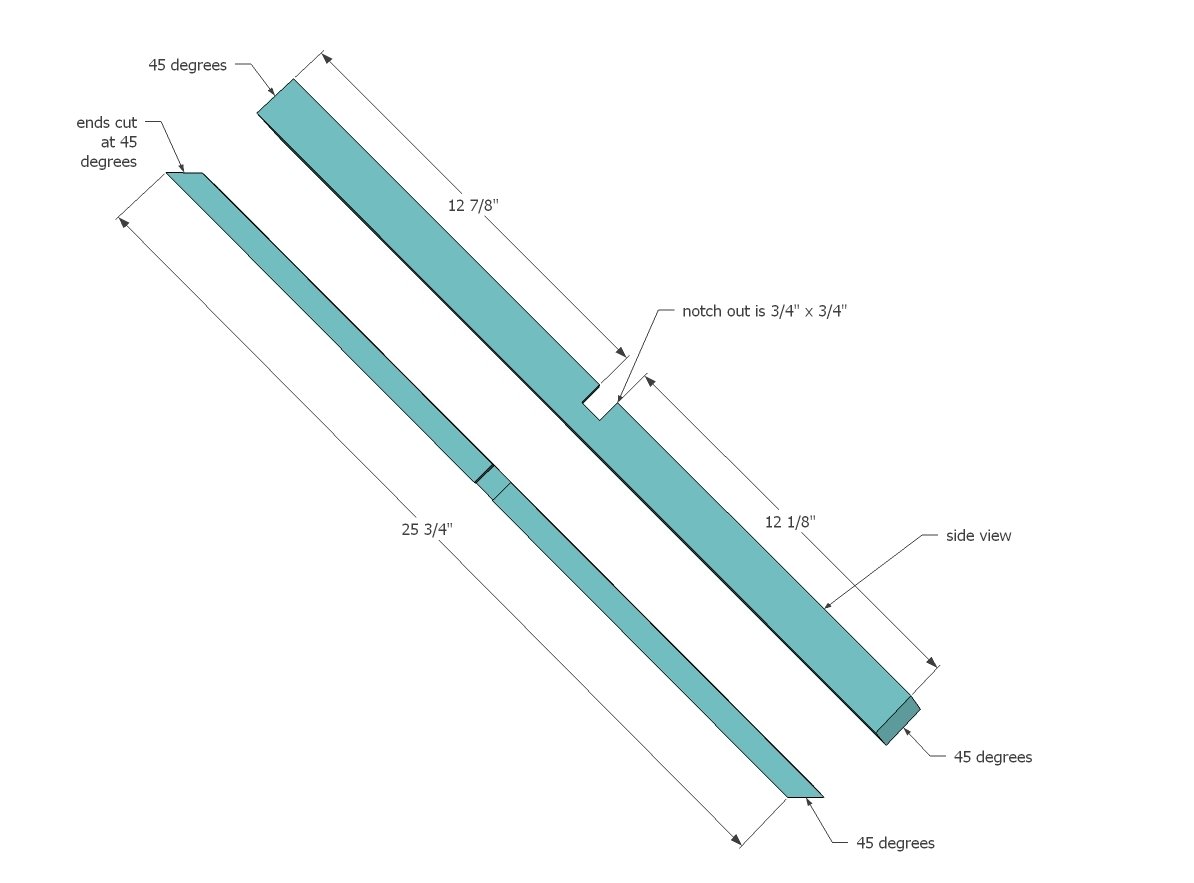
Cut the 1x2s for the Xs and notch out. To notch out, set circular saw blade depth to 3/4" and make multiple cuts between the notches (about every 1/4"). Then use a chisel to remove the material in the notched out area.
Step 5
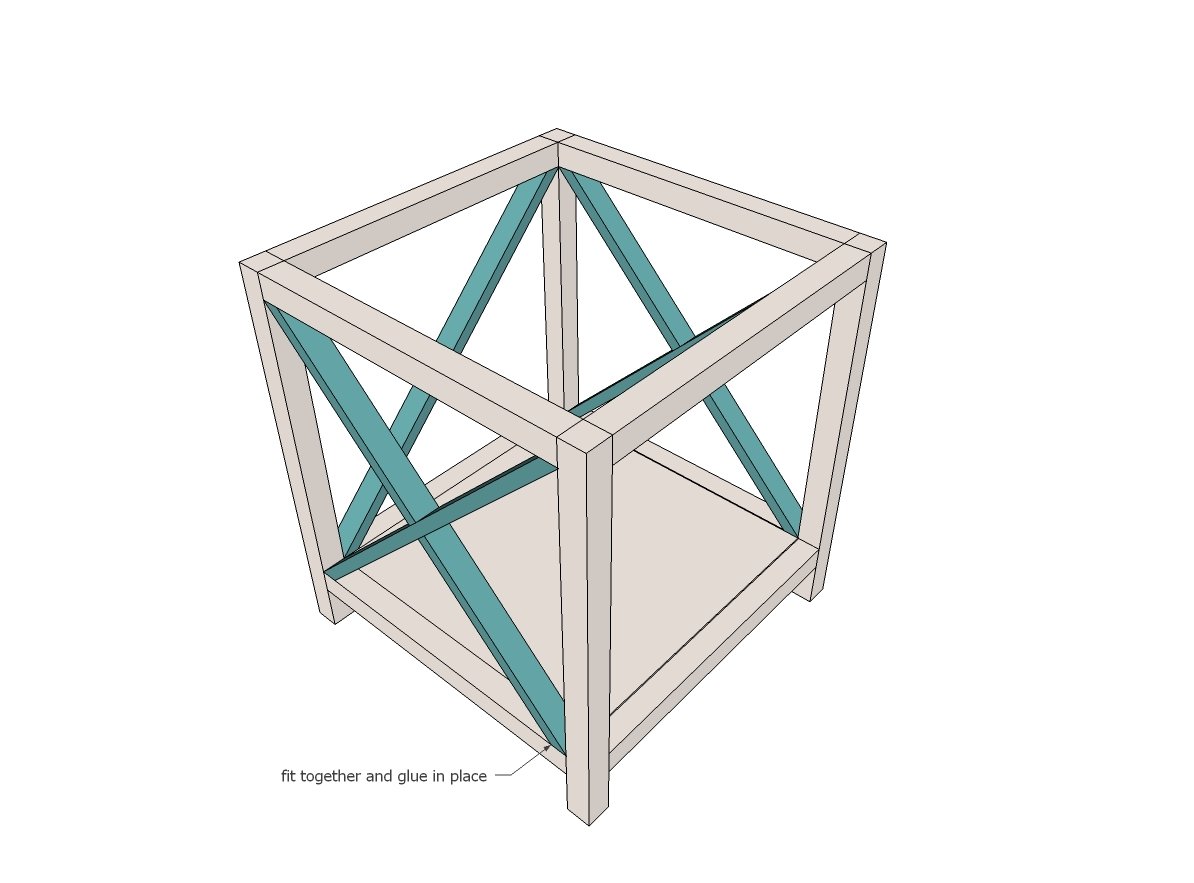
Install the 1x2s inside the openings as shown.
Step 6
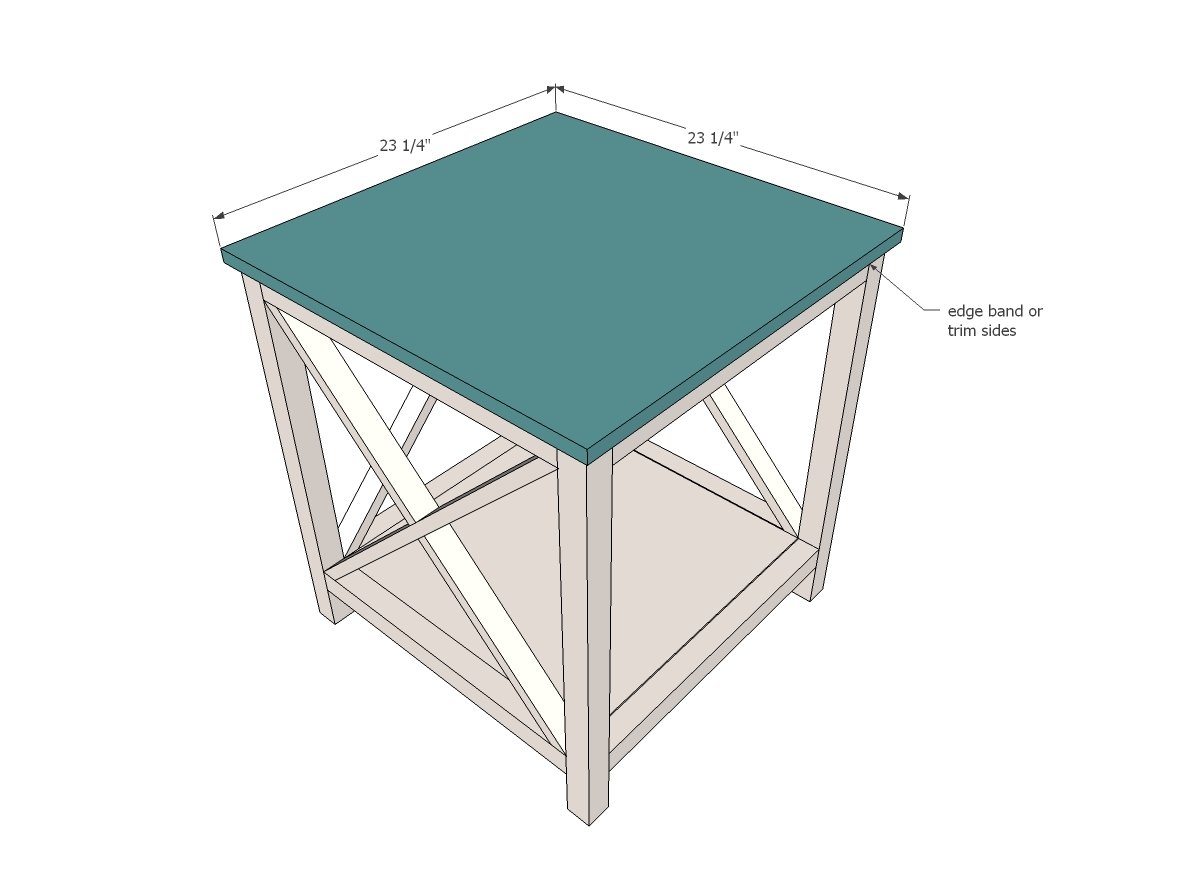
Apply edge banding to the outer edges of the plywood top panel. Attach to the top through the 2x2 pieces with 2" screws.
Finishing
Sand all surfaces, starting with a medium grit and finishing with fine. Wipe off the dust, fill any holes or gaps with wood filler, and sand smooth once dry. Apply primer if you're painting, then finish with your choice of paint or stain and seal with a durable clear topcoat. For outdoor projects, use exterior-rated primer, paint or stain, and sealer so the piece stands up to the weather.
Source (temporary): https://www.ana-white.com/woodworking-projects/diy-x-end-table-free-woodworking-plans-rustic-farmhouse-side-table