Doll Bunk Beds for American Girl Doll and 18" Doll
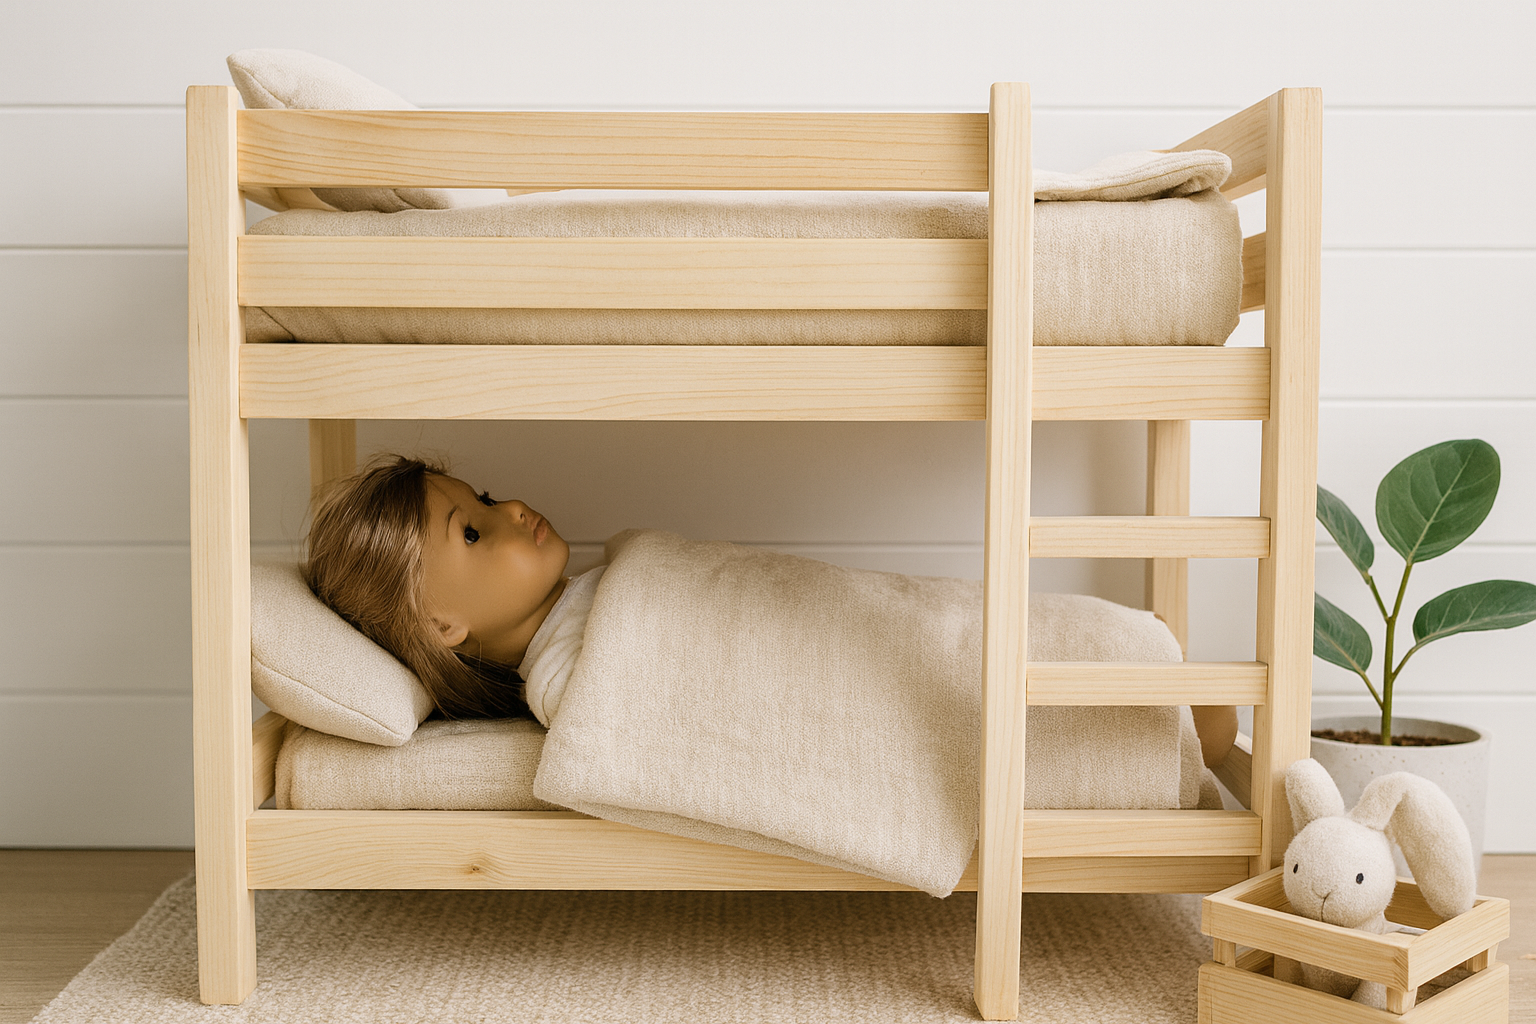
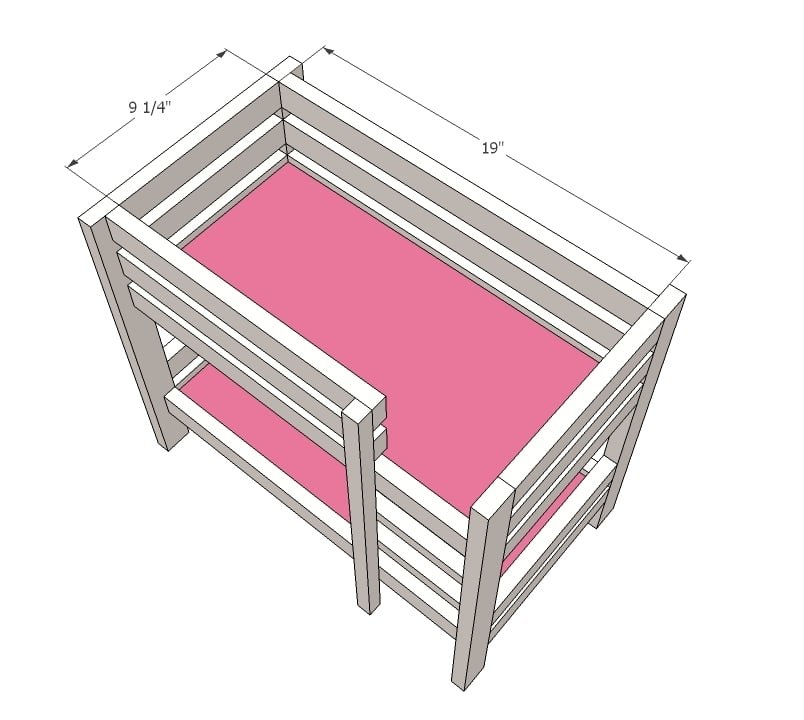
Free DIY Doll Bunk Bed Plans – Easy Woodworking Project for 18" Dolls Build your own adorable doll bunk bed with, designed to fit 18" dolls like American Girl and Our Generation. This simple project uses basic tools and affordable materials, making it a perfect weekend build for beginners and experienced woodworkers alike. Crafted in a clean farmhouse style with natural wood lines and a sturdy frame, this DIY doll bed is both functional and charming. The plans include step-by-step instructions, detailed diagrams, and a full cut list—everything you need to create a custom piece your child will treasure. Whether you're creating a heartfelt handmade gift or adding to your collection of doll furniture, these free doll bed plans are a budget-friendly way to build something beautiful from scratch. Features: • Fits standard 18" dolls (American Girl, Our Generation, My Life, etc.) • Beginner-friendly woodworking design • Printable cut list and step-by-step instructions included • Finished in a timeless farmhouse style Design image is rendered from plans
Specifications
| Project type | Doll Furniture |
|---|---|
| Room | Kids and Toys |
| Style | Children's and Kid's Room Furniture and Toy Plans |
| Difficulty | Beginner Projects |
| Estimated cost | Under $20 |
Dimensions
Use the size-specific shopping and cut lists below.
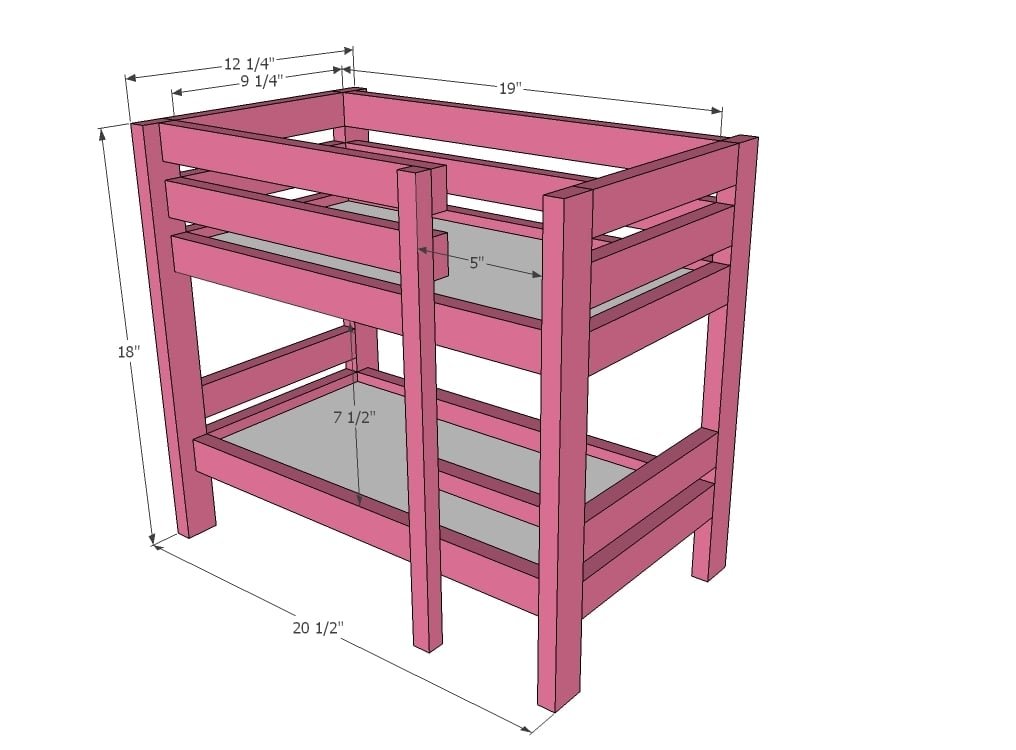
Shopping List
4 - 1x2 @ 8 feet long
1 - 1x1 @ 8 feet long
(look for a square trim board that measures 3/4" x 3/4" or if you have a tablesaw, rip a 1x2 in half)
Scrap hardboard, 1/4" plywood or other sheet goods Use either the pocket holes or regular screws:
Cut List
10 - 1x2 @ 9 1/4"
4 - 1x2 @ 18"
6 - 1x2 @ 19"
2 - 1x2 @ 14"
1 - 1x1 @ 18"
2 - 1x1 @ 5 3/4"
4 - 1x1 @ 19"
Tools
- measuring tape
- square
- pencil
- safety glasses
- hearing protection
- kreg-jig
- drill
- circular saw
- nailer
- sander
- level
- countersink drill bit
Step-by-step Instructions
Step 1
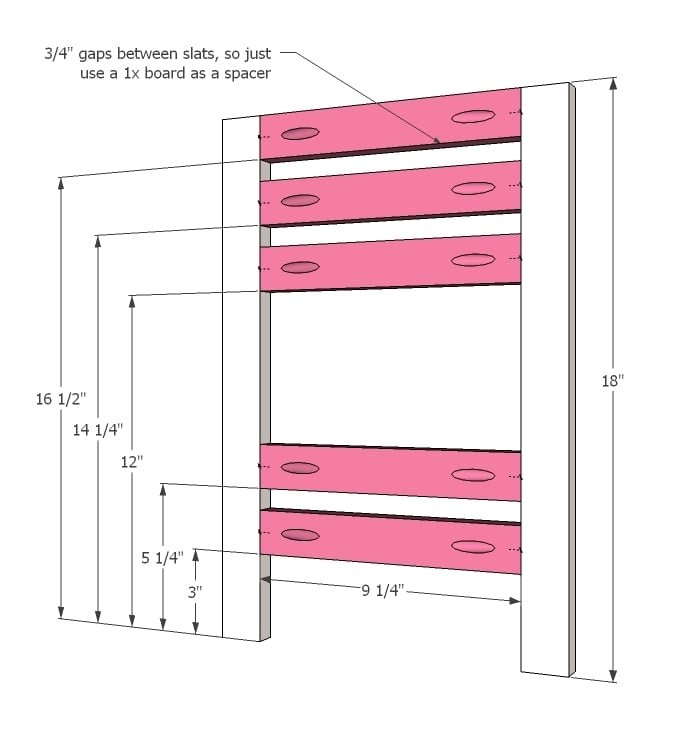
Build two of the ends as shown above. I used the Kreg Jig to hide all holes, but you could use countersunk 2" screws from the outsides. Use a piece of 1x material as a spacer.
Step 2
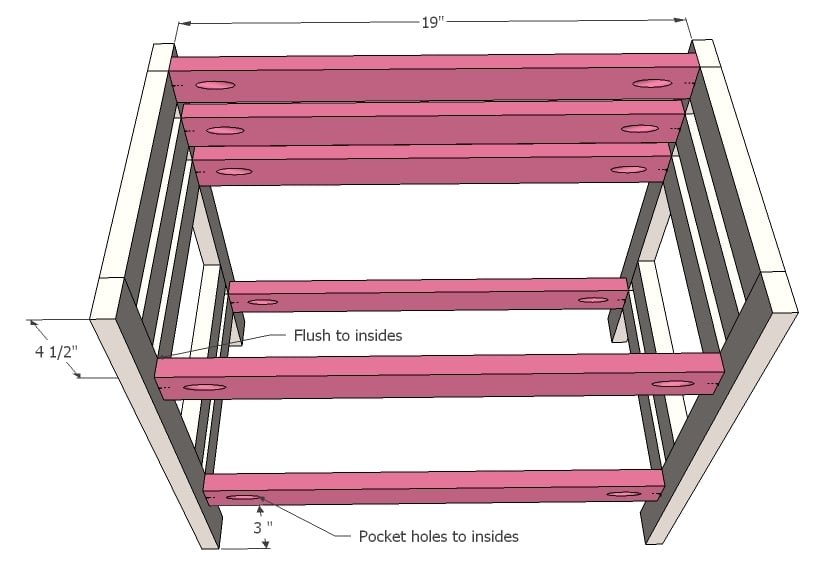
Now join the two ends as shown above.
Step 3
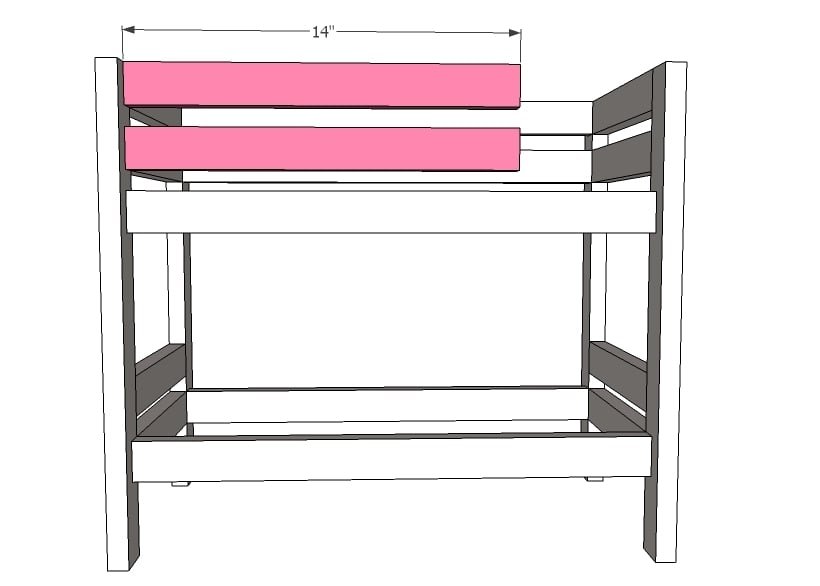
Followed by the guardrail on the ladder side.
Step 4
Now here is where the clamps are your good friend. Position, glue and clamp, then nail in place with 1 1/4" nails. You could also use 1 1/4" screws, but then you got to cover the screw holes, which is no big deal if you are painting it. But in our case, we wanted to gift the doll bed unfinished so the birthday girl could do the painting.
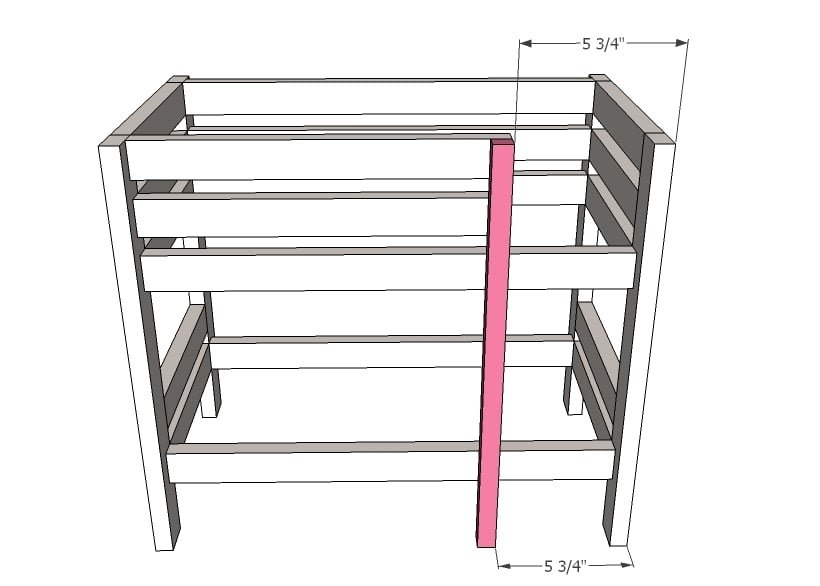
Step 5
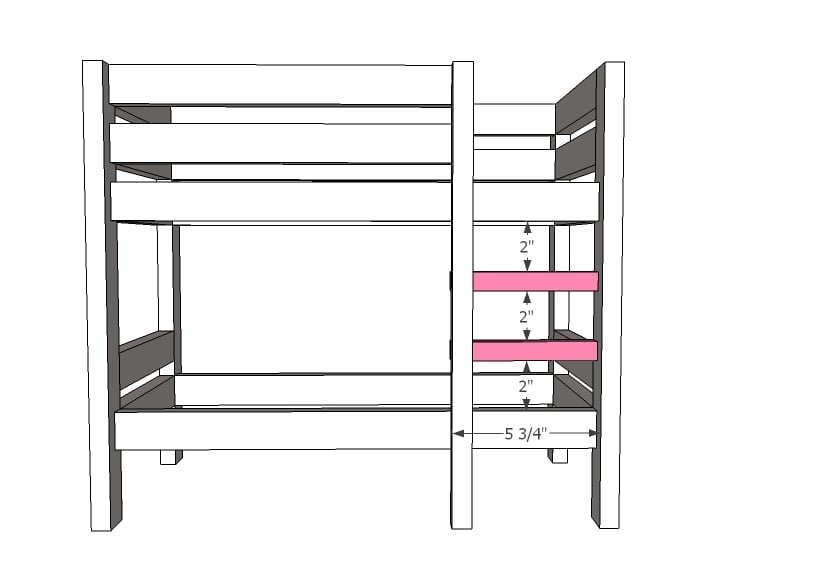
Step 6
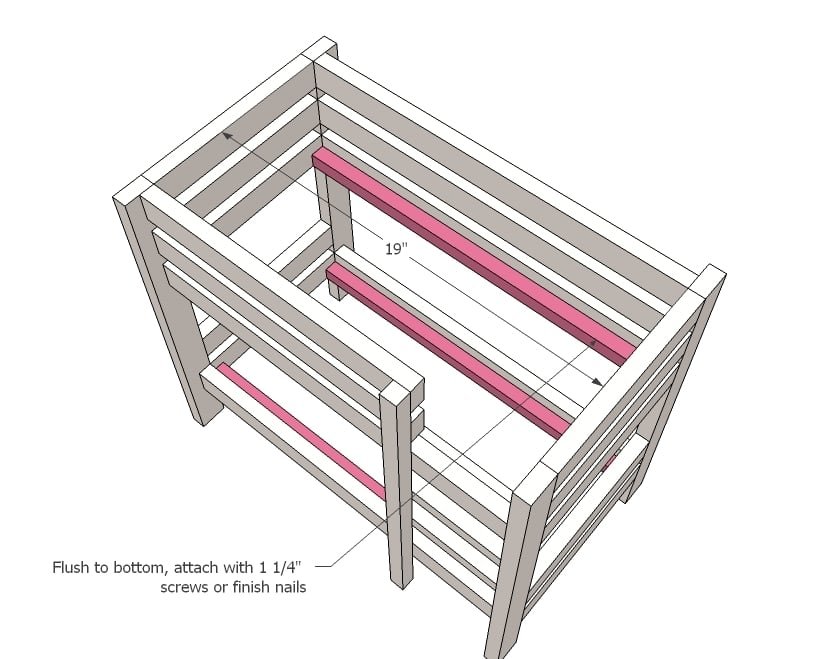
I have a pretty good sized nailer and was able to get it in there. But if you are at all concerned, you could definitely add the cleats before step #2.
Step 7
Really, anything works here. I had some scrap 1/4" PureBond Plywood (Formaldehyde Free, yay!) so I put that in there.
Finishing
Sand all surfaces, starting with a medium grit and finishing with fine. Wipe off the dust, fill any holes or gaps with wood filler, and sand smooth once dry. Apply primer if you're painting, then finish with your choice of paint or stain and seal with a durable clear topcoat. For outdoor projects, use exterior-rated primer, paint or stain, and sealer so the piece stands up to the weather.
Source (temporary): https://www.ana-white.com/woodworking-projects/doll-bunk-beds-american-girl-doll-and-18-doll