Doll Closet
Beautiful folding doll bedroom stores a bed, clothes, accessories and a 18 inch doll inside. Opens up on hinges to create a play bedroom. Free
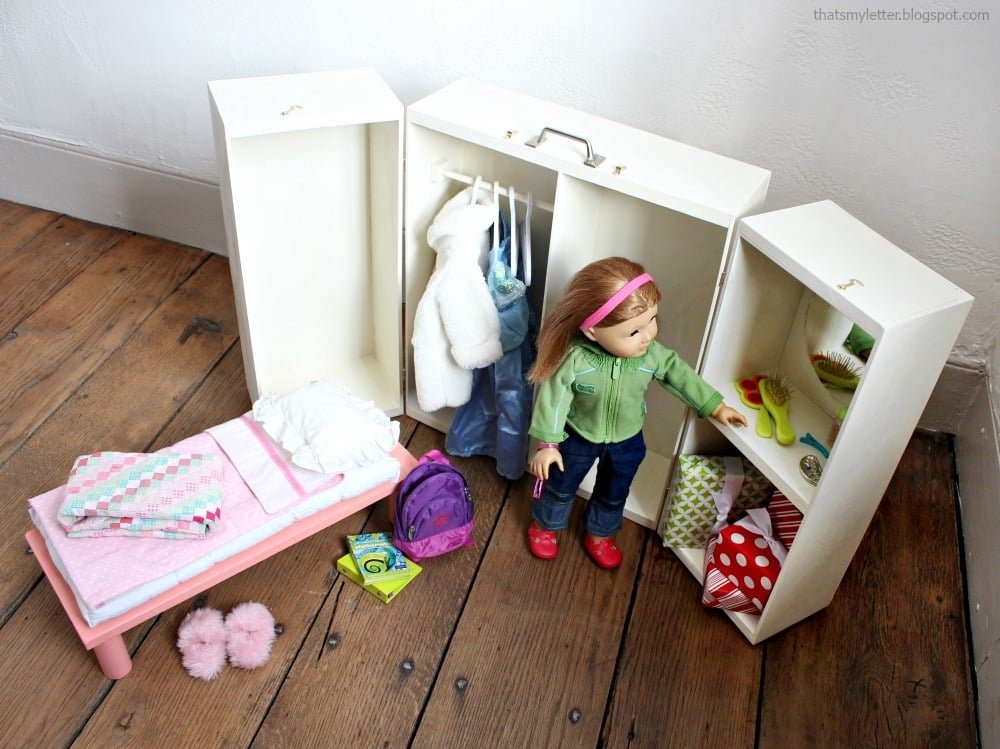
Specifications
| Project type | Toys |
|---|---|
| Room | Kids and Toys |
| Style | Cottage Style Furniture Plans |
| Difficulty | Intermediate |
| Estimated cost | $20 - $50 |
Shopping List
1 - 1x6 @ 8 feet long
7 pieces of 1/4" thick x 5-1/2" wide hobby boards (poplar or similar) 21" long (you can buy 4', 6', 8' pieces and cut down)
1 - 1/4" plywood panel 24" x 48"
1-1/4" brad nails or staples
wood glue
Hot glue also recommended
2 sets of hinges with screws 1/4" in length
1 handle
clasps for holding shut
Cut List
5 - 1x6 @ 8-1/2" long - smaller section top, bottom and shelf
6 - 1/4" x 5-1/2" hobby boards @ 21" long - sides
2 - 1/4" plywood @ 9" x 21" - back of smaller sections
2 - 1x6 @ 17-1/2" long - top and bottom of larger section
1 - 1/4" x 5-1/2" hobby board @ 20" long - larger section divider
1- 1/4" plywood @ 18" x 21" - back of larger section
Tools
- measuring tape
- square
- pencil
- safety glasses
- hearing protection
- compound miter saw
- nailer
- sander
Step-by-step Instructions
Step 1
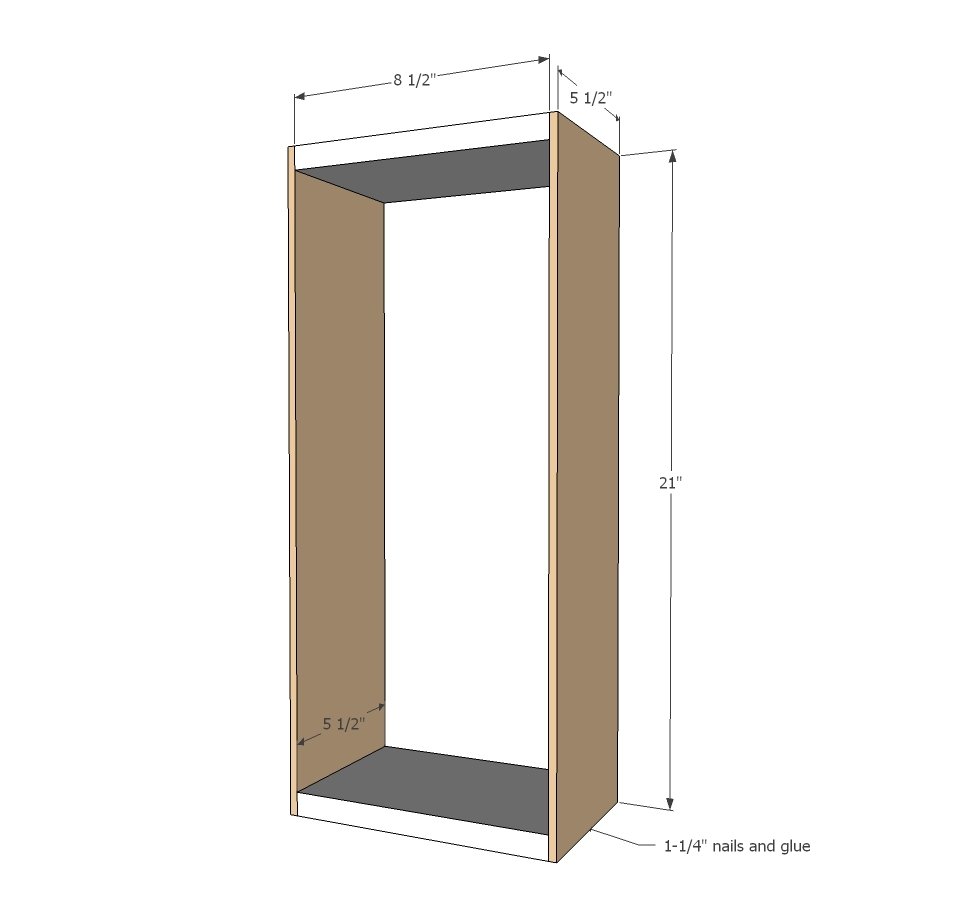
Attach 1/4" hobby boards to the top and bottom 1x6 pieces with 1-1/4" nails or staples and wood glue. Adjust for square.
Step 2
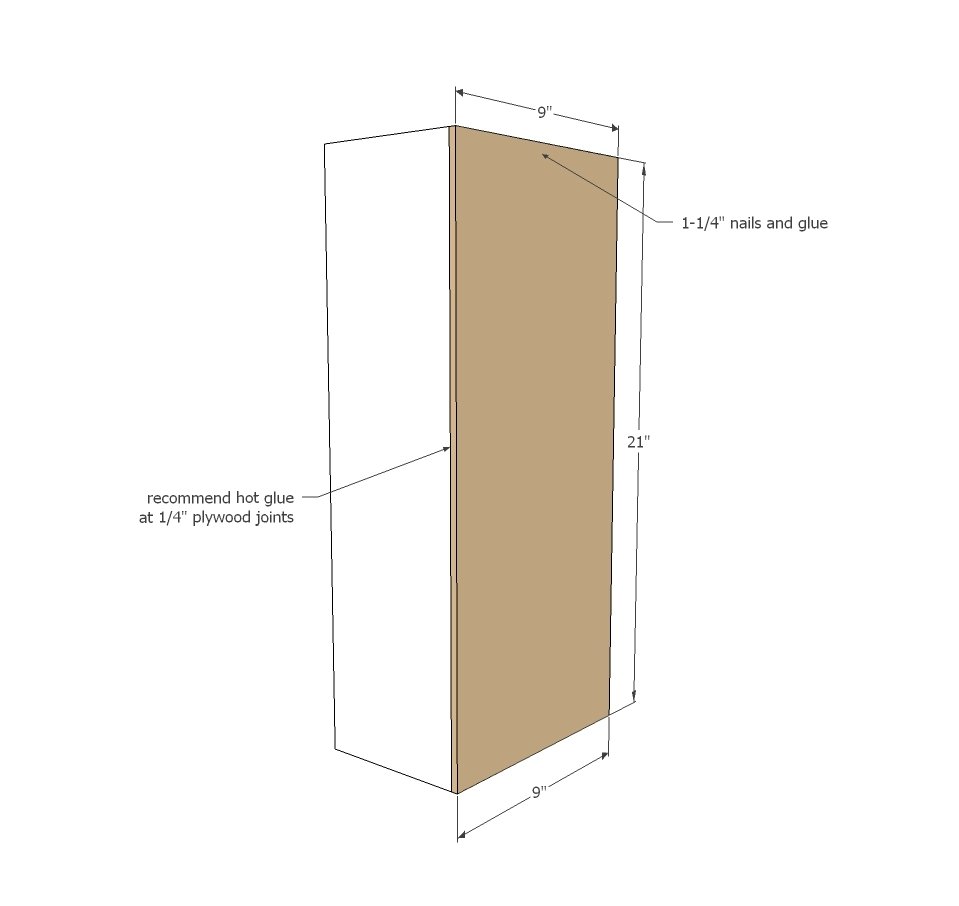
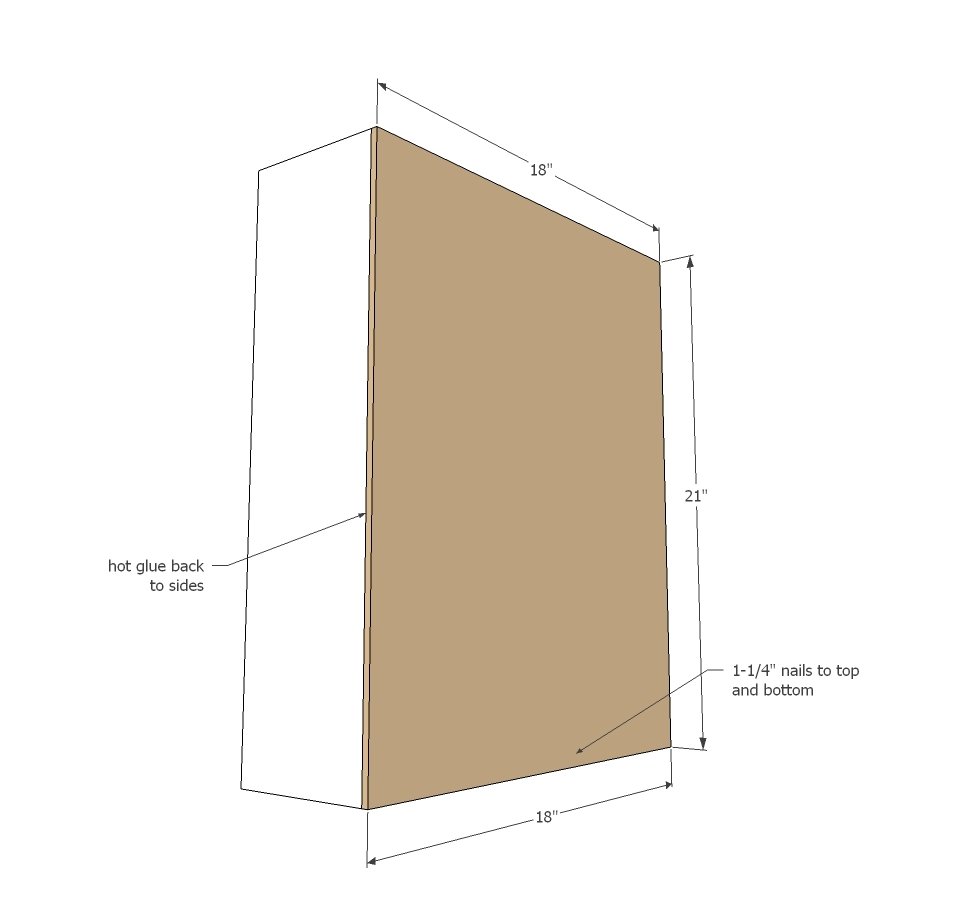
Apply wood glue to the back edges of the top and sides. Place back on project, and nail or staple to the top and bottom. TIP: Hot glue could be used to further strengthen the hobby board to 1/4" plywood joint.
Step 3
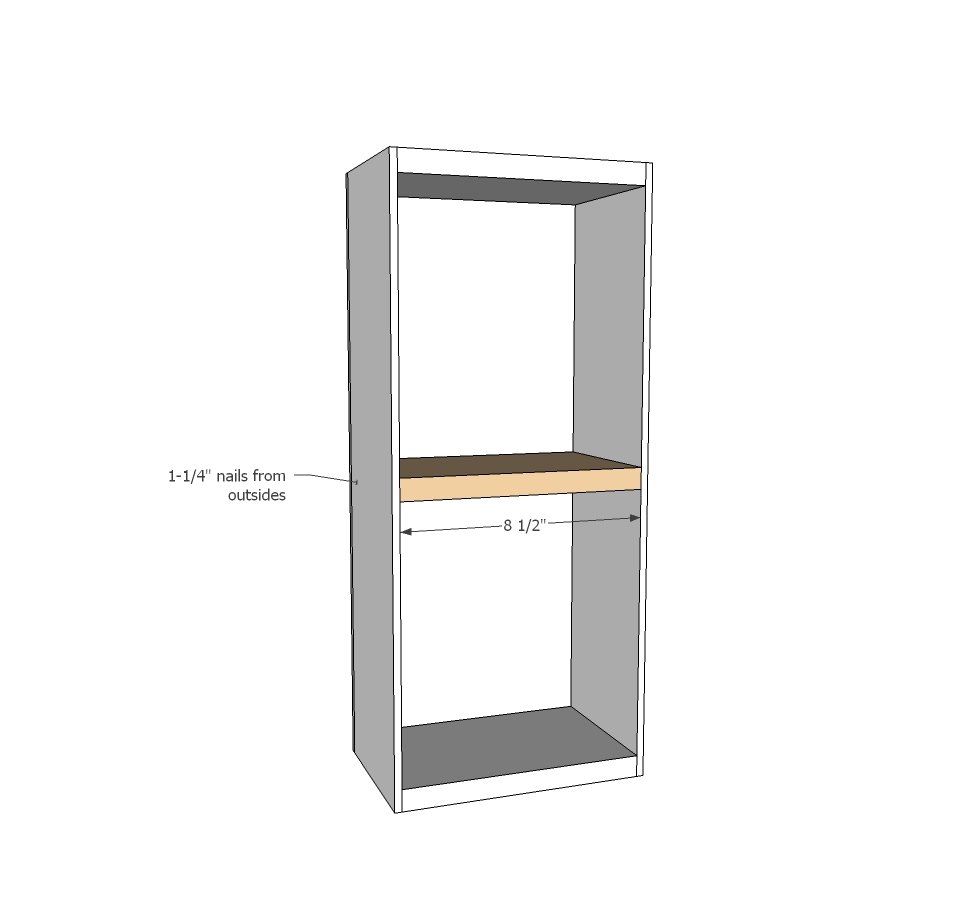
For the vanity side, add a shelf. The shelf will help tie the two pieces together. Apply glue to edges of 1x6 shelf and nail in place through the hobby boards and 1/4" plywood.
Step 4
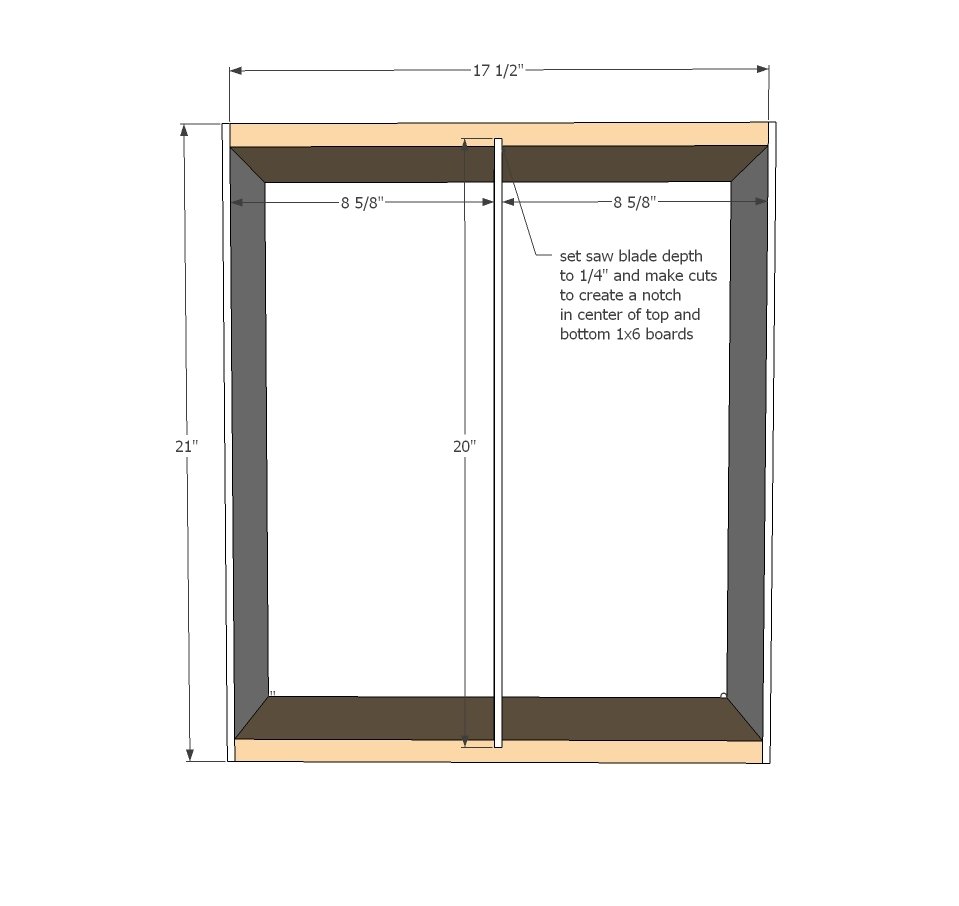
Build the larger section of the doll closet, notching the top and bottom 1x6s for the 1/4" hobby board piece to fit inside. NOTE: You may need to add the closet rod to the divider section before assembly as Jaime did. Use glue to secure all joints. Ajdust for square.
Step 5
Step 6
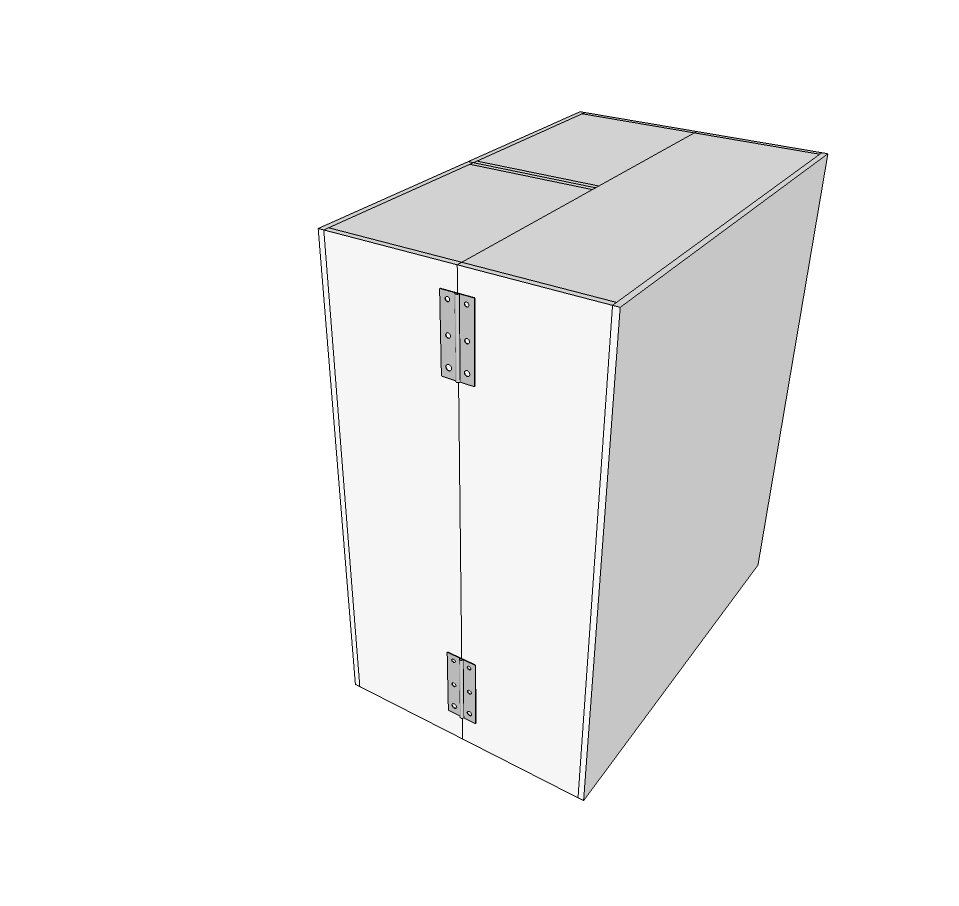
Place the three pieces of the doll closet in the closed position and attach on outside with hinges. Also add a locking (hook and eye or other clasp) to keep project closed when in storage position.
Finishing
Sand all surfaces, starting with a medium grit and finishing with fine. Wipe off the dust, fill any holes or gaps with wood filler, and sand smooth once dry. Apply primer if you're painting, then finish with your choice of paint or stain and seal with a durable clear topcoat. For outdoor projects, use exterior-rated primer, paint or stain, and sealer so the piece stands up to the weather.
Source (temporary): https://www.ana-white.com/woodworking-projects/doll-closet-folding-18-inch-doll-furniture-storage-trunk-bed