Doll X Picnic Table and Bench Set
Make a doll picnic table for American Girl or 18 doll.
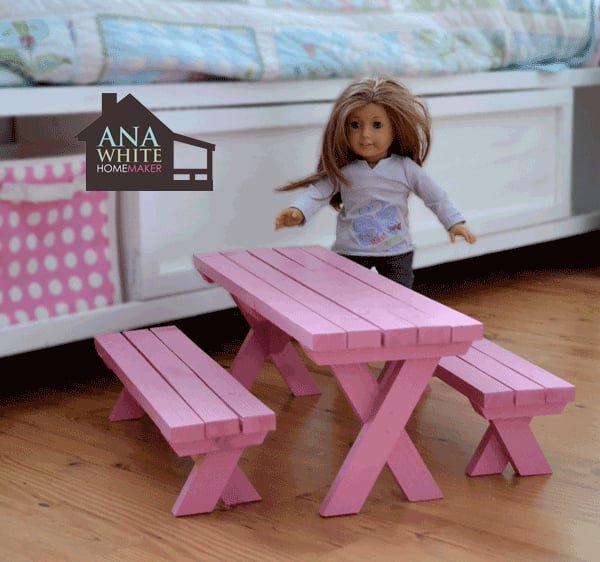
Specifications
| Project type | Doll Furniture |
|---|---|
| Room | Kids and Toys |
| Style | Children's and Kid's Room Furniture and Toy Plans |
| Difficulty | Intermediate |
| Estimated cost | Under $20 |
Shopping List
4 - 1x2 @ 8 feet long
Cut List
TABLE
5 - 1x2 @ 17 3/4"
3 - 1x2 @ 7 1/2" (Long point to long point, both ends cut at 30 degrees off square, NOT parallel)
2 - 1x2 @ 8 3/4" (Both ends cut at 30 degrees off square, ends are parallel)
2 - 1x2 @ 7 7/8" (Both ends cut at 30 degrees off square, ends are parallel)
2 - 1x2 @ 6 1/4" (Both ends BEVELED at 30 degrees off square, ends are parallel)
BENCHES (2)
6 - 1x2 @ 13"
4 - 1x2 @ 4 1/2" (Long point to long point, both ends cut at 30 degrees off square, NOT parallel)
4 - 1x2 @ 4 3/8" (Both ends cut at 30 degrees off square, ends are parallel)
4 - 1x2 @ 3 1/2" (Both ends cut at 30 degrees off square, ends are parallel)
Tools
- measuring tape
- pencil
- safety glasses
- hearing protection
- compound miter saw
- nailer
Step-by-step Instructions
Step 1
Step 2
Glue and nail the supports to underside of tabletop boards.
Step 3
Now attach the longer legs to the insides of the supports, as shown in diagram.
Step 4
Then attach remaining shorter legs as shown in diagram. Don't forget the glue on these legs - it is very important.
Step 5
Step 6
Step 7
Finishing
Sand all surfaces, starting with a medium grit and finishing with fine. Wipe off the dust, fill any holes or gaps with wood filler, and sand smooth once dry. Apply primer if you're painting, then finish with your choice of paint or stain and seal with a durable clear topcoat. For outdoor projects, use exterior-rated primer, paint or stain, and sealer so the piece stands up to the weather.
Source (temporary): https://www.ana-white.com/woodworking-projects/doll-x-picnic-table-and-bench-set