Dollhouse Bookcase
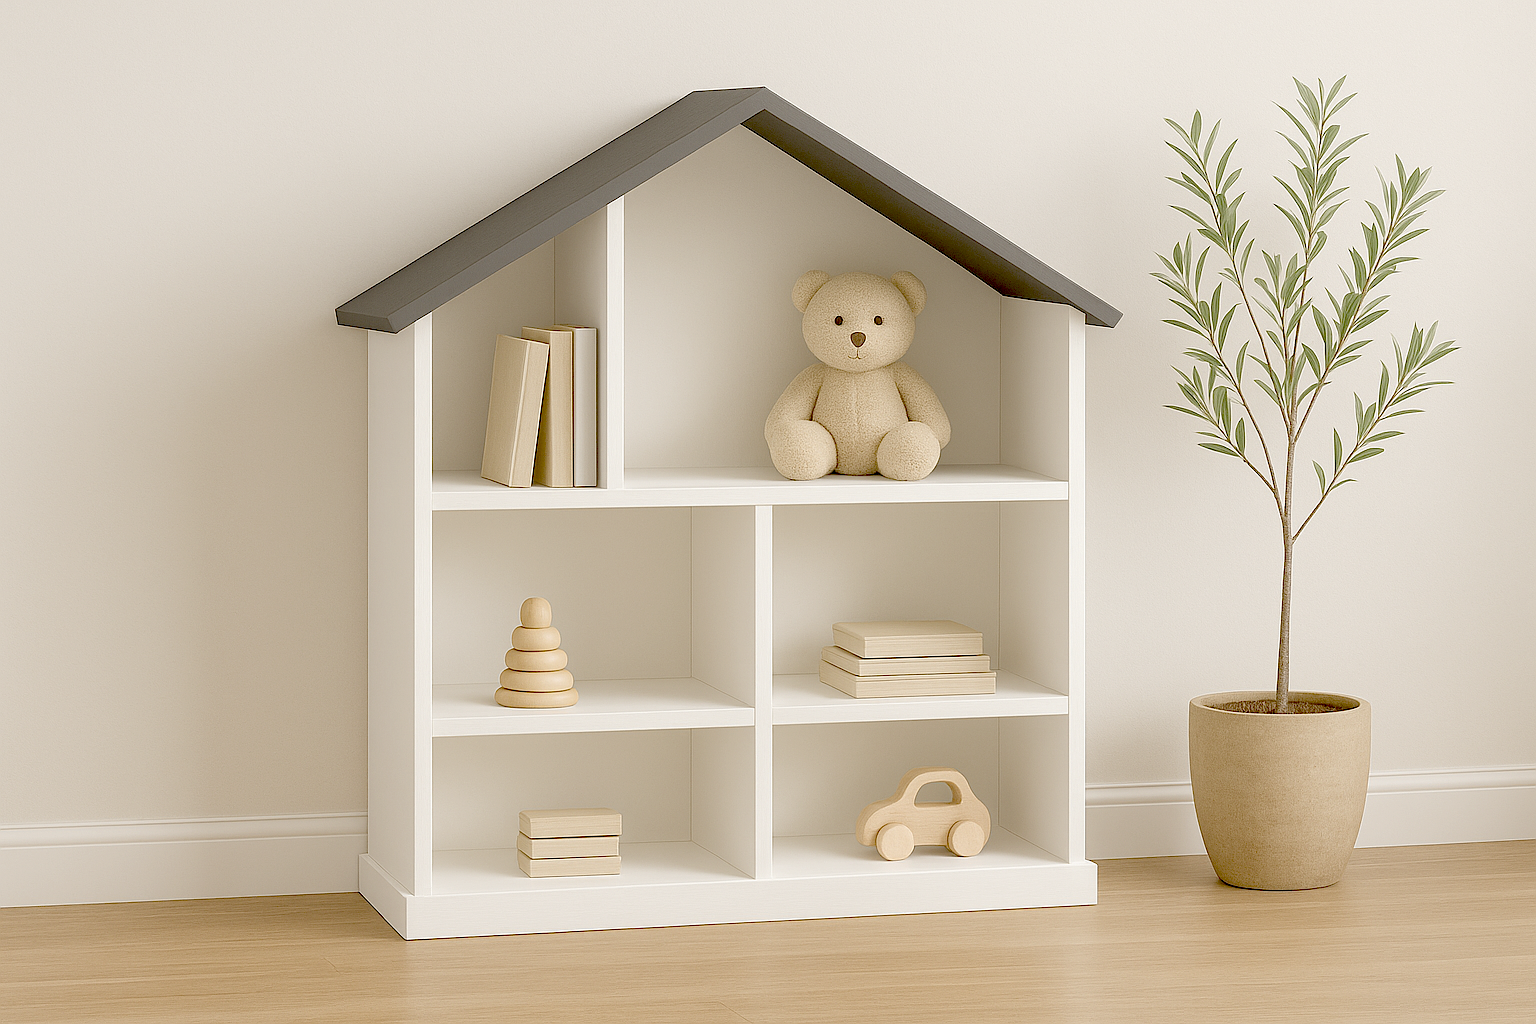
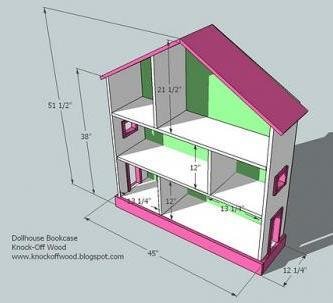
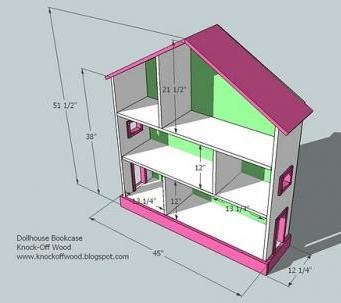
Dollhouse Bookshelf – Bring charm and function into your home with this farmhouse-inspired dollhouse bookshelf. Designed to double as playful storage and stylish décor, this piece is perfect for children’s rooms, playrooms, or even as a unique feature in a living space. • Finished dimensions: 45" wide x 51 ½" high x 12 ¼" deep • Proportions: Nearly square design, styled like a dollhouse • Construction: Solid wood with clean partition walls for easy storage and organization • Finish: Painted all white with a charcoal gray pitched roof for a timeless, modern farmhouse look • Interior: Partitioned into multiple compartments for books, toys, and storage bins • Use: Functions as both a bookcase and a dollhouse play space This versatile project blends storage with creativity, offering kids an imaginative play space while keeping their room organized. Download the and build your own dollhouse bookshelf today!
Specifications
| Project type | Bookshelf and Bookcase Plans |
|---|---|
| Room | Storage Solutions |
| Difficulty | Intermediate |
| Estimated cost | $20 - $50 |
Dimensions
Use the size-specific shopping and cut lists below.
Shopping List
- 4 - 1x12 @ 8 feet
- 1 - 1x4 @ 4 feet
- 1 - 1x2 @ 8 feet
- 1/4″ plywood cut 45″ wide x 51 1/2″ high, cut in a house shape with the vertical ends at 38 1/2″ (measure for exact fit)
Cut List
Main Carcass
A) 2 – 1×12 @ 38 1/2″ (top edge cut off at 30 degree angle)
B) 2 – 1×12 @ 12″ (Bottom Vertical Dividers)
C) 3 – 1×12 @ 42″ (Shelves)
D) 1 – 1×12 @ 17 1/2″ (Top Vertical Divider, top edge mitered down at 30 degree angle)
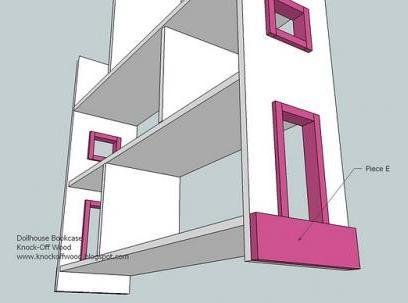
E) 2 – 1×4 @ 1 1/2″ (Side Footer)
F) 1 – 1×4 @ 45″ (Front Footer)
G) 2 – 1×12 @ 27 1/2″ (Top Edge Mitered down at 30 degrees)
Trim for Windows and Doors
H) 6 – 1×2 @ 4″
I) 4 – 1×2 @ 4 3/4″
J) 4 – 1×2 @ 10 1/4″ Plywood 1/4″ plywood cut 45″ wide x 51 1/2″ high, cut in a house shape with the vertical ends at 38 1/2″ (measure for exact fit)
Tools
- measuring tape
- square
- safety glasses
- hearing protection
- drill
- circular saw
- compound miter saw
- nailer
- sander
Step-by-step Instructions
Step 1
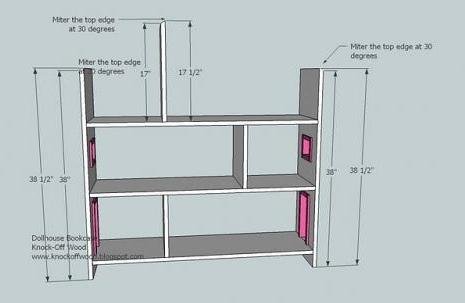
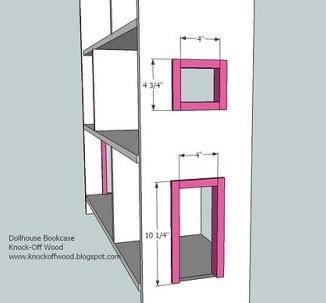
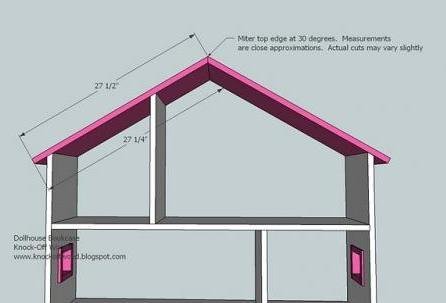
Use the above diagram to help guide you. Please note that the measurements are close approximations and the miter saw will cut the exact angle for you.
Step 2
Windows and Doorways. From Boards A, cut the window holes out as shown above.
Step 3
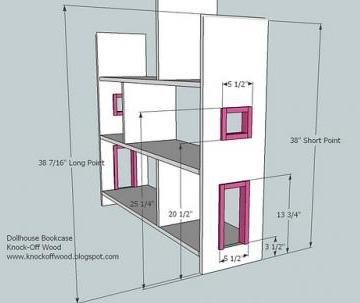
Windows and Doors. First build the window and door frames as shown above, using 1 1/2″ nails. Then center the frames on the openings cut in step 2 and nail the frames into the openings. If you are painting the frames different colors, you may wish to paint and finish the bookshelf and the frames seperately, and then fasten the frames to the bookshelf.
Step 4
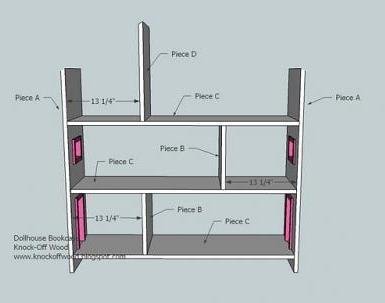
Once the sides, A, are complete, begin working on the center. First nail boards B and C together, as shown above. Then fasten D to the top shelf. Once B, C, and D are completed, nail the sides A on.
Step 5
Step 6
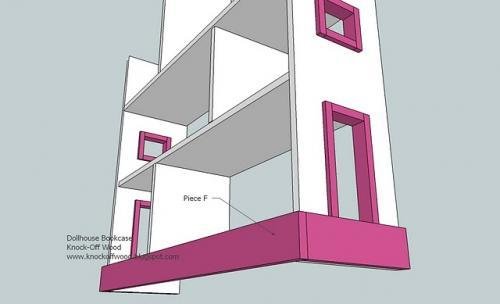
Footer. Now fasten the front footer, F, to the front of the bookshelf as shown above.
Step 7
Top. Fasten the top as shown above. Make sure you nail from each of the top pieces into the opposite top piece at the top of the gable end.
Step 8
Cut and add the plywood to the back, using glue and 1 1/2″ nails.
Step 9
Finishing. Fill nail holes with wood filler and sand and finish as desired.
Finishing
Sand all surfaces, starting with a medium grit and finishing with fine. Wipe off the dust, fill any holes or gaps with wood filler, and sand smooth once dry. Apply primer if you're painting, then finish with your choice of paint or stain and seal with a durable clear topcoat. For outdoor projects, use exterior-rated primer, paint or stain, and sealer so the piece stands up to the weather.
Source (temporary): https://www.ana-white.com/woodworking-projects/dollhouse-bookcase