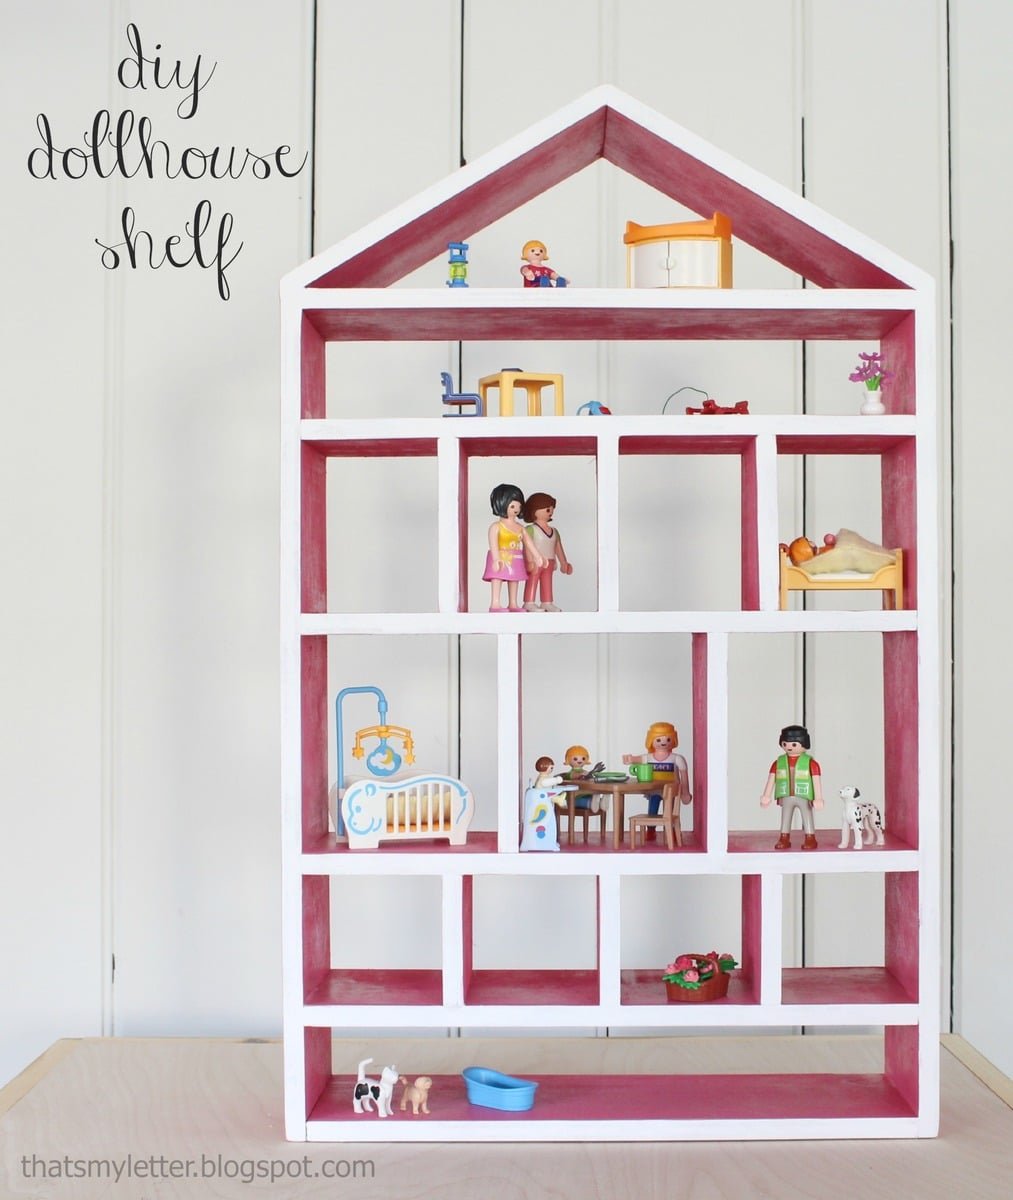
Dollhouse Wall Shelf
Simple DIY dollhouse wall shelf plans from
Specifications
| Project type | shelves |
|---|---|
| Room | Kids and Toys |
| Style | Children's and Kid's Room Furniture and Toy Plans |
| Difficulty | Intermediate |
| Estimated cost | Under $20 |
Dimensions
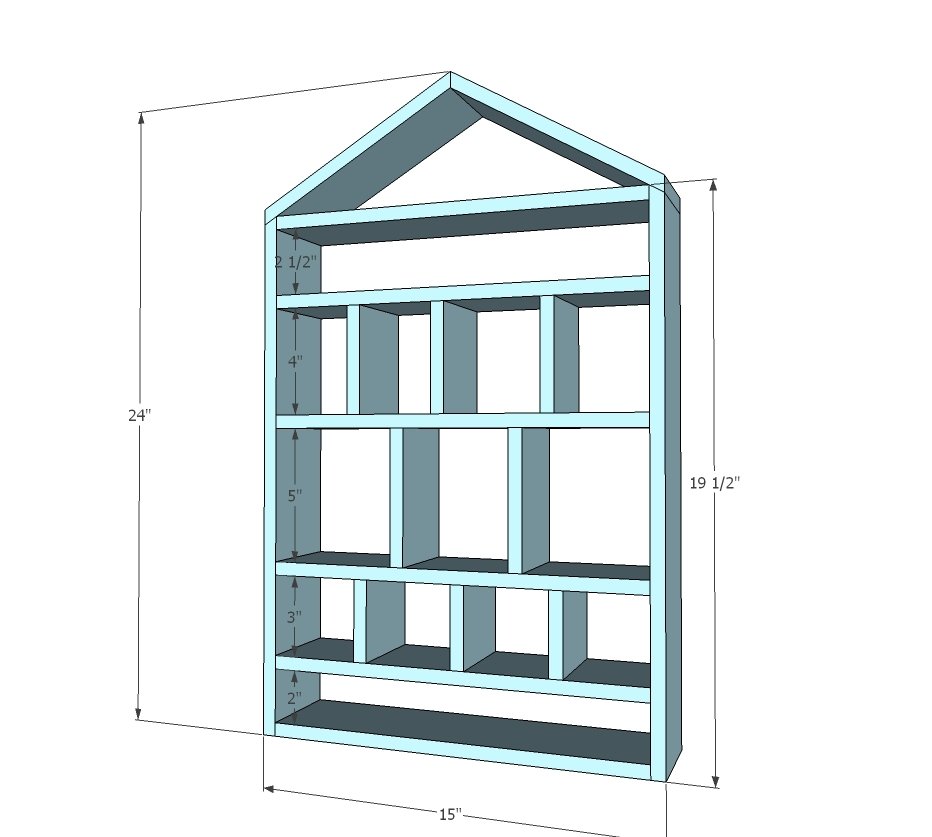
Use the size-specific shopping and cut lists below.
Shopping List
1 sheet of 1/2" thick plywood, ripped into strips 5" wide x 48" long
Trim screws (about 1-1/2" length) or brad nails or staples (1")
Cut List
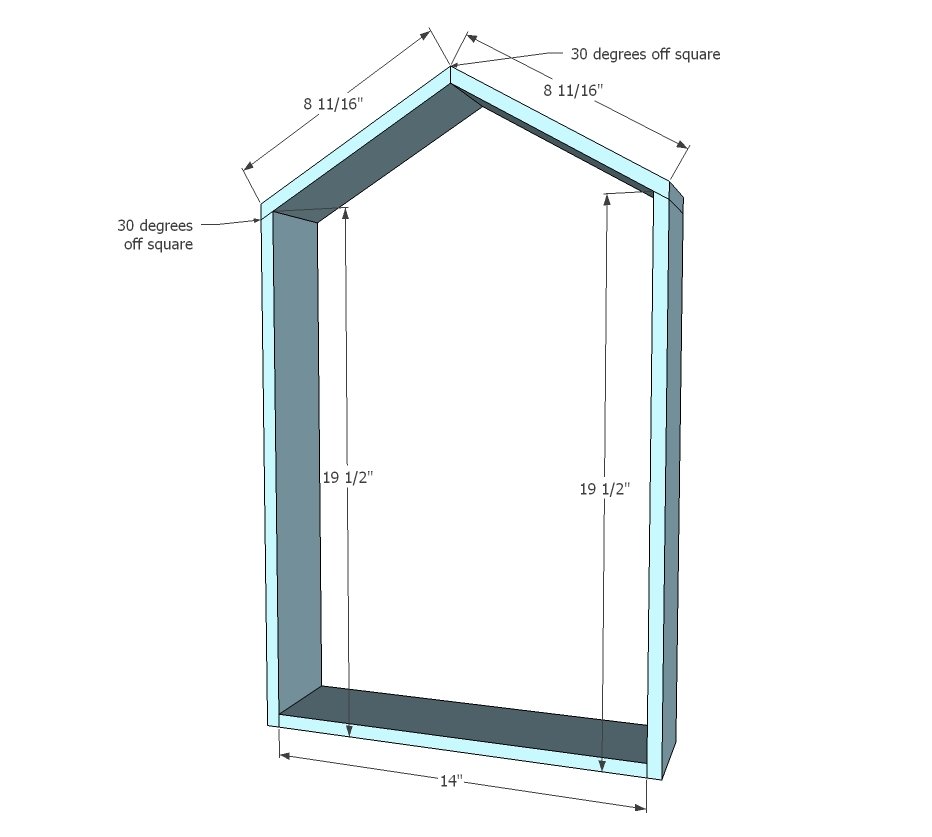
2 - 1/2" plywood @ 5" x 19-1/2" - longest point measurement, one end cut at 30 degrees off square
2 - 1/2" plywood @ 5" x 8-11/16" - long point to short point measurement, both ends cut at 30 degrees off square PARALLEL
6 - 1/2" plywood @ 5" x 14"
3 - 1/2" plywood @ 5" x 3"
2 - 1/2" plywood @ 5" x 5"
3 - 1/2" plywood @ 5" x 4"
Tools
- measuring tape
- square
- pencil
- safety glasses
- hearing protection
- circular saw
- nailer
Step-by-step Instructions
Step 1
Build the outer frame of the dollhouse shelf.
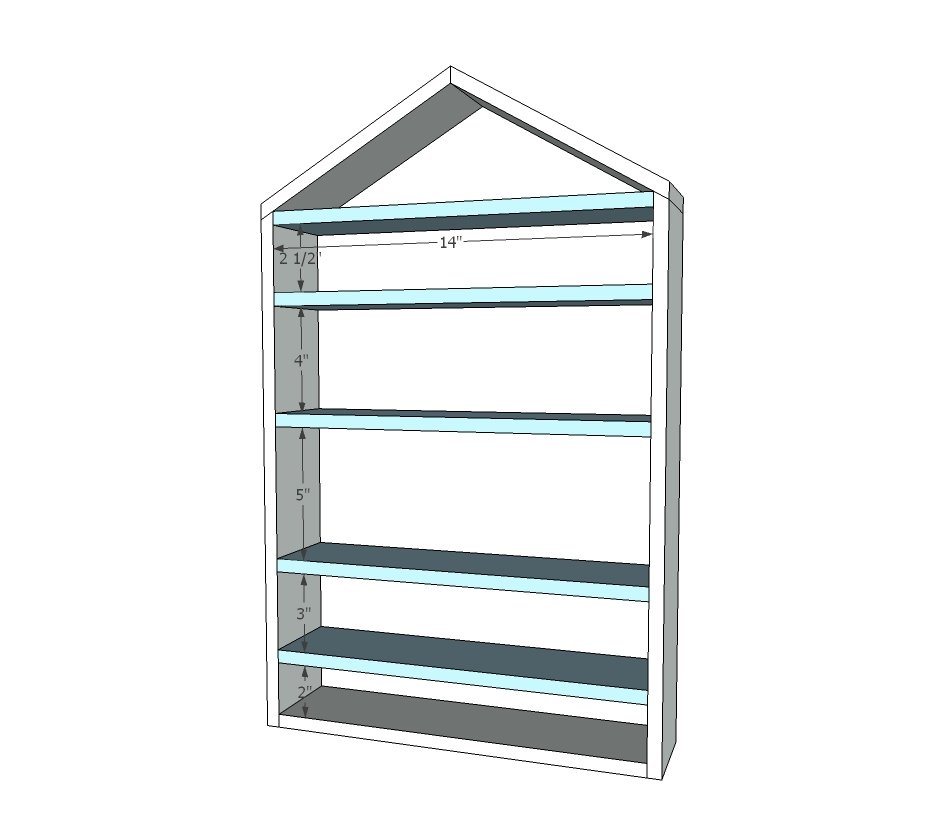
Add shelves. Use the shelf dividers as spacers to help you place the shelves.
NOTE: Jaime actually attached her dividers first - that worked better for her.
Step 3
Attach dividers with brad nailer at front and back (you should be able to fit the nose of your nailer in there).
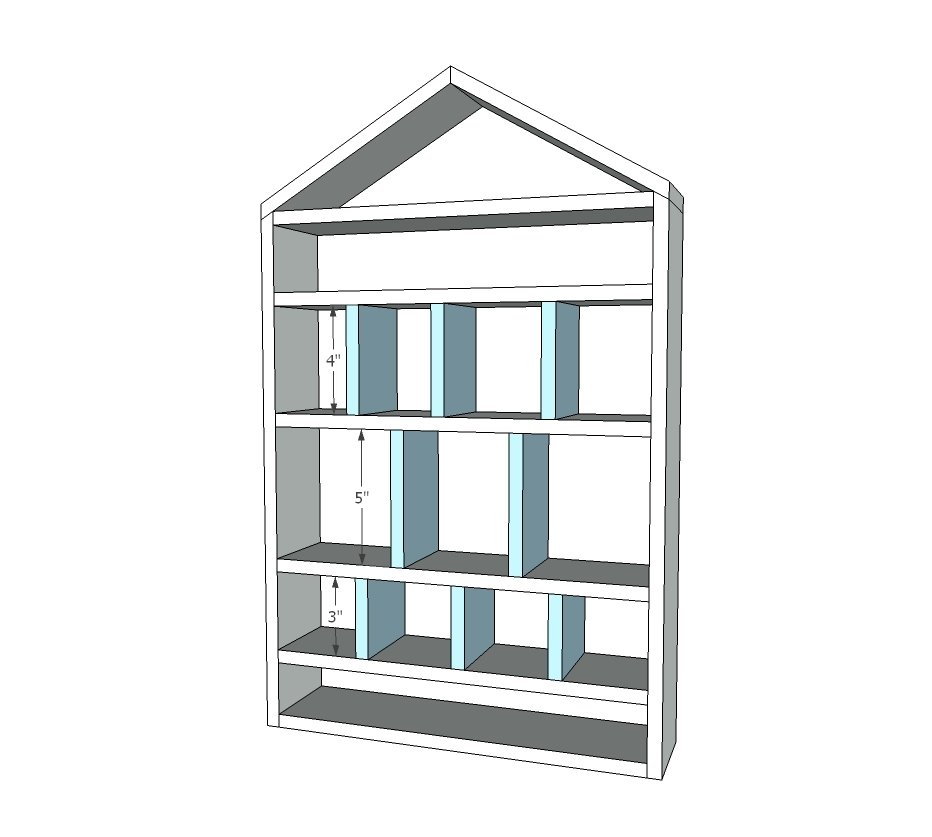
Step 4
Optional - add a back.
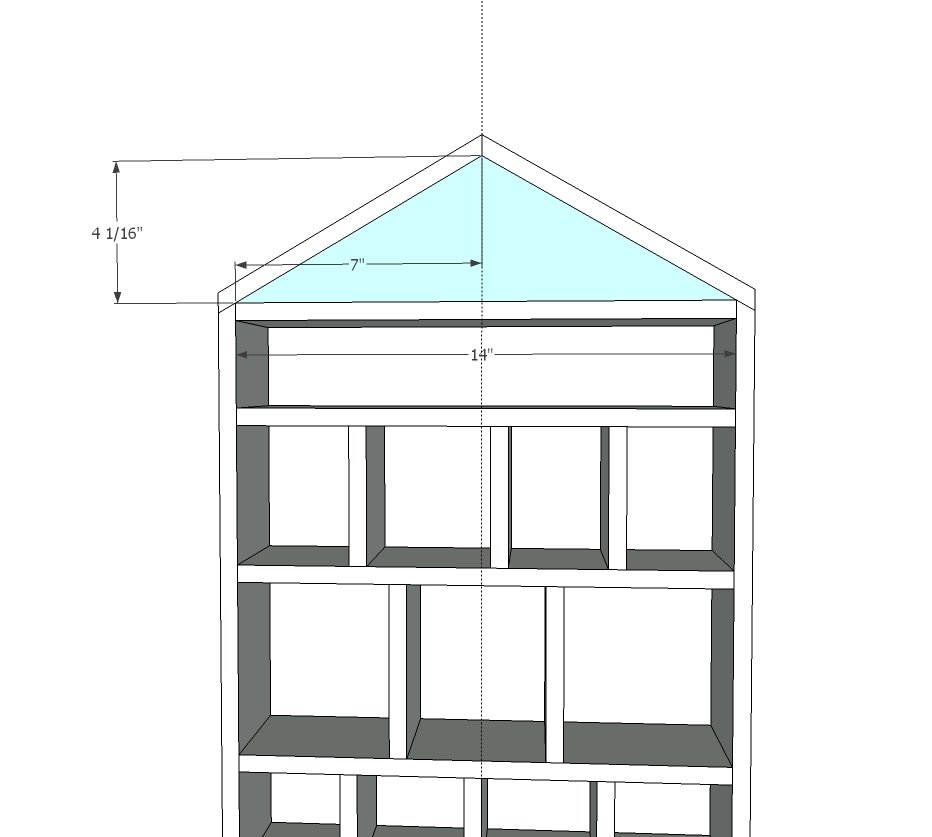
Finishing
Sand all surfaces, starting with a medium grit and finishing with fine. Wipe off the dust, fill any holes or gaps with wood filler, and sand smooth once dry. Apply primer if you're painting, then finish with your choice of paint or stain and seal with a durable clear topcoat. For outdoor projects, use exterior-rated primer, paint or stain, and sealer so the piece stands up to the weather.
Source (temporary): https://www.ana-white.com/woodworking-projects/dollhouse-wall-shelf