Doors for the Apothecary Media Console
Doors and drawers for the Apothecary Console.
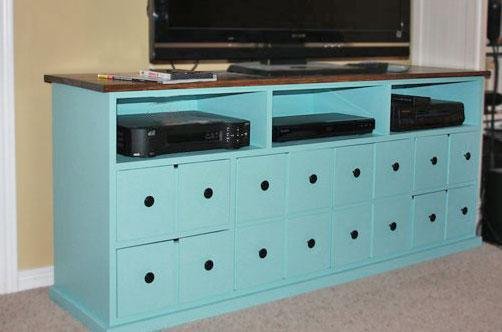
Specifications
| Project type | Storage Woodworking Plans |
|---|---|
| Room | living room |
| Style | Farmhouse Furniture |
| Difficulty | Advanced |
| Estimated cost | $20 - $50 |
Dimensions
Use the size-specific shopping and cut lists below.
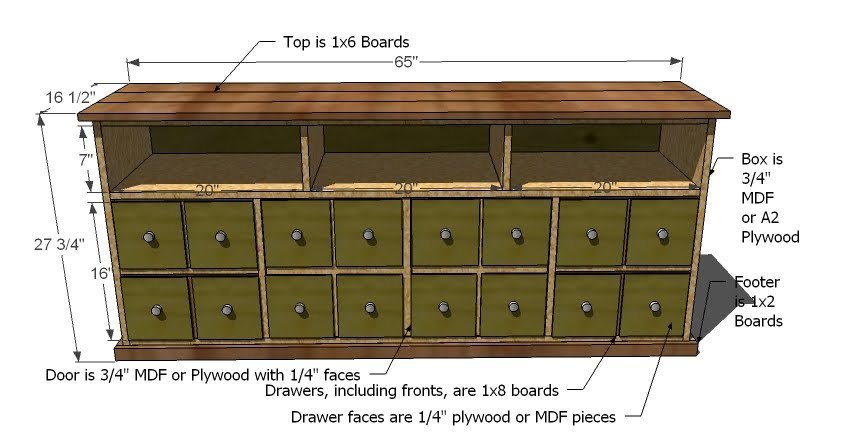
Shopping List
2 – 1×8 Boards, 10′ Long 2″ Screws Scrap 1×16 and 1/4″ plywood from the base cabinet 16 Knobs 4 Total Euro Style Hinges, Full Overlay or Inset (see below)
Cut List
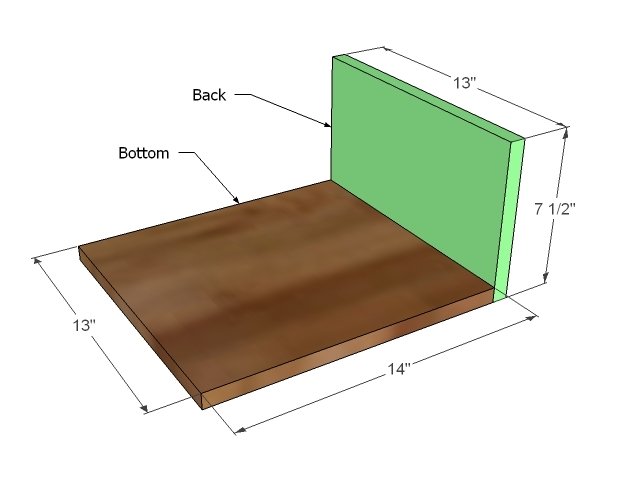
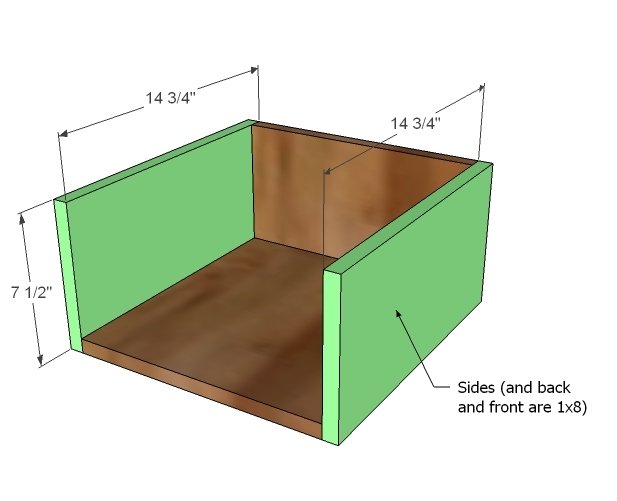
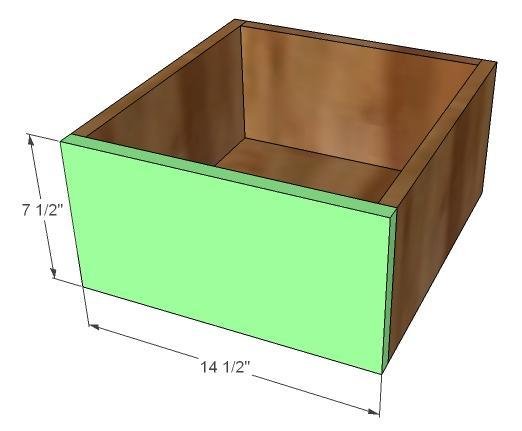
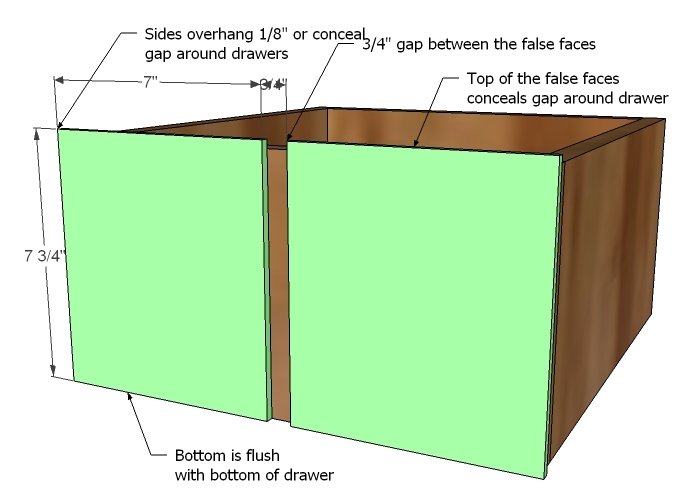
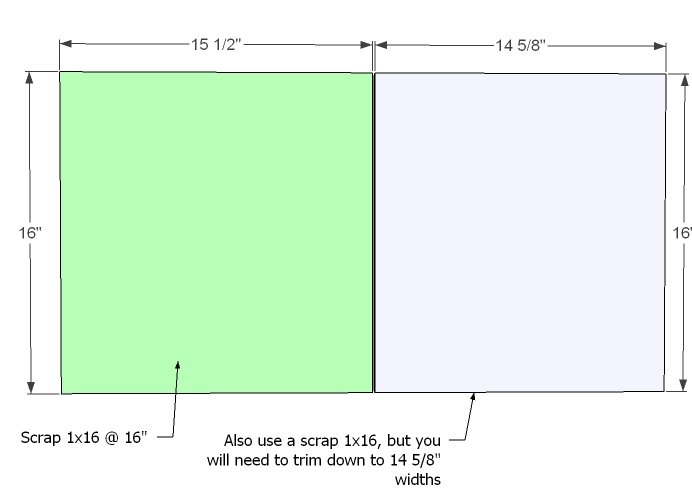
Cut List: For 4 Drawers 4 – 3/4″ Plywood or MDF @ 13″ x14″ (Drawer bottoms, use scrap 1×16 pieces) 4 – 1×8 @ 13″ (Drawer Backs) 8 – 1×8 @ 14 3/4″ (Drawer Sides) 4 – 1×8 @ 14 1/2″ (Drawer Fronts 16 – 1/4″ plywood @ 7″ x 7 3/4″ (False Faces) Cut List: For Both Drawers (Drawers are not the same!) 1 – 3/4″ Plywood or MDF @ 16″ x15 1/2″ (Larger Door, use scrap 1×16 pieces) 1 – 3/4″ Plywood or MDF @ 16″ x14 5/8″ (Smaller Door, use scrap 1×16 pieces) 8 – 1/4″ plywood @ 7″ x 7 3/4″ (False Faces, use scraps from the back)
Tools
- measuring tape
- square
- pencil
- hammer
- safety glasses
- hearing protection
- circular saw
- nailer
- sander
Step-by-step Instructions
Drawer Backs
Begin by fastening the drawer back to the drawer bottom using 2″ screws and glue. A trick I do to make my drawers slide better without having to buy hardware is rest the bottom (but not the back and sides and front) on a scrap piece of 1/4″ plywood when fastening the backs, sides and front. This raises the bottom 1/4″ and that way your bottom doesn’t drag when the door is opened and closed. After you finish you piece, you can rub vasoline on the sides and your drawers should glide smoothly on the side edges.
Drawer Sides
Just like you added the back, now add the sides. Make sure you also fasten to the back piece.
Drawer Fronts
Now add the front, making use the drawer is square and the front lines up with all outside edges. Fasten with 2″ screws and glue to the sides and bottom.
False Faces
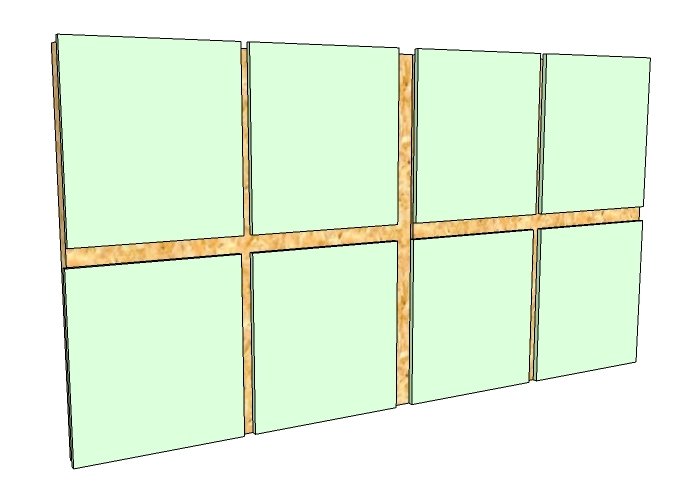
Here is what I would do because I’m a slight perfectionist. I would put all of your drawers into the drawer boxes without the false faces and center the drawers on the opening, with approximately an 1/8″ all the way around (a 1/4″ on the top). Then I would position the false faces over the drawers so that the false faces just covers this gap. Leave a 3/4″ space between the false faces. Glue and if you have your nailer handy, tack a few nails into the corners of the false faces. Clamp and let dry.
Step 5
Doors
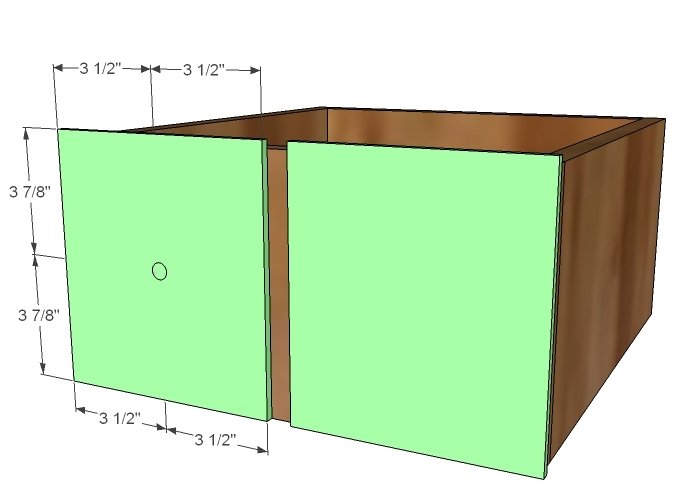
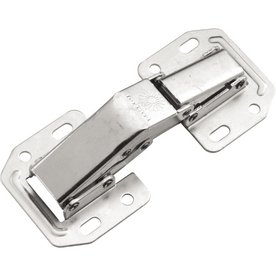
Cut you doors as shown above. The doors are not the same. Fit in the opening and attach with inset euro style full overlay hinges.
Step 7
My favorite are these from Lowes:
False Faces
As you did with the false faces from the drawers, attach the false faces to the doors, concealing the gap around the doors.
Finishing
Sand all surfaces, starting with a medium grit and finishing with fine. Wipe off the dust, fill any holes or gaps with wood filler, and sand smooth once dry. Apply primer if you're painting, then finish with your choice of paint or stain and seal with a durable clear topcoat. For outdoor projects, use exterior-rated primer, paint or stain, and sealer so the piece stands up to the weather.
Source (temporary): https://www.ana-white.com/woodworking-projects/doors-apothecary-media-console