Double Trestle Play Table
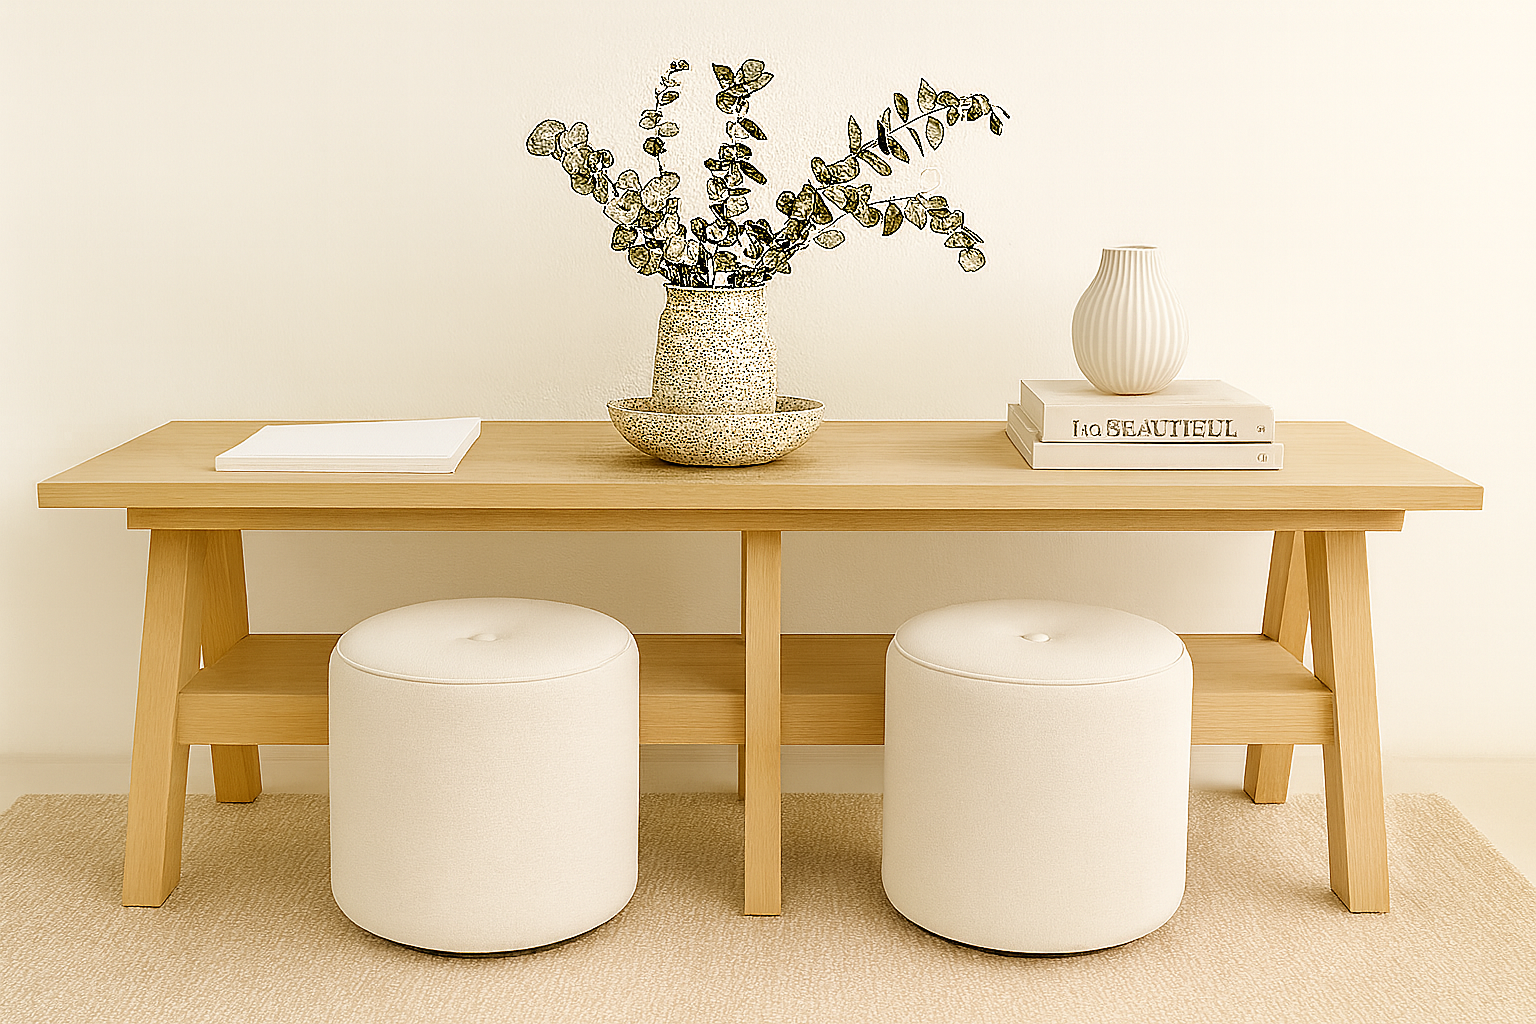
Make this adorable table for $65 using off the shelf materials and basic power tools. We love the smooth, wide top, the storage underneath, and the solid wood design - so you can stain or paint any way you want. include lots of diagrams, shopping list and cut list. We also have plans for a smaller version of this play table here.
Specifications
| Project type | Kids Tables and Chairs |
|---|---|
| Room | Kids and Toys |
| Style | Children's and Kid's Room Furniture and Toy Plans |
| Difficulty | Intermediate |
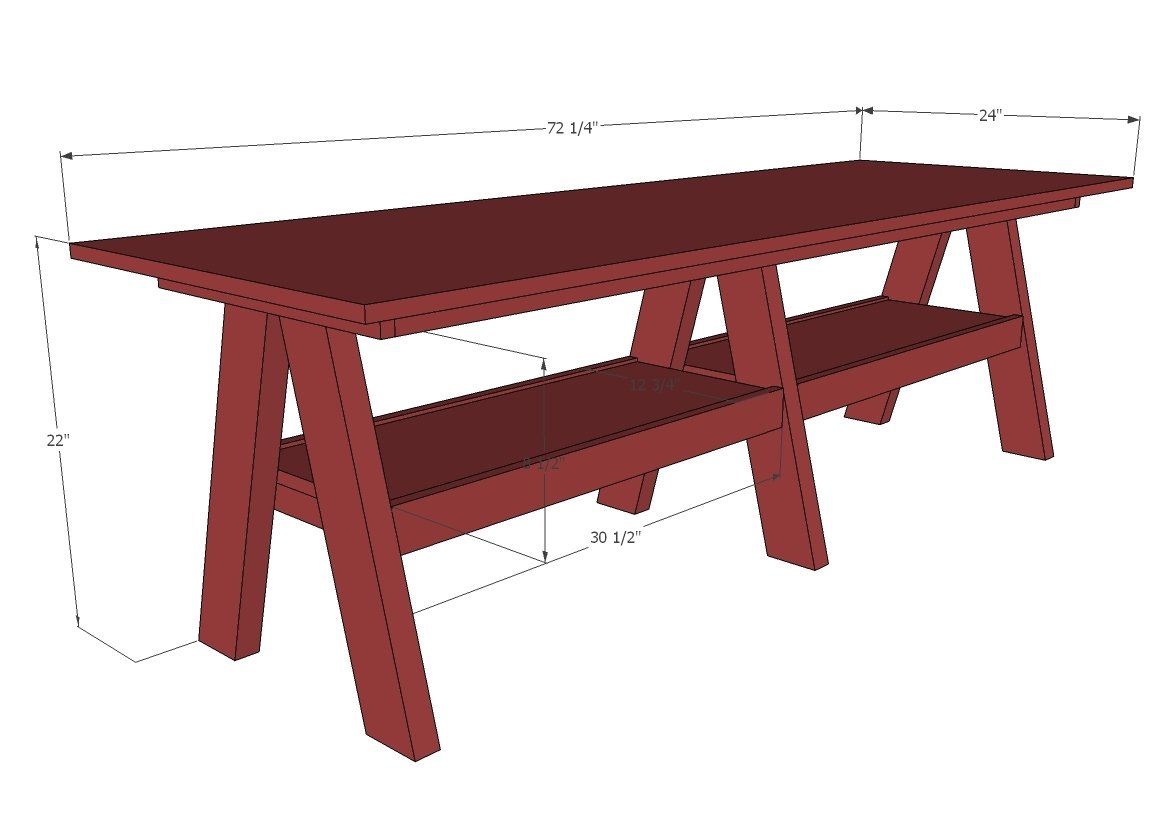
Dimensions
Use the size-specific shopping and cut lists below.
Shopping List
- 2 – 2x4 @ 8 feet long
- 2 – 1x2 @ 8 feet long
- 1 – 1x12 @ 6 feet long
- 2 – 1x3 @ 8 feet long
- 2 – 2x2 @ 8 feet long
- 1 – ¾” thick project panel 24” x 72”
Cut List
- 6 – 2x4 @ 22” (both ends cut at 15 degrees off square, long point to short point, ends ARE parallel)
- 4 – 1x2 @ 11 ¼” (cut to width of 1x12 shelf)
- 2 – 1x2 @ 18”
- 2 – 1x2 @ 15”
- 2 – 1x12 @ 30 ½”
- 4 – 1x3 @ 30 ½”
- 2 – 2x2 @ 65 ½”
- 1 – ¾” pine project panel 24” x 72”
Tools
- measuring tape
- square
- pencil
- safety glasses
- hearing protection
- kreg-jig
- drill
- compound miter saw
- countersink drill bit
Step-by-step Instructions
If you can get your legs all built square, you will be good to go!
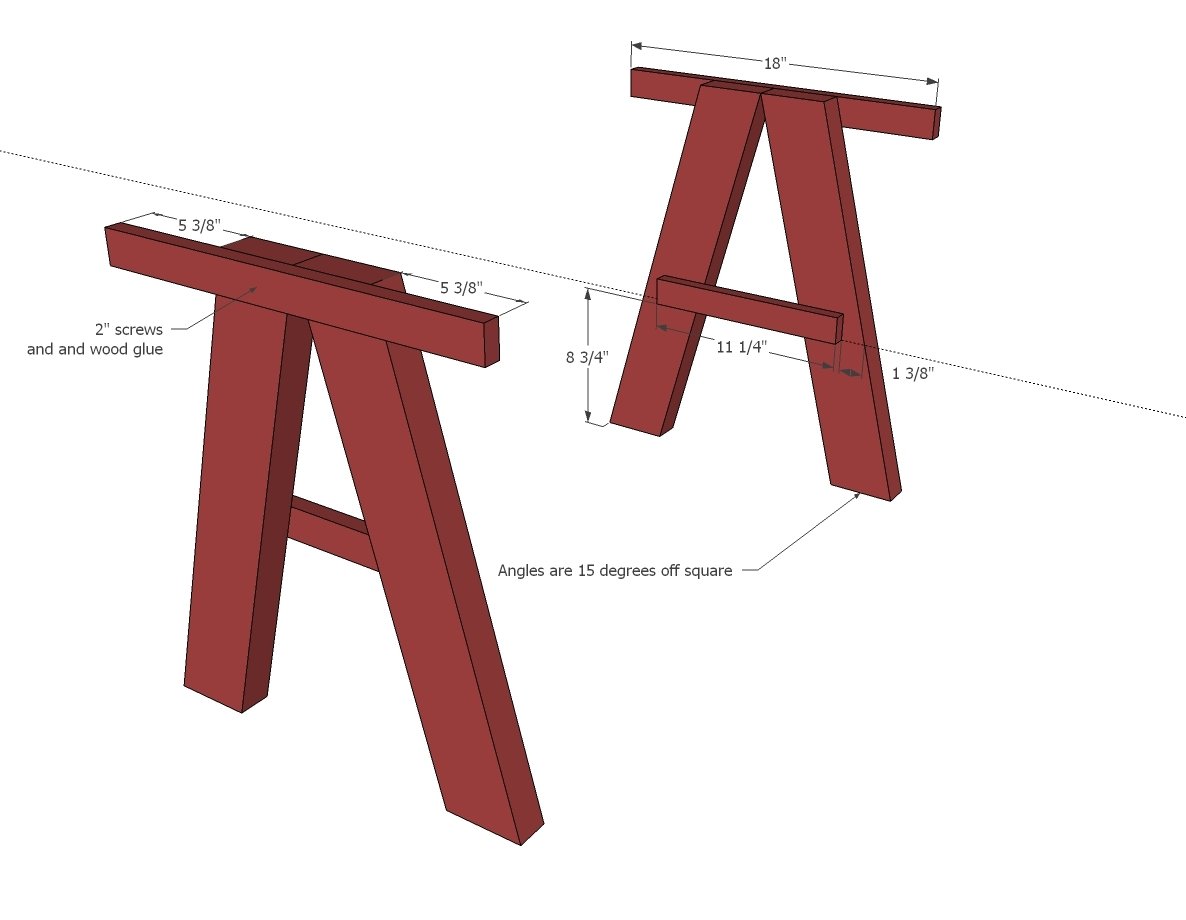
First mark out the 1x2s @ 18" long 5 3/8" from each end. Layout the two ends, and attach top 1x2 to two end legs and repeat for second side. Then measure up from the base of the legs 8 3/4" on each leg and mark a line across both legs. Place the 1x2 @ 11 1/4" on this line and attach with 2" countersunk screws and glue as shown in diagram. Remember, you will need to make two ends that are identical. NOTE that this plan assumes your 1x12s are 11 1/4" wide. If your 1x12s differ in width, adjust the bottom shelf cleats to the length of your 1x12s.
Step 2
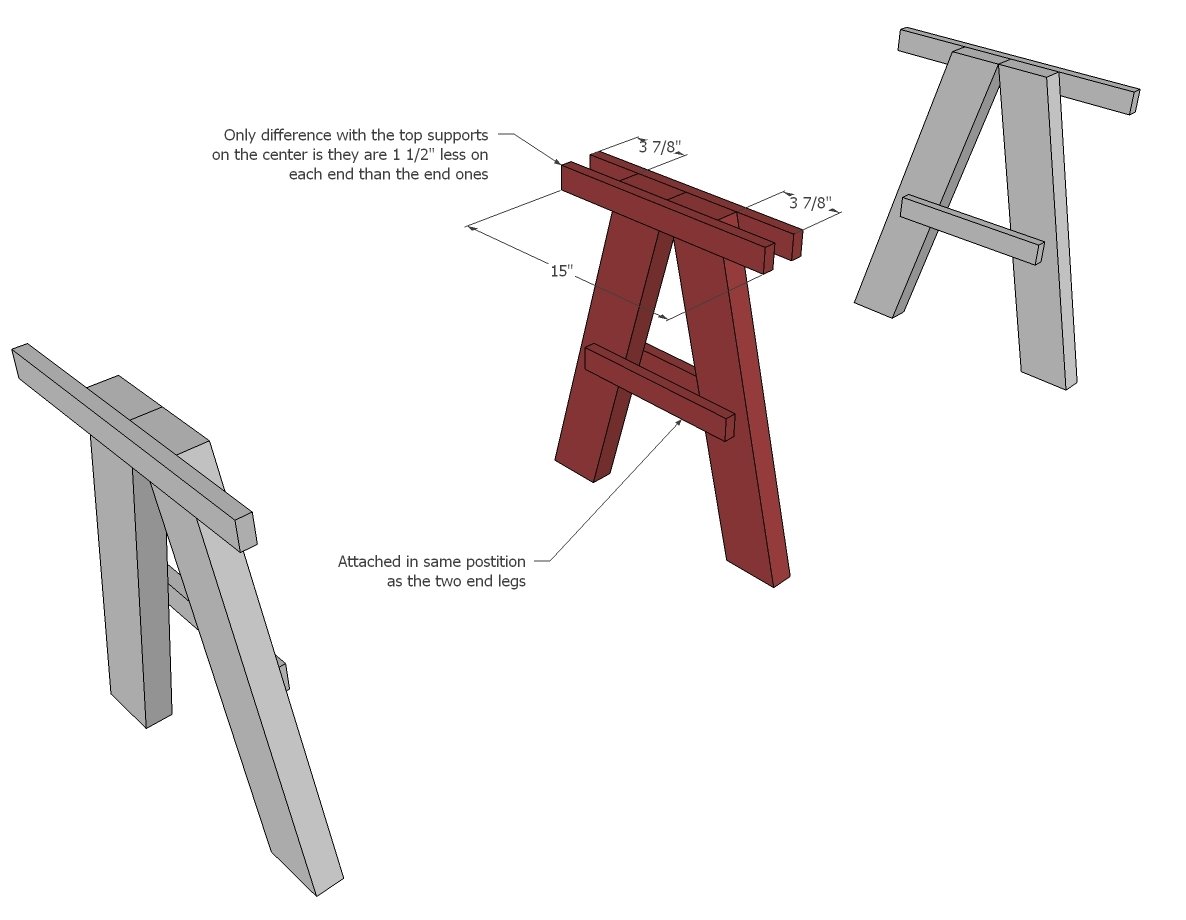
The middle leg follows the same process, only we will do the cleats on both sides for bottom shelf, and the top boards are a little shorter. Build middle same as ends, noting the changes.
Step 3
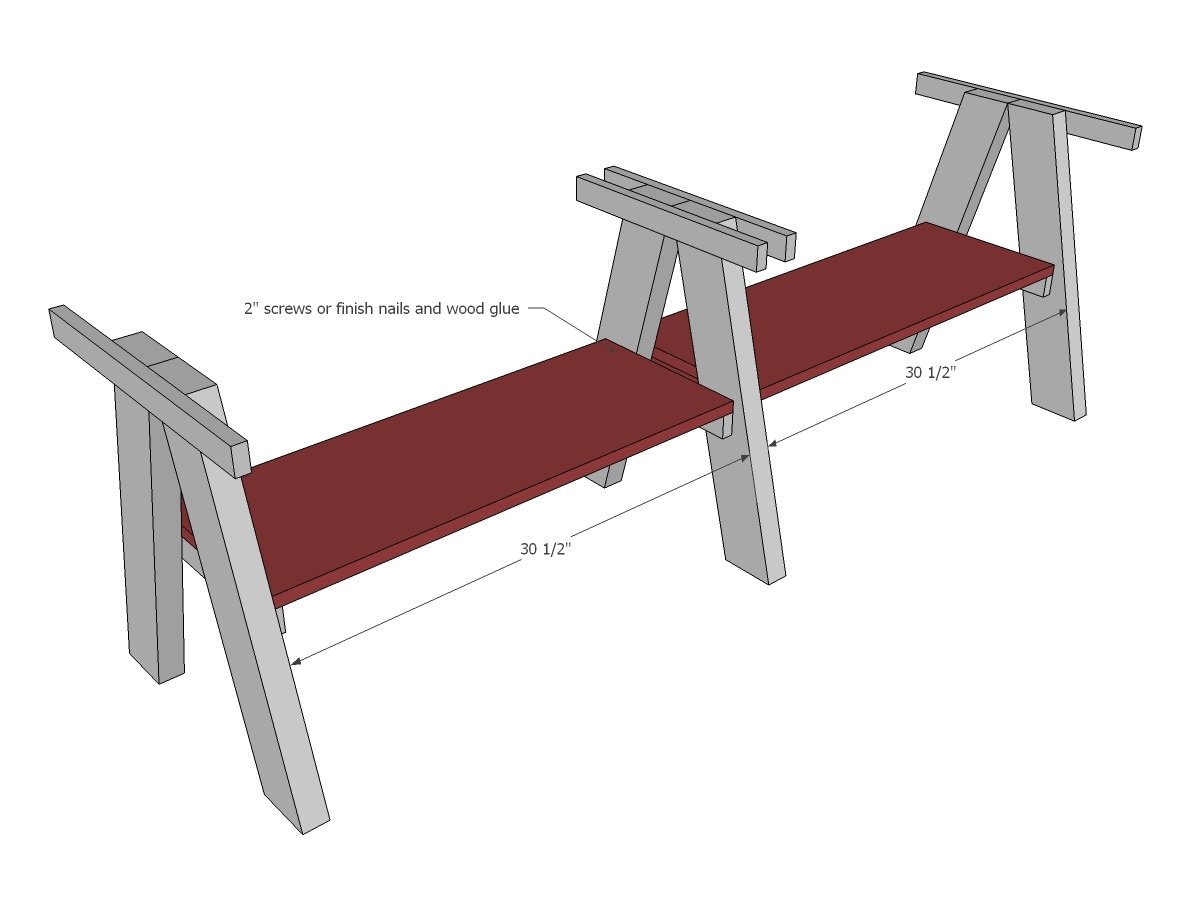
Attach 1x12 to legs with 1-1/4" brad nails and wood glue.
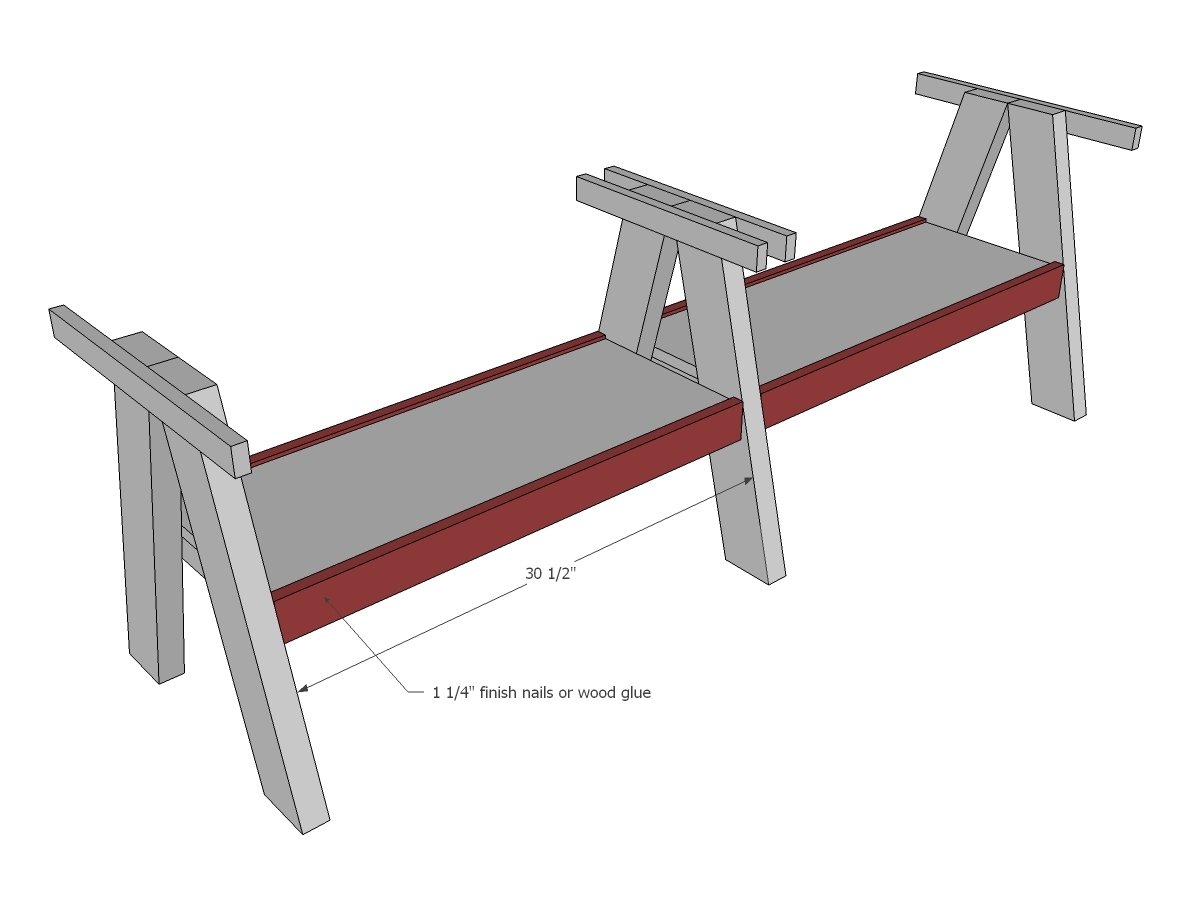
Attach trim to edges of 1x12 with 1-1/4" brad nails and wood glue.
It's also a good idea to use 2" screws to attach from the outside of the legs into the ends of the 1x3 and 1x12.
Step 5
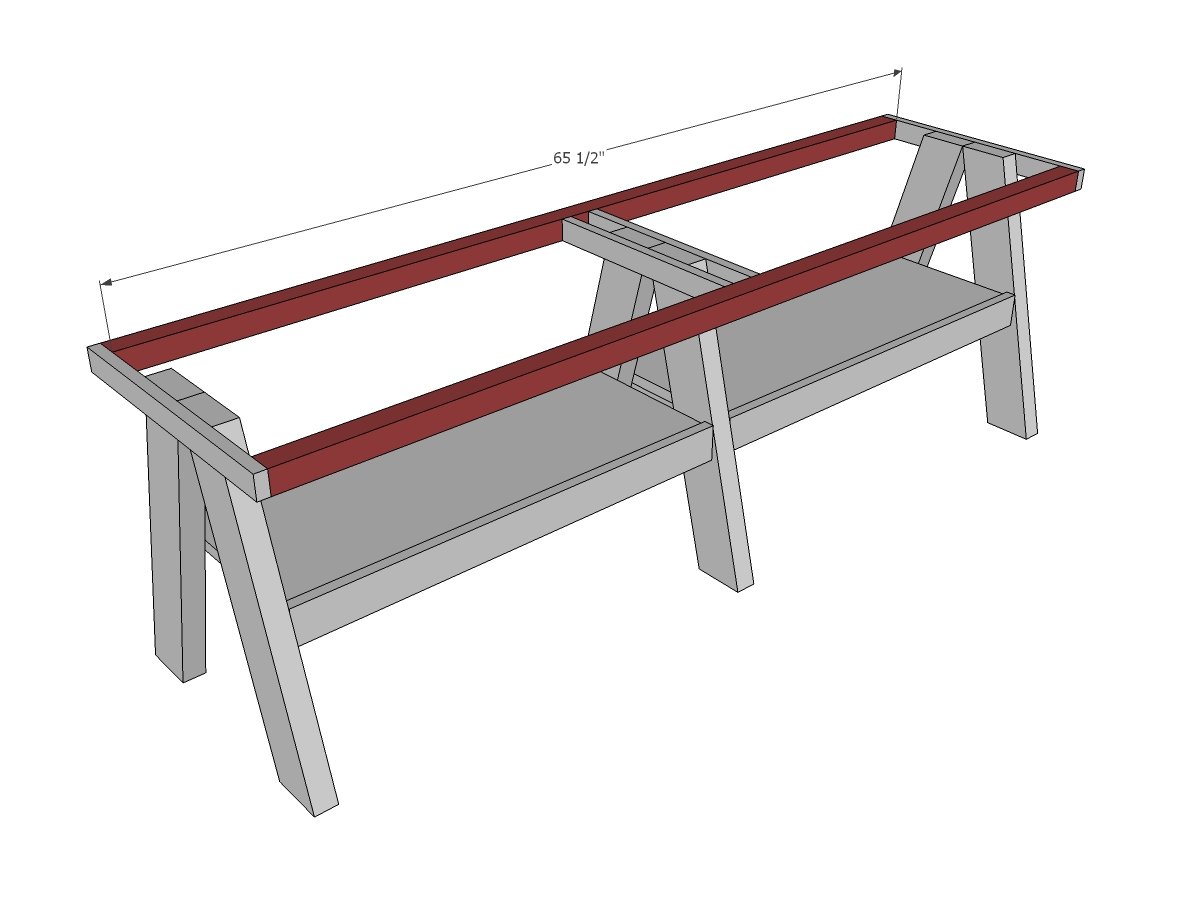
Attach side trim to the leg 1x2s with 2" screws.
Step 6
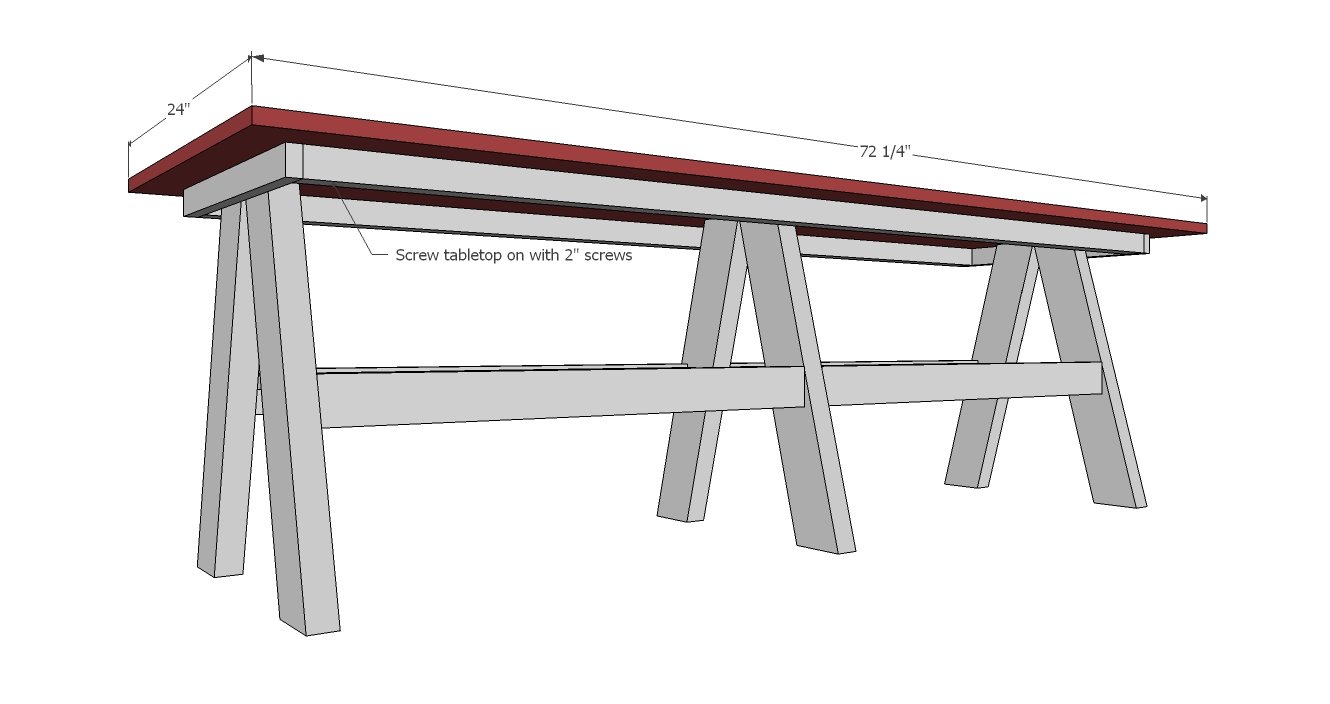
Add the top, with even overhangs on all sides. Use 1-1/4" brad nails and wood glue through the top or 2" screws from the underside.
Finishing
Sand all surfaces, starting with a medium grit and finishing with fine. Wipe off the dust, fill any holes or gaps with wood filler, and sand smooth once dry. Apply primer if you're painting, then finish with your choice of paint or stain and seal with a durable clear topcoat. For outdoor projects, use exterior-rated primer, paint or stain, and sealer so the piece stands up to the weather.
Source (temporary): https://www.ana-white.com/woodworking-projects/double-trestle-play-table