Dress Up Center
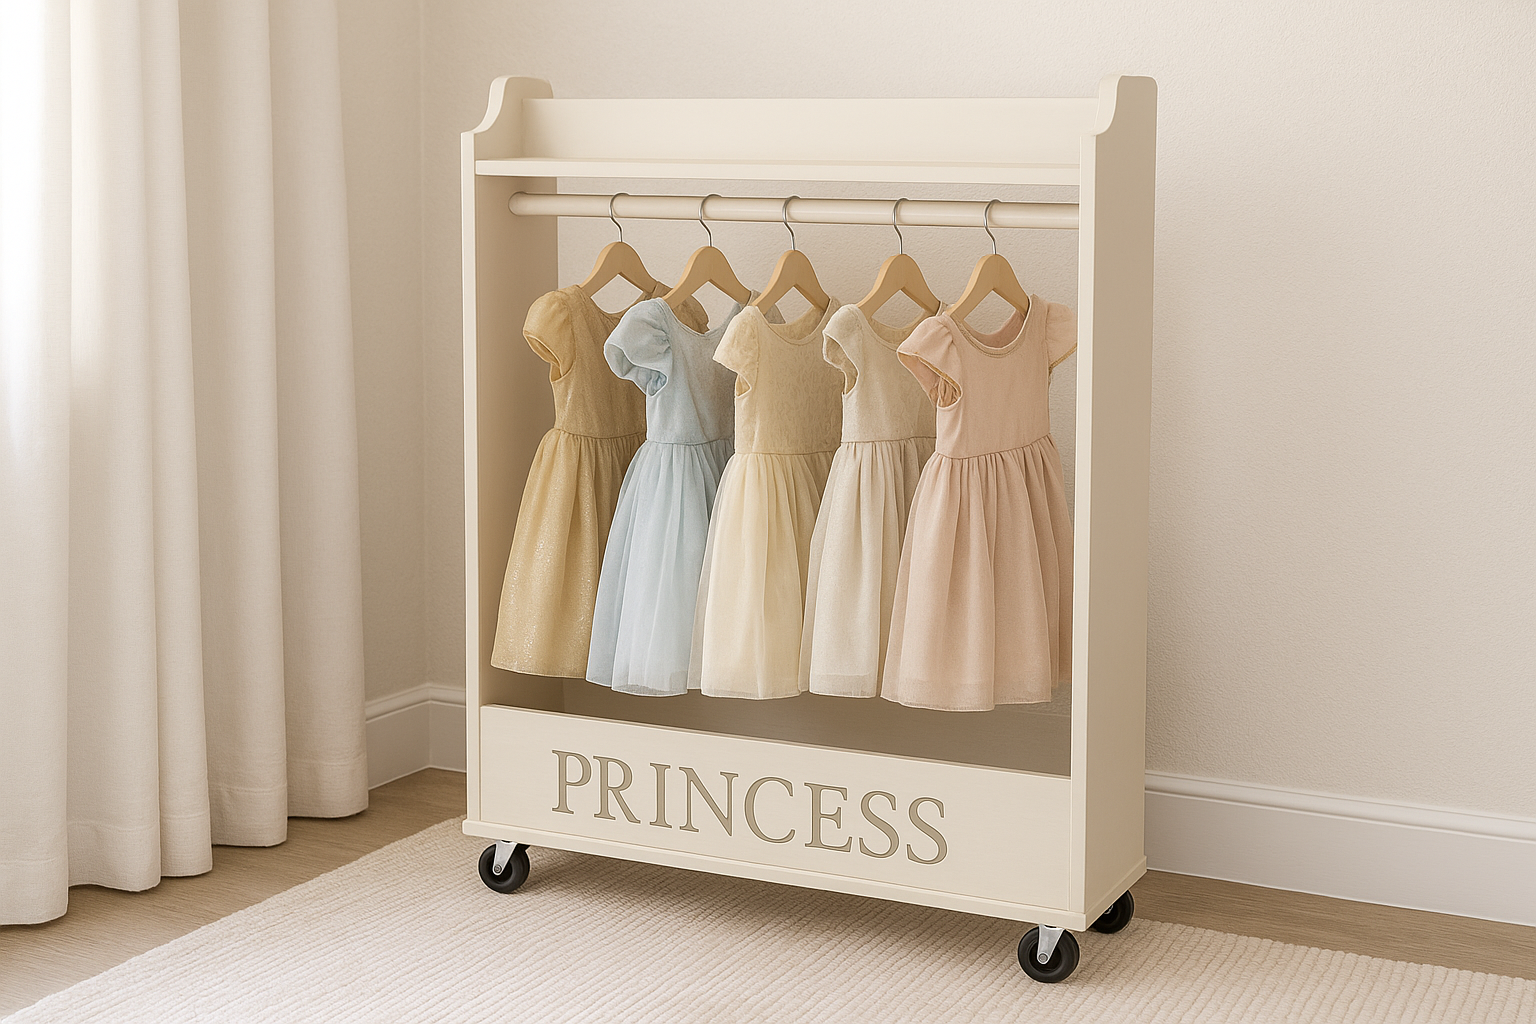
Build a stylish and functional dress‑up rack for your child (or children!) with this no‑cut, beginner‑friendly plan. Using readily available 48″ boards and easy fasteners, you’ll create a sturdy unit for costumes, shoes, and accessories—all on caster wheels for mobility. With its clean lines and neutral palette, it’s perfect for today’s modern playroom. include the full shopping list, step‑by‑step instructions, and finishing tips.
Specifications
| Project type | Toys |
|---|---|
| Room | Kids and Toys |
| Style | Children's and Kid's Room Furniture and Toy Plans |
| Difficulty | Starter Projects |
Dimensions
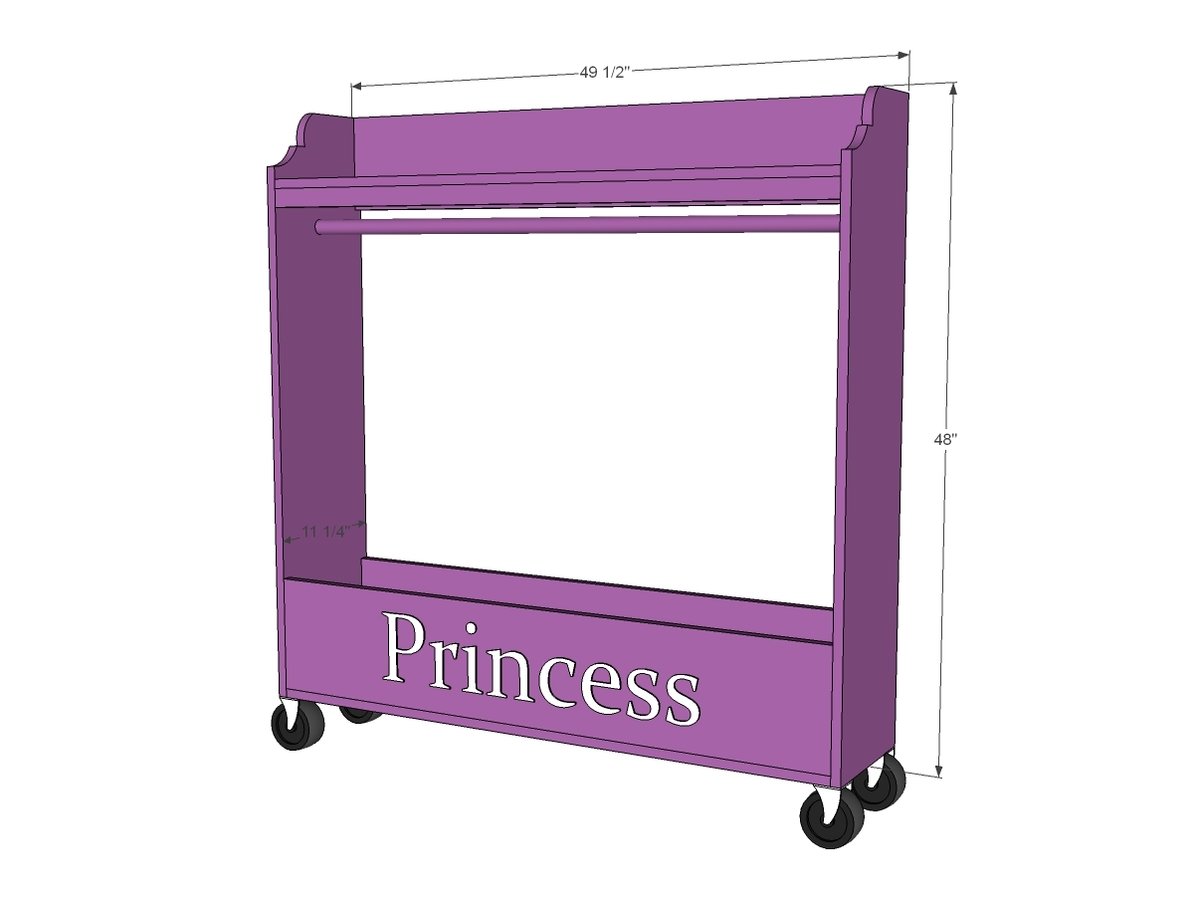
Use the size-specific shopping and cut lists below.
Shopping List
- 4 - 1x12 @ 48”
- 2 - 1x10 @ 48”
- 1 - 1x6 @ 48”
- 2 - 1x2 @ 48”
- 4 - Caster Wheels with screws for attaching
- 1 - 1 1/4” closet rod
- 2 closet rod pockets
- 2" Trim screws or 1-1/4" brad nails for building
- Wood glue
Cut List
No cuts required!!!!
Tools
- measuring tape
- square
- drill
- jigsaw
- countersink drill bit
Step-by-step Instructions
Step 1
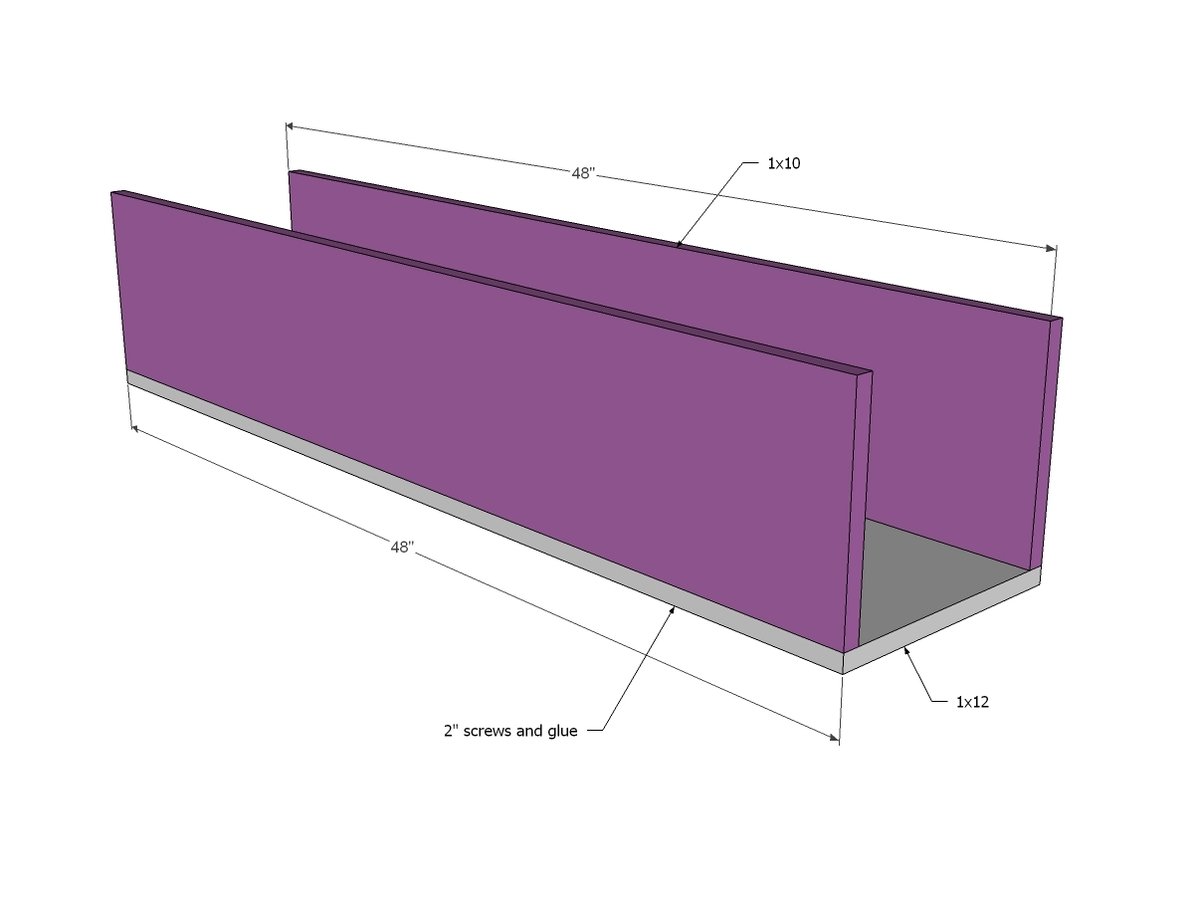
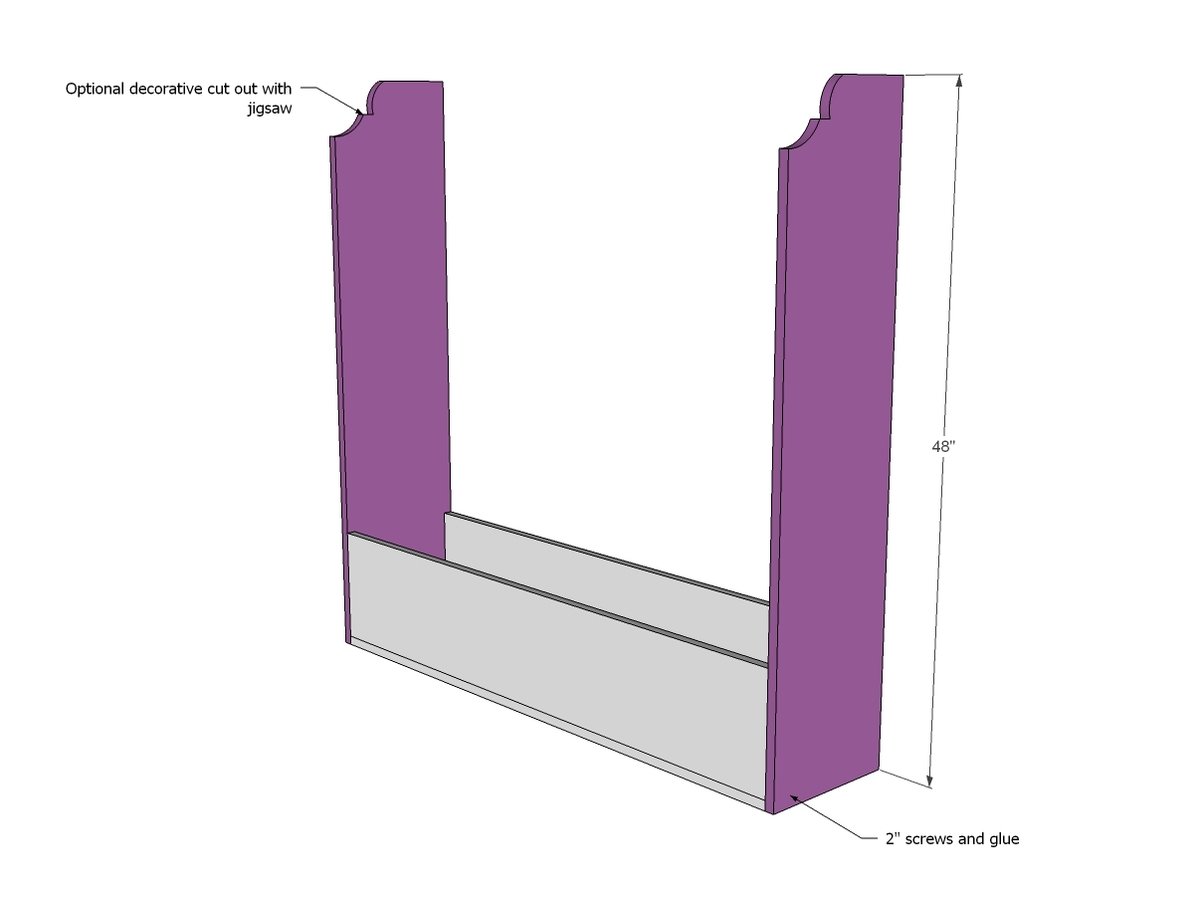
Attach bottom to the sides. This will create a compartment in the bottom for shoes and accessories.
Step 2
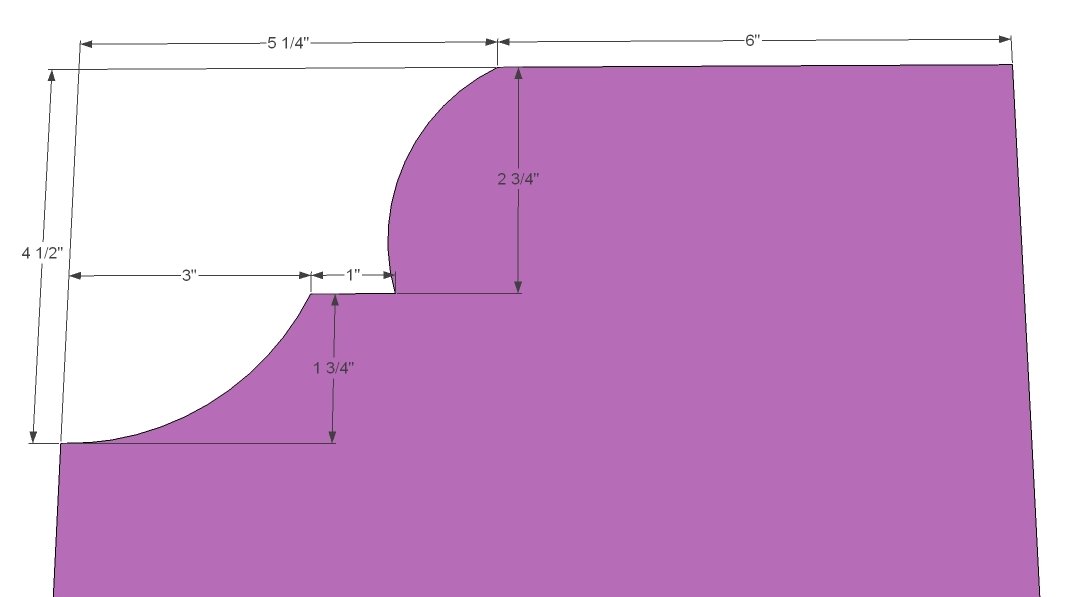
This is optional if you want to use a jigsaw to cut out the top of the sides - it’s totally up to you!
Step 3
Attach sides to the bottom compartment with screws.
Step 4
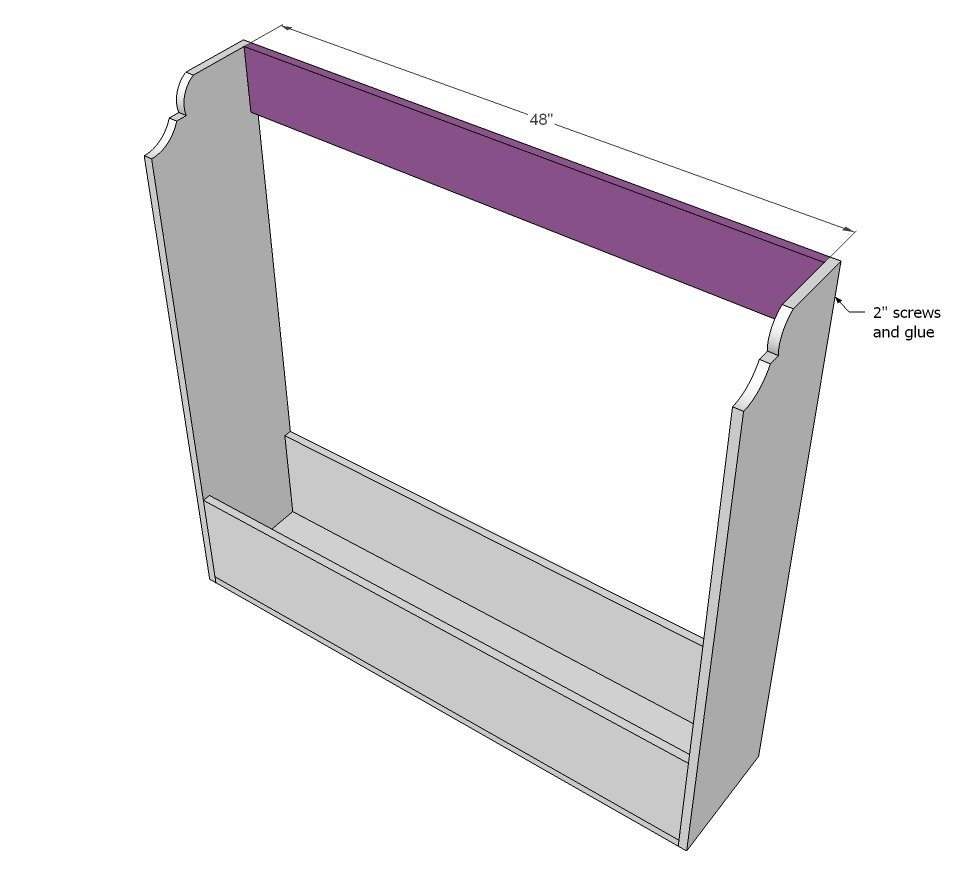
Now the back - this will provide a back for the top shelf so little shoes and hats and crowns stay on the top shelf. Just screw to the sides.
Step 5
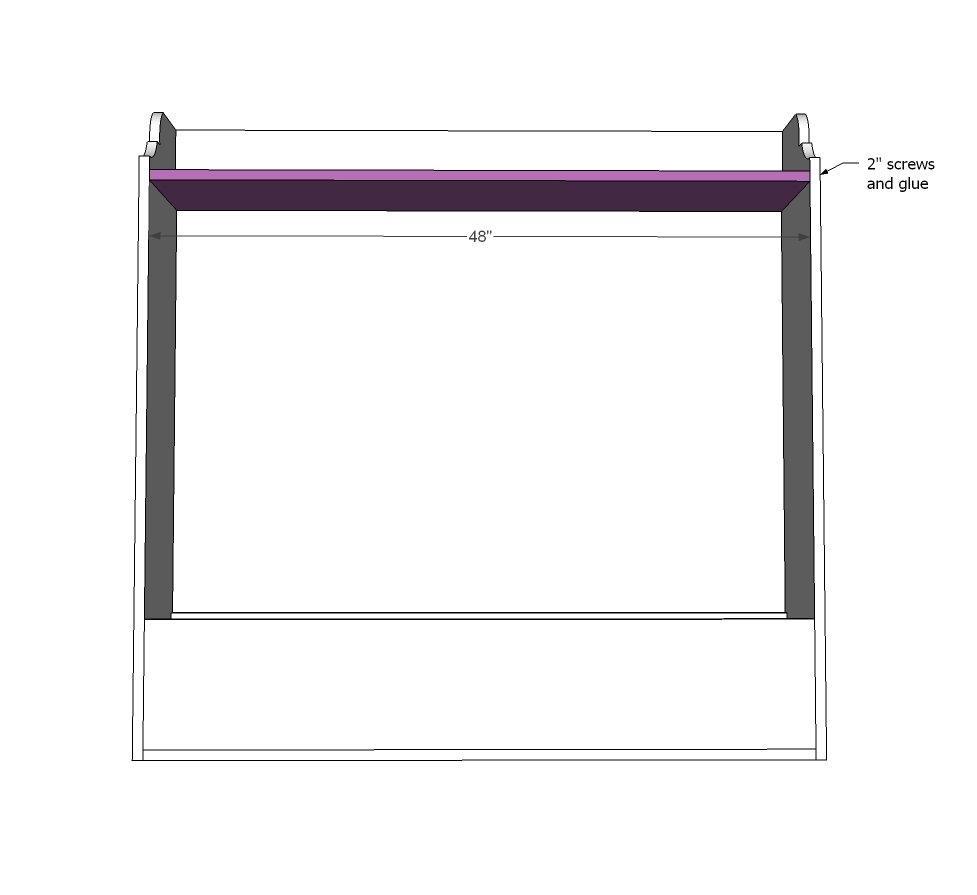
Step 6
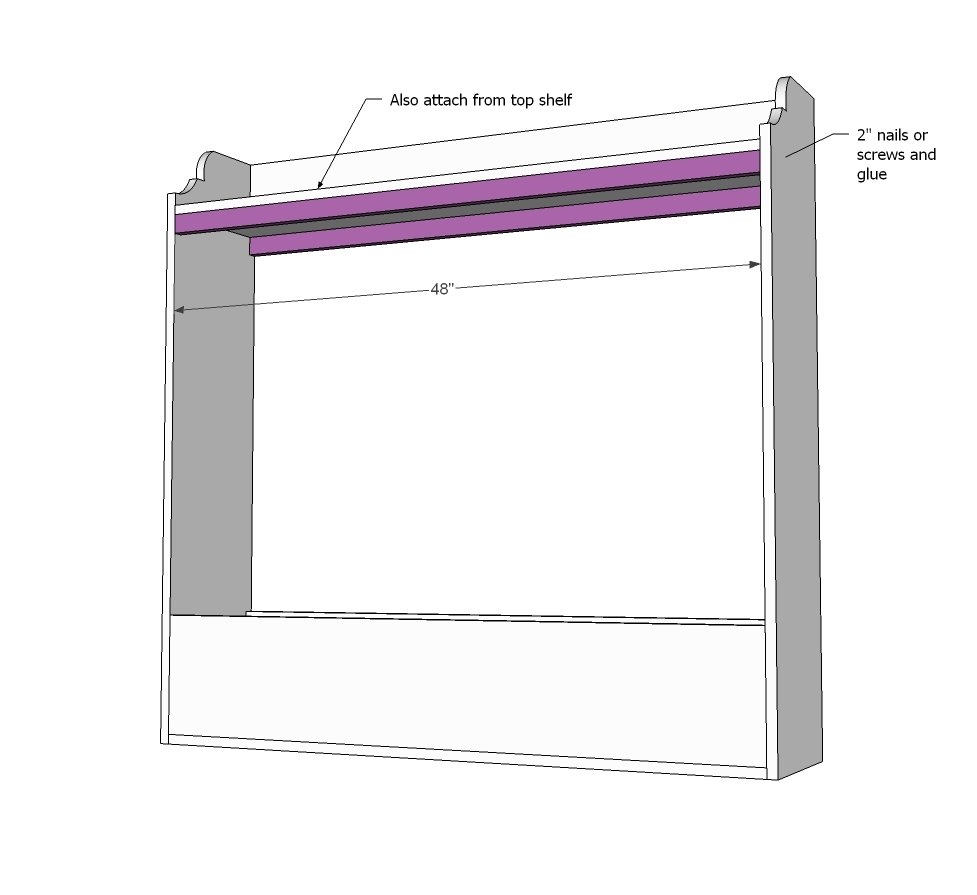
Just because it’s DIY doesn’t mean you shouldn’t make something nice! These aren’t absolutely necessary, but at $1 for both, these little boards called 1x2s will strengthen up your shelves and give your project a finishing tough. Just screw or nail to the top shelf and ends.
Step 7
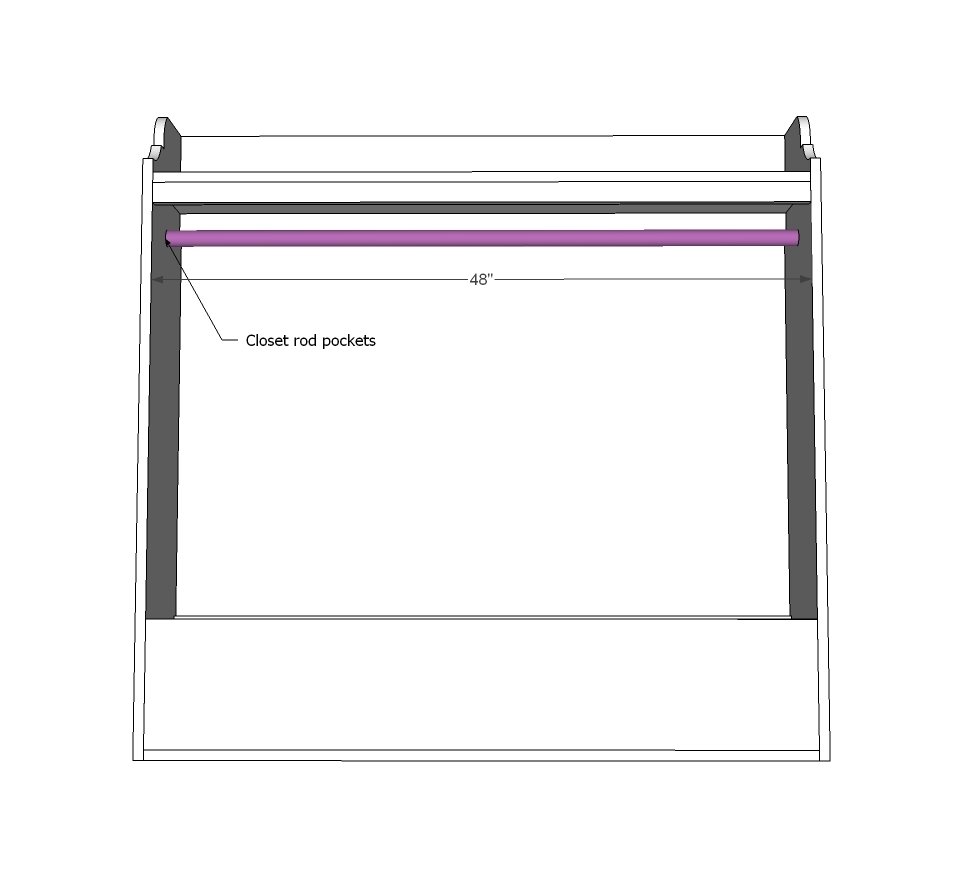
You could use a shower curtain rod here, but I just went ahead and got some closet rod pockets and a closet rod that was already the right length - 48”! So all I have to do is attach the closet rod pockets inside the dress up center and put the closet rod in!
Step 8
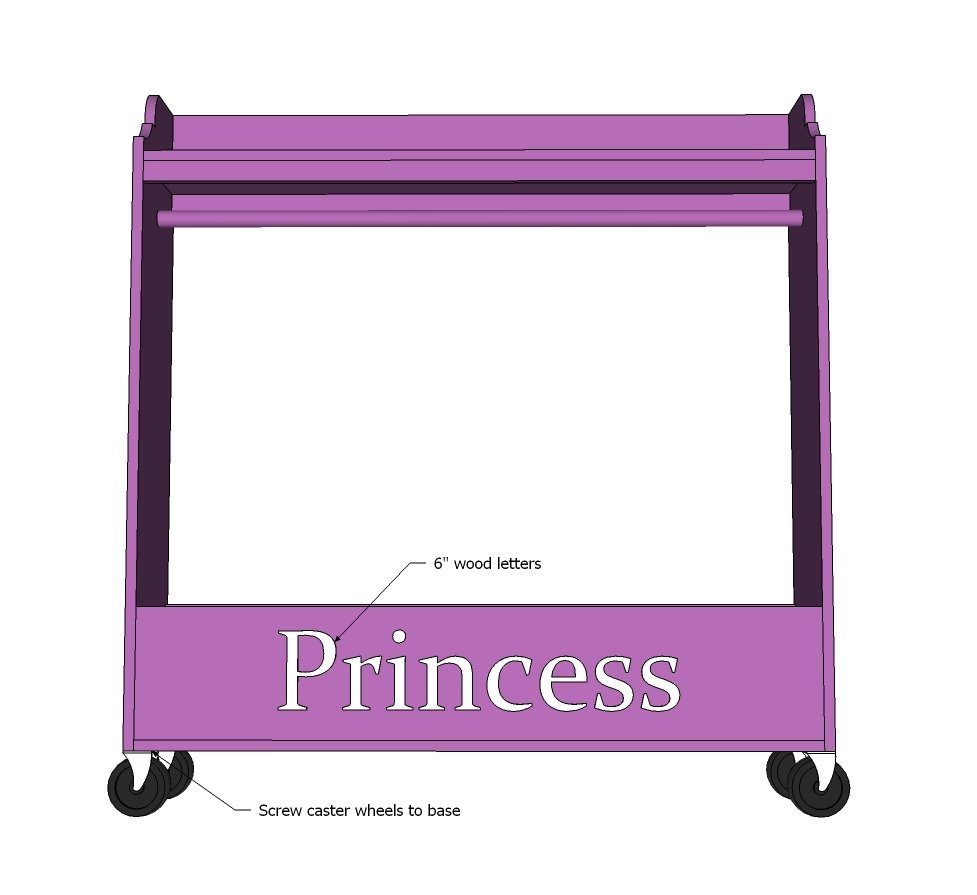
Now just add the caster wheels and personalize the dress up center so your little one knows it was made just for them! And that’s it - we are done!!!!
Finishing
Sand all surfaces, starting with a medium grit and finishing with fine. Wipe off the dust, fill any holes or gaps with wood filler, and sand smooth once dry. Apply primer if you're painting, then finish with your choice of paint or stain and seal with a durable clear topcoat. For outdoor projects, use exterior-rated primer, paint or stain, and sealer so the piece stands up to the weather.
Source (temporary): https://www.ana-white.com/woodworking-projects/dress-center-no-cutting-required-free-plans