Dress Up Storage by Craftiness is not Optional
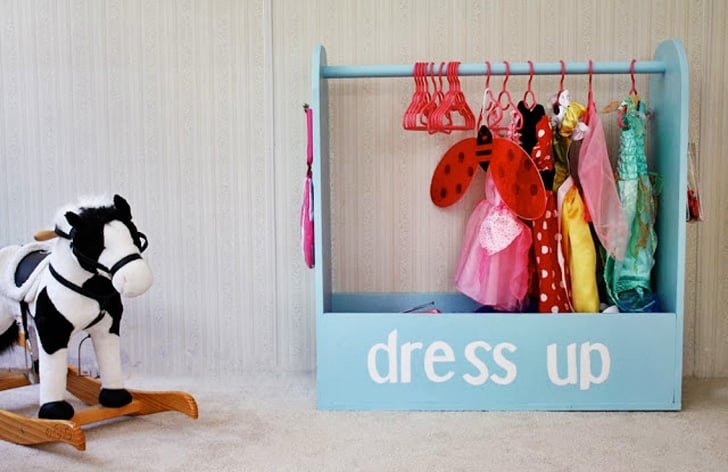
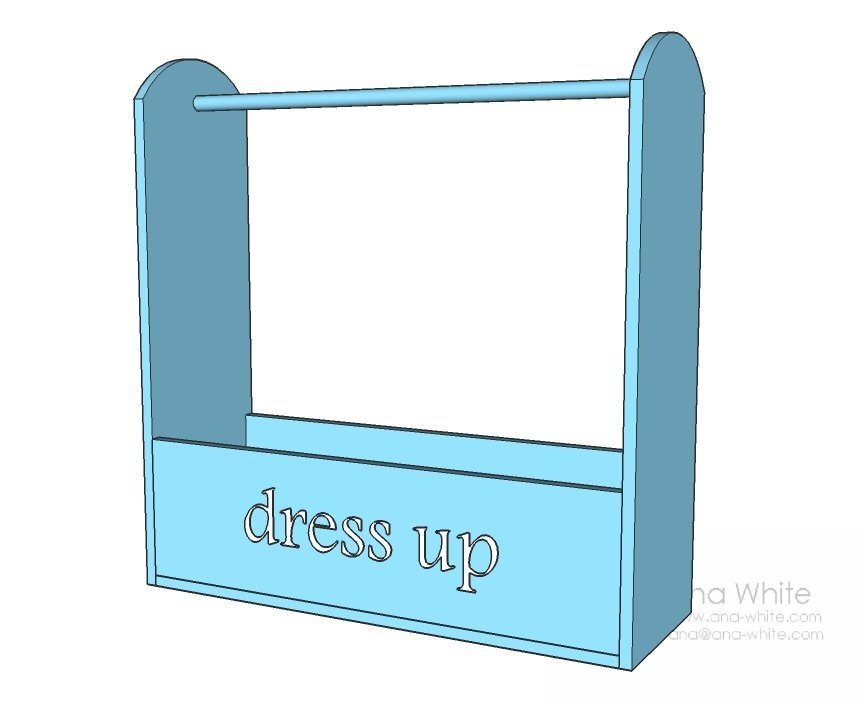
Organize and store all the dresses! This dress up storage project features a hanging closet rod and lots of storage for all the accessories and the shoes in the open base. Designed and built by Craftiness is Not Optional, free detailed plans below.
Specifications
| Project type | Toys |
|---|---|
| Room | Storage Solutions |
| Style | Children's and Kid's Room Furniture and Toy Plans |
| Difficulty | Beginner Projects |
| Estimated cost | $20 - $50 |
Dimensions
Use the size-specific shopping and cut lists below.
Shopping List
- 1 – 10 foot 1×12 board
- 1 – 6 foot 1×10 board
- 36″ long 1-1/4″ diameter dowel or wood closet rod
- 2″ self tapping wood screws (about 20)
Cut List
- 2 – 1×12 @ 36″ (Sides, round top corners 3″ down with a jigsaw)
- 1 – 1×12 @ 34 1/2″ (Bottom)
- 2 – 1×10 @ 34 1/2″ (Sides of Storage Box)
- 1 – 1-1/4″ diameter dowel or closet rod @ 34 1/2″ (Closet rod)
Tools
- measuring tape
- square
- pencil
- safety glasses
- hearing protection
- drill
- circular saw
- jigsaw
- sander
- level
- countersink drill bit
Step-by-step Instructions
Storage Box
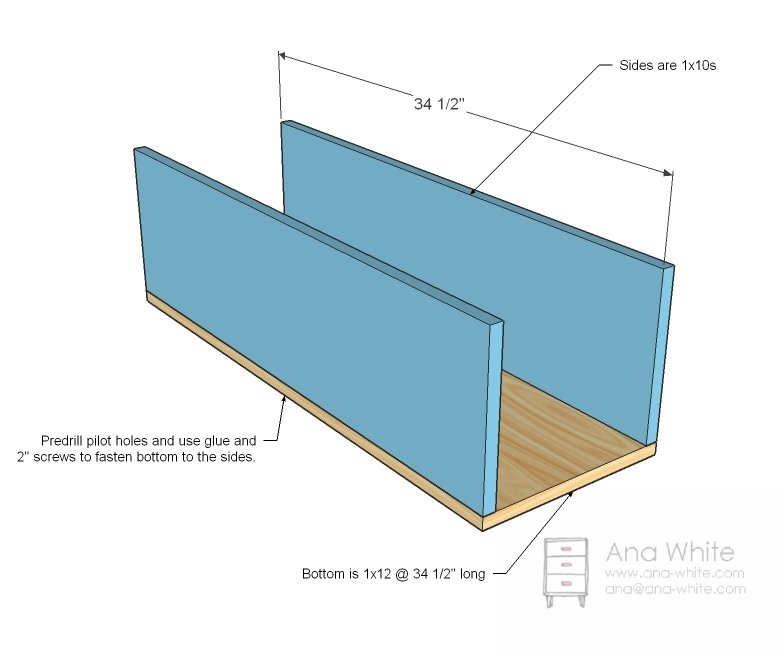
Predrill holes along the long edges of the bottom with a countersink bit. Then apply glue to the bottom edge of the storage box sides and screw the bottom to the storage box sides with 2″ screws and glue.
Sides
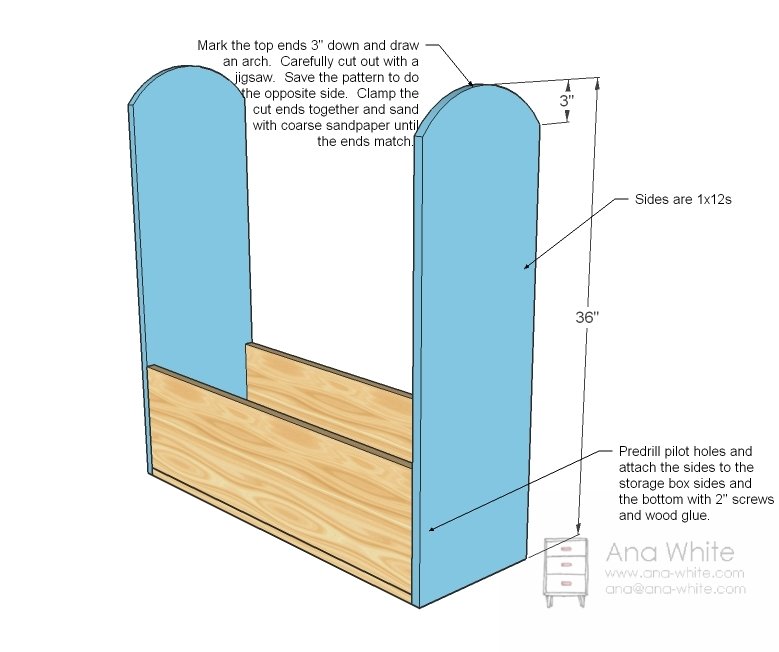
Cut the arch shape from the sides as shown above. I’ve done this quite a bit, and it’s easier said than done to get two arches that match exactly with a jigsaw. What I do is create a pattern by folding a sheet of 12″ x 12″ scrapbooking paper in half and cutting out an arch shape. Then I trace this pattern on to the wood and carefully cut to the outside of the traced line with a jigsaw. Then I clamp the two boards together, and sand, sand sand with coarse sandpaper until the ends match. Another trick if you just can’t get the ends to match is to round the cut edges, so it’s not such a sharp line – then it’s more difficult for the human eye to see that the ends are not a perfect match. Once you’ve cut the ends, predrill pilot holes along the bottom and side edges 10″ up (I center mine 3/8″ in) and screw the sides to the storage box. Oh, apply glue to the ends of the storage box first, and keep your outside edges flush.
Closet Rod
Now there are several different ways you could attach the closet rod, but I liked the idea of actually gluing and screwing it in place because the top would then have some support to keep the sides in place. So measure down 3″ and to the center of your tops and predrill pilot holes. My trick... thread your screws through so the end is just barely showing through. Then line the screw tip showing through to the center of the dowel. Apply glue and screw it together. Do the same on the other side.
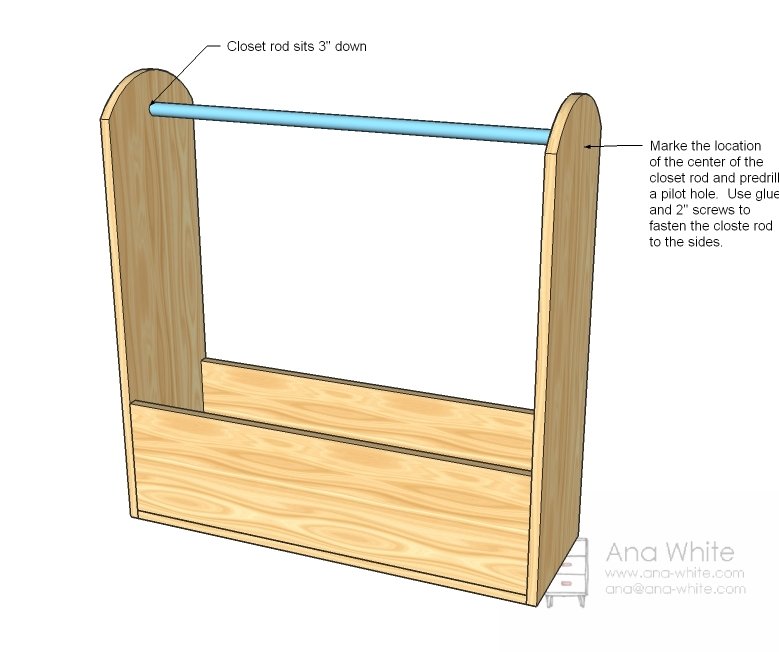
Step 4
And here is what we’ve got with 2″ caster wheels and 6″ letters. Is this just for princesses? Because I LOVE this, even for a big girl closet! Hmmmm... now you got me thinking.
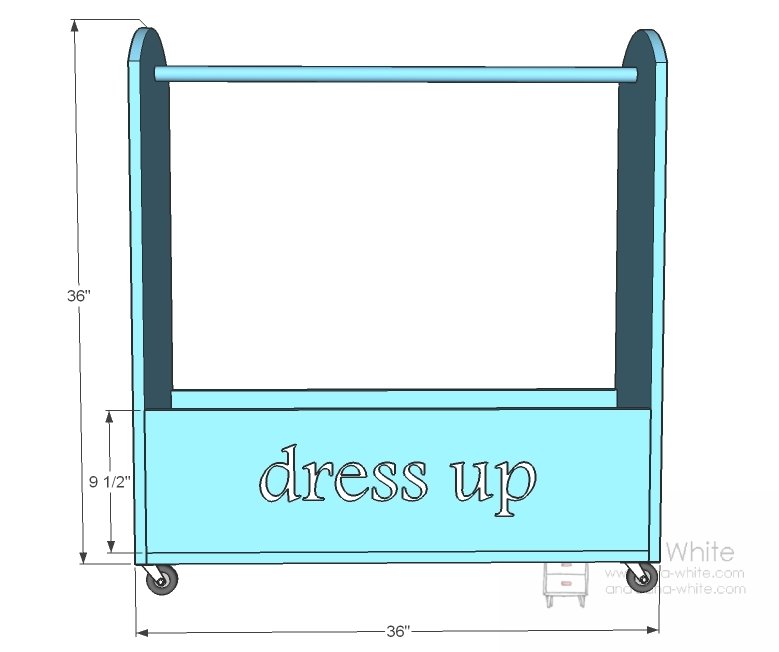
Step 5
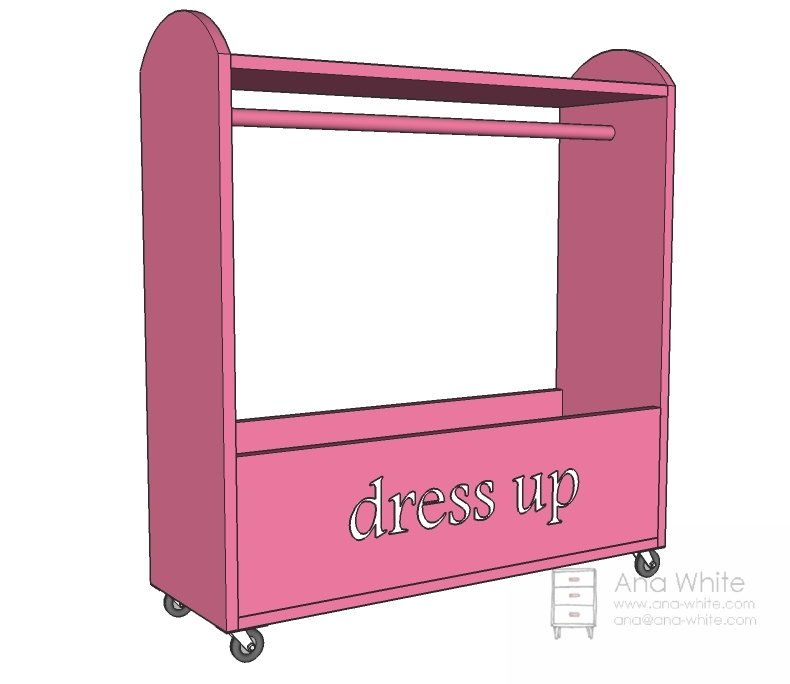
Finishing
Sand all surfaces, starting with a medium grit and finishing with fine. Wipe off the dust, fill any holes or gaps with wood filler, and sand smooth once dry. Apply primer if you're painting, then finish with your choice of paint or stain and seal with a durable clear topcoat. For outdoor projects, use exterior-rated primer, paint or stain, and sealer so the piece stands up to the weather.
Source (temporary): https://www.ana-white.com/woodworking-projects/dress-storage-craftiness-not-optional