Dresser with Open Shelves
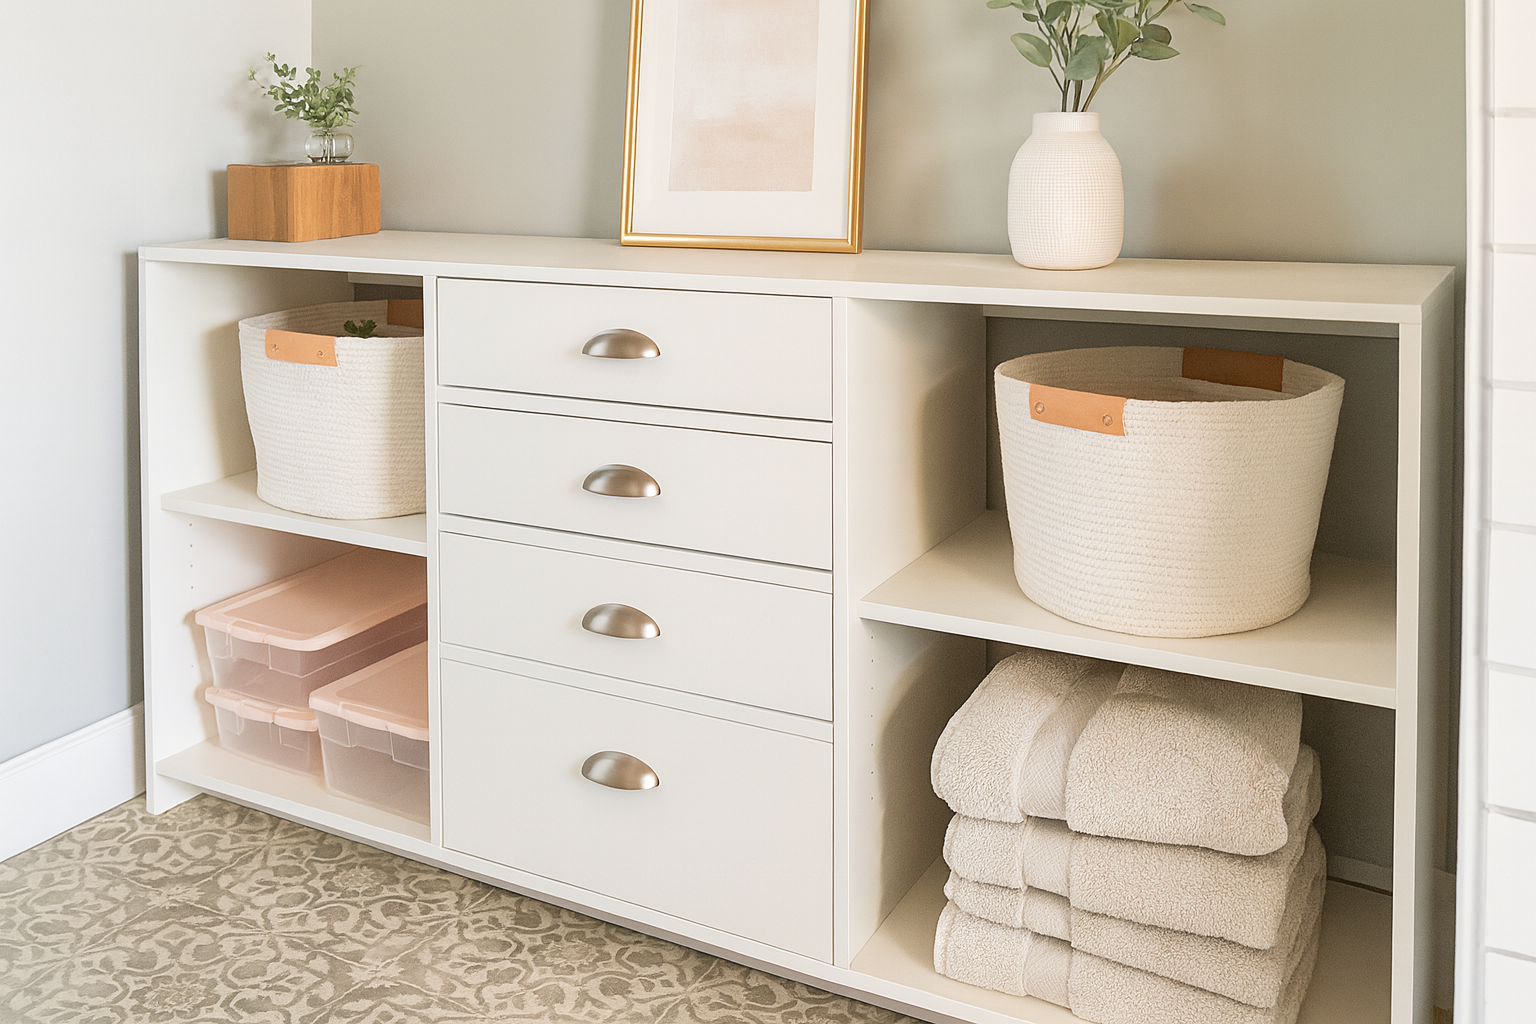
This modern dresser combines the best of both worlds — deep drawers for concealed storage and open shelves for easy access or display. Perfect for bedrooms, entryways, or even bathrooms, this piece offers functional versatility with clean, simple lines and customizable shelving. Use the drawers for clothing or linens, and style the open shelves with baskets, towels, or decor. Built from basic materials, this DIY dresser is sturdy, beginner-friendly, and designed to fit seamlessly into any home style — from farmhouse to modern minimalism.
Specifications
| Project type | Media and Entertainment Centers |
|---|---|
| Room | Storage Solutions |
| Difficulty | Intermediate |
Dimensions
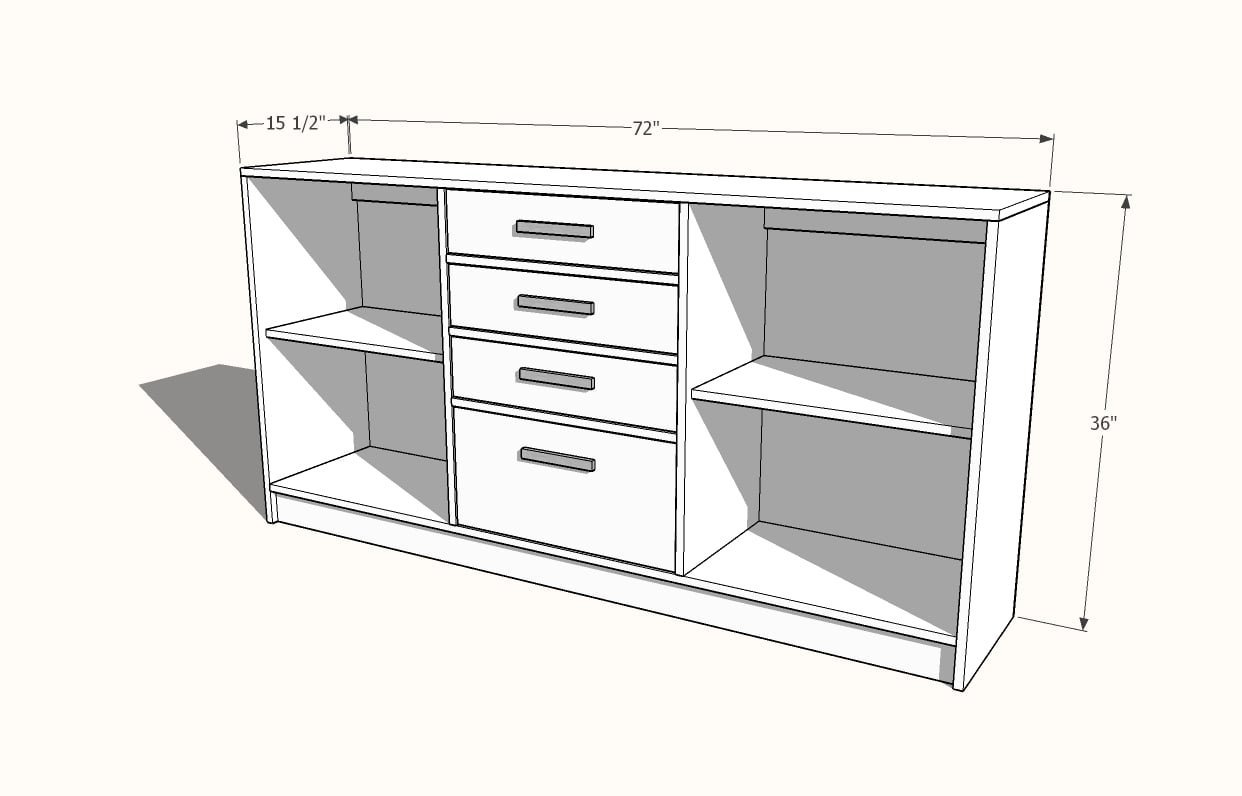
Use the size-specific shopping and cut lists below.
Shopping List
- 2 Sheets of 3/4" thick plywood and edge banding OR Shelf Help Carcass Kit
- 1 sheet of 1/4" plywood for back and drawer bottoms
- 5 - 1x4 @ 8 feet long
- 1 - 1x2 @ 6 feet long
- 1 - 1x8 @ 6 feet long
- 1 - 1x6 @ 6 feet long
- 1 - 1x12 @ 2 feet long
- 4 sets of 14" full extension drawer slides ( affiliate link to Amazon)
- About 100 - 1-1/4" Pocket Hole Screws
- 1-1/4" and 3/4" brad nails
- wood glue
- 4 knobs or pulls
- primer and paint or desired wood finishing supplies
Cut List
Shelf Help Carcass Kit or 3/4" plywood panels, cut into pieces as noted below, front edge finished with edge banding
- 1 - 3/4" plywood @ 15-1/4" x 72"
- 2 - 3/4" plywood @ 15-1/4" x 35-1/4"
- 1 - 3/4" plywood @ 15-1/4" x 70-1/2"
- 2 - 3/4" plywood @ 15-1/4" x 31"
Carcass Trim
- 2 - 1x4 @ 23" (bay supports, upper)
- 2 - 1x4 @ 70-1/2" (bay supports, lower)
- 3 - 1x2 @ 23" (drawer seperators)
- 1 - 1/4" plywood @ 34" x 72" (cut 34" instead of 36" so you can get the drawer bottoms out of the scrap wood)
Drawers
- 6 - 1x4 @ 14" (drawer sides)
- 2 - 1x8 @ 14" (drawer sides)
- 6 - 1x4 @ about 20-1/2" - measure and cut to fit (drawer front and back)
- 2 - 1x8 @ about 20-1/2" - measure and cut to fit (drawer front and back)
- 3 - 1x6 @ 22-3/4" - (drawer faces)
- 1 - 1x12 @ 22-3/4" (drawer face)
- 4 - 1/4" plywood @ 14" x 22" (drawer bottoms) - cut the back for the project first, and then cut the drawer bottoms from the leftover plywood
Tools
- measuring tape
- square
- pencil
- safety glasses
- kreg-jig
- drill
- circular saw
- nailer
- sander
- shelf pin jig
Step-by-step Instructions
Step 1
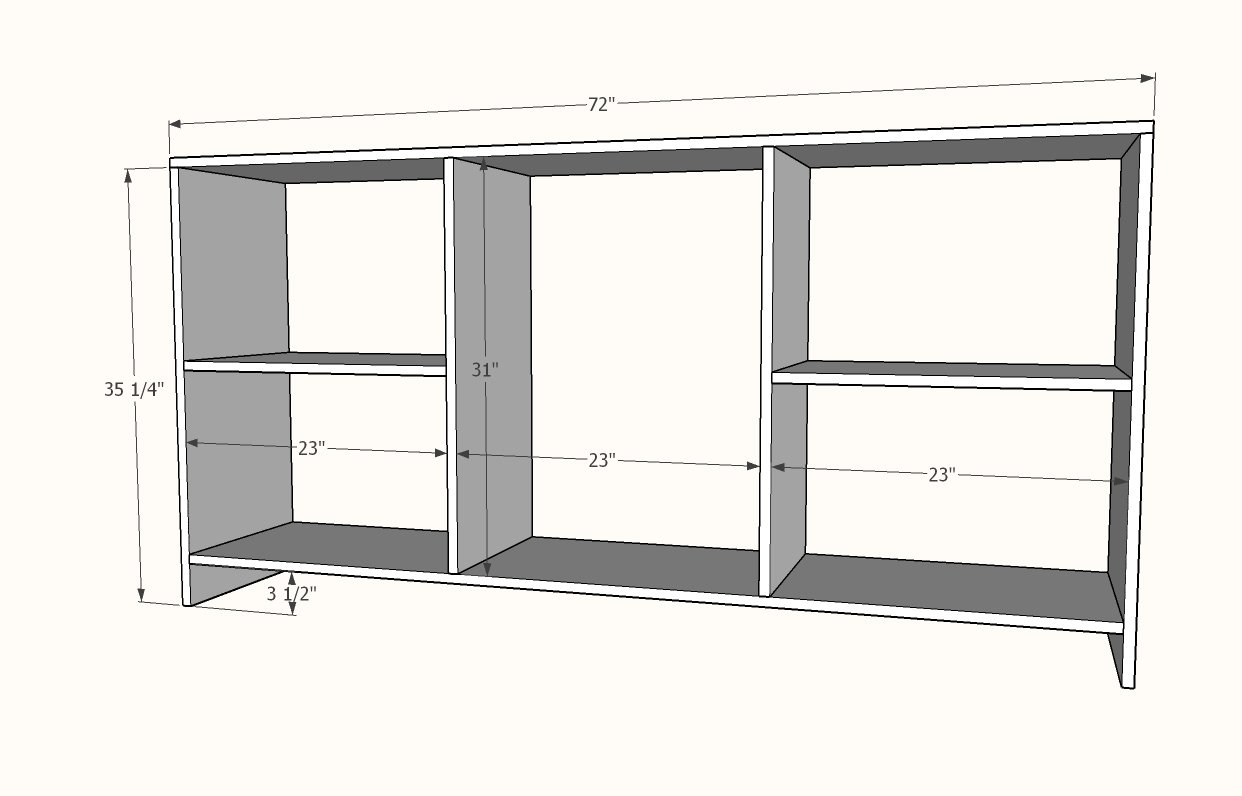
Build the carcass, starting from the sides attached to the top, then the bottom attached to the sides, and finally the dividers attached to the top and bottom. The shelves can be made fixed or adjustable with shelf pin holes. Use three 3/4" pocket holes and 1-1/4" pocket hole screws for each joint.
Step 2
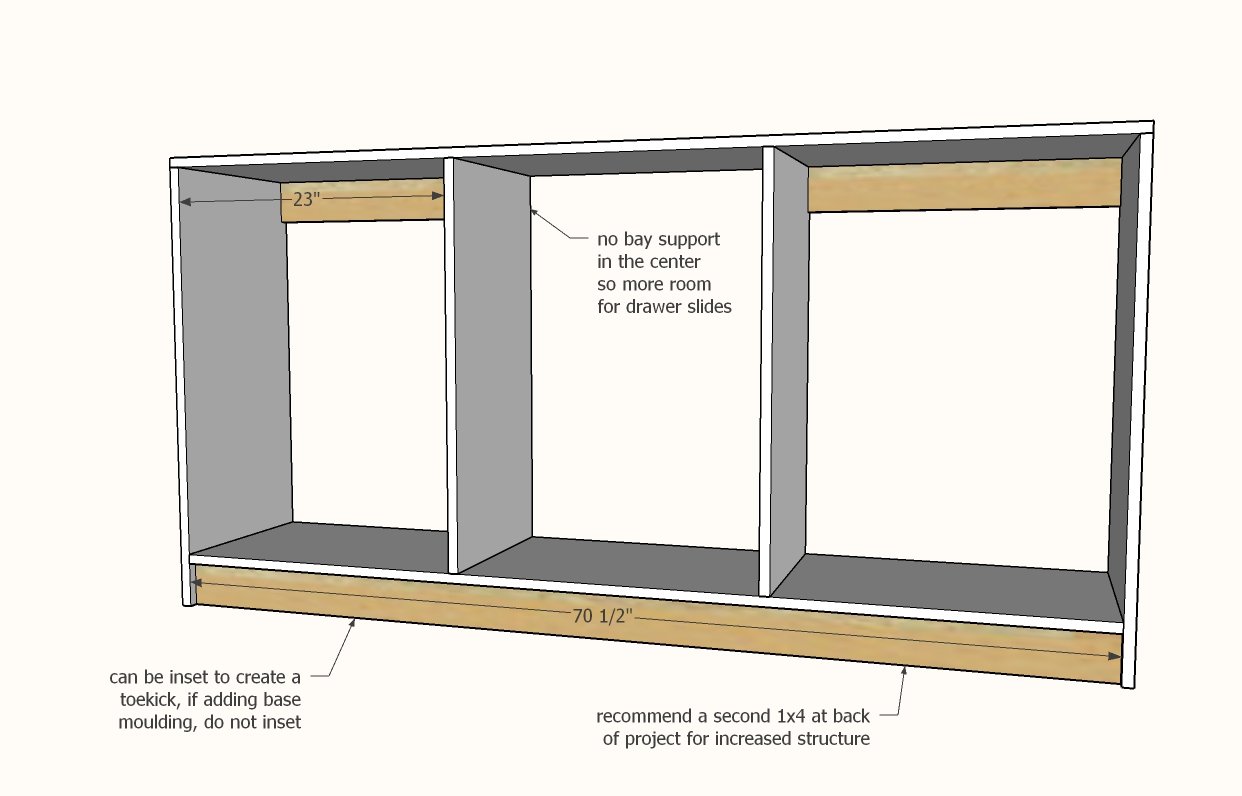
Add bay supports along the top, and at the front and back of the bottom, with pocket holes hidden on the back side. Use two 3/4" pocket holes on each end, and then pocket holes facing upward to further secure. For the top bay supports, I found they made the space too small for the 14" drawer slides, so did not put a bay support in the center bay. If you want drawers all across the top, use 12" drawer slides, and keep the bay supports all across the top.
Step 3
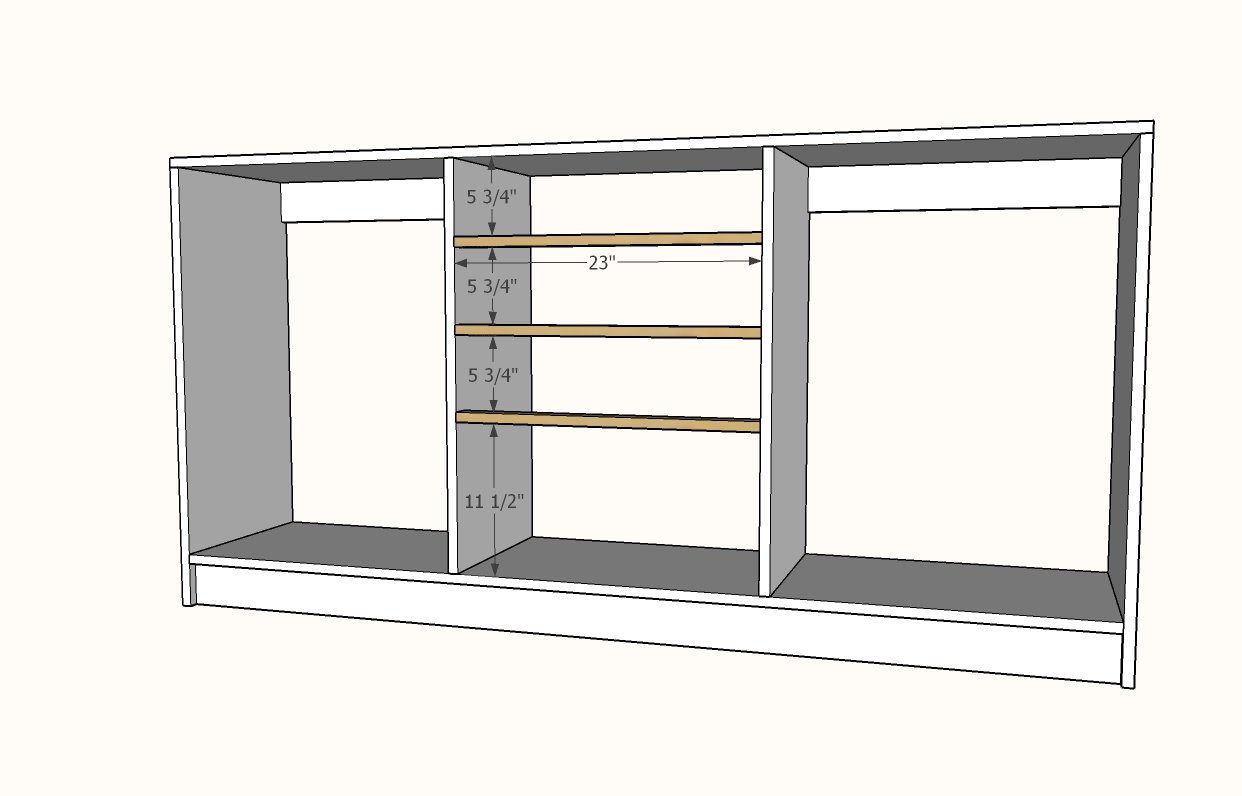
Attach 1x2 drawer trim as shown, with pocket holes on undersides.
Step 4
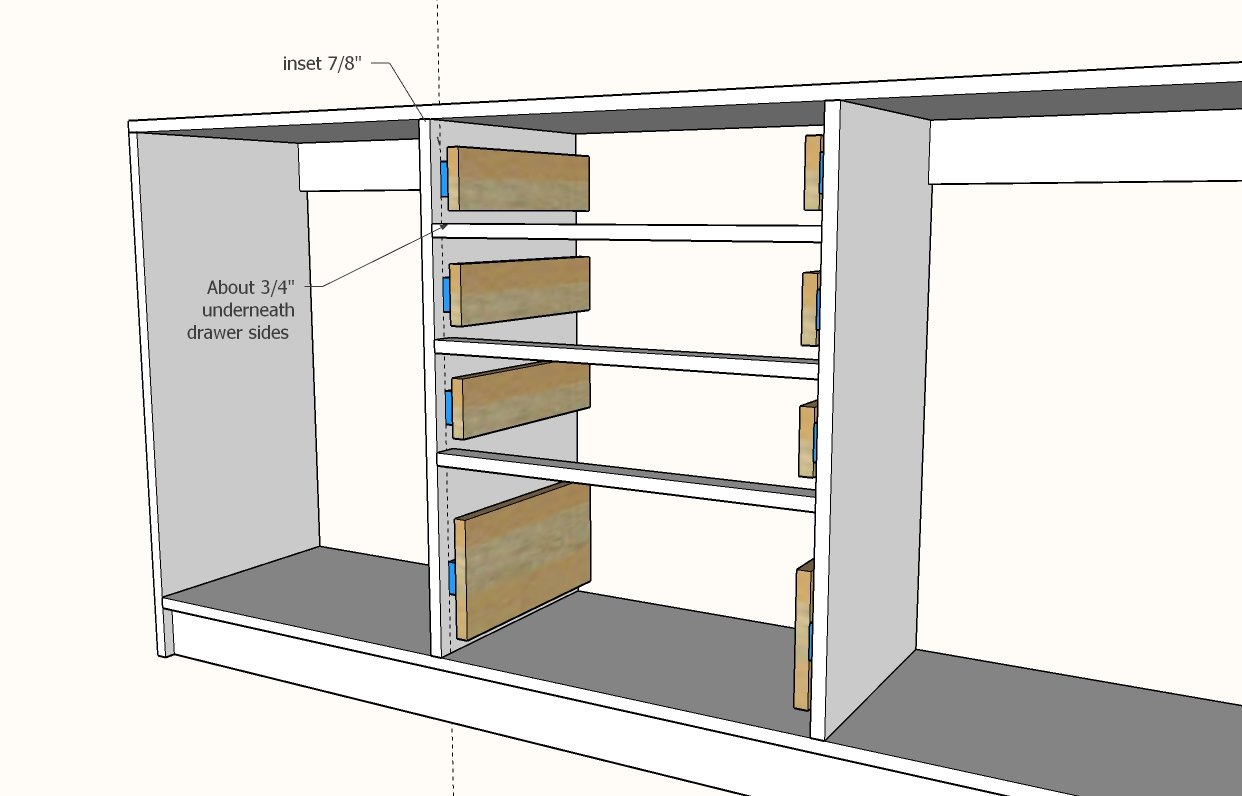
Install the drawer members of the drawer slides on the 14" drawer side pieces, so the drawer slide is centered of the drawer side. Position the drawer side in the opening and mark approximately where the center of the drawer slide should be mounted inside the cabinet. Also mark 7/8" in from the front. Install the cabinet member of the drawer slide inside the cabinet.
Step 5
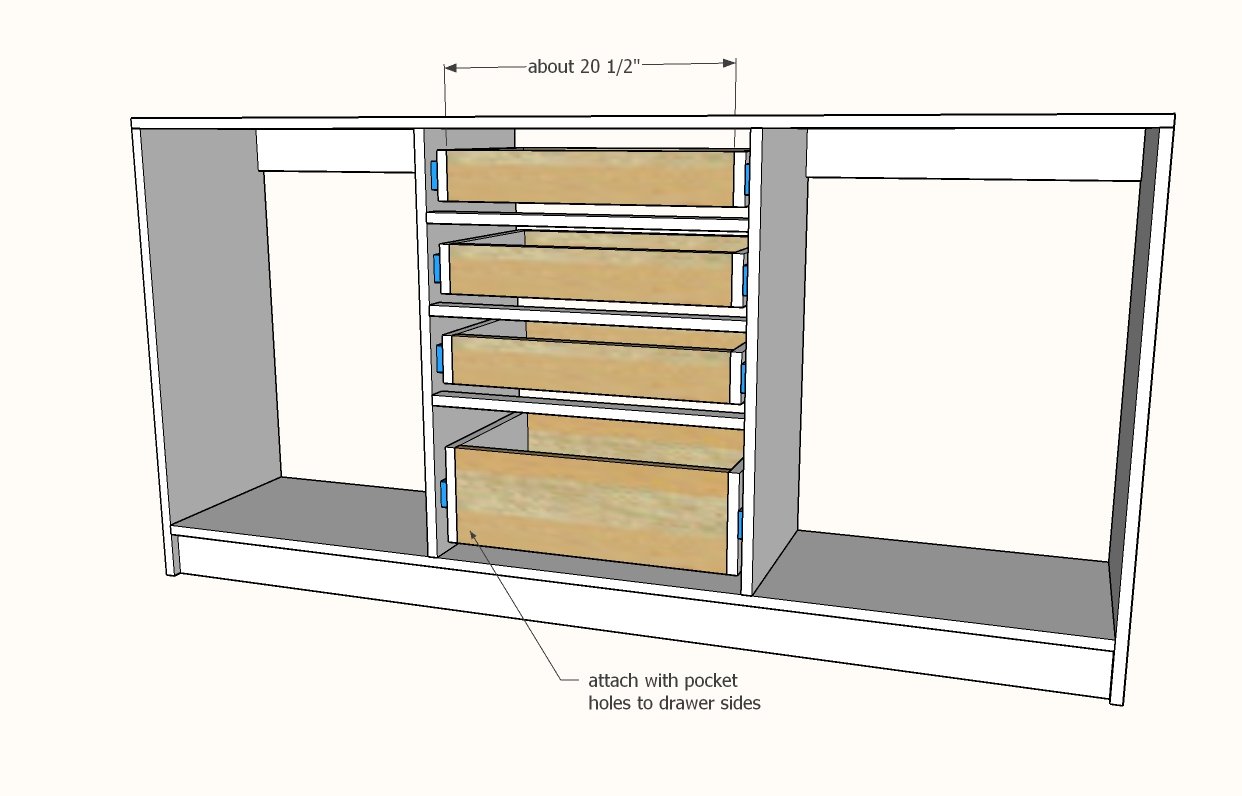
Measure in between the two drawer sides, and cut 1x boards to fit. Drill two pocket holes on each end and attach to the drawer sides.
Step 6
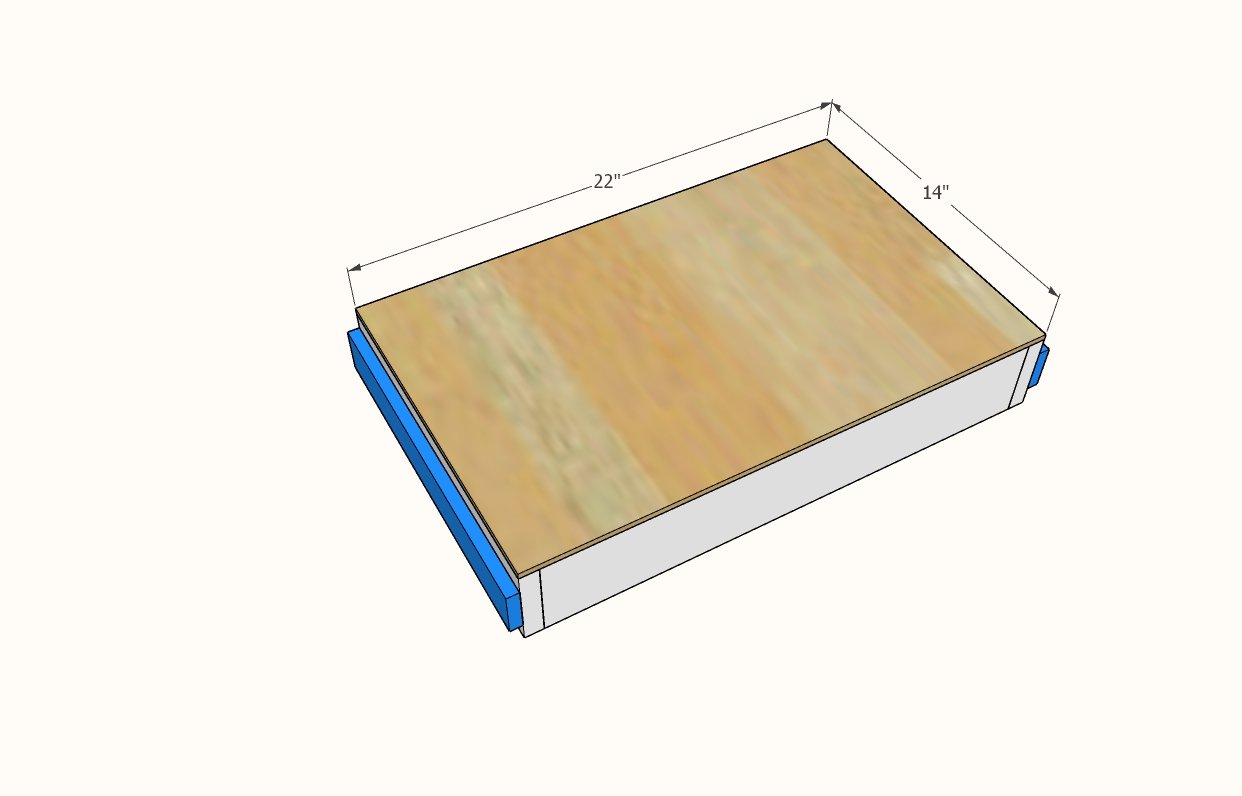
Remove the drawers, measure the bottoms of the drawers, and cut the plywood bottoms to fit. Attach with glue and 3/4" brad nails. NOTE: Reserve back piece of plywood for back of cabinet.
Step 7
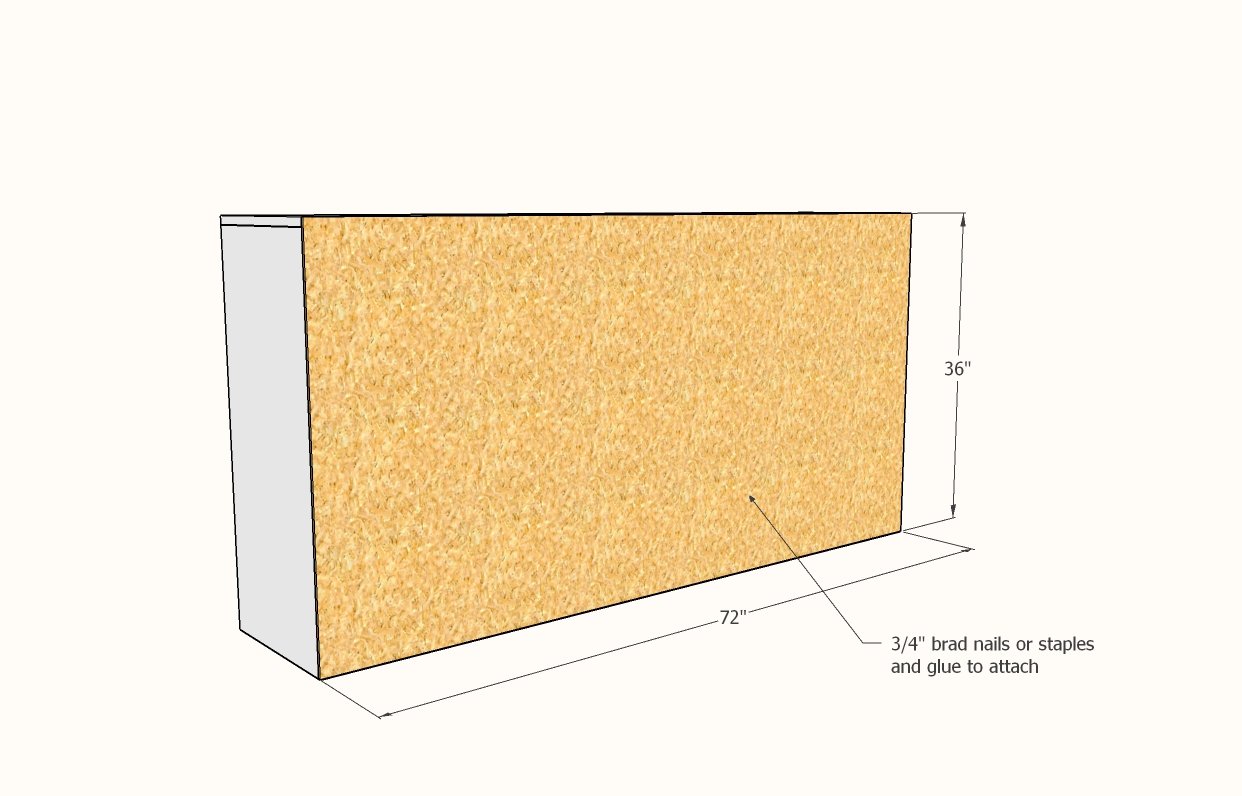
Cut the back piece for the cabinet. If cutting at 34" to fit all the pieces on a single sheet, hold the back up from the floor. Attach with glue and 3/4" brad nails. TIP: Before attaching the back, mark with a pencil on the outside sides of the cabinet the location of the dividers. Then you can pencil between your marks on the back when it is in place to know where to nail to.
Step 8
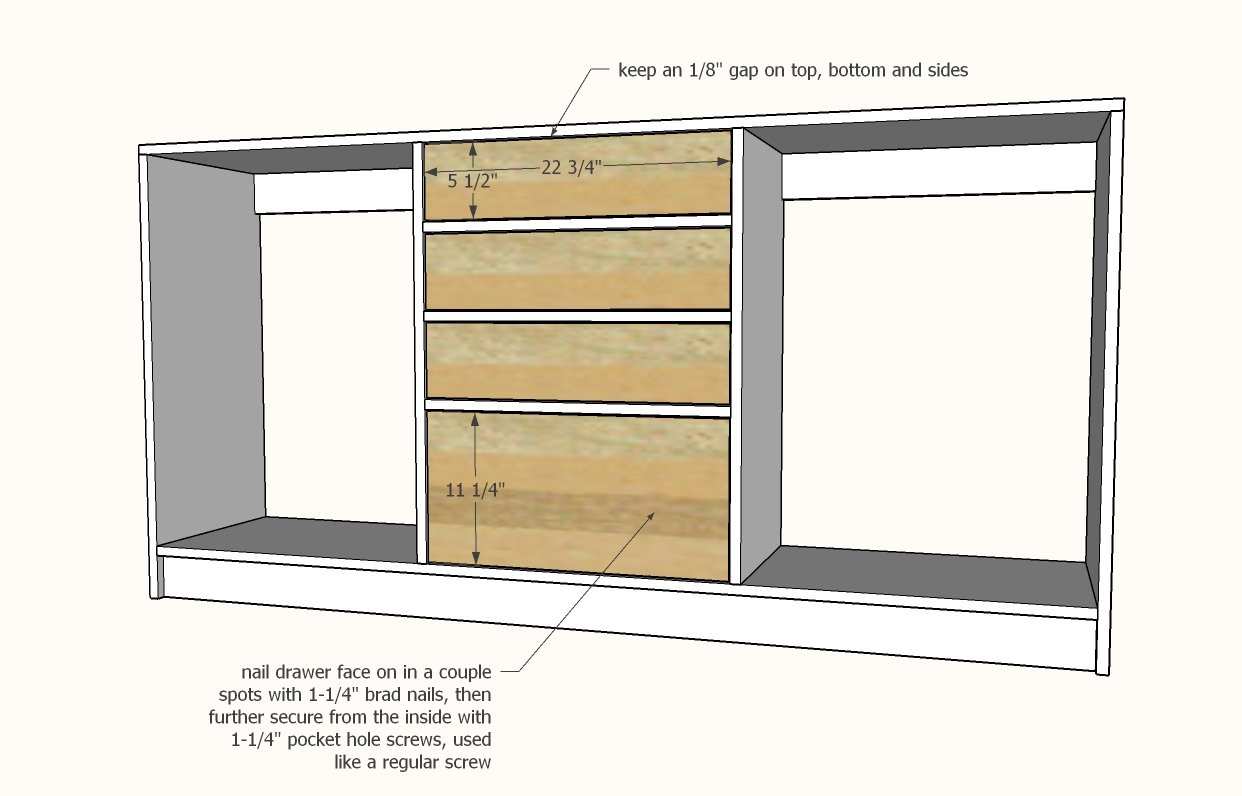
Attach the drawer faces to the front of the drawers with a couple of 1-1/4" brad nails. Avoid location of hardware when nailing. Pull the drawer open and further secure with a couple of pocket hole screws, used like regular screws here.
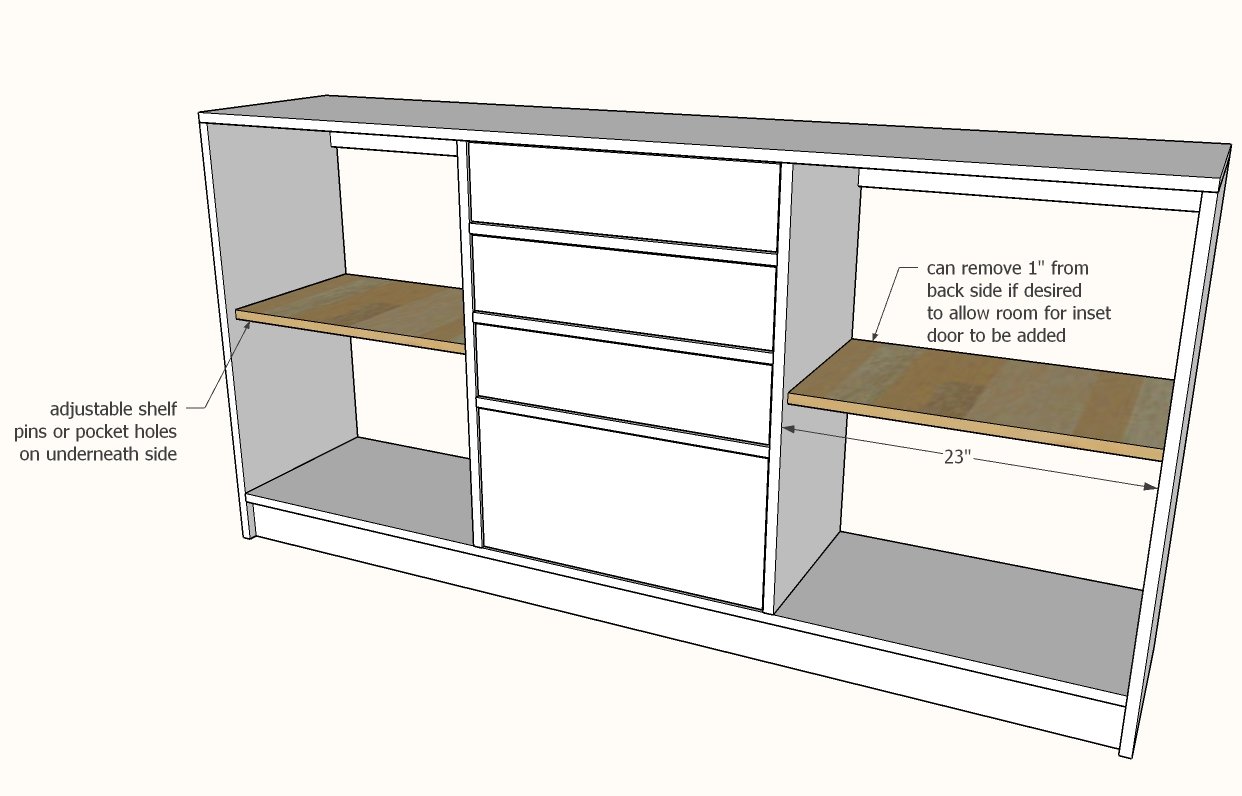
Drill holes for adjustable shelves (if desired) or install shelves fixed.
NOTE: I decided to cut 1" off the back of the shelves so they would sit inset and also not be in the way if I add doors later on. This is optional.
Finishing
Sand all surfaces, starting with a medium grit and finishing with fine. Wipe off the dust, fill any holes or gaps with wood filler, and sand smooth once dry. Apply primer if you're painting, then finish with your choice of paint or stain and seal with a durable clear topcoat. For outdoor projects, use exterior-rated primer, paint or stain, and sealer so the piece stands up to the weather.
Source (temporary): https://www.ana-white.com/woodworking-projects/dresser-open-shelves-free-diy-plans