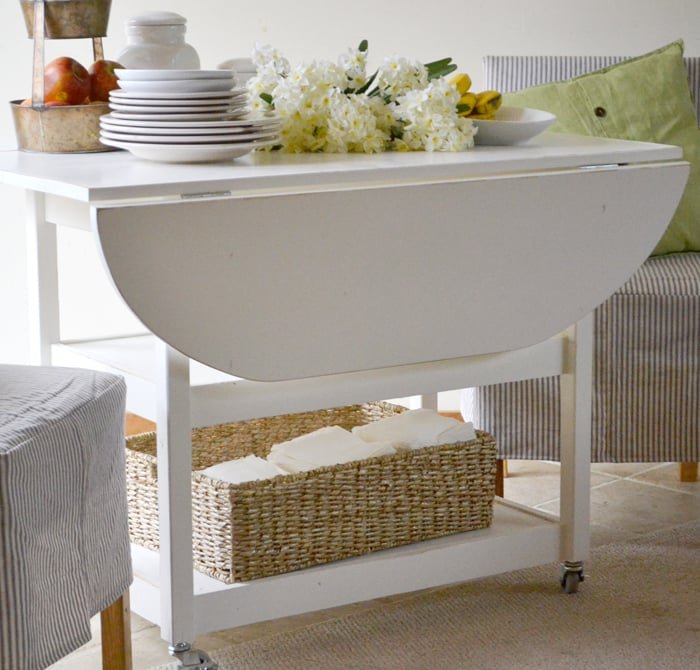
Drop Leaf Round Storage Table
How to build a drop leaf storage table with free, simple, step by step plans from
Specifications
| Project type | Table Plans |
|---|---|
| Room | dining room |
| Style | Farmhouse Furniture |
| Difficulty | Intermediate |
Dimensions
Use the size-specific shopping and cut lists below.
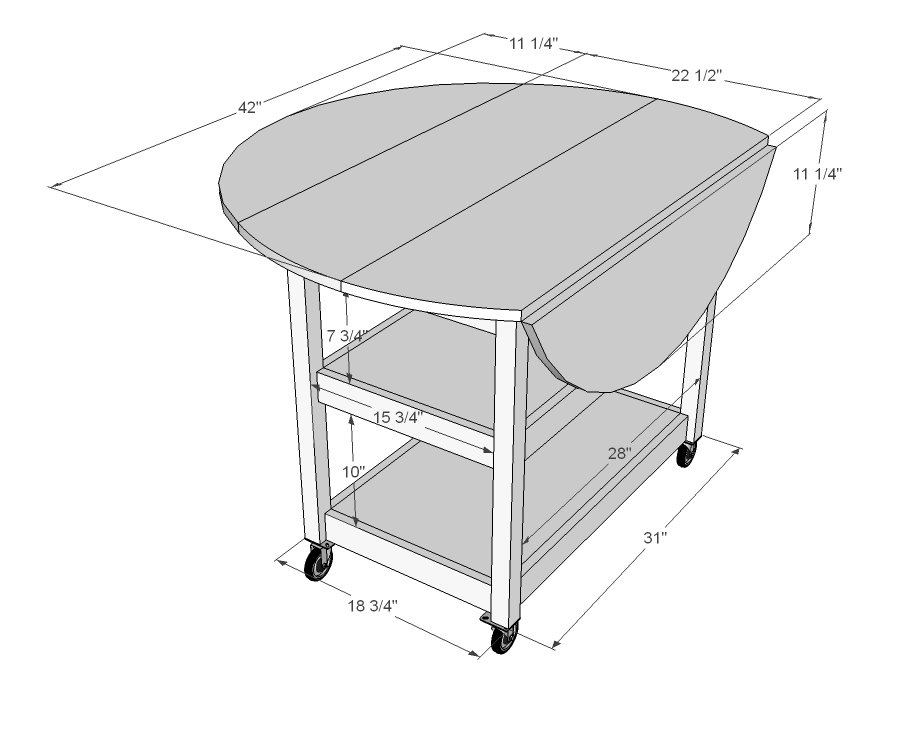
Shopping List
2 – 2x2 @ 8 feet long
1 – 1x4 @ 8 feet long
2 – 1x3 @ 8 feet long
2 – 1x12 @ 8 feet long
1 – ½ sheet ¾” plywood
2 - sets of basic hinges
2 - Drop Leaf Support 8 inch Pair
4 - 2" caster wheels
Cut List
4 – 2x2 @ 26 ¼”
2 – 1x4 @ 15 ¾”
4 – 1x3 @ 15 ¾”
2 – ¾” Plywood 15 ¾” x 28”
2 – 1x4 @ 28”
4 – 1x3 @ 28”
4 – 1x12 @ 42”
Tools
- measuring tape
- square
- pencil
- safety glasses
- hearing protection
- kreg-jig
- drill
- circular saw
- jigsaw
- sander
Step-by-step Instructions
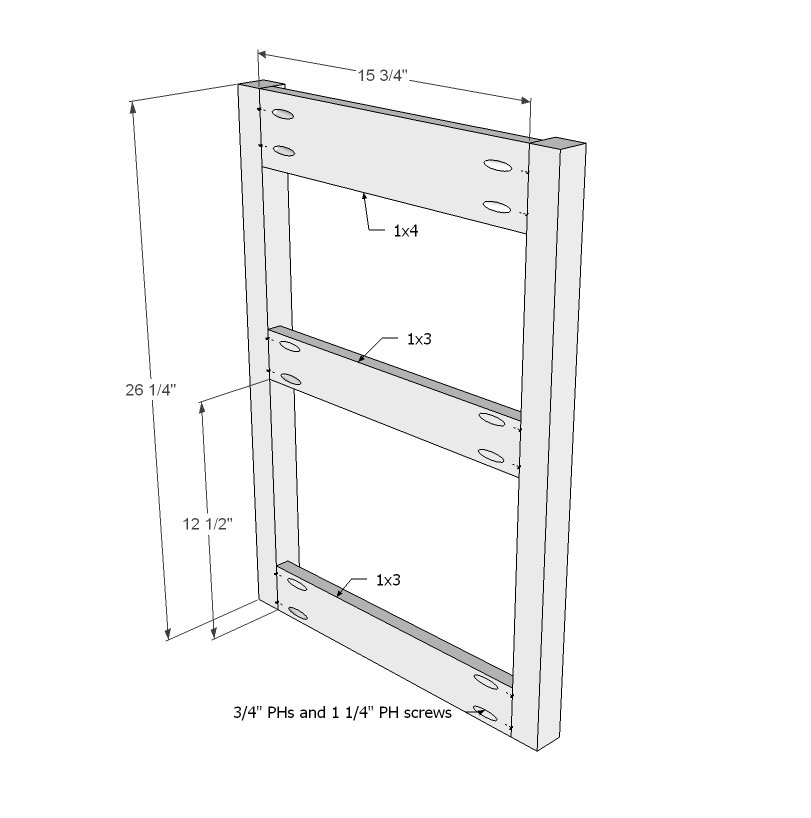
Step 1
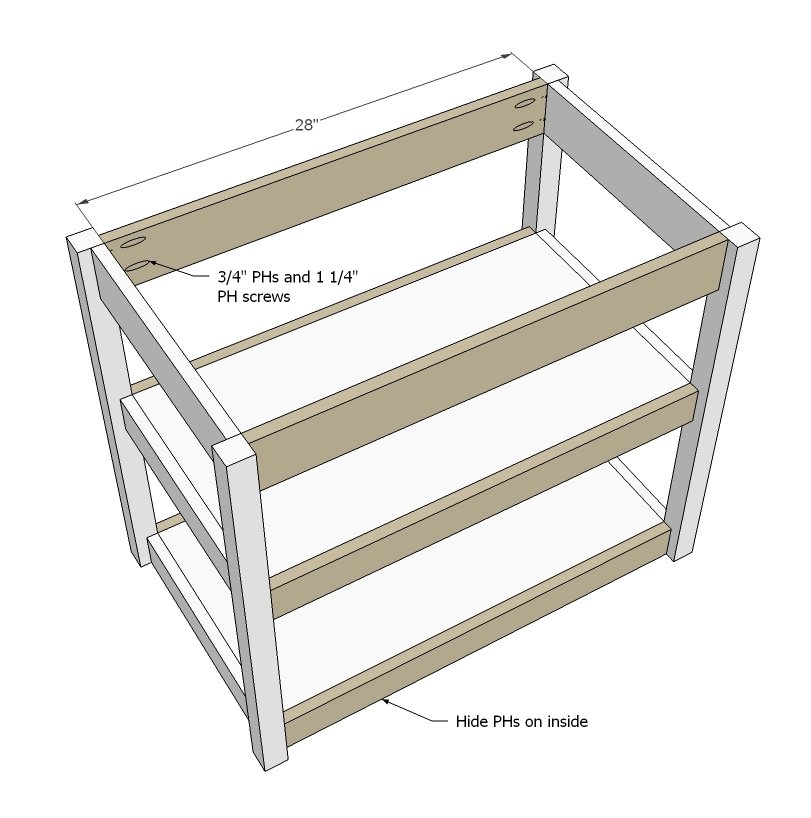
Start by building two ends. Super easy. Keep the insides flush, hiding the 3/4" pocket holes to insides, and joining with 1 1/4" pocket hole screws and glue. TIP: Drill 3/4" pocket holes facing upward on insides of top aprons for later attaching your tabletop.
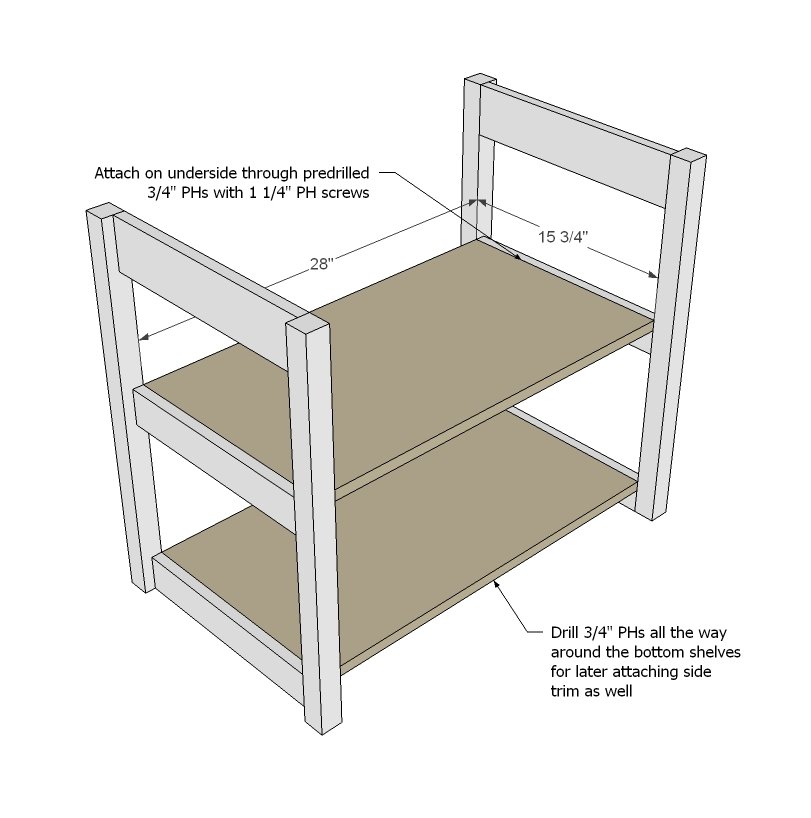
Step 2
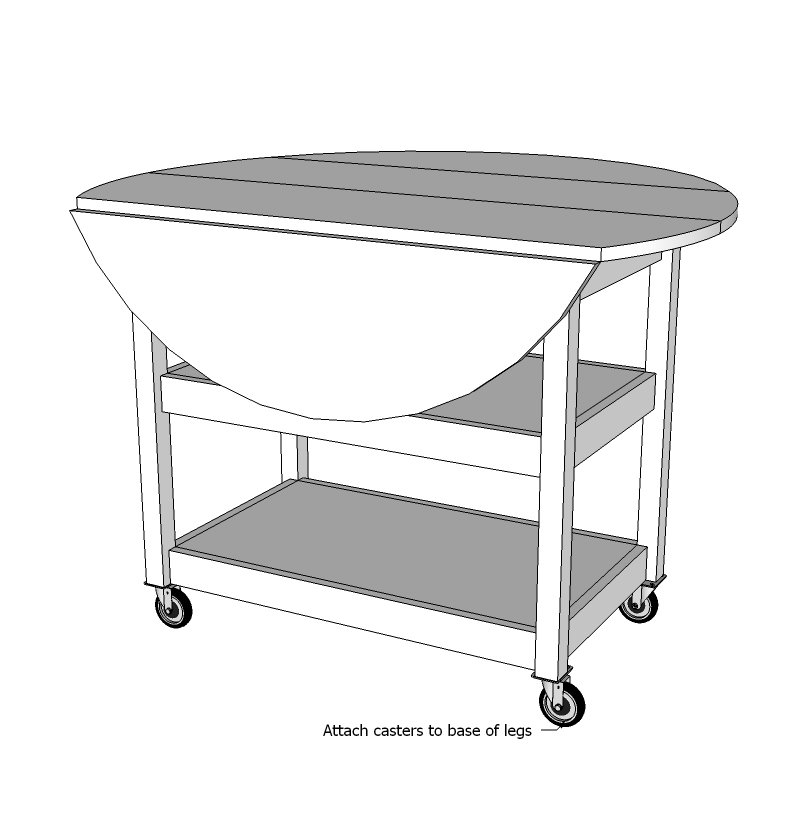
Drill 3/4" pocket holes all the way around both shelves. Attach to legs as shown in diagram.
Step 3
Then add your side trim with 3/4" PHs and 1 1/4" PH screws, attaching the shelves also to the corresponding trim. TIP: Drill 3/4" pocket holes facing upward on insides of top aprons before attaching to table for later attaching your tabletop.
Step 4
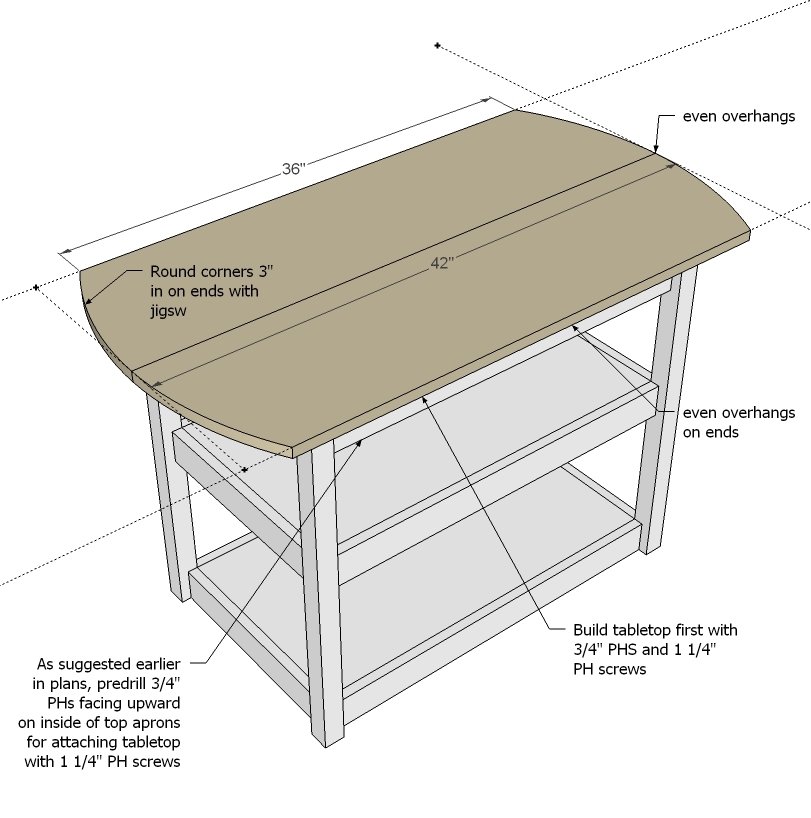
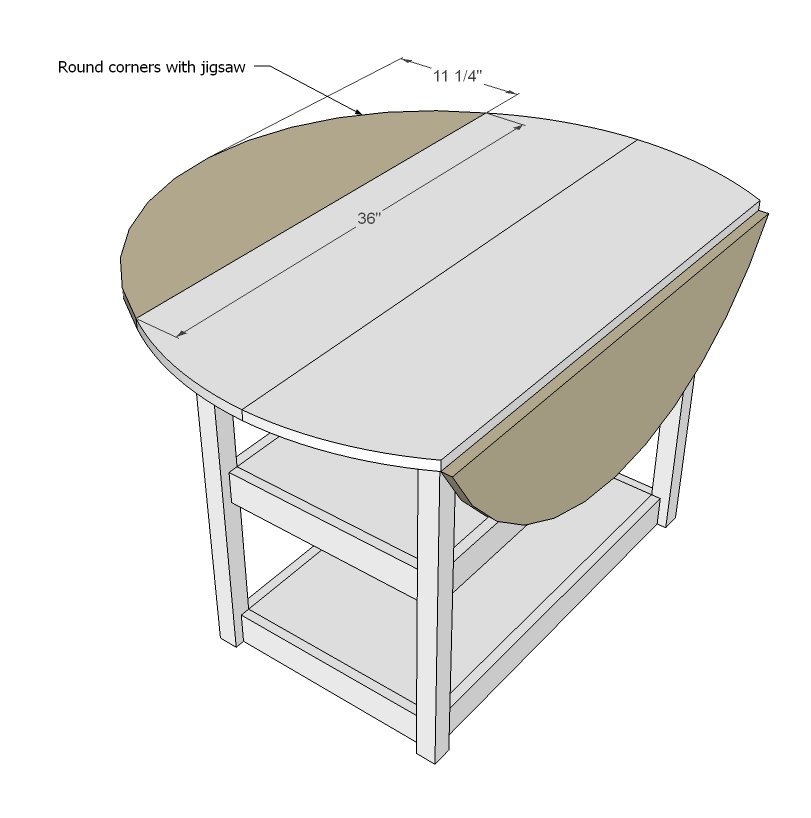
What I actually did here was build my tabletop with a row of 3/4" pocket holes/ 1 1/4" pocket hole screws down the center (and glue) and attached to tabletop. Then I attached the two leaves, so the tabletop is a giant square. Then I drew out the arch shape I liked and cut with a jigsaw. Here's a video on cutting arches with a jigsaw. Just be very careful to make sure your jigsaw blade isn't beveling as it cuts the wood, and go slow. Use a very sharp, appropriate blade. And remember, you can always take more wood off later! Practice, practice!
Step 5
Step 6
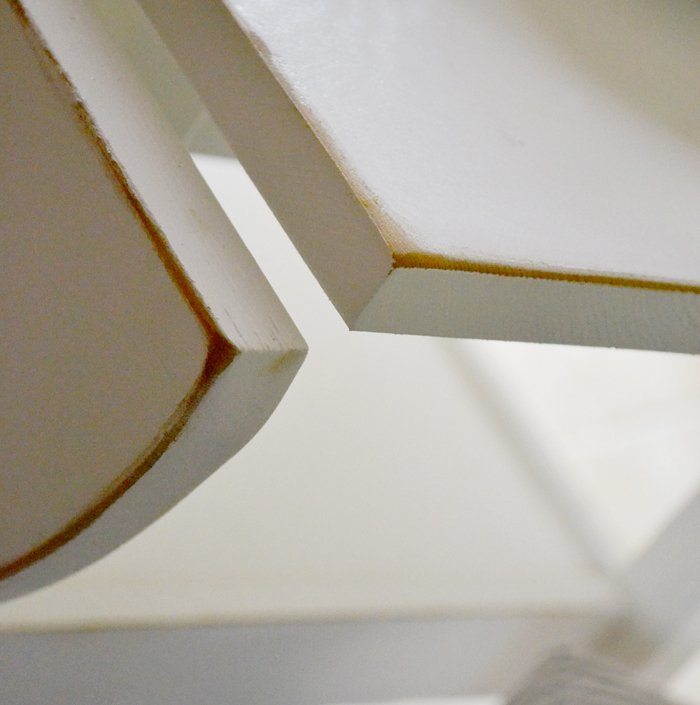
I also posted a step by step tutorial on how I finished this table here.
Step 7
Add the caster wheels to bottom. I actually did the bolt kind - but a word of caution - I did have some trouble with my caster wheel bolt colliding with the pocket hole screws from the bottom shelf trim, so you may want to opt for the plate kind instead.
Step 8
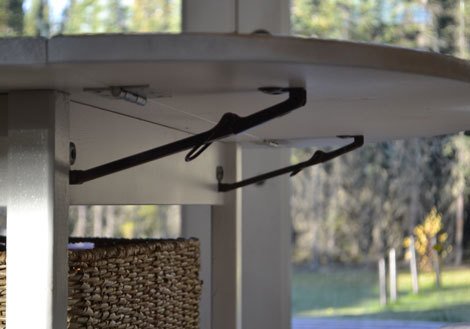
And we waited two weeks for these to come in the mail and they were worth it! They are called Drop Leaf Support 8 inch Pair and no, they are not rock solid, but they are plenty sturdy for our purposes and install in seconds! I recommend installing them about half way down the table apron - you may need to do a little trial and error to get things just right.
Finishing
Sand all surfaces, starting with a medium grit and finishing with fine. Wipe off the dust, fill any holes or gaps with wood filler, and sand smooth once dry. Apply primer if you're painting, then finish with your choice of paint or stain and seal with a durable clear topcoat. For outdoor projects, use exterior-rated primer, paint or stain, and sealer so the piece stands up to the weather.
Source (temporary): https://www.ana-white.com/woodworking-projects/drop-leaf-round-storage-table