Easier 36" Corner Base Kitchen Cabinet
Easier to build 36" corner base kitchen cabinet plans from
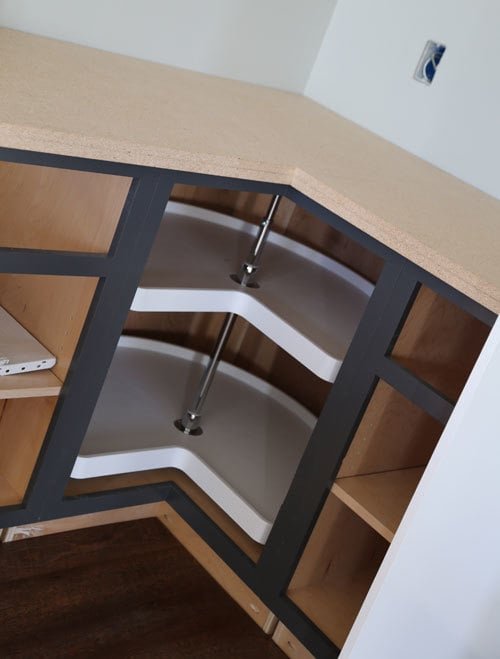
Specifications
| Project type | Kitchen Cabinet Plan, Accessories and Serving |
|---|---|
| Room | kitchen |
| Difficulty | Intermediate |
| Estimated cost | $150 - $200 |
Dimensions
Use the size-specific shopping and cut lists below.
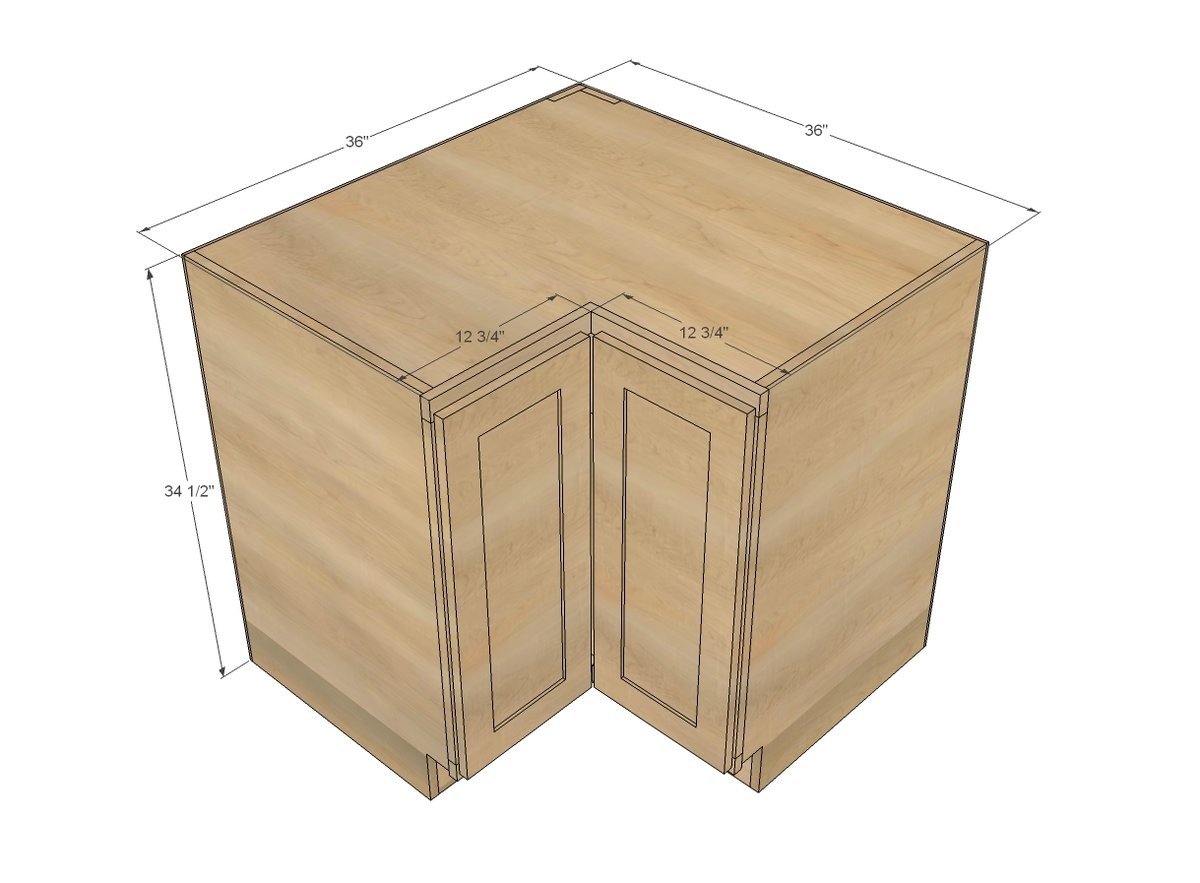
Shopping List
1 - sheet 3/4" plywood (we used prefinished PureBond in Maple)
1 - sheet 1/4" plywood (we used prefinished PureBond in Maple)
scrap 3/4" plywood for supports
10 feet of 1x2s in hardwood to match doors (we used poplar for a paint grade finish)
Cut List
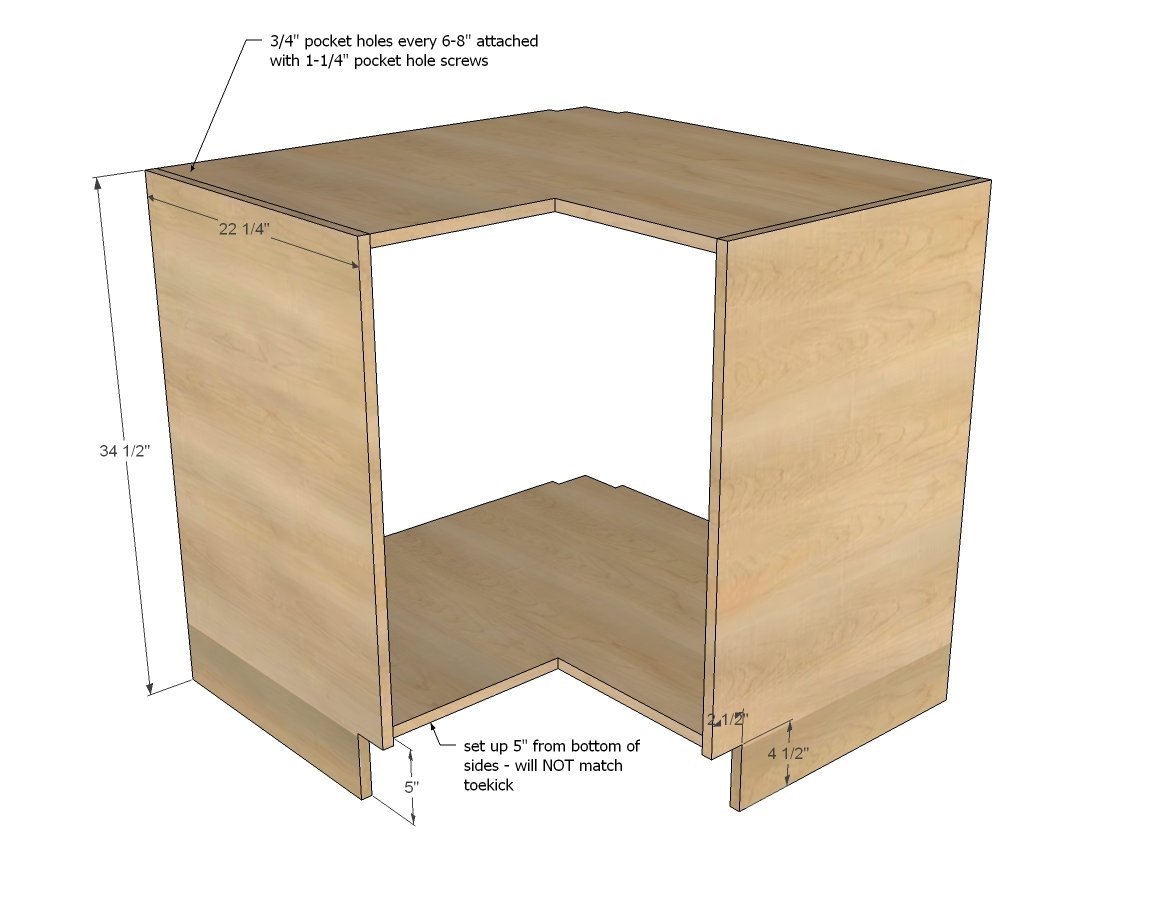
2 - 3/4" plywood @ 34-3/4" x 34-3/4" (top and bottom)
2 - 3/4" plywood @ 34-1/2" x 22-1/4" (sides)
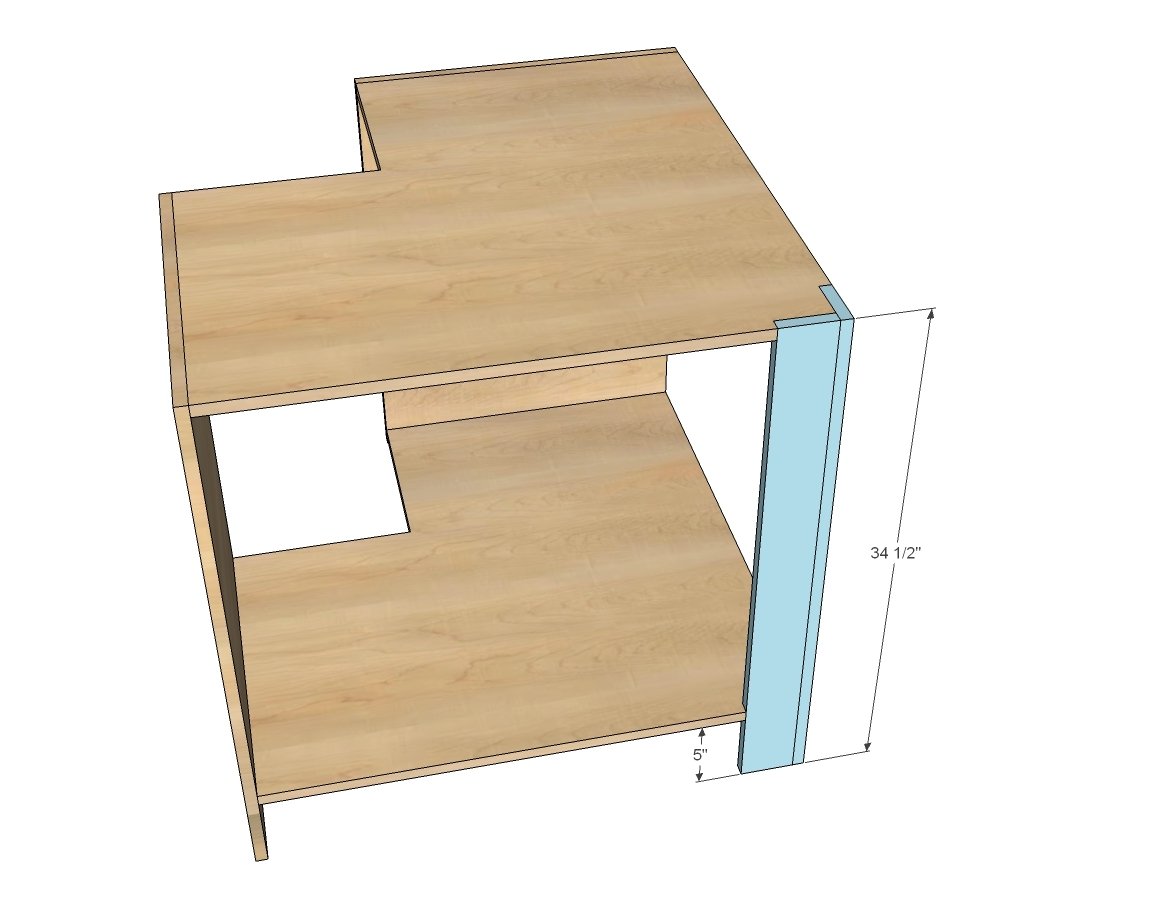
2 - 1x4s or scrap plywood pieces @ 34-1/3" long (back supports)
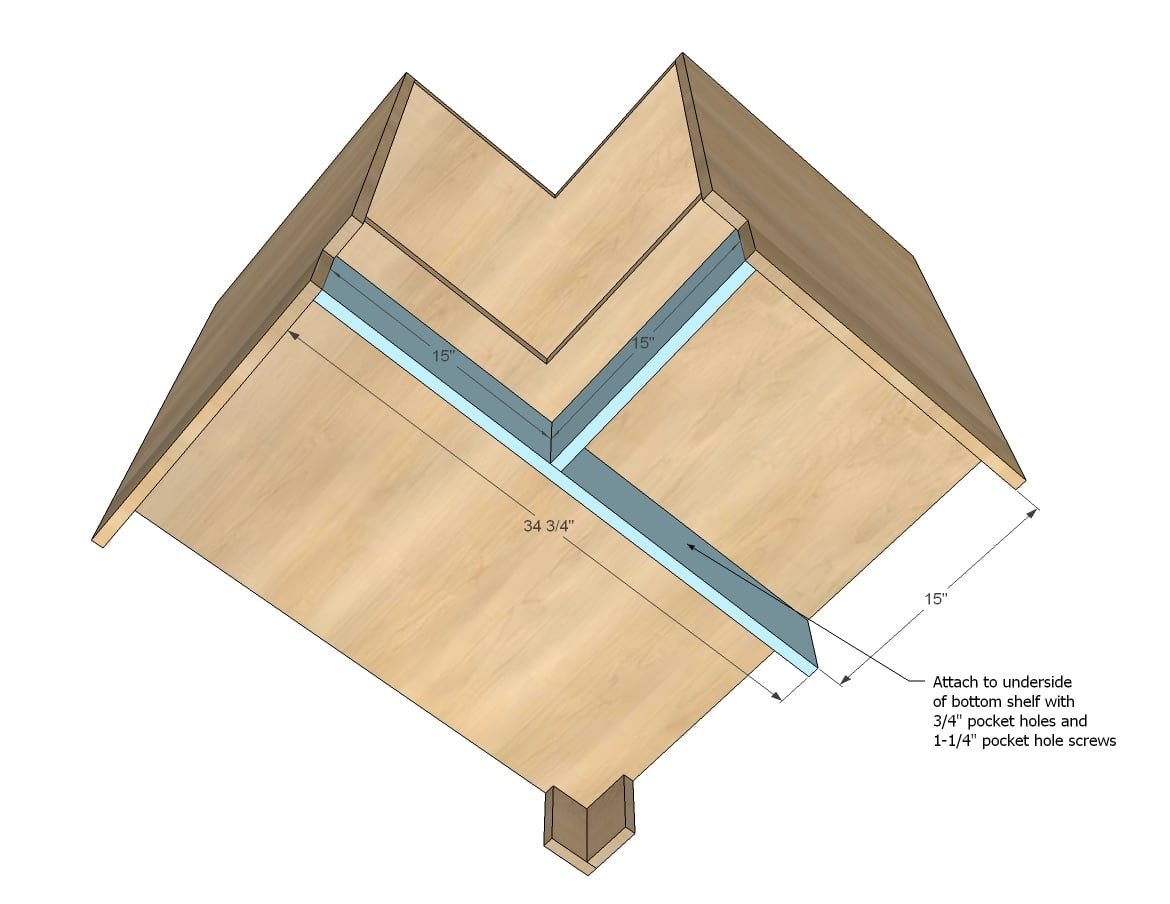
1 - 3/4" plywood @ 5" x 15" (bottom support)
1 - 3/4" plywood @ 5" x 34-3/4" (support support)
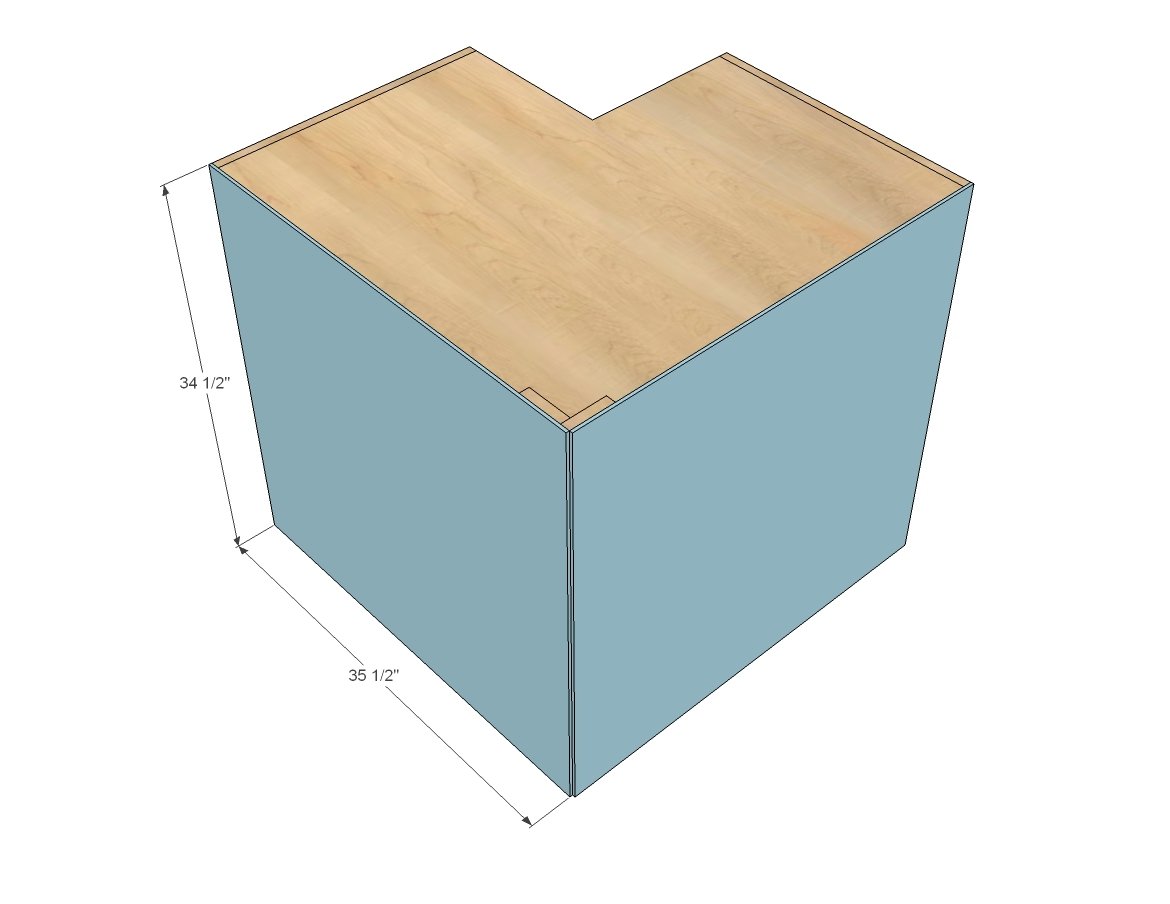
2 - 1/4" plywood @ 34-1/2" x 35-1/2" (back)
FACE FRAME
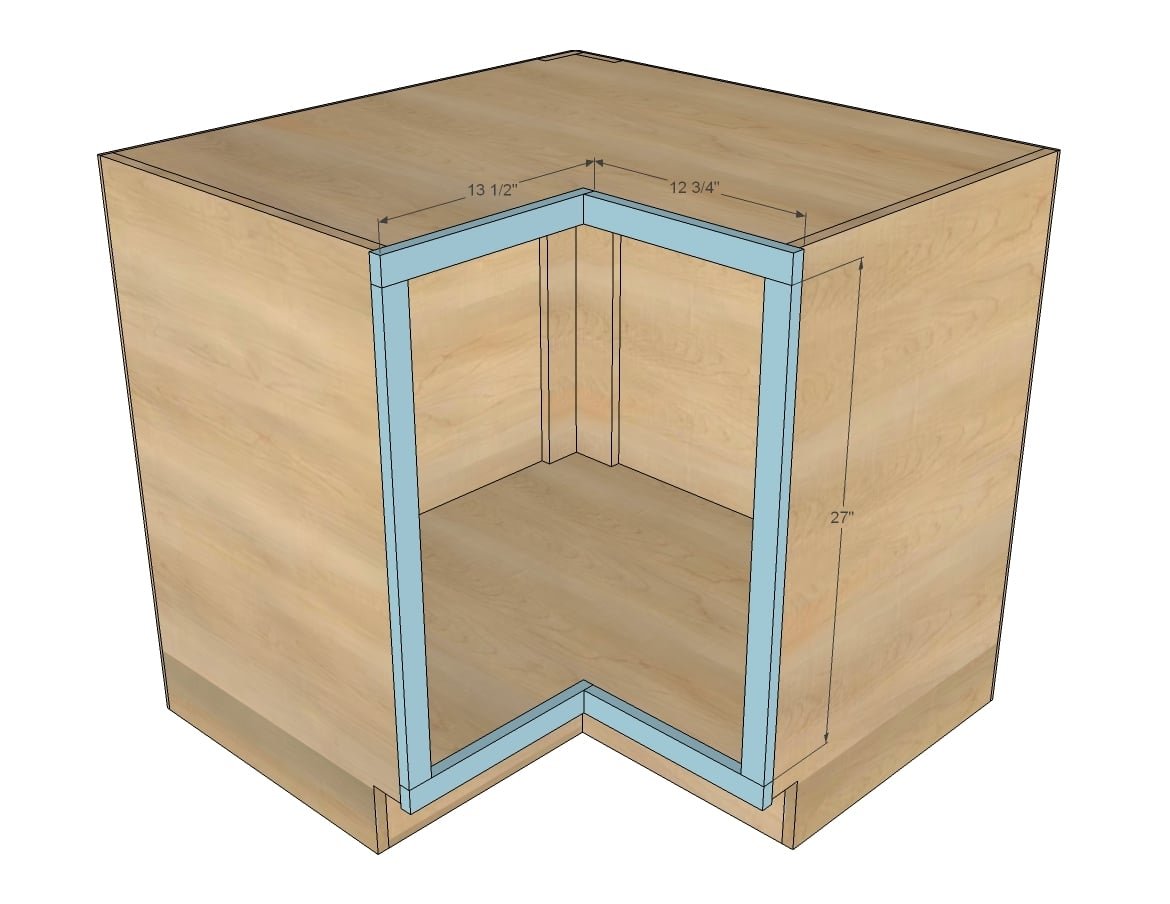
2 - 1x2 @ 27"
2 - 1x2 @ 13-1/2"
2 - 1x2 @ 12-3/4"
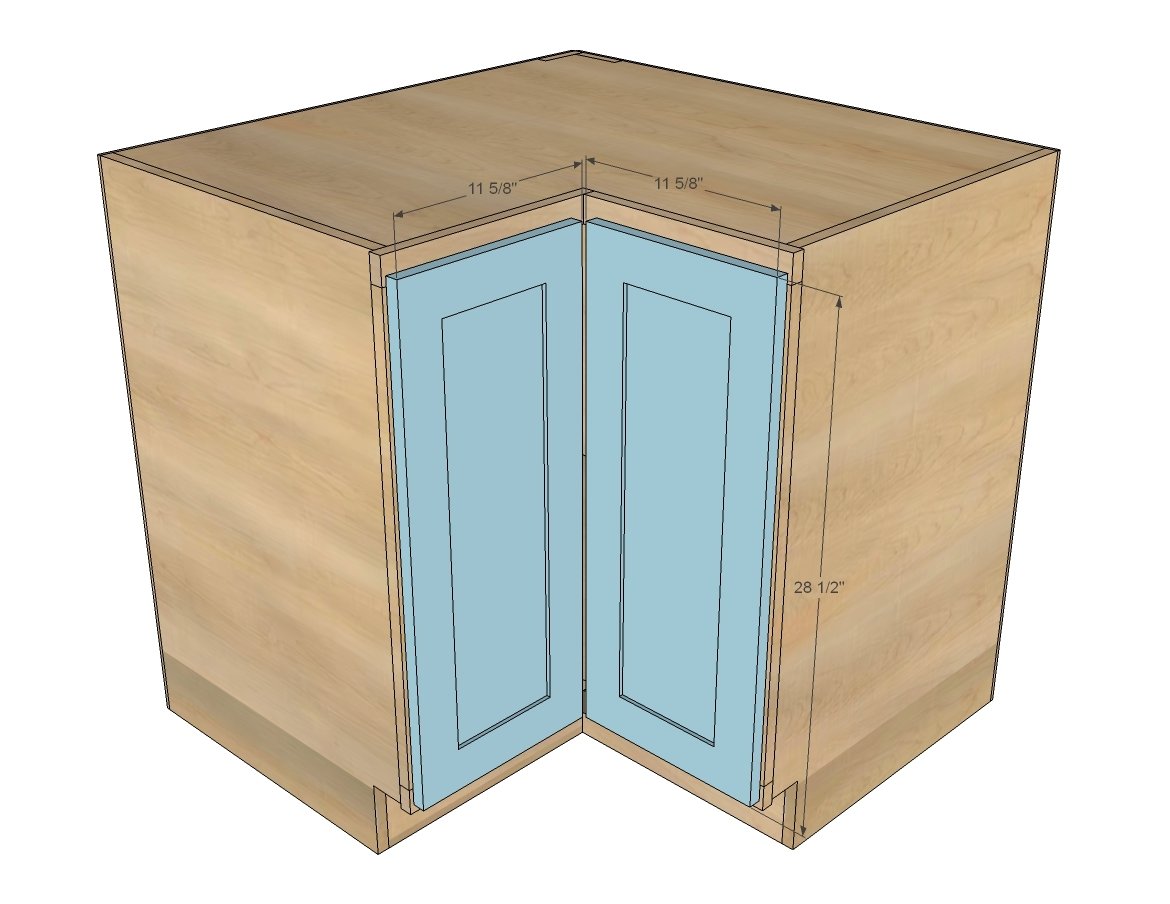
DOOR SIZE FOR FULL OVERLAY
11-5/8" x 28-1/2"
Tools
- measuring tape
- square
- pencil
- safety glasses
- hearing protection
- kreg-jig
- drill
- circular saw
- jigsaw
- compound miter saw
- table saw
- nailer
- sander
Step-by-step Instructions
Step 1
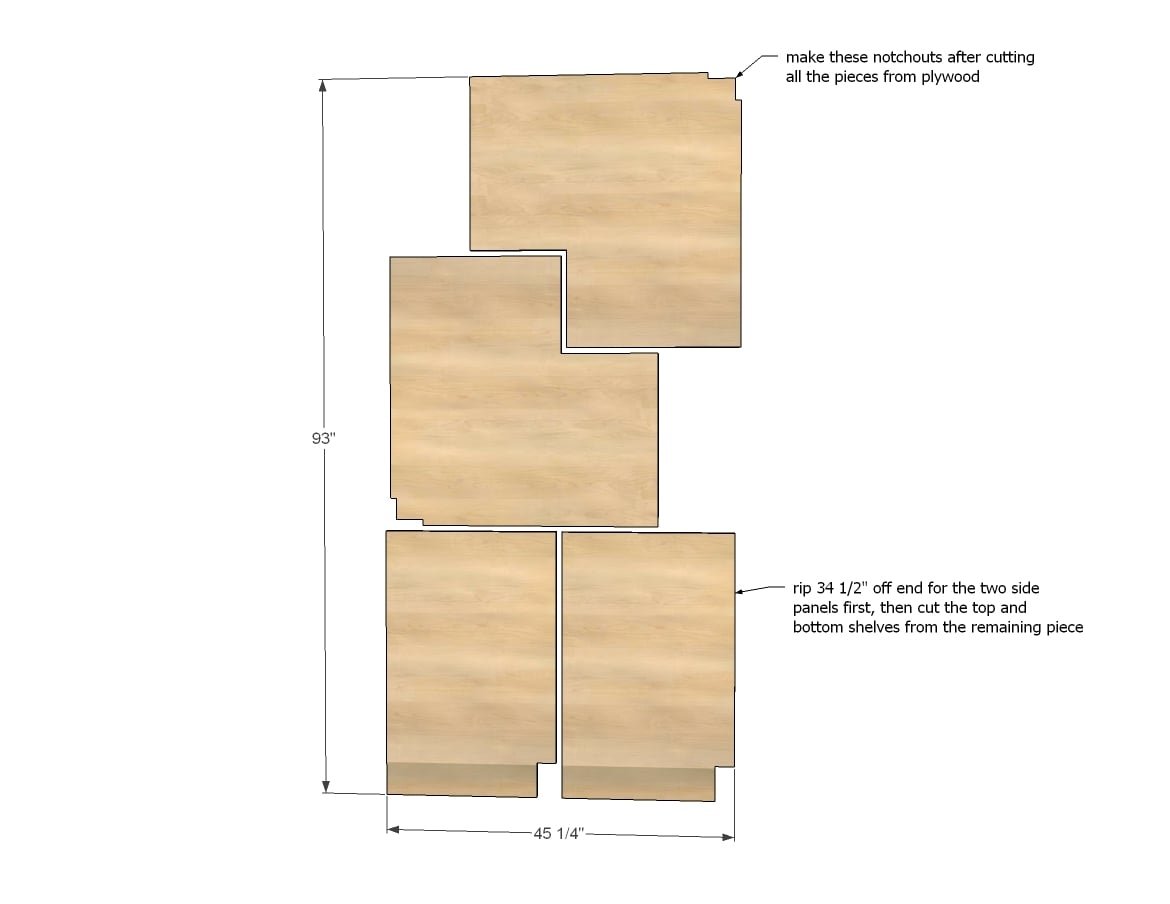
You can get all the pieces cut from a single sheet of plywood if you are careful. I'd cut the bottom off first for the two sides at 34-1/2", and then cut the two side out of the remaining pieces. You'll have to use your jigsaw to cut the toekicks and inside corner of the top and bottom. See step 2 and 3 for sizes on the top, bottom and sides.
Step 2
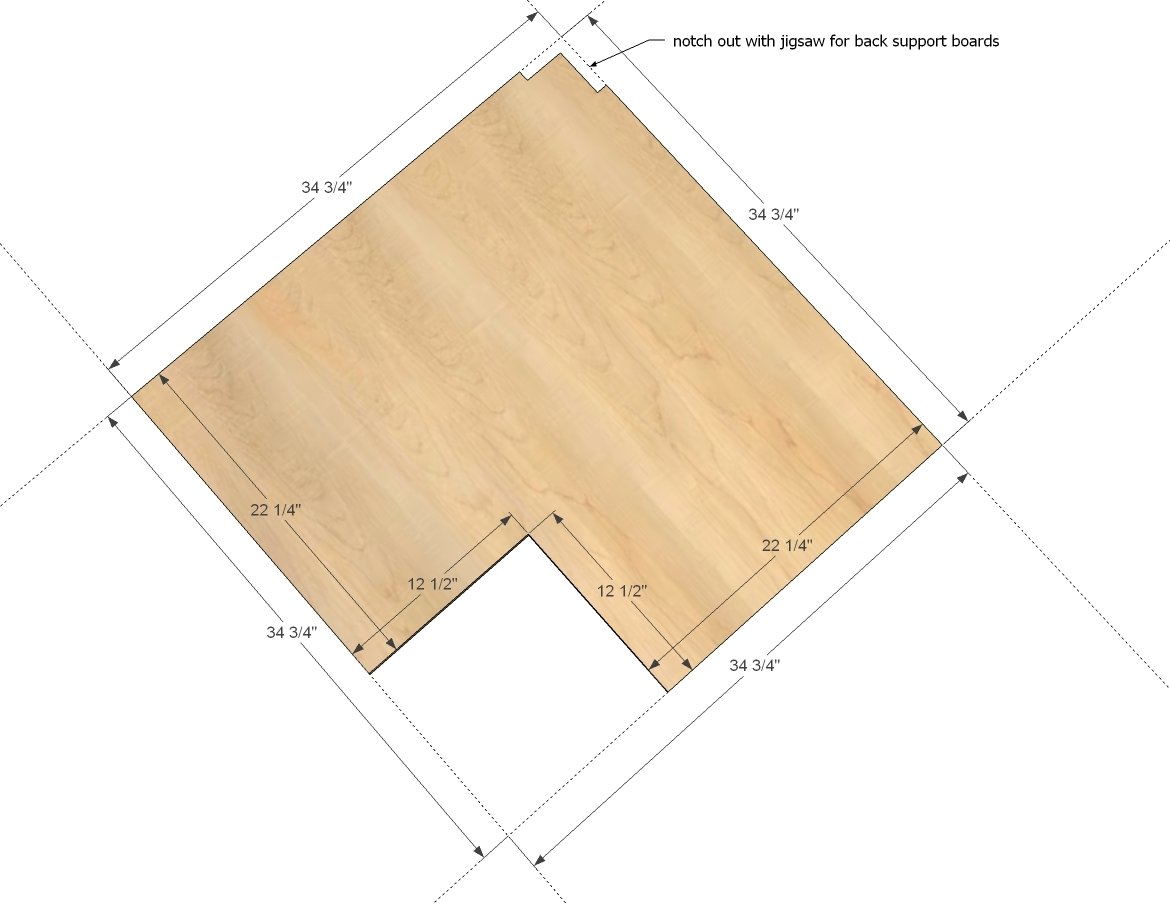
The back corner of the top and bottom needs to be notched out for the back supports. We used the scrap piece of plywood from ripping the sides (about 3-1/2" wide) for these pieces, but you could also use 1x4 boards. Notch out with a jigsaw to fit the boards.
Step 3
TIP: Before assembly, drill 3/4" pocket holes on outsides of sides, top and bottom for attaching face frame in later steps. Attach top and bottom to sides, leaving a 5" gap underneath bottom shelves.
Step 4
Attach back to the top and bottom, leaving a 5" gap underneath bottom shelf.
Step 5
Step 6
Attach 1/4" plywood to back with finish nails and glue - we use 3/4" finish nails.
Step 7
Build the face frame separately, and then attach to front of cabinet. Note that the face frame overextends the sides of the cabinet by 1/4".
Step 8
We used full overlay doors - here's the sizes we ordered.
Finishing
Sand all surfaces, starting with a medium grit and finishing with fine. Wipe off the dust, fill any holes or gaps with wood filler, and sand smooth once dry. Apply primer if you're painting, then finish with your choice of paint or stain and seal with a durable clear topcoat. For outdoor projects, use exterior-rated primer, paint or stain, and sealer so the piece stands up to the weather.
Source (temporary): https://www.ana-white.com/woodworking-projects/easier-36-corner-base-kitchen-cabinet-momplex-vanilla-kitchen