Easiest Play TeePee Tutorial
Make your own Play TeePee with free easy step by step tutorial from This teepee is so easy to make you can do it in a few hours!
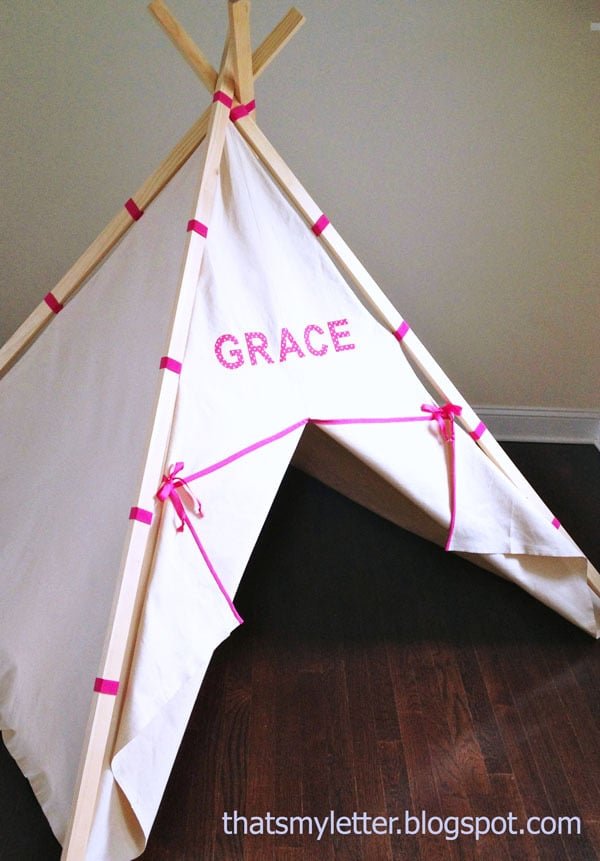
Specifications
| Project type | Toys |
|---|---|
| Room | Kids and Toys |
| Style | Children's and Kid's Room Furniture and Toy Plans |
| Difficulty | Starter Projects |
Dimensions
Use the size-specific shopping and cut lists below.
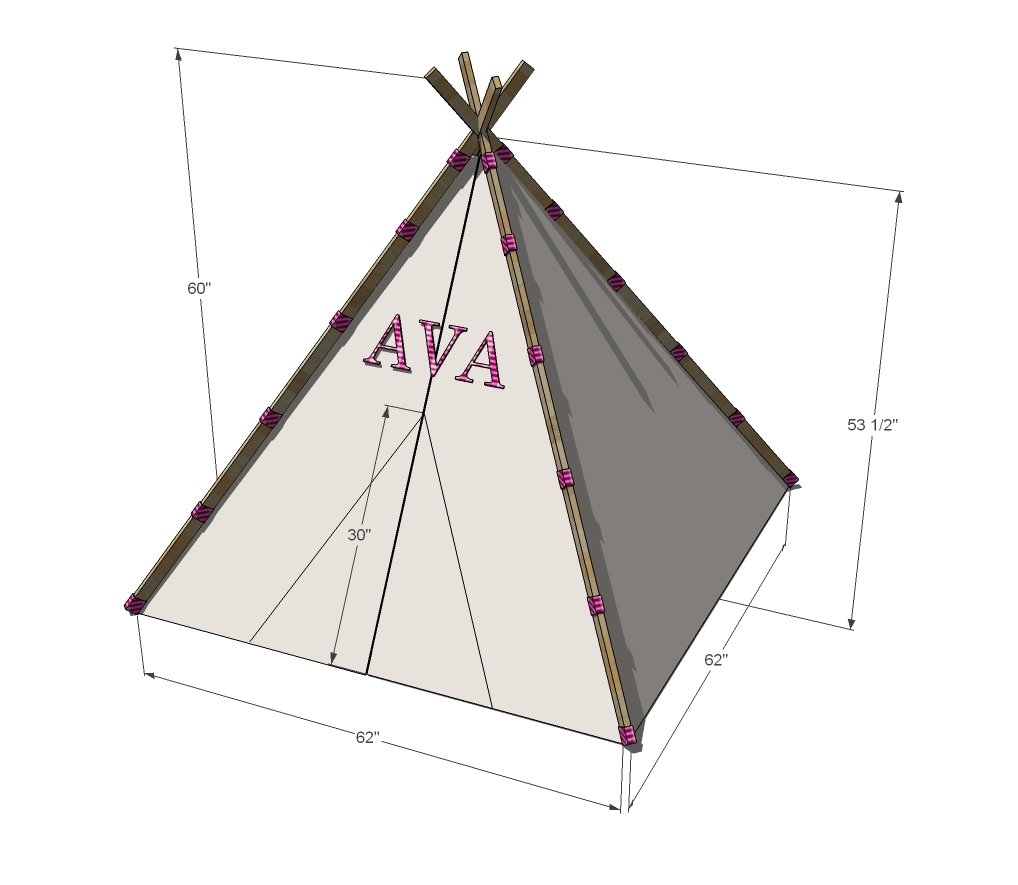
Shopping List
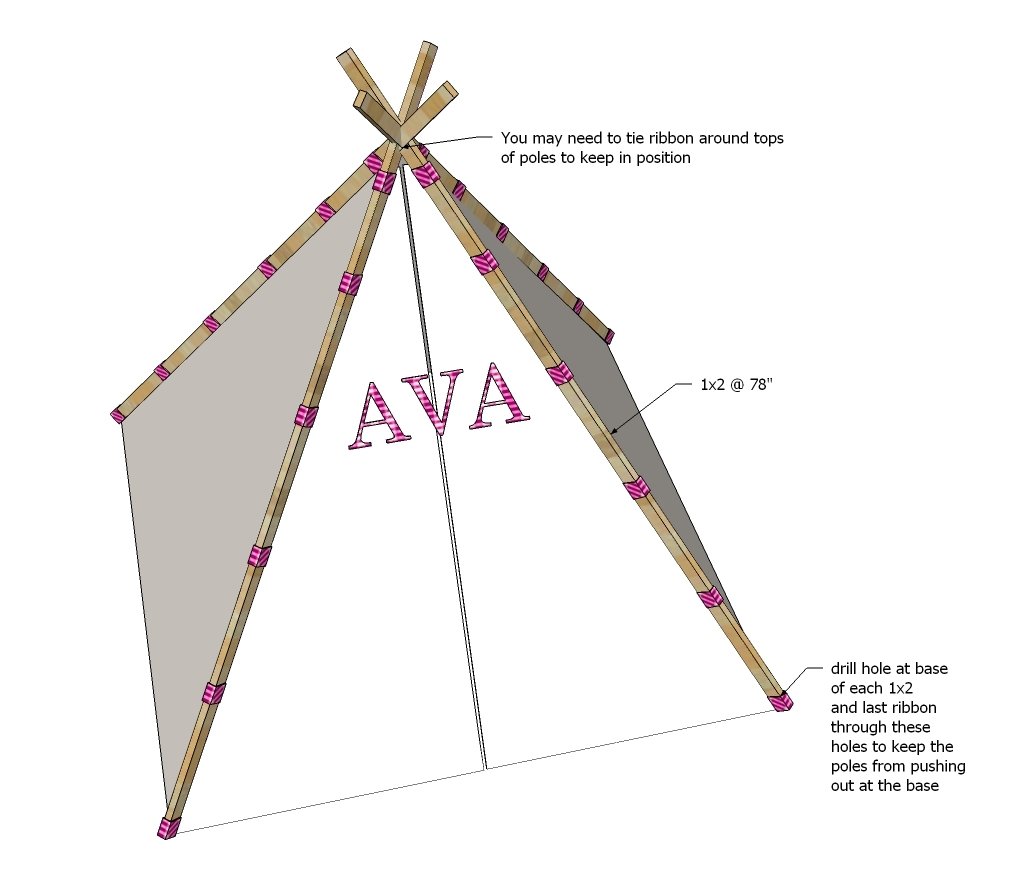
4 - 1x2 @ 8 feet long
4 yards of webbing
4 yards 60” wide cotton canvas or duck fabric
Sewing Notions
Step-by-step Instructions
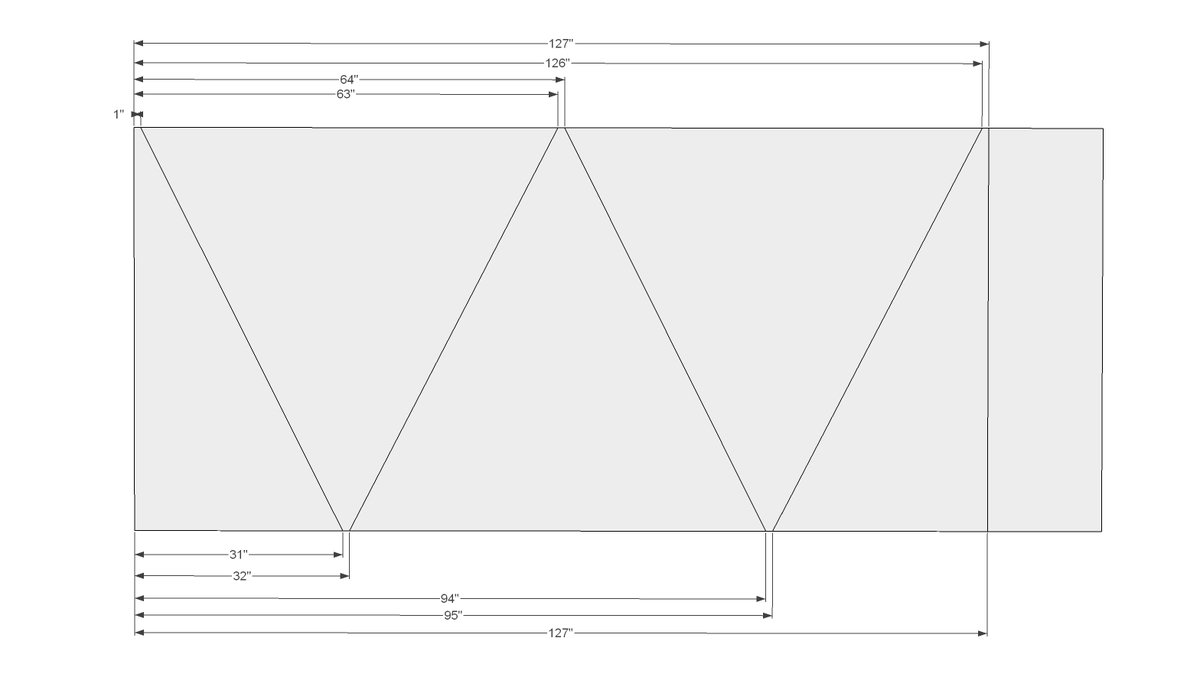
Step 1
Cut fabric out as shown here. I gave a full 1” on the ends just in case you want to fold over twice for a finished seam. If your fabric is wider than 60” no biggie, cut same as shown above.
Make the front first. If you want to add a zipper or anything else, do it now.
You can decorate the side panels (add windows!) at this stage too!
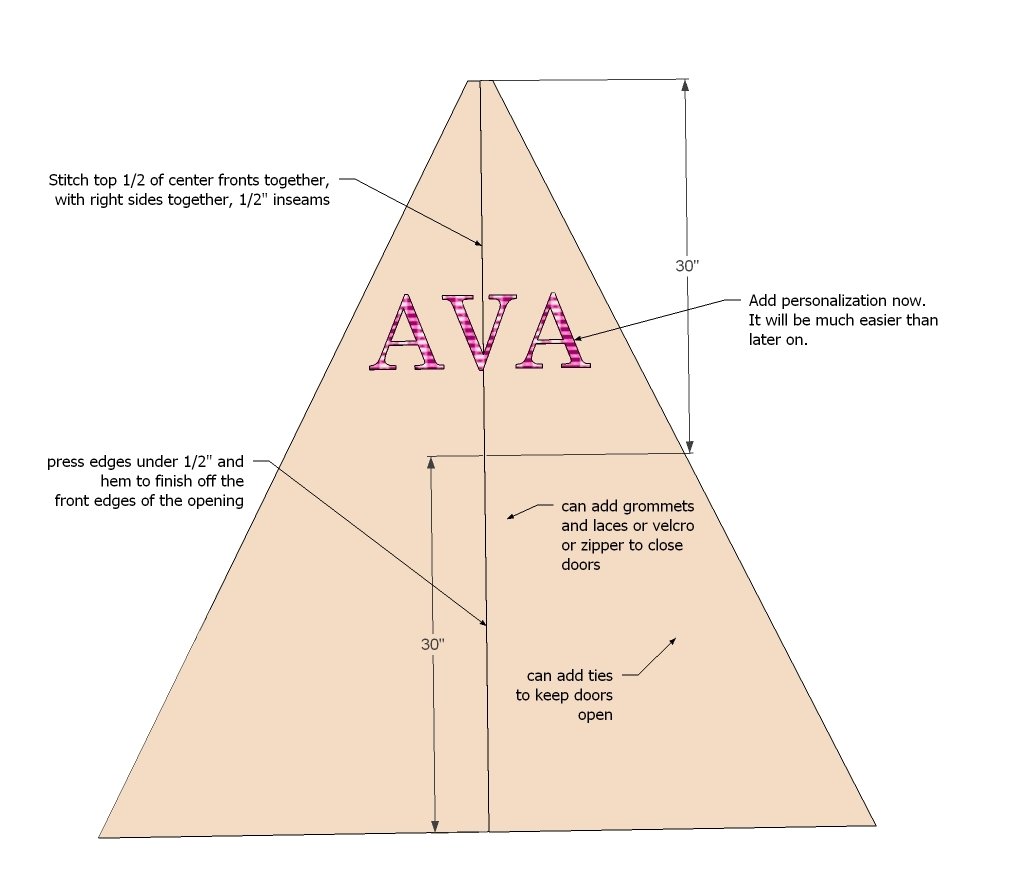
Step 3
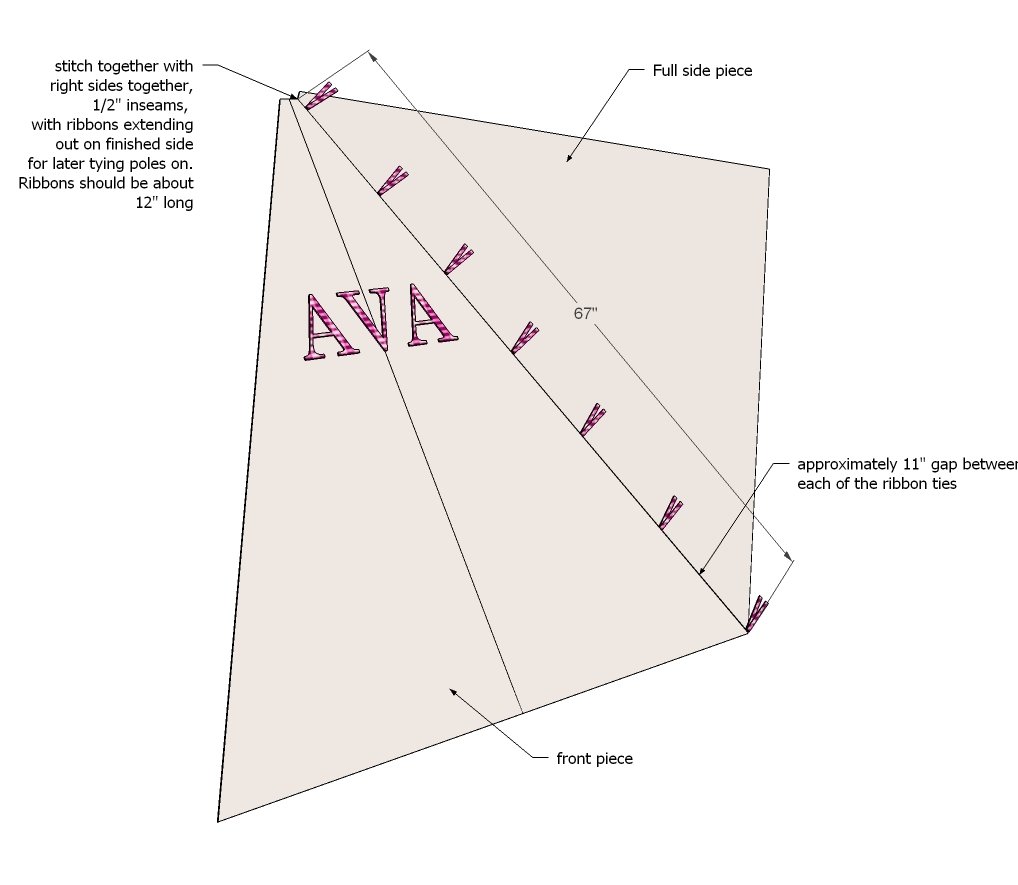
Sew front to one side, pinning ribbons in the seam every 11-12"” or so. You will need ribbons at bottom and top. TIP: Jaime suggested looping the webbing instead of the ties to save on ribbon and also for a stronger hold to the poles.
Step 4
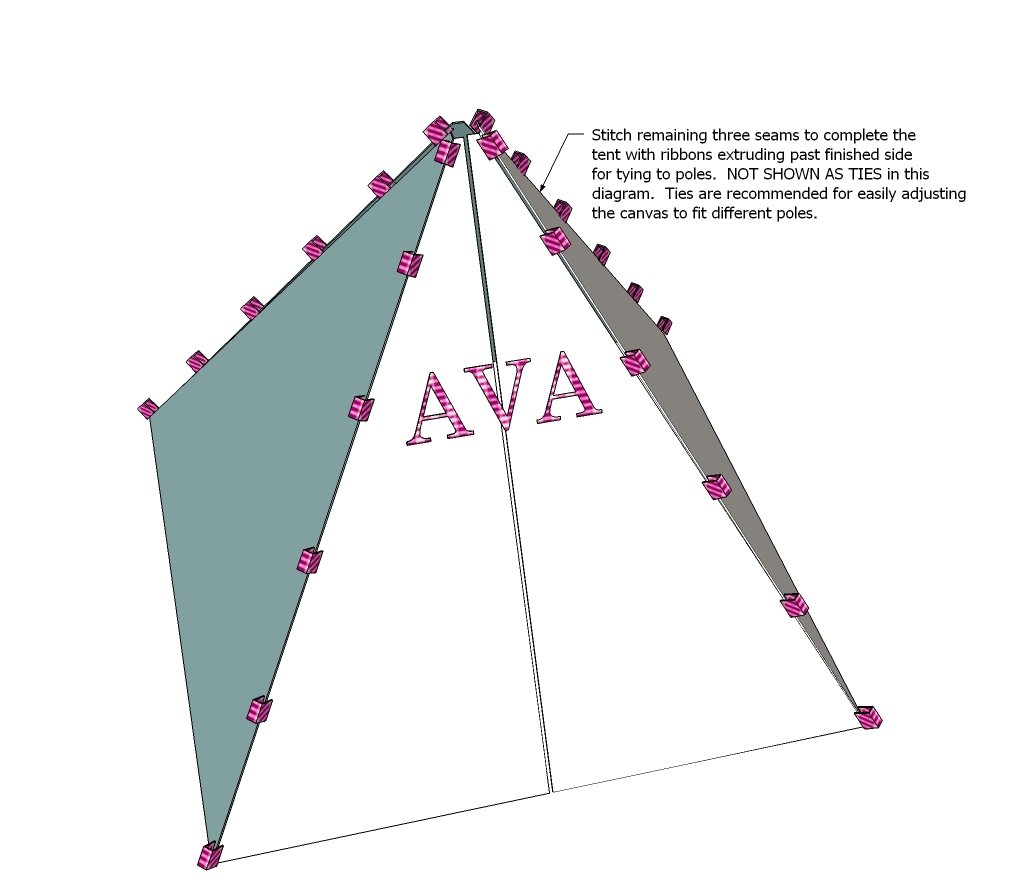
Then add the remaining two sides and attach to the front panel, same thing with the ribbons.
Step 5
Finishing
Sand all surfaces, starting with a medium grit and finishing with fine. Wipe off the dust, fill any holes or gaps with wood filler, and sand smooth once dry. Apply primer if you're painting, then finish with your choice of paint or stain and seal with a durable clear topcoat. For outdoor projects, use exterior-rated primer, paint or stain, and sealer so the piece stands up to the weather.
Source (temporary): https://www.ana-white.com/woodworking-projects/easiest-play-teepee-tutorial