Easy to Build Floating Shelves
build first, then hang for easy to finish and install. with video from
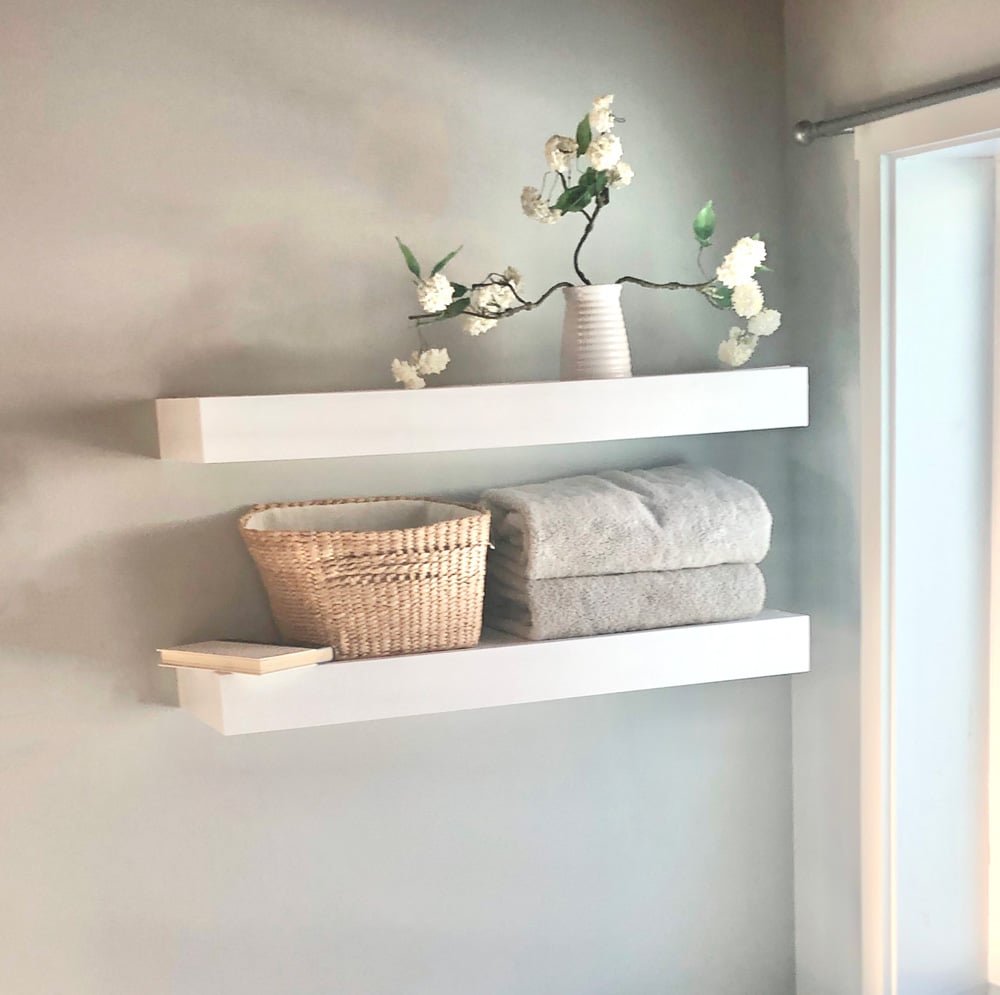
Specifications
| Project type | shelves |
|---|---|
| Room | Bathroom |
| Difficulty | Beginner Projects |
| Estimated cost | Under $20 |
Dimensions
Use the size-specific shopping and cut lists below.
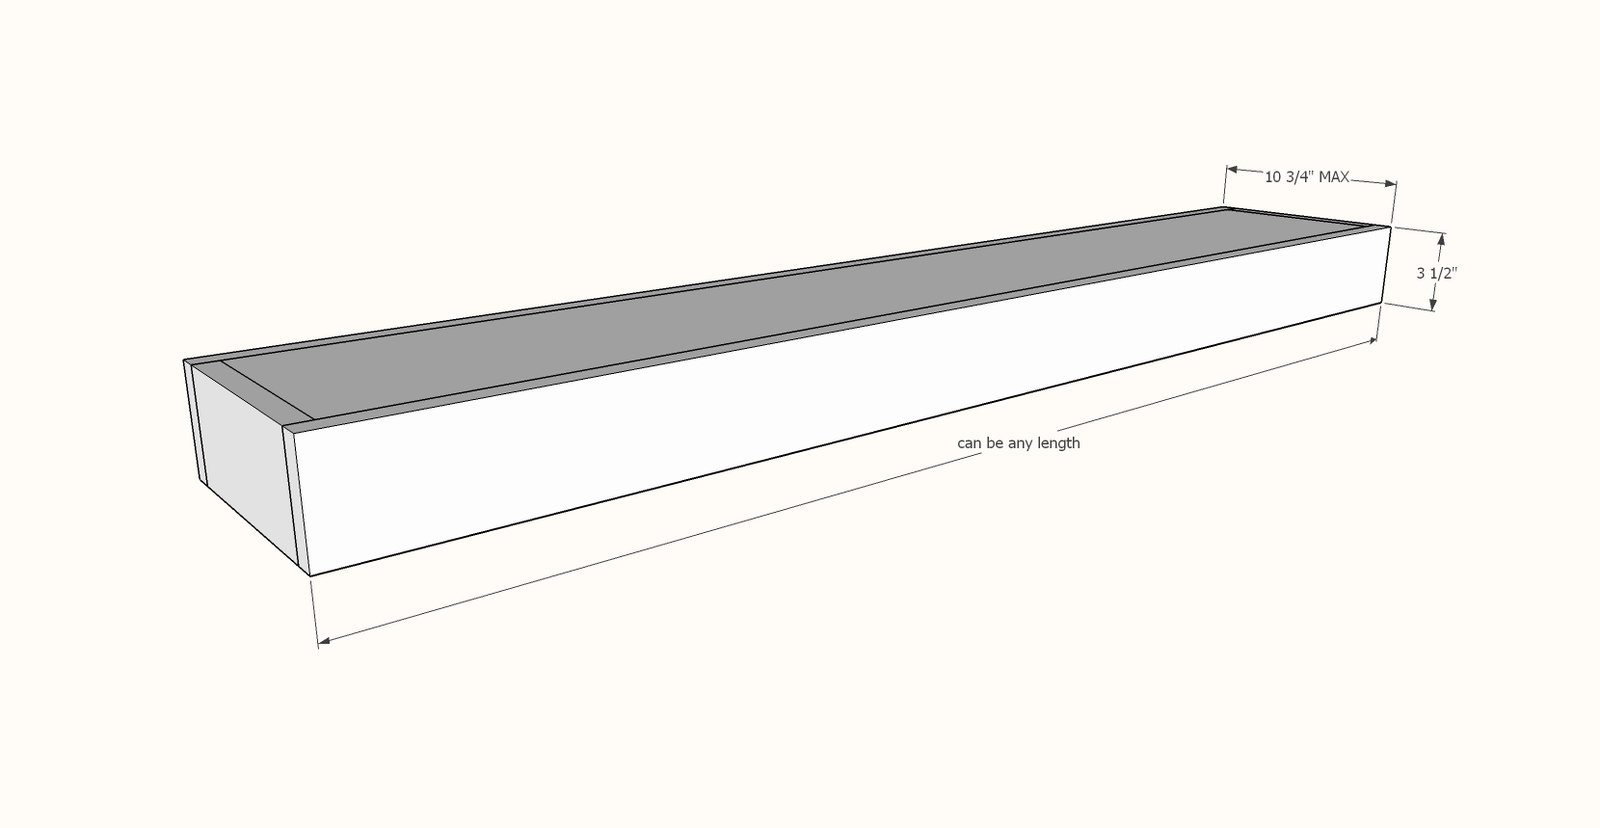
Shopping List
- 1x4, 1x6, 1x8 or 1x10 shelf top board in desired length of shelf, minus 1-1/2"
- 1x4 long enough to go all the way around your 1x shelf top board
- 2x3 or 2x4 - inside support pieces
- 1/4" plywood, same size as your shelf top board
- #8 2-1/2" to 3" long self tapping wood screws ( like these from Home Depot )
- 3/4" and 1-1/4" brad nails
Tools
- measuring tape
- pencil
- safety glasses
- hearing protection
- drill
- circular saw
- nailer
- sander
- level
Step-by-step Instructions
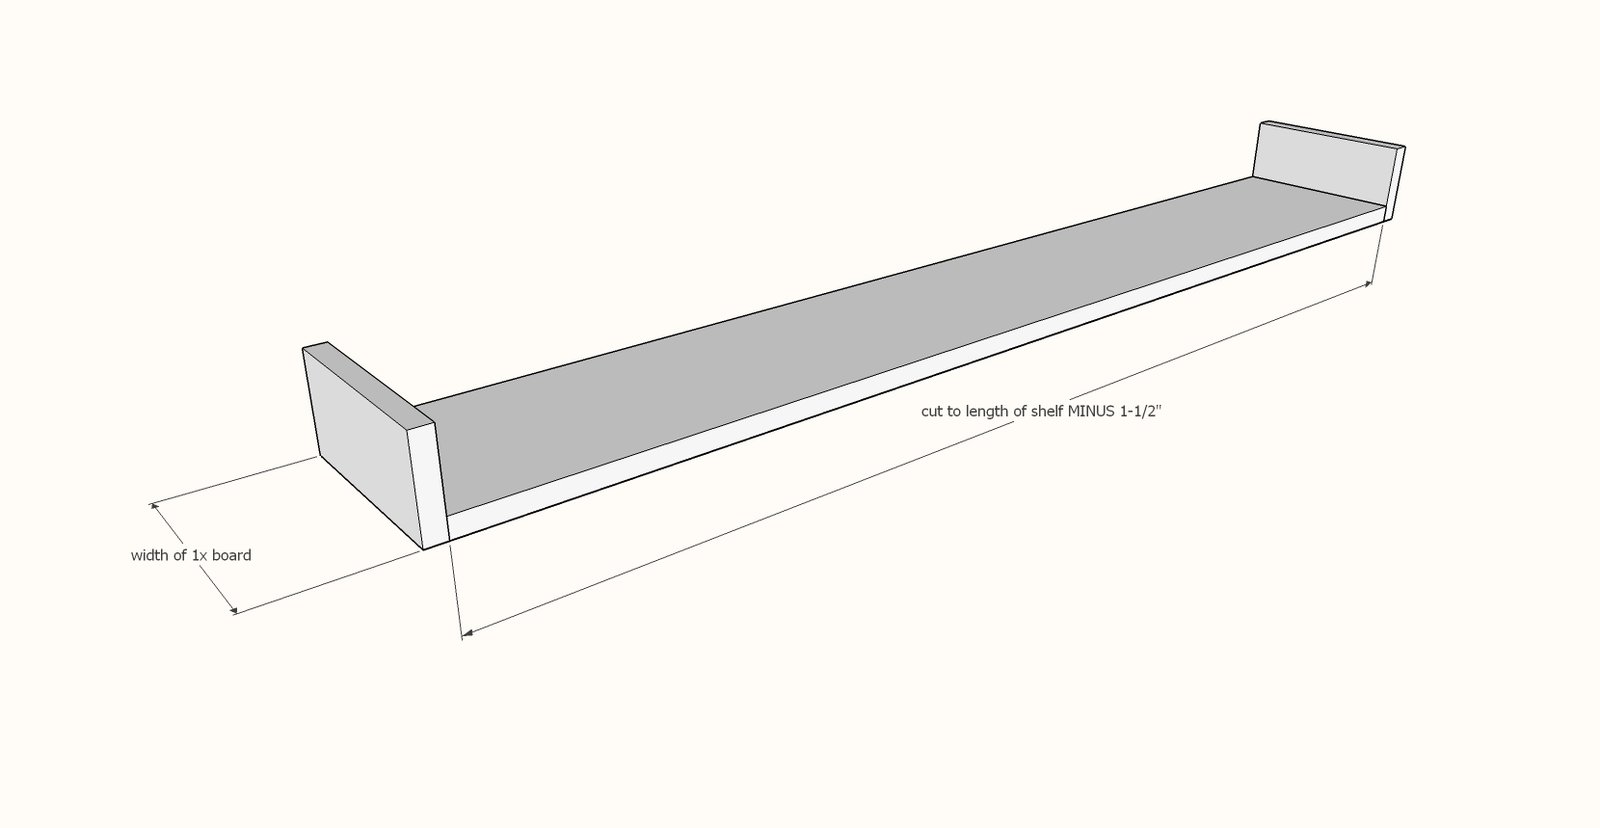
Cut your shelf top board to the desired length of your shelf, MINUS 1-1/2".
Cut 1x4 end pieces to match the width of your shelf top board. Use glue and 1-1/4" brad nails to attach the 1x4 end pieces to the shelf top board. All outside edges are flush.
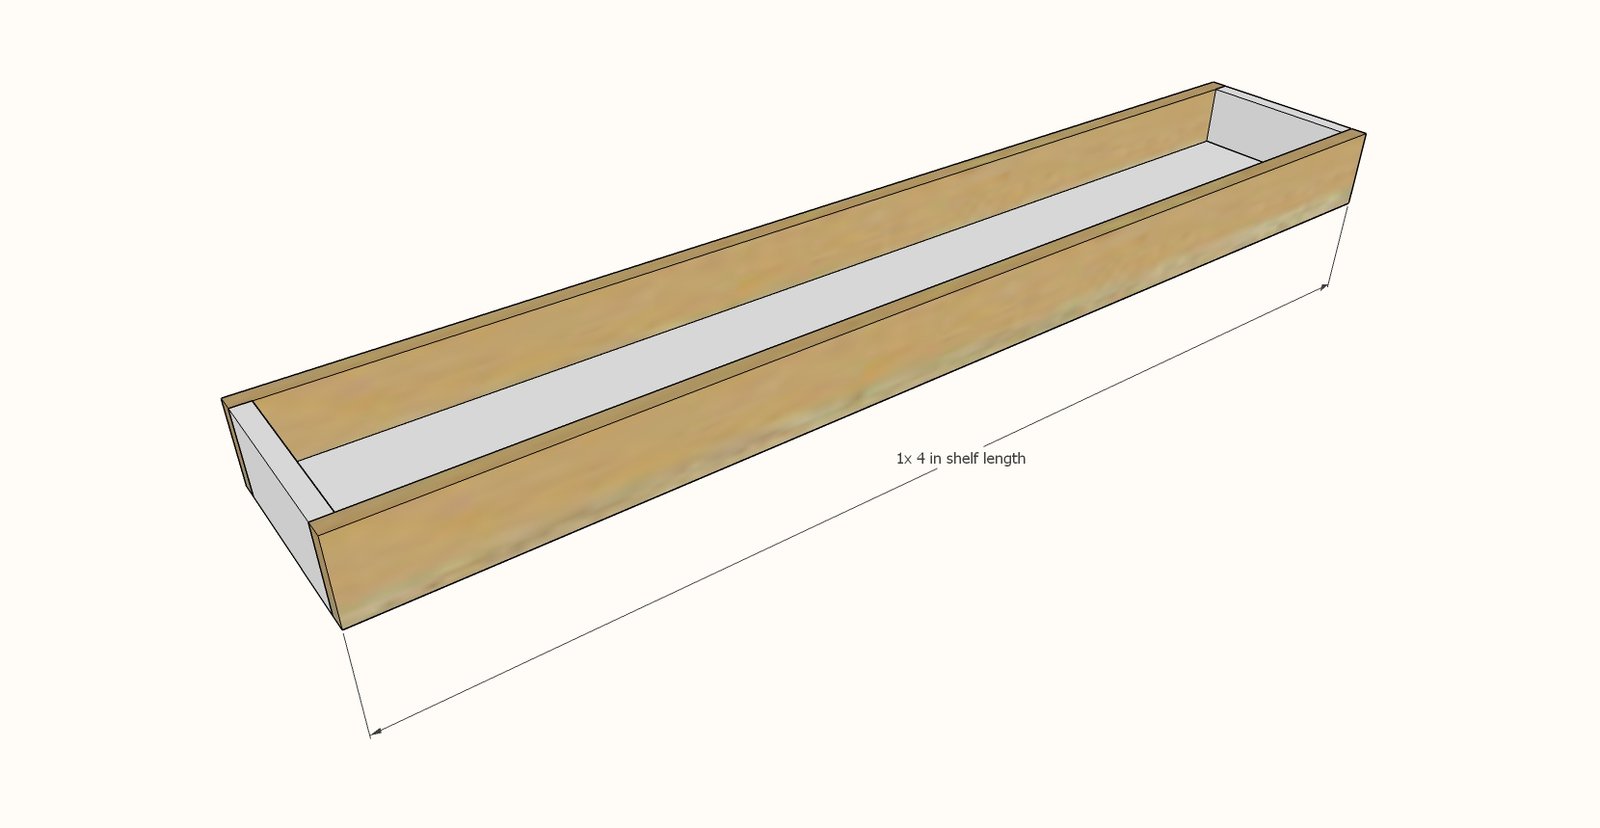
Cut 1x4 front and back pieces to match the shelf length.
Attach front of shelf with 1-1/4" brad nails and wood glue. For back of shelf, for extra strength, you can attach with 2-1/2" self tapping screws and glue, or use nails.
Cut 2x boards to match the width of your shelf top board.
For 2x3s, set inside the shelf, making sure there is 1/4" gap on top for the 1/4" plywood. Attach from back with glue and 2-1/2" screws and from front with glue and 1-1/4" brad nails. If using 2x4s OR 2x3s are too big to leave the 1/4" gap, turn the 2x board flat side up, and attach set down 1/4" from the top (as done in the video) with screws on the back side and 1-1/4" brad nails on the front side. Place a support about every 12" and one on or near each end. Avoid placing supports where studs in walls are located in the final hanging location. Cut 1/4" plywood with a circular saw or tablesaw. Make sure it easily fits inside the floating shelf. Paint or stain the floating shelf and the 1/4" plywood panel and let dry.
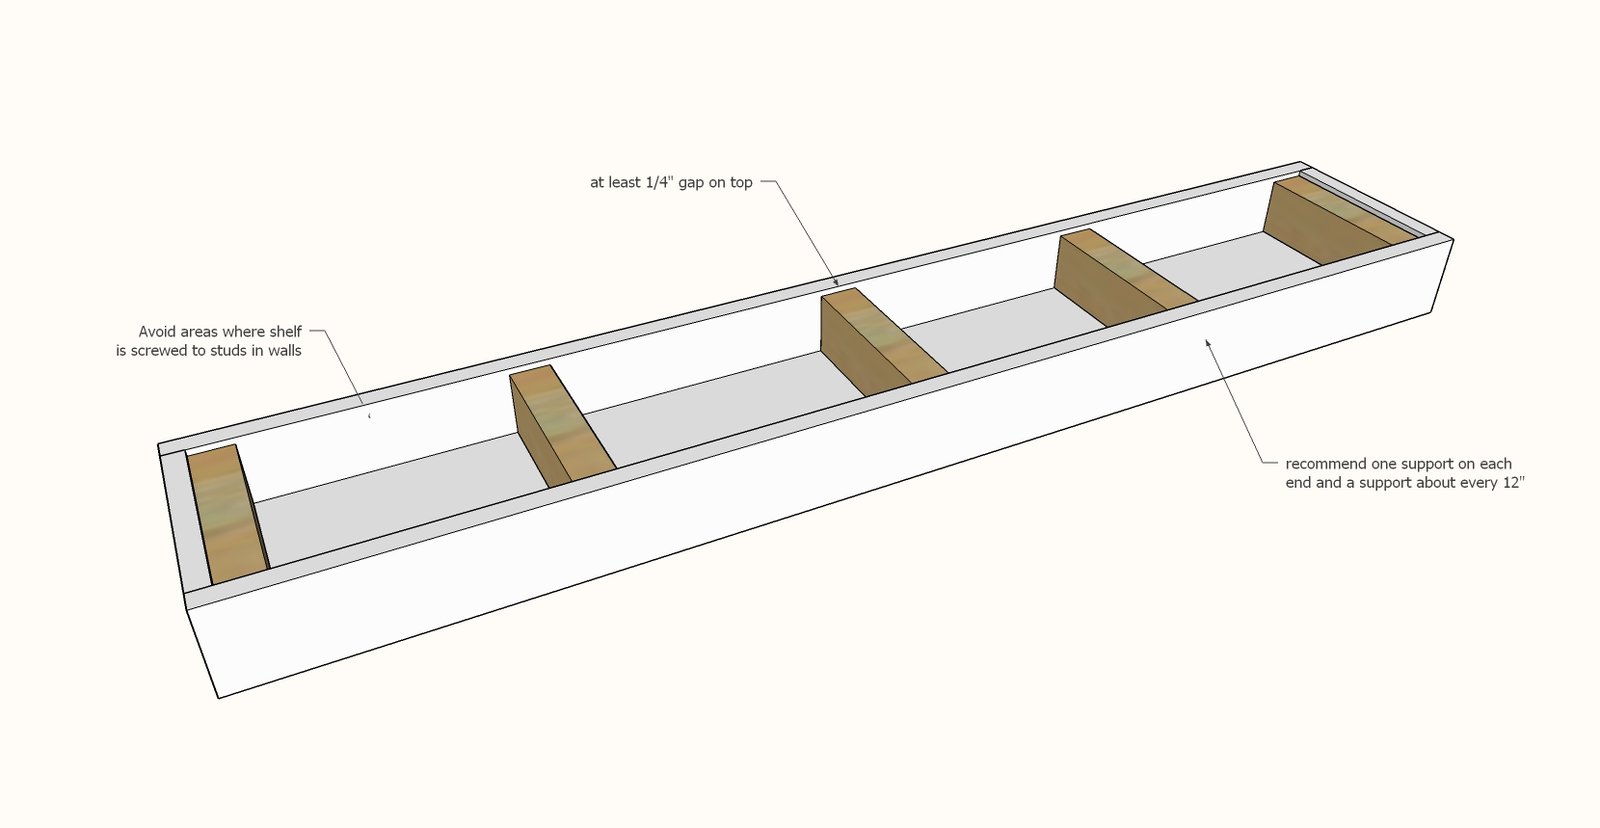
Step 4
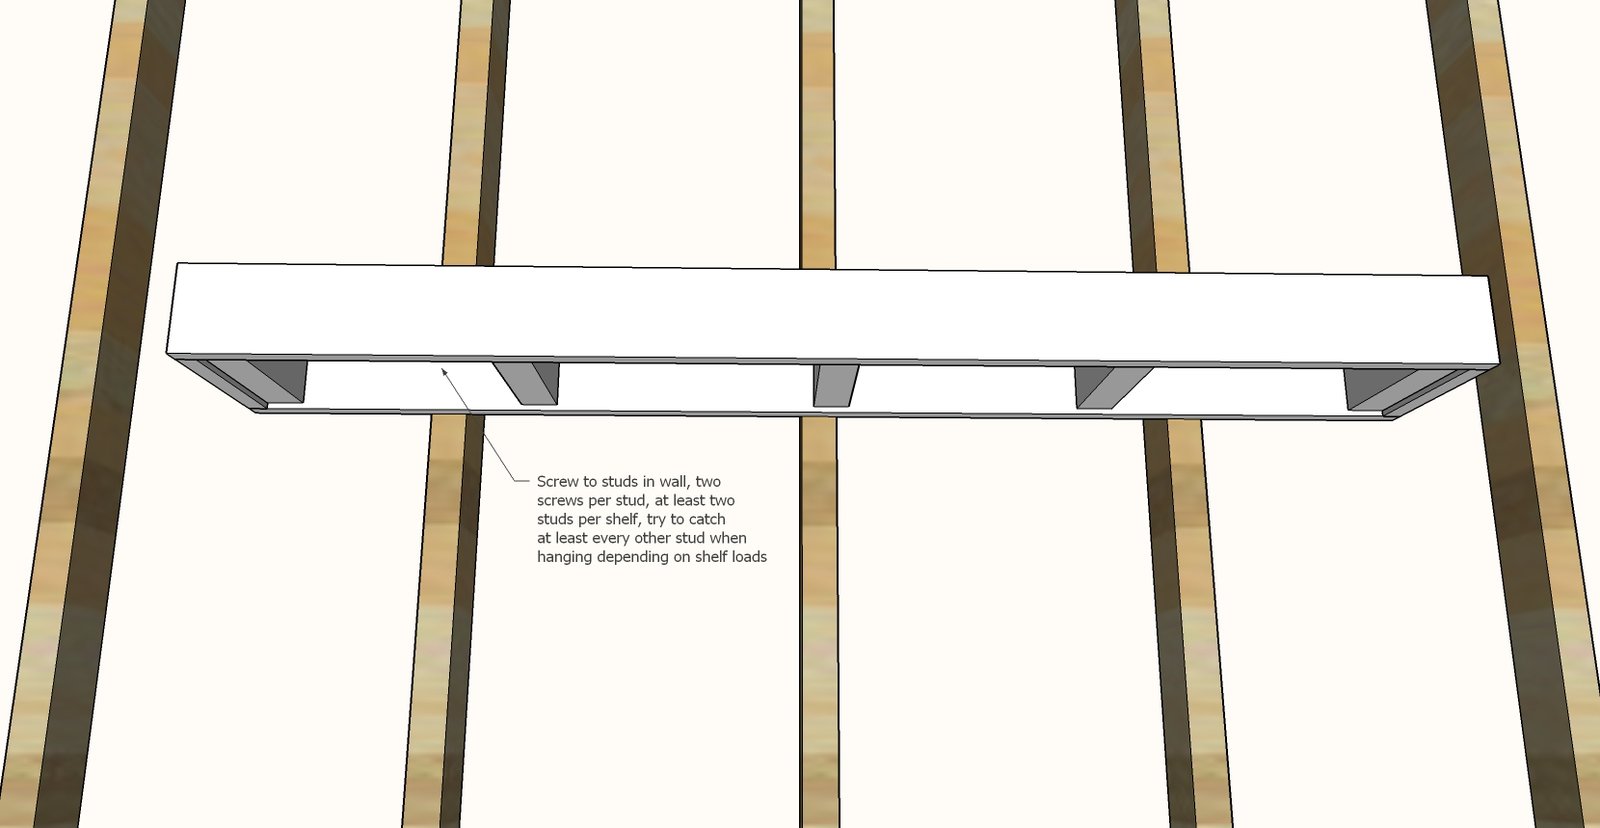
Locate studs in wall and hang the floating shelf through the back 1x4 board into studs in the walls using 2-1/2" or longer self tapping screws. If you are attaching the 1/4" plywood to the bottom, hang the highest shelf first, complete the next step, than hang the next lower shelf. If you are attaching the 1/4" plywood to the top, hange the lowest shelf first, complete the next step, than hang the next higher shelf.
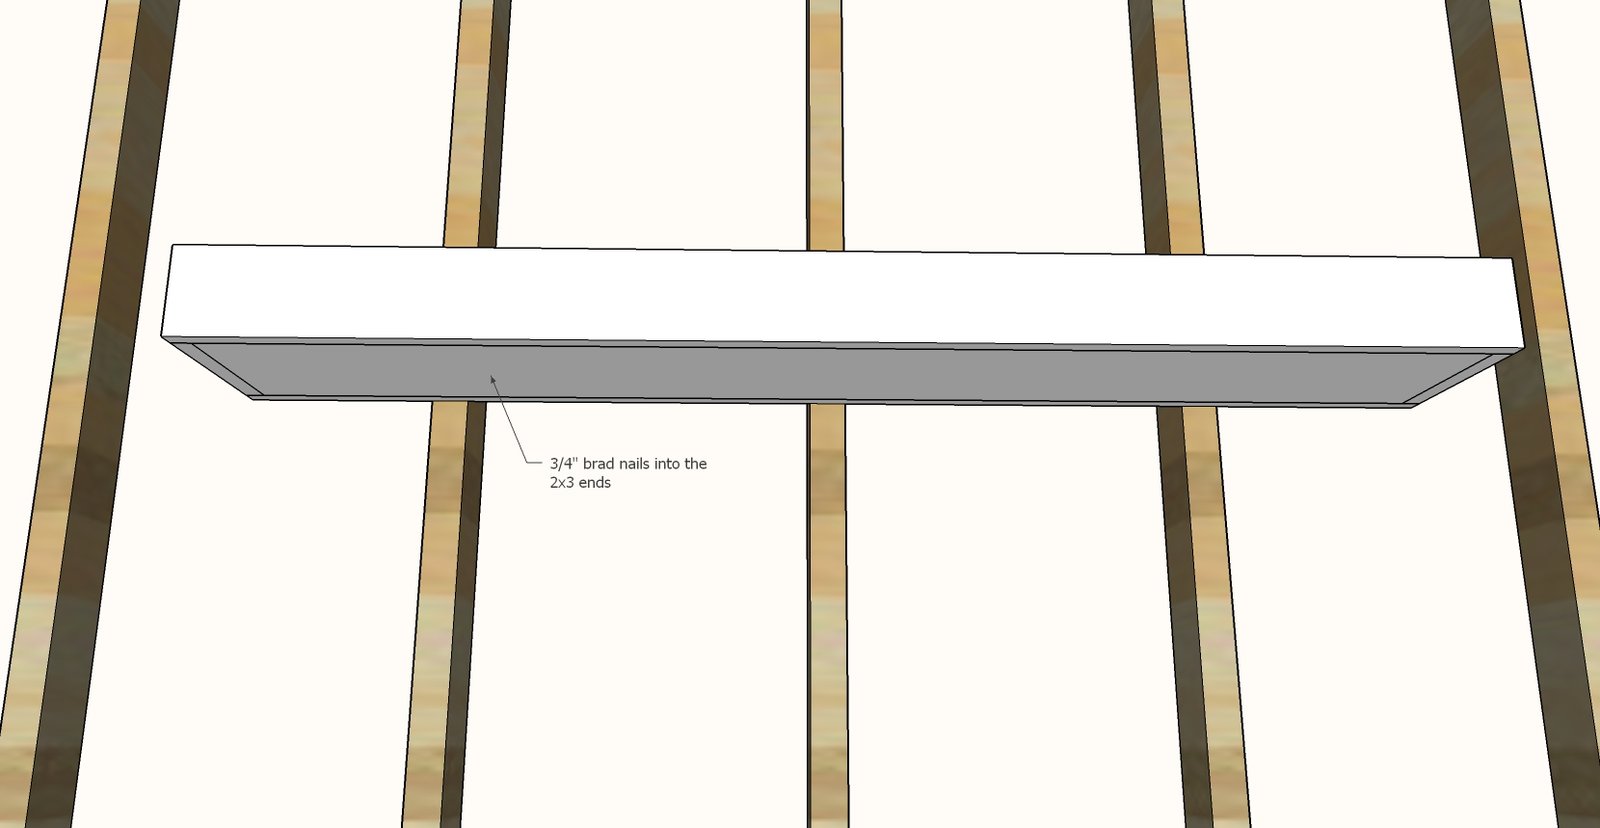
Place the 1/4" plywood panel inside the floating shelf and use the 3/4" nails to secure.
Touch up paint or stain as needed to finish the floating shelf.
Finishing
Sand all surfaces, starting with a medium grit and finishing with fine. Wipe off the dust, fill any holes or gaps with wood filler, and sand smooth once dry. Apply primer if you're painting, then finish with your choice of paint or stain and seal with a durable clear topcoat. For outdoor projects, use exterior-rated primer, paint or stain, and sealer so the piece stands up to the weather.
Source (temporary): https://www.ana-white.com/woodworking-projects/easy-build-floating-shelves