EASY BUILD Lemonade Stand
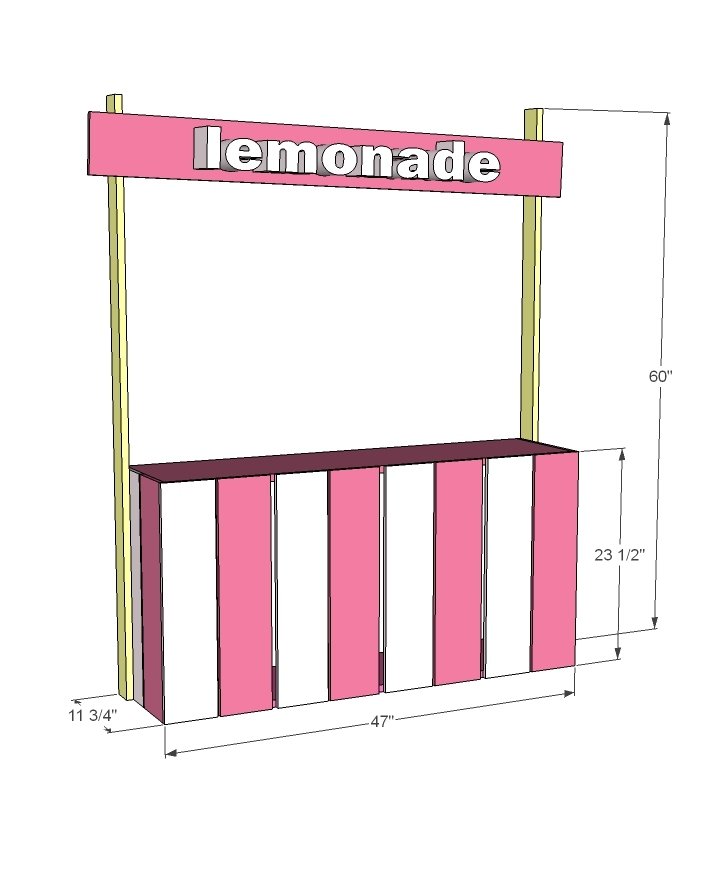
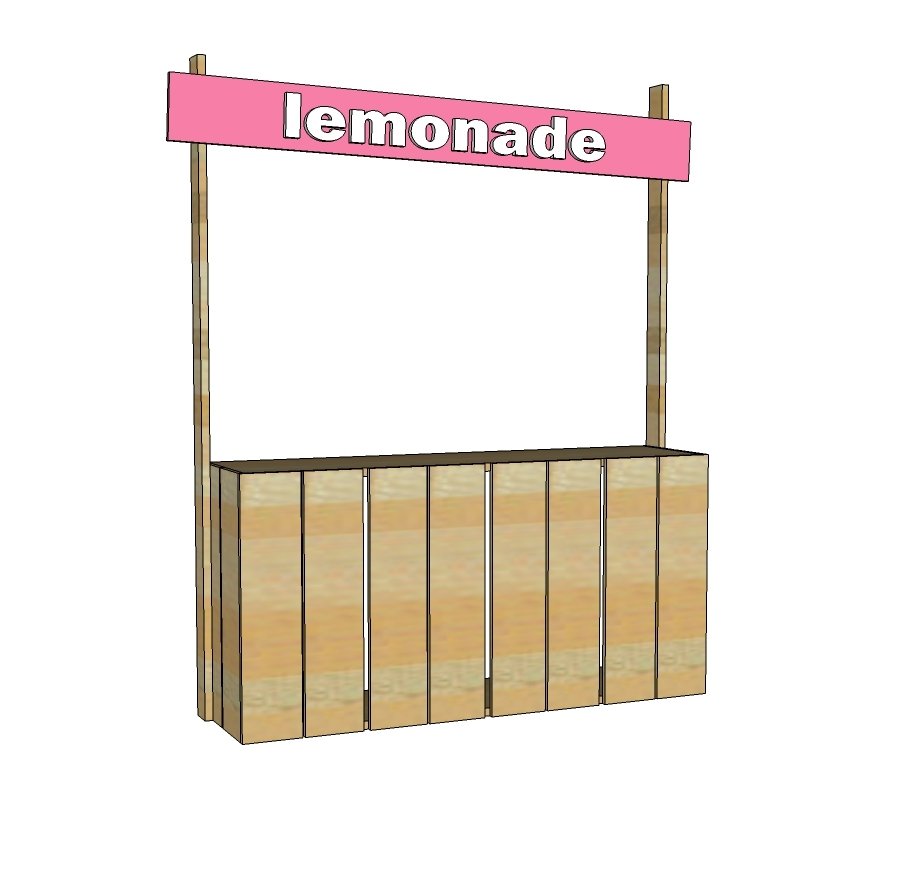
Super easy to build Lemonade Stand uses cedar fence pickets to keep the cost down - We spent about $30 on our lemonade stand. Remove the sign and this lemonade stand stores like a giant crate - so it's easy to transport and put away. Add wheels to the bottom to make it mobile. This is a free DIY project plan and includes step by step diagrams, shopping and cut list from

Specifications
| Project type | Grace's Town |
|---|---|
| Room | Outdoor |
| Style | Children's and Kid's Room Furniture and Toy Plans |
| Difficulty | Starter Projects |
| Estimated cost | $20 - $50 |
Dimensions
Use the size-specific shopping and cut lists below.
Shopping List
- 1 - 1x12 @ 8 feet long
- 5 - 5-1/2" wide x 72" long fence pickets (dog eared are fine)
- 2 -1x3 @ 8' long (furring strips)
- 1-1/2" self tapping star bit screws ( like these ) or use 1-1/2" brad nails and wood glue
Cut List
- 2 - 1x12 @ 46"
- 12 - 5-1/2" wide fence pickets @ 23-1/2"
- 2 - 1x3 @ 60"
Tools
- measuring tape
- pencil
- safety glasses
- circular saw
Step-by-step Instructions
Step 1
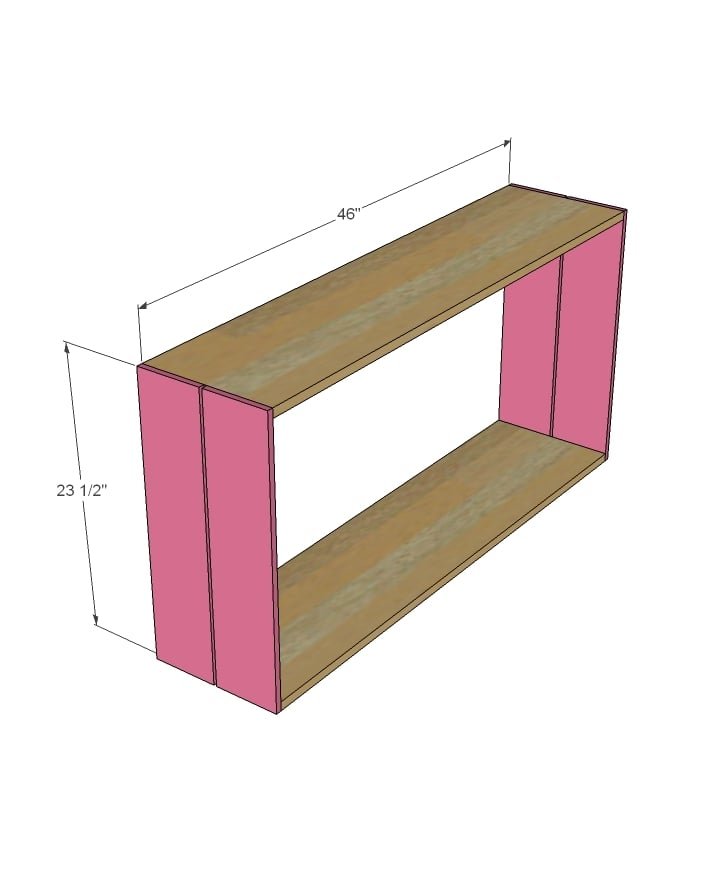
Nail or staple or screw 2 boards to each end of the 1x12s to create a box shape.
Step 2
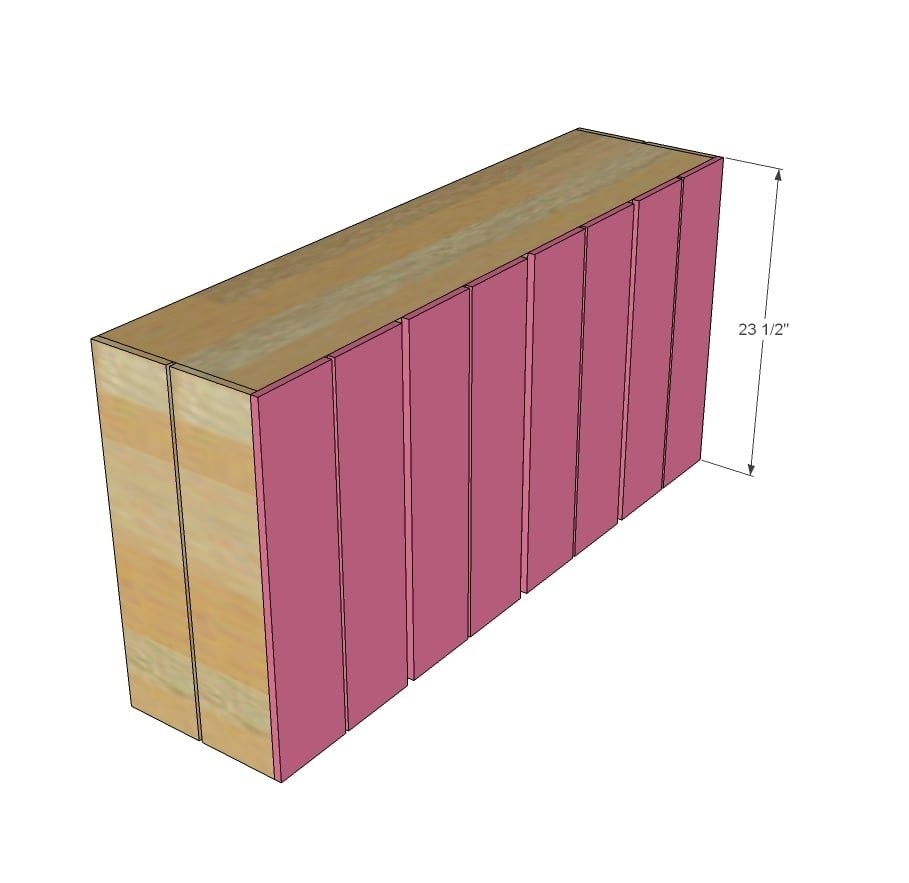
Attach remaining fence picket boards to front.
Step 3
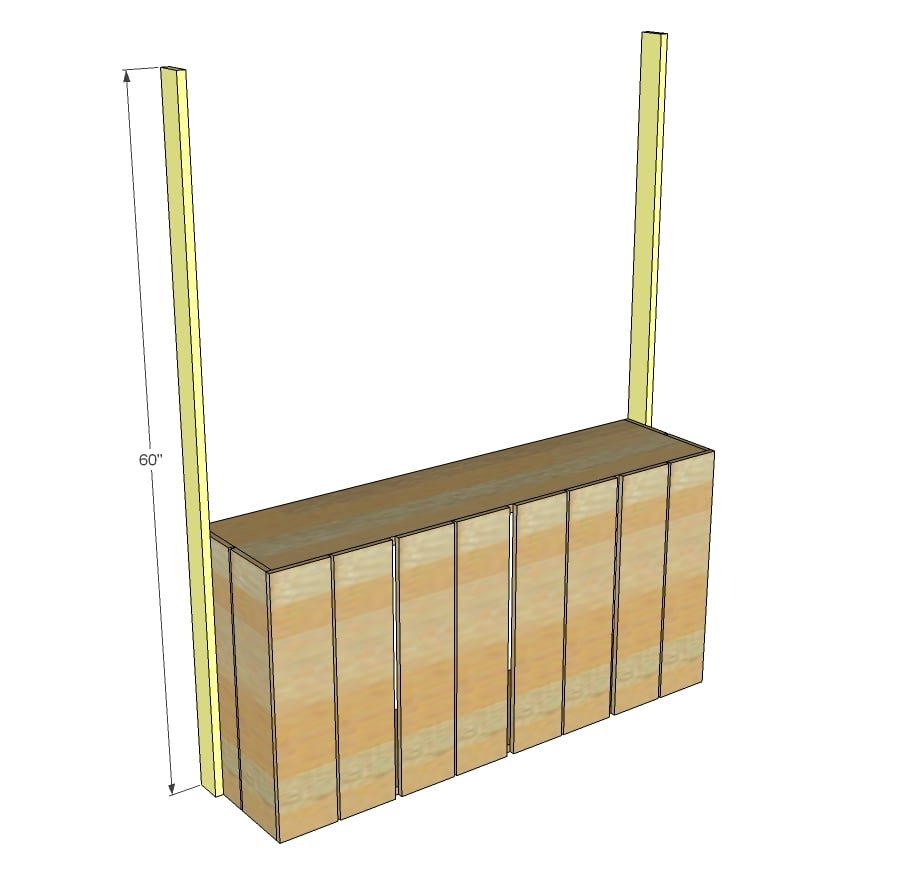
I used screws (removeable for storage) to attach the sign legs to the 1x12 ends.
Step 4
I screwed the top sign to the 1x3s - cutting to fit. I found the sign couldn't fit in my car without unscrewing. I attached at an angle on purpose. I saved the scraps to make the smaller signs.
Finishing
Sand all surfaces, starting with a medium grit and finishing with fine. Wipe off the dust, fill any holes or gaps with wood filler, and sand smooth once dry. Apply primer if you're painting, then finish with your choice of paint or stain and seal with a durable clear topcoat. For outdoor projects, use exterior-rated primer, paint or stain, and sealer so the piece stands up to the weather.
Source (temporary): https://www.ana-white.com/woodworking-projects/easy-build-lemonade-stand