Easy Build Wood Headboard (All Mattress Sizes)
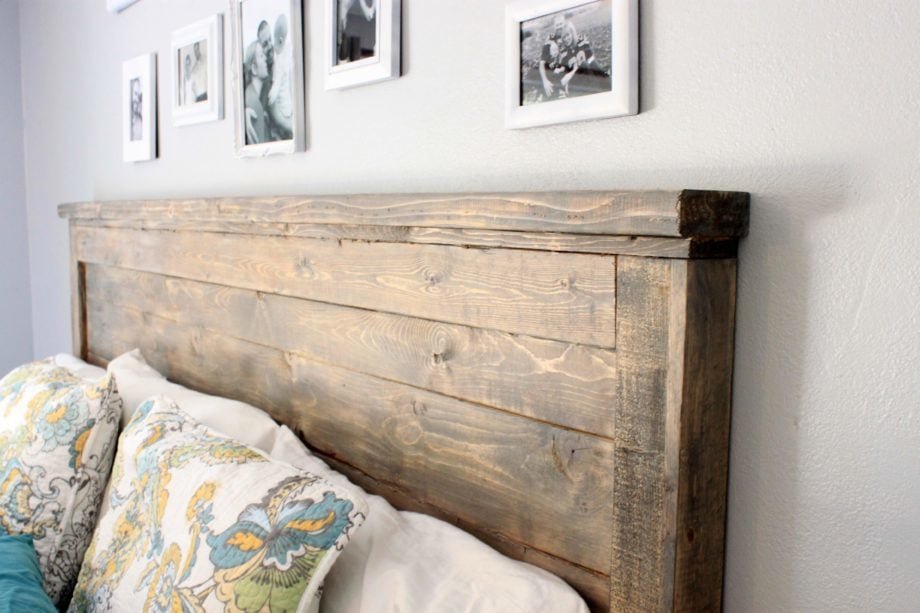
Easy DIY planked wood headboard build - no special tools required! This beautiful headboard gives that wood texture to your bedroom - without costing a fortune or being a huge project. You can use inexpensive pine boards or furring strips. Free step by step
Specifications
| Project type | Headboard |
|---|---|
| Room | Bedroom |
| Style | Farmhouse Furniture |
| Difficulty | Beginner Projects |
| Estimated cost | $20 - $50 |
Dimensions
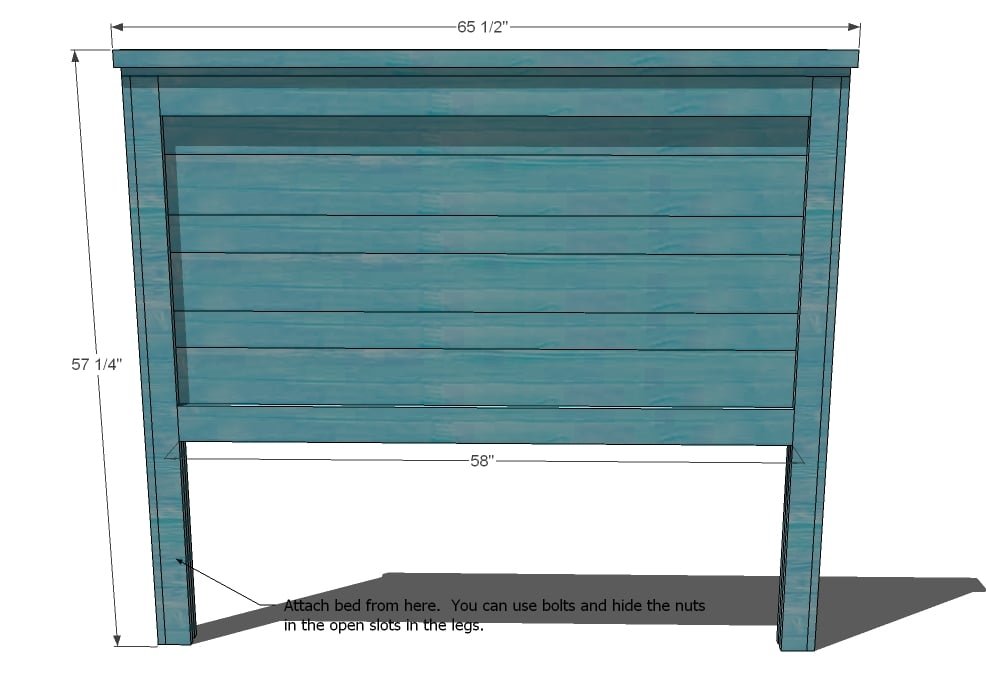
Use the size-specific shopping and cut lists below.
Shopping List
Twin Lumber Shopping List
- 2 – 1×2 – 8′ Length
- 7 – 1×3 – 8′ Length
- 3 – 1×4 – 10′ Length
- 1 – 1×6 – 10′ Length
- 1 – 2×4 – 8′ or Stud Length
Full Shopping List
- 2 – 1×2 – 8′ Length
- 7 – 1×3 – 8′ Length
- 4 - 1×4 – 10′ Length
- 1 – 1×4 – 6′ Length
- 3 – 1×6 – 5′ Length
- 1 – 2×4 – 8′ or Stud Length
Queen Lumber Shopping List
- 2 – 1×2 – 8′ Length
- 7 – 1×3 – 8′ Length
- 4 - 1×4 – 10′ Length
- 1 – 1×4 – 6′ Length
- 3 – 1×6 – 5′ Length
- 1 – 2×4 – 8′ or Stud Length
Standard King Shopping List
- 2 – 1×2 – 8′ Length
- 7 – 1×3 – 8′ Length
- 9 - 1×4 – 8′ Length
- 3 - 1×6 – 8′ Length
- 1 – 2×4 – 8′ or Stud Length
California King Lumber for California King
- 2 – 1×2 – 8′ Length
- 7 – 1×3 – 8′ Length
- 5 - 1×4 – 12′ Length
- 4 - 1×6 – 6′ Length
- 1 – 2×4 – 8′ or Stud Length
Cut List
Cut List for Twin
- 6 - 1×3 @ 55″ (Fronts and backs of Legs)
- 2 – 1×2 @ 55″ (Inside of Legs)
- 5 – 1×4 @ 39″ (Panel Pieces)
- 3 – 1×6 @ 39″ (Panel Pieces)
- 4 – 1×4 @ 37″ (Panel Trim, Front and Back)
- 1 – 1×3 @ 43 1/2″ (Top Trim)
- 1 – 2×4 @ 44 1/2″ (Top of Headboard)
Cut List for Full
- 6 - 1×3 @ 55″ (Fronts and backs of Legs)
- 2 – 1×2 @ 55″ (Inside of Legs)
- 5 – 1×4 @ 54″ (Panel Pieces)
- 3 – 1×6 @ 54″ (Panel Pieces)
- 4 – 1×4 @ 52″ (Panel Trim, Front and Back)
- 1 – 1×3 @ 58 1/2″ (Top Trim)
- 1 – 2×4 @ 59 1/2″ (Top of Headboard)
Cut List for Queen
- 6 - 1×3 @ 55″ (Fronts and backs of Legs)
- 2 – 1×2 @ 55″ (Inside of Legs)
- 5 – 1×4 @ 60″ (Panel Pieces)
- 3 – 1×6 @ 60″ (Panel Pieces)
- 4 – 1×4 @ 58″ (Panel Trim, Front and Back)
- 1 – 1×3 @ 64 1/2″ (Top Trim)
- 1 – 2×4 @ 65 1/2″ (Top of Headboard)
Cut List for Standard King
- 6 – 1×3 @ 55″ (Fronts and backs of Legs)
- 2 – 1×2 @ 55″ (Inside of Legs)
- 5 – 1×4 @ 76″ (Panel Pieces)
- 3 – 1×6 @ 76″ (Panel Pieces)
- 4 – 1×4 @ 74″ (Panel Trim, Front and Back)
- 1 – 1×3 @ 80 1/2″ (Top Trim) (measure before cutting)
- 1 – 2×4 @ 81 1/2″ (Top of Headboard) (measure before cutting)
Cut List for California King
- 6 – 1×3 @ 55″ (Fronts and backs of Legs)
- 2 – 1×2 @ 55″ (Inside of Legs)
- 5 – 1×4 @ 72″ (Panel Pieces)
- 3 – 1×6 @ 72″ (Panel Pieces)
- 4 – 1×4 @ 70″ (Panel Trim, Front and Back)
- 1 – 1×3 @ 76 1/2″ (Top Trim) (measure to fit)
- 1 – 2×4 @ 77 1/2″ (Top of Headboard) (measure to fit)
Tools
- measuring tape
- square
- pencil
- safety glasses
- hearing protection
- circular saw
- nailer
- sander
Step-by-step Instructions
Step 1
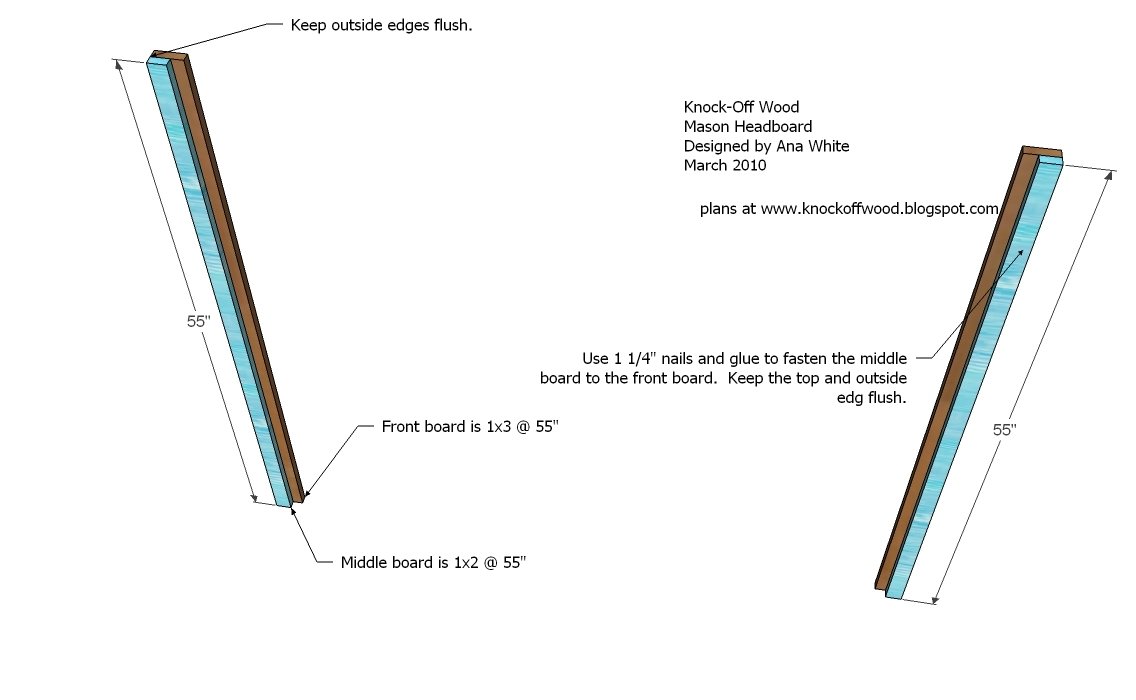
Legs. Begin building the legs by fastening the 1×2 middle piece to the 1×3 front leg piece, as shown above. To hide your nail holes, fasten for the 1×2 board into the back side of the 1×3 board. Keep outside edges flush.
Step 2
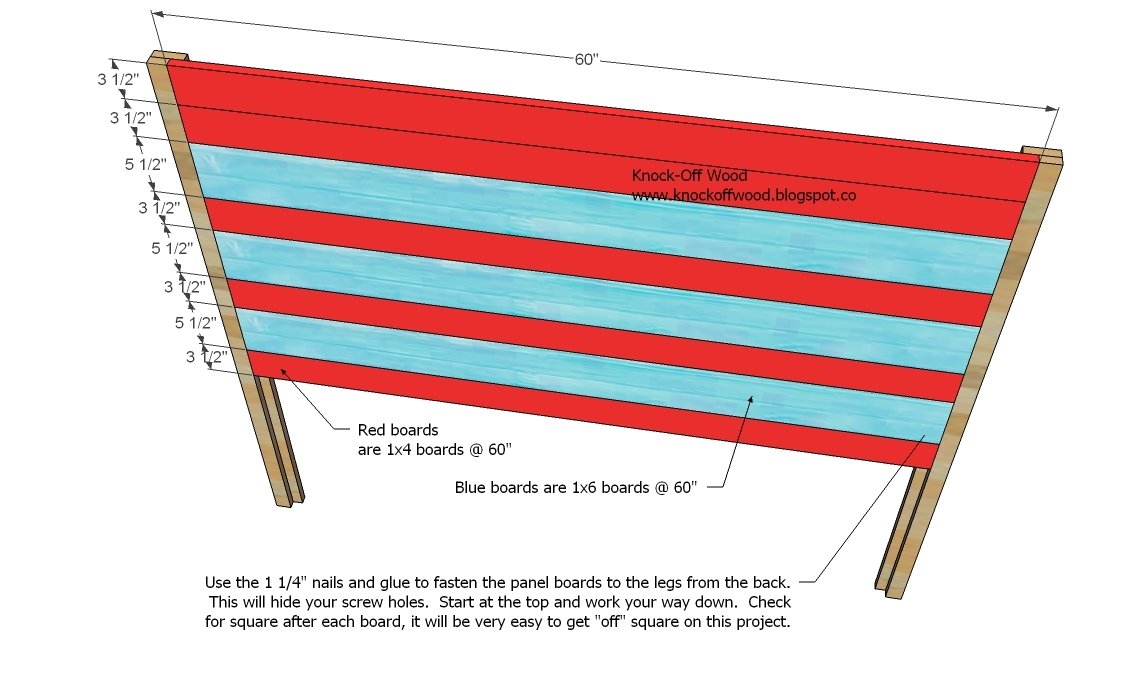
Panel Pieces. Starting on the top, fasten the panel pieces as shown above. The red pieces are 1×4 boards, the blue are 1×6 boards. Use 1 1/4″ nails and glue. Check for square. Hide your nail holes as you did in step 1.
Step 3
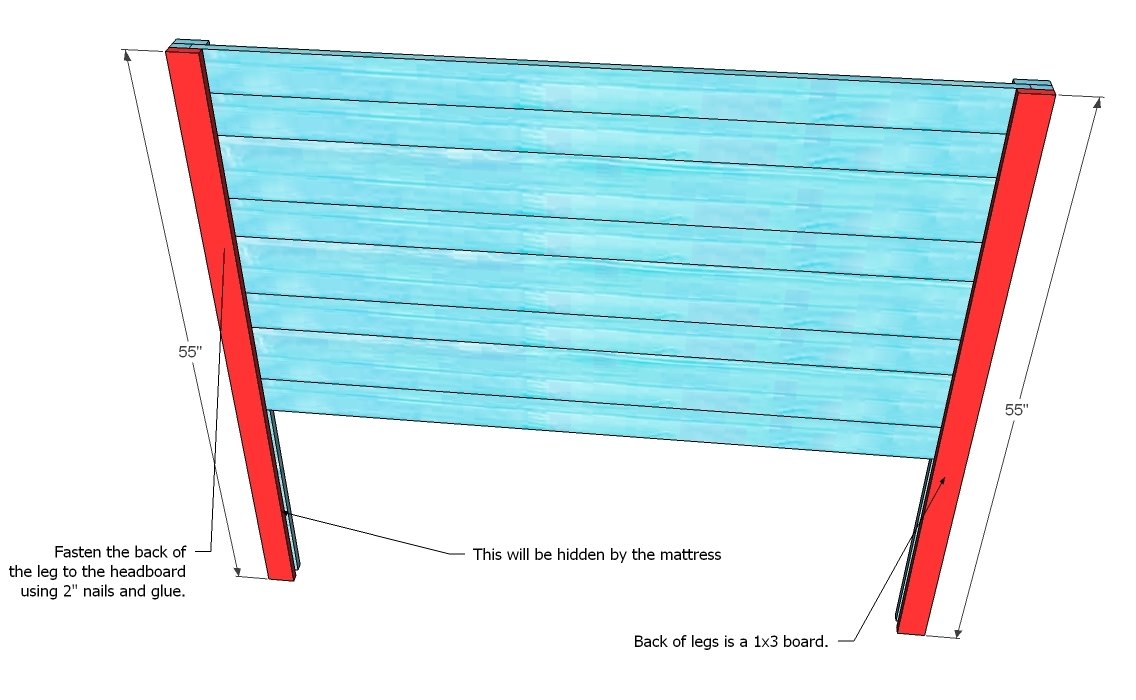
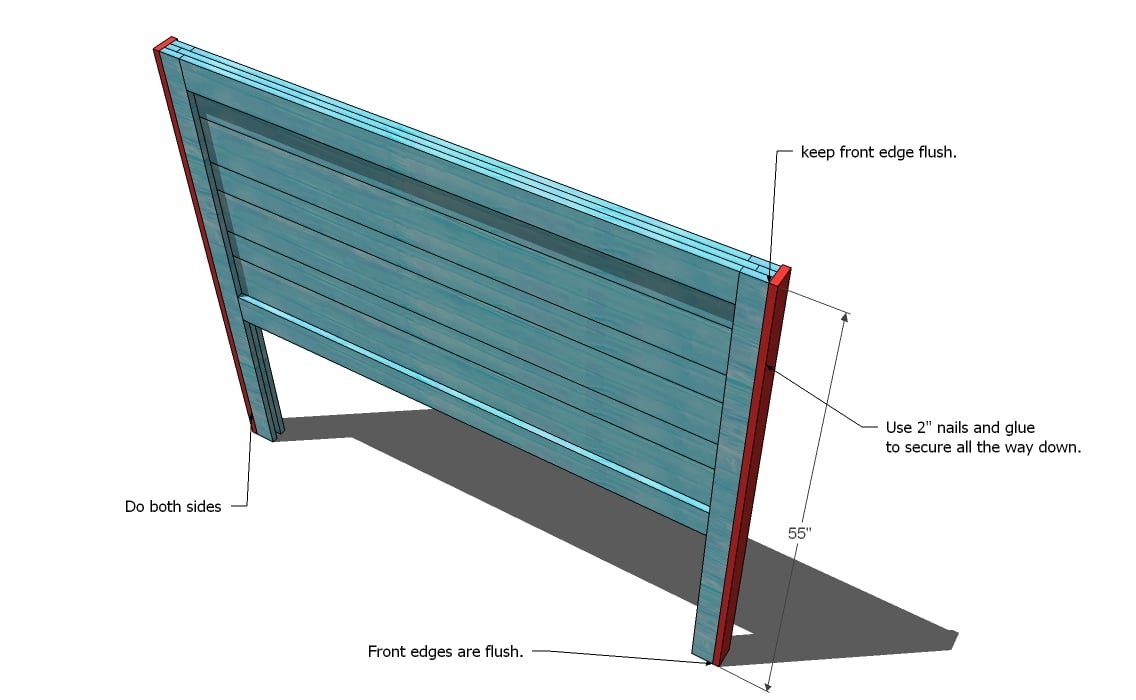
Back of Legs. Use 2″ nails and glue to fasten the back of the legs in place. Fasten to the panel pieces and the middle leg piece. Keep outside edges flush.
Step 4
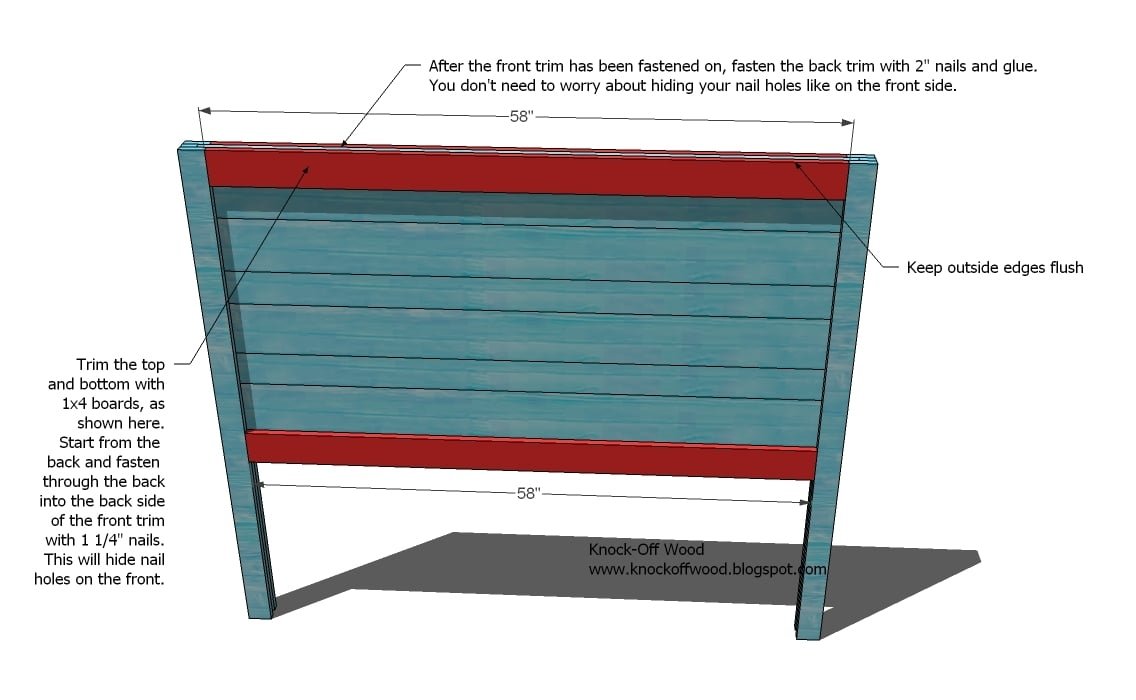
Trim Pieces. Start by fastening the front trim pieces by using 1 1/4″ nails and nailing through the back into the back edge of the front trim. This will hide your nail holes. Then fasten the back trim in place using 2″ nails and glue.
Step 5
Step 6
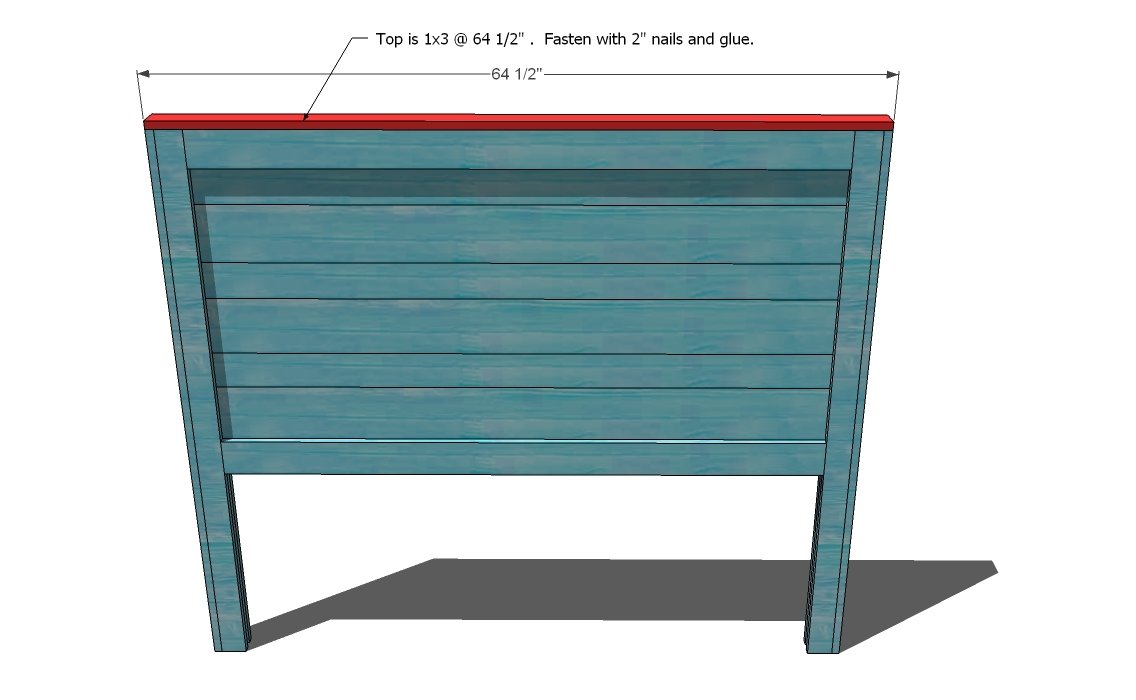
Top Trim. As shown above, measure and cut your top trim piece. The distance will be the overall width of the headboard at this step. Keeping the top trim flush with the outer leg and the front of the headboard, use 2″ nails and glue to fasten in place.
Step 7
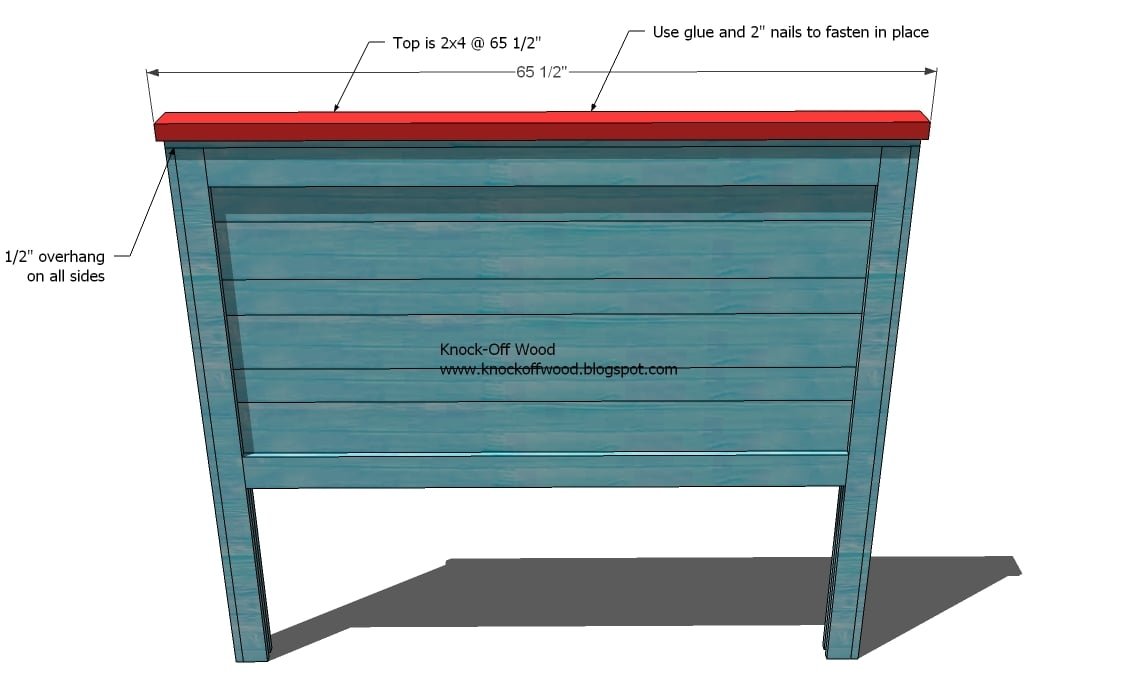
Top of Headboard. Cut the top of the headboard piece 1″ longer than the trim piece from step 6. Mark 1/2″ in from all sides. Center on top of the headboard and fasten in place with glue and 2″ nails.
Step 8
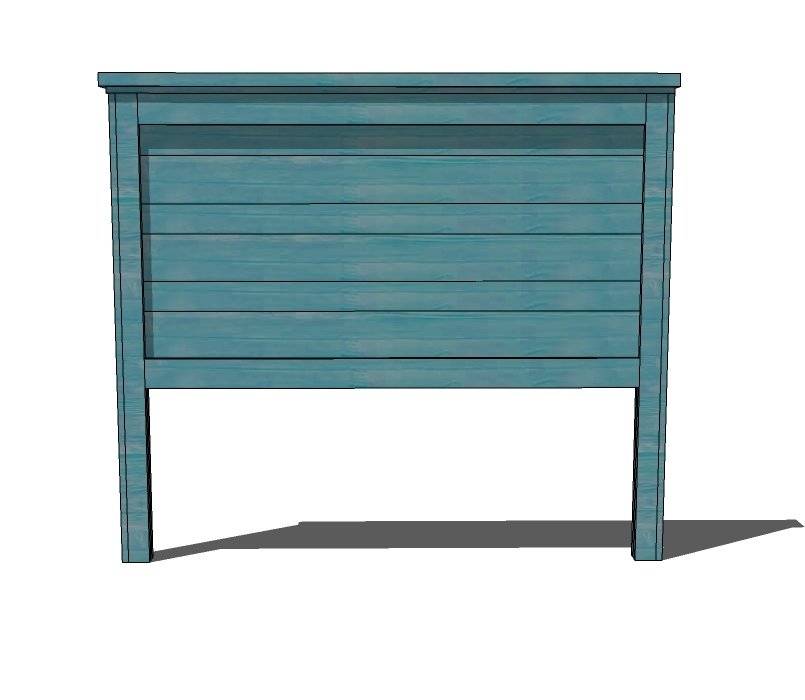
Finishing. Fill any visible nail holes with wood filler and sand and finish as desired. A bed frame can be attached by drilling holes in the fronts of the legs, and using bolts and nuts inserted in the slots open in the insides of the legs.
Finishing
Sand all surfaces, starting with a medium grit and finishing with fine. Wipe off the dust, fill any holes or gaps with wood filler, and sand smooth once dry. Apply primer if you're painting, then finish with your choice of paint or stain and seal with a durable clear topcoat. For outdoor projects, use exterior-rated primer, paint or stain, and sealer so the piece stands up to the weather.
Source (temporary): https://www.ana-white.com/woodworking-projects/easy-build-wood-headboard-all-mattress-sizes