Easy DIY Kitchen Cabinet Tray Dividers
Turn any kitchen cabinet into organized vertical storage for baking sheets, cutting boards, serving trays, and muffin tins. This simple custom-fit insert uses 1/4-inch plywood and common 1x boards, so you can size every divider to your cabinet and the items you need to store.
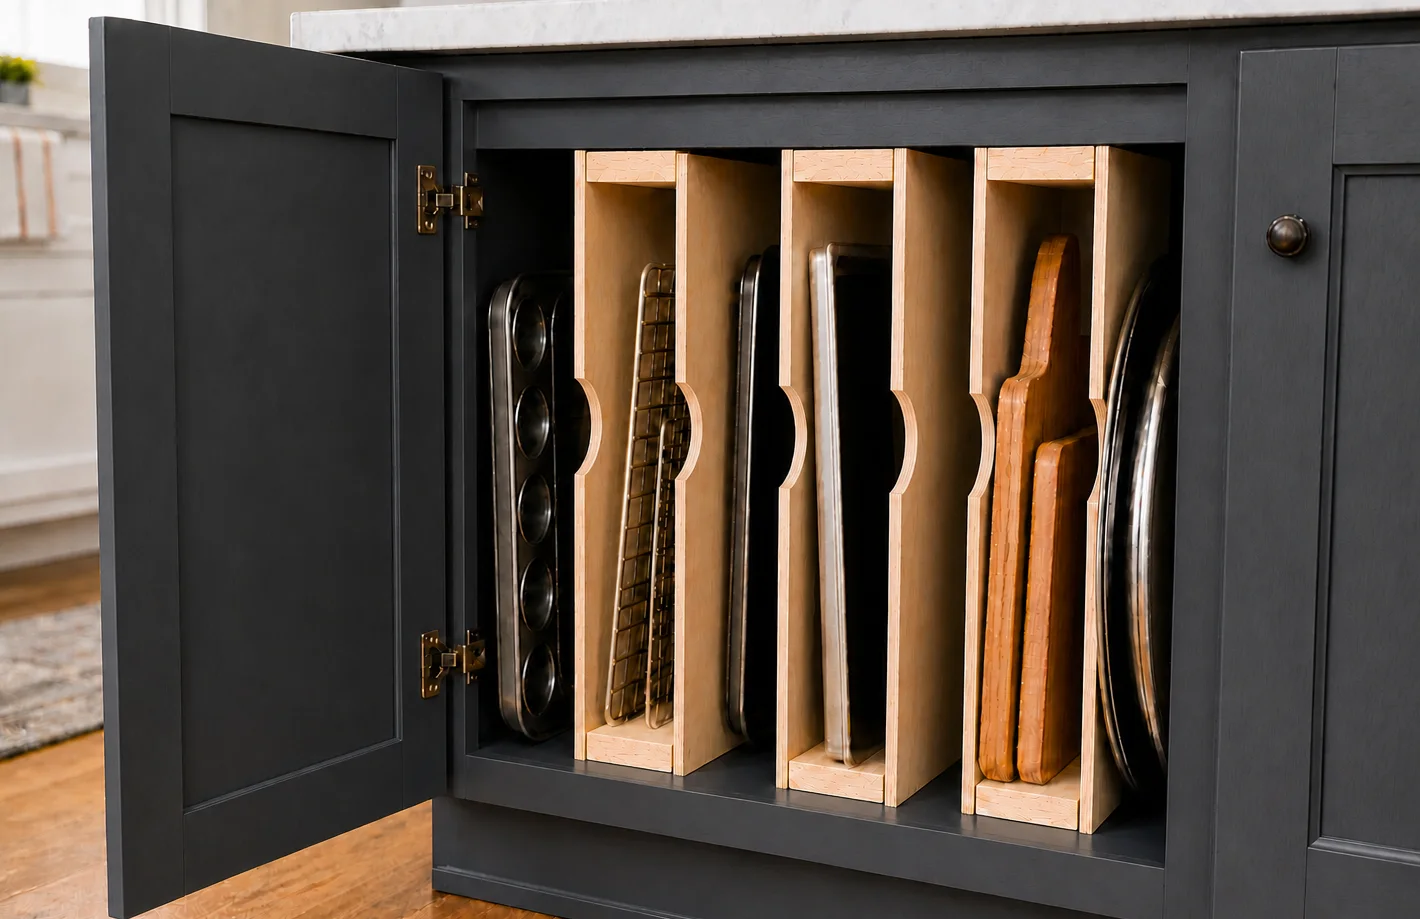
Specifications
| Project type | Kitchen Cabinet Plan, Accessories and Serving |
|---|---|
| Room | kitchen |
| Style | Simple |
| Difficulty | Beginner |
| Estimated cost | $10–$25 |
| Build time | About 1–2 hours |
Dimensions
Use the size-specific shopping and cut lists below.
Shopping List
1/4-inch plywood (6 mm plywood), enough for two sides per divider
1x3, 1x4, or 1x6 boards for the divider tops and bottoms
1-1/4-inch brad nails
Wood glue
Optional: screws for securing the completed dividers inside the cabinet
Optional: removable mounting strips if you do not want to screw into the cabinet
Cut List
CUT AS YOU GO TO FIT YOUR CABINET
For each divider:
2 plywood sides: cut to the desired divider height x the clear inside depth of the cabinet
2 pieces of 1x3, 1x4, or 1x6: cut to the overall desired depth of the divider
Measure your cabinet interior before cutting. Test-fit the first divider before cutting parts for additional dividers. The nominal 1x board width determines the finished slot width.
Tools
- Tape measure
- Pencil
- Speed square
- Circular saw
- Table saw
- Nail gun
- Drill
- Sander
- Clamps
Step-by-step Instructions
Measure the Cabinet and Plan the Dividers
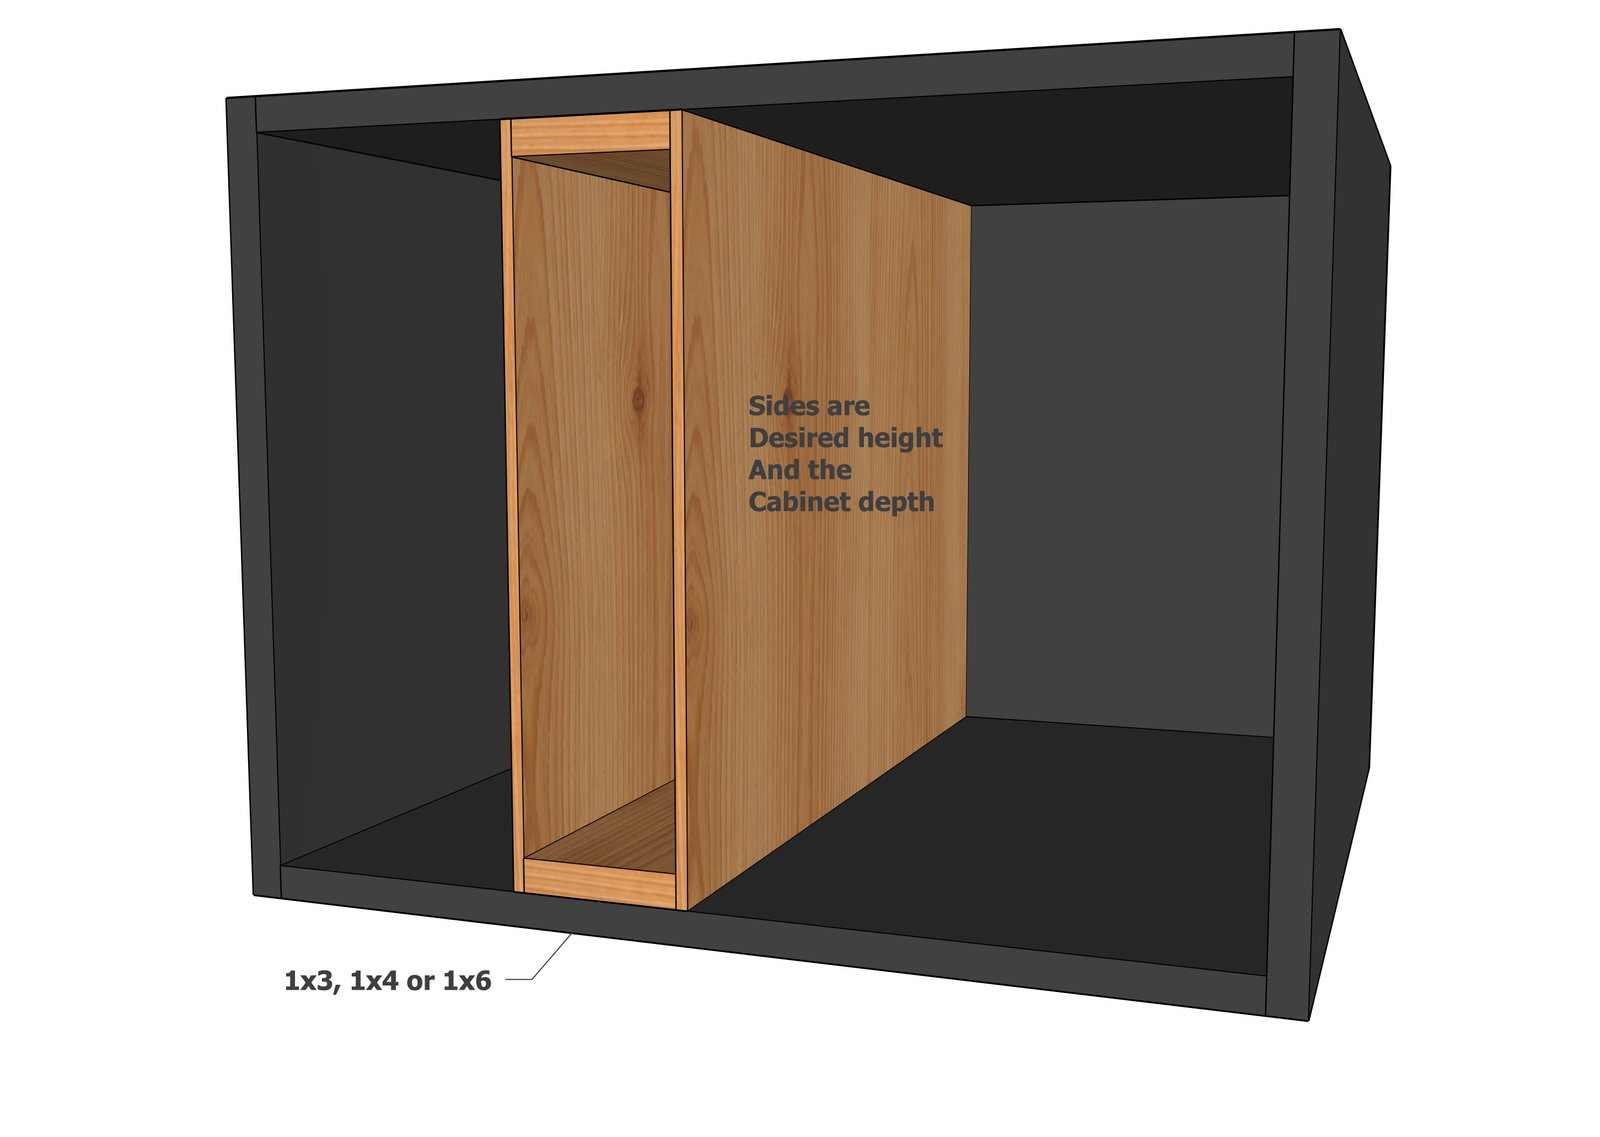
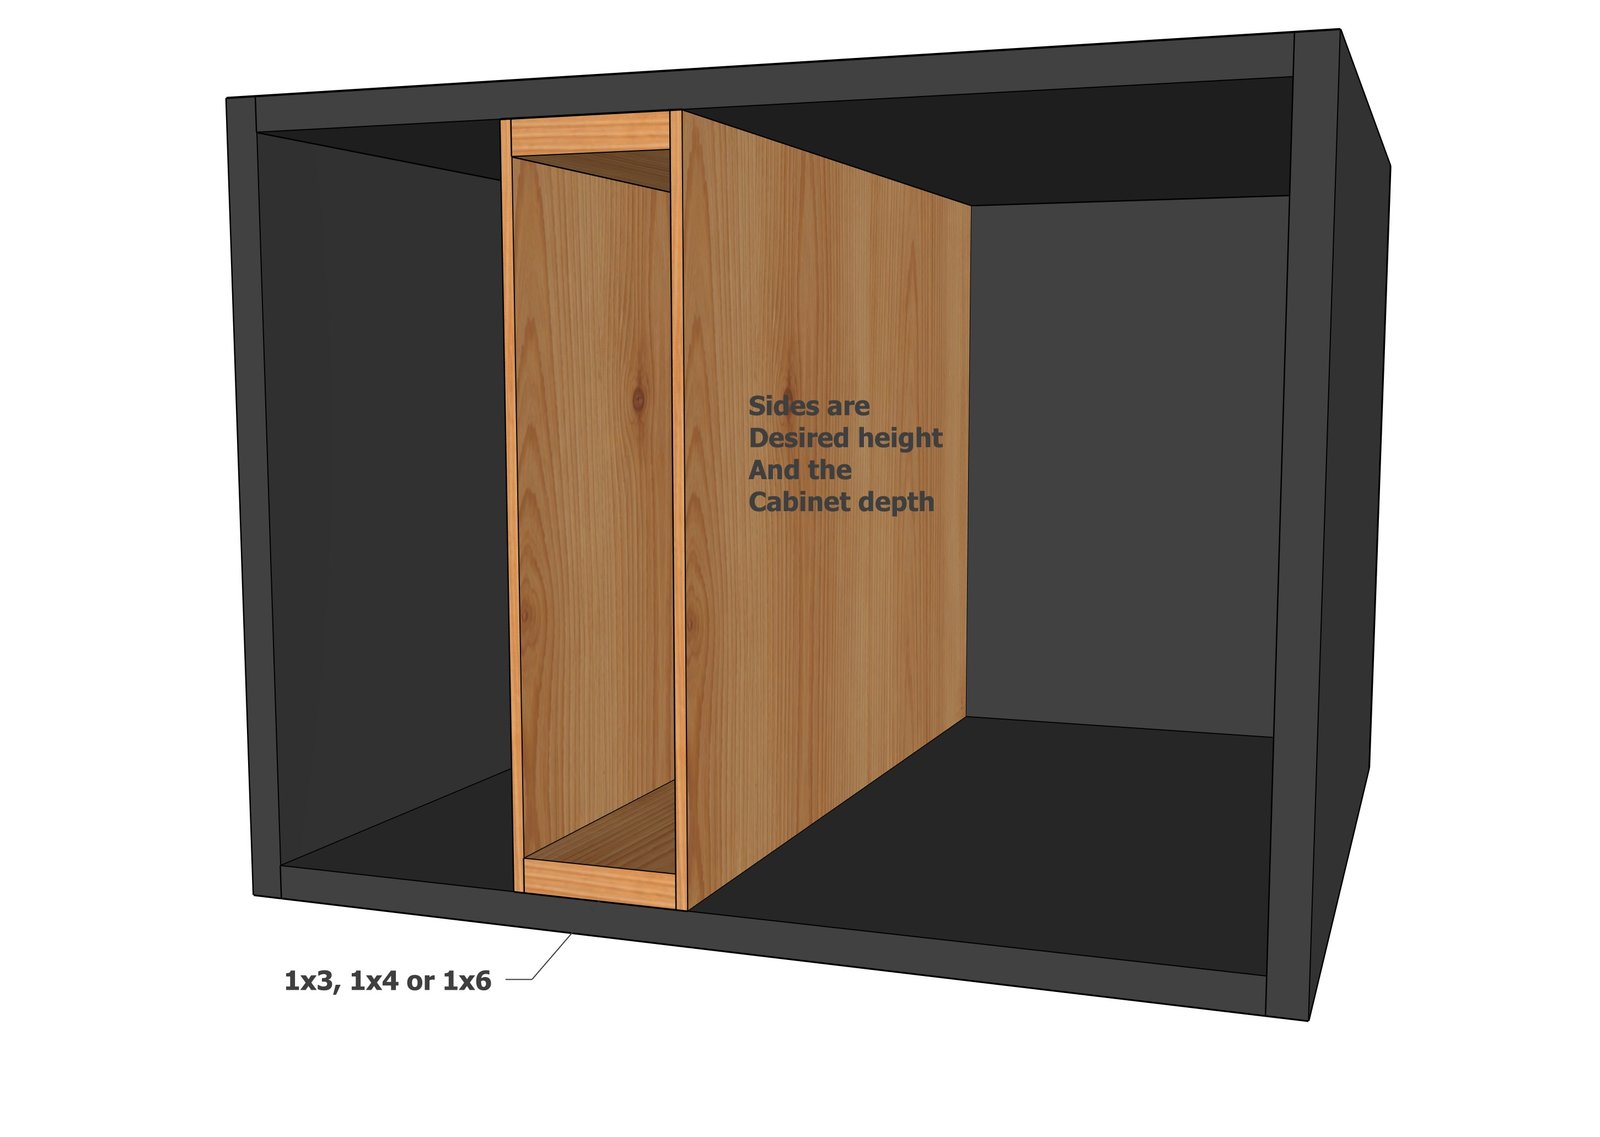
Measure the clear inside height and depth of the cabinet. Decide how tall you want the dividers and how many vertical storage slots you need. Choose a 1x3, 1x4, or 1x6 based on the desired width of each divider assembly. Measure in several places and plan to cut as you go.
Build Each Divider Assembly
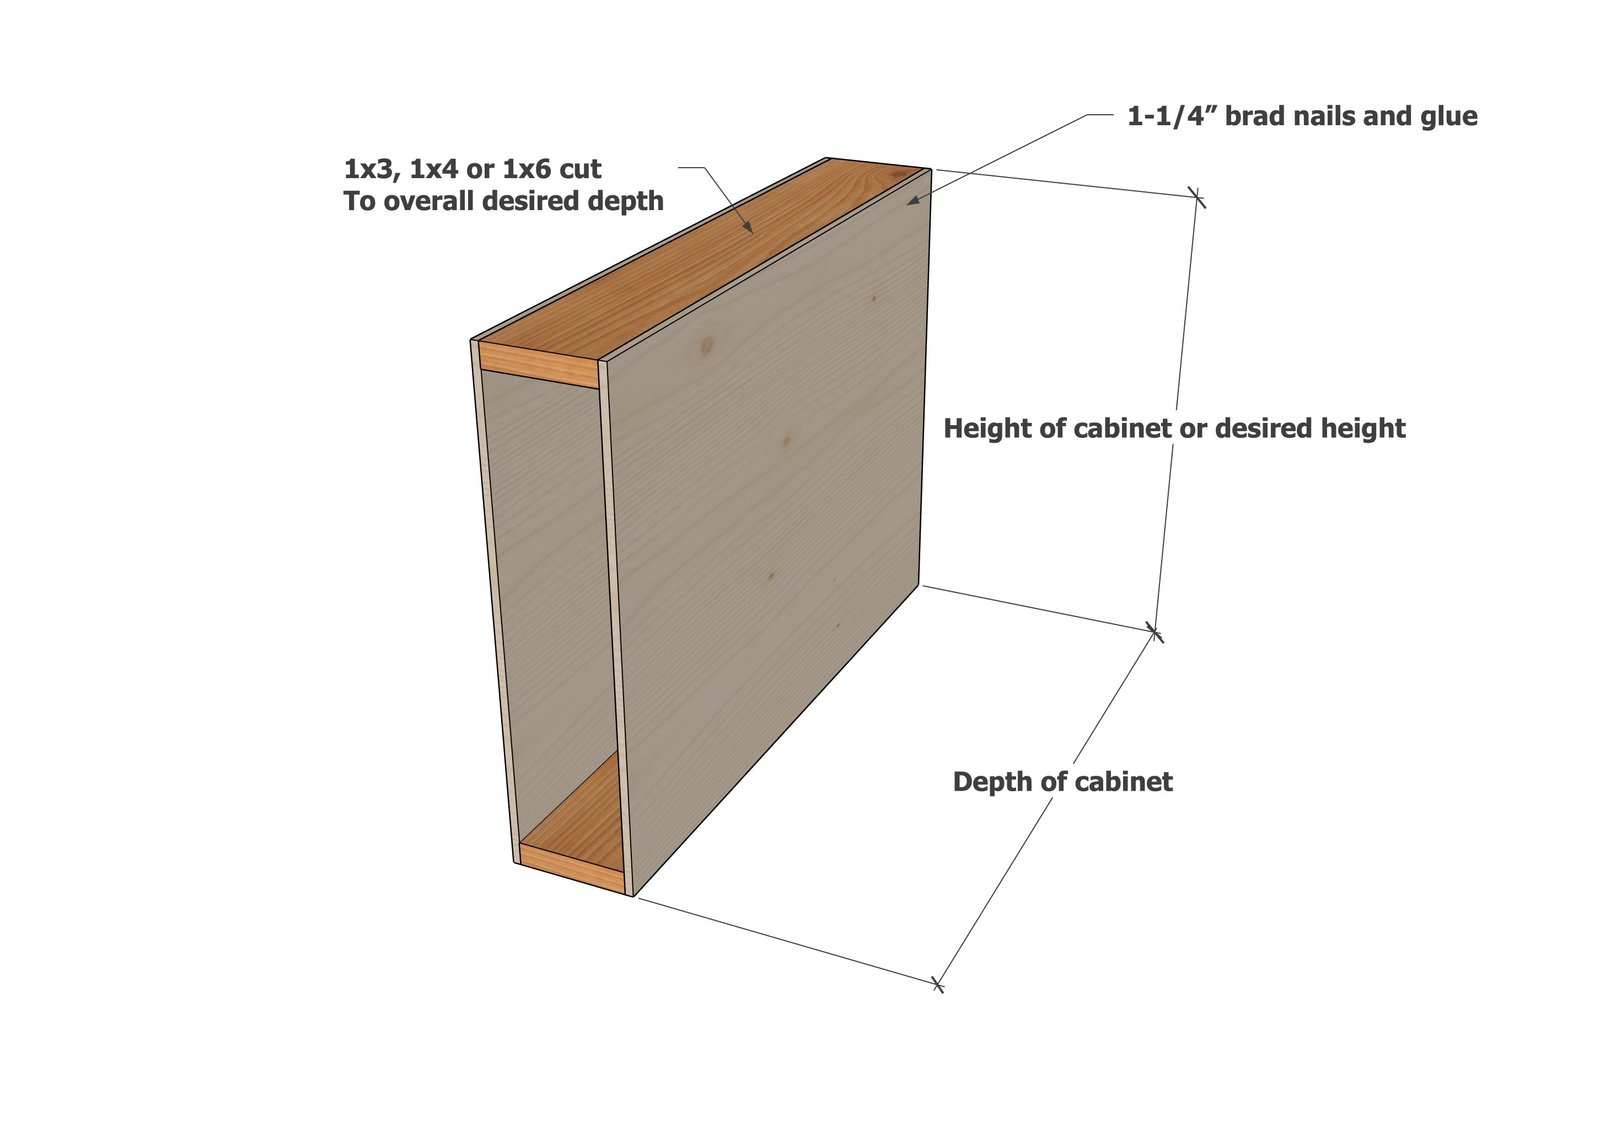
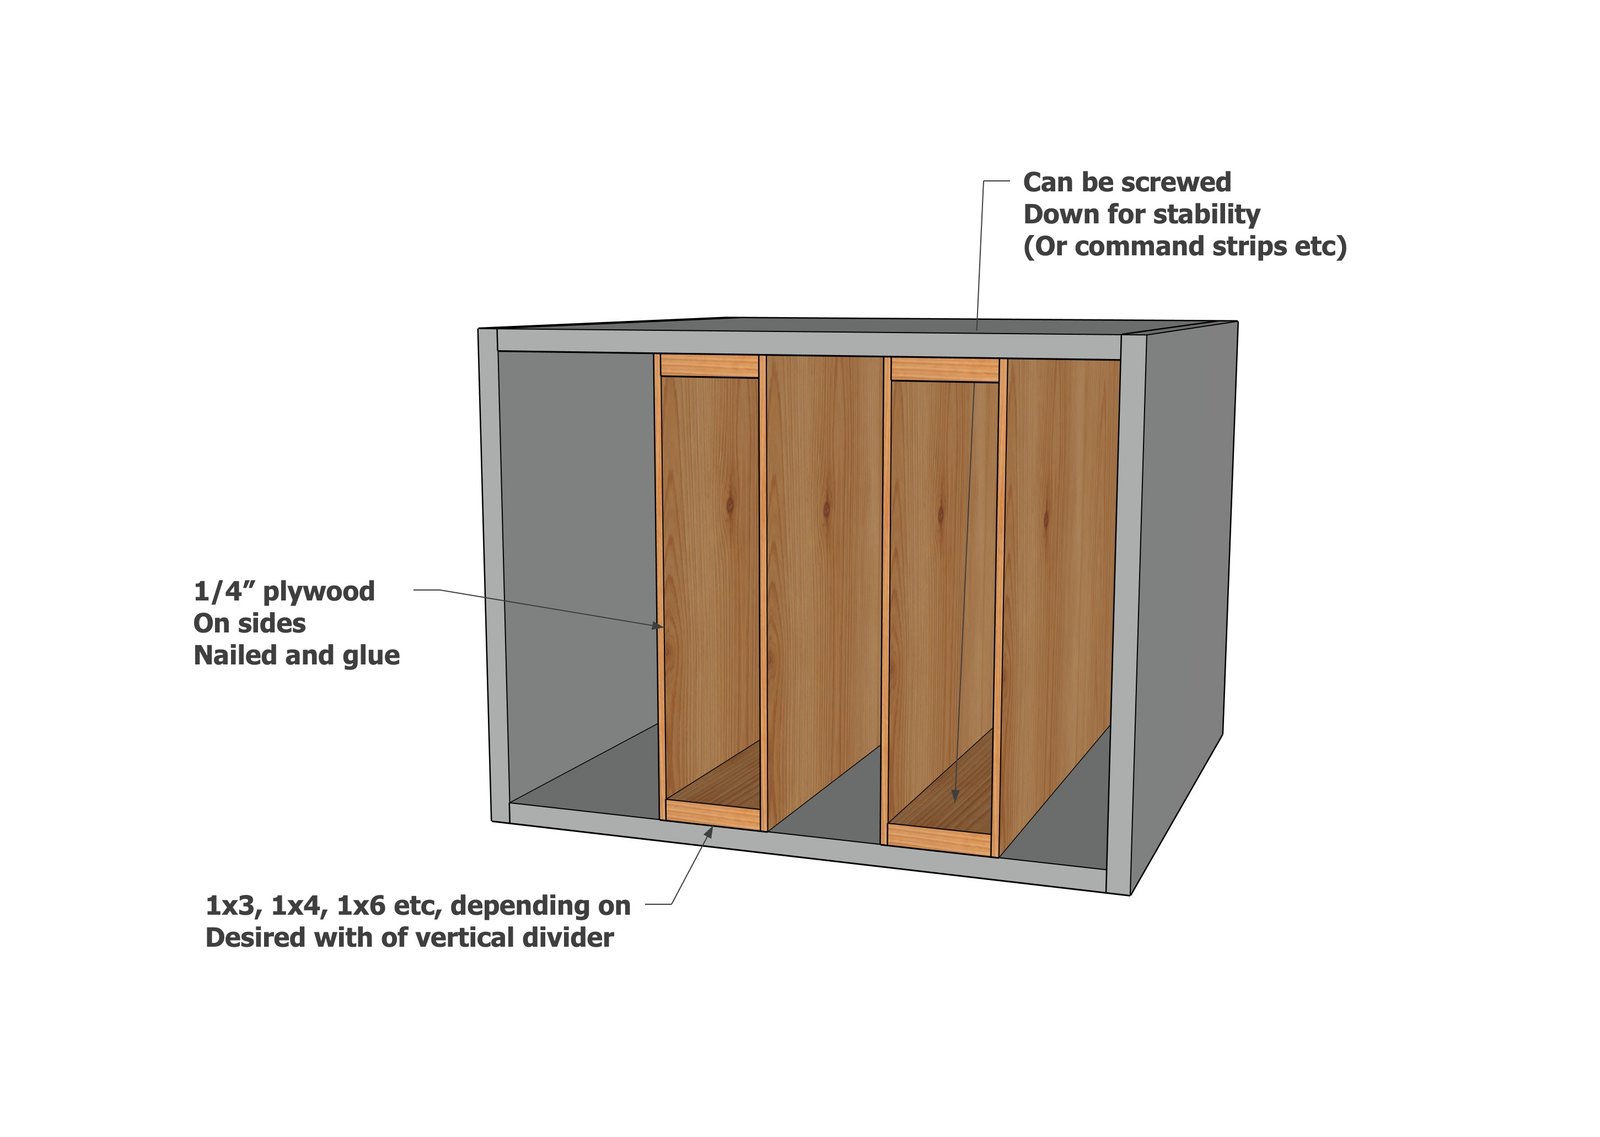
Cut two 1/4-inch plywood sides to the desired height and the clear inside depth of the cabinet. Cut the top and bottom 1x boards to the overall desired divider depth. Apply wood glue, align the plywood sides flush with the edges of the 1x boards, and fasten with 1-1/4-inch brad nails. Check that the assembly is square before the glue dries.
Install and Space the Dividers
Place the completed divider assemblies inside the cabinet and test them with the trays, baking sheets, or cutting boards you plan to store. Adjust the spacing until everything is easy to slide in and remove. Secure the dividers through the cabinet top or bottom with screws for maximum stability, or use removable mounting strips if you prefer a nonpermanent installation.
Finishing
Sand all surfaces, starting with a medium grit and finishing with fine. Wipe off the dust, fill any holes or gaps with wood filler, and sand smooth once dry. Apply primer if you're painting, then finish with your choice of paint or stain and seal with a durable clear topcoat. For outdoor projects, use exterior-rated primer, paint or stain, and sealer so the piece stands up to the weather.
Source (temporary): https://www.ana-white.com/woodworking-projects/easy-diy-kitchen-cabinet-tray-dividers