Easy DIY Plant Stand or Beverage Bucket Stand
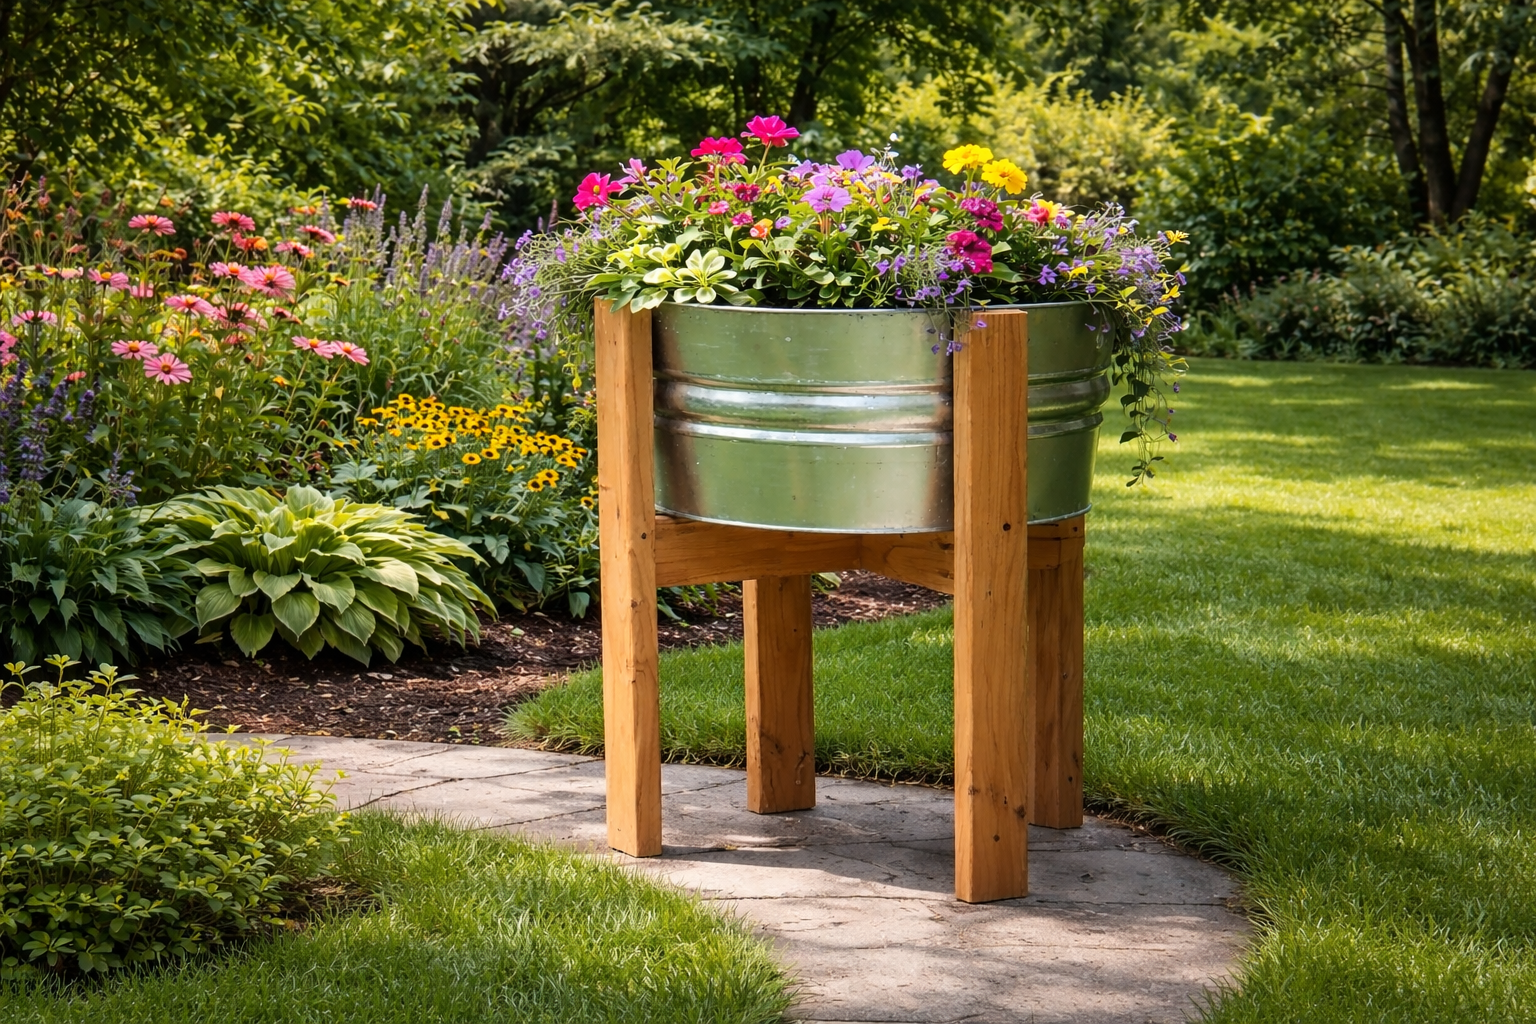
This DIY wood stand is a simple, sturdy build that works double-duty as both a beverage station and a plant display. Designed to hold a metal tub, it’s perfect for keeping drinks chilled at parties or showcasing flowers in your garden. The build is beginner-friendly with straight cuts and solid construction, making it a great weekend project. Its heavy-duty frame keeps everything stable, even when fully loaded with ice and drinks. Best part — you can easily adjust the size to fit different tubs or planters, so it works for anything from small patios to large gatherings. A practical, good-looking project you’ll use all season long.
Specifications
| Project type | Outdoor Projects |
|---|---|
| Room | Outdoor |
| Difficulty | Intermediate |
Dimensions
Use the size-specific shopping and cut lists below.
Shopping List
- 2 - 2x4 @ 8 feet long or stud length (92-5/8")
- 12 - 2-1/2" pocket hole screws or 3" self tapping deck screws
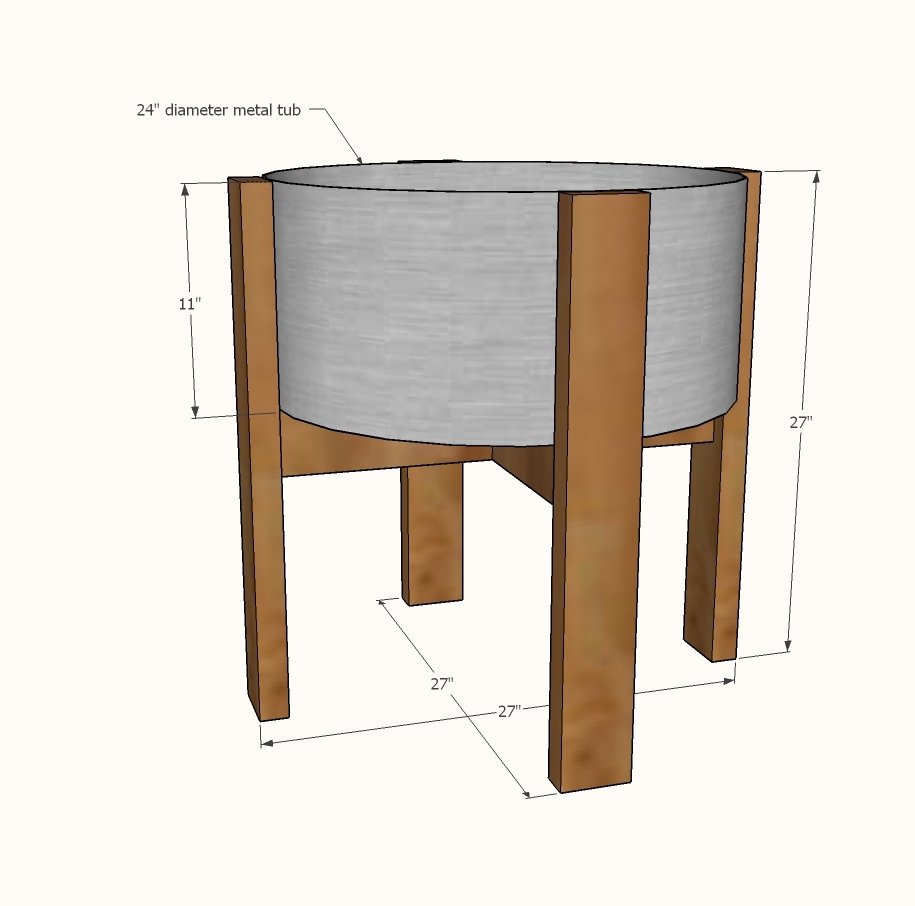
- 1 - 24" round galvanized bucket (plans can be altered for a different sized bucket but would NOT recommend going larger in size)
Cut List
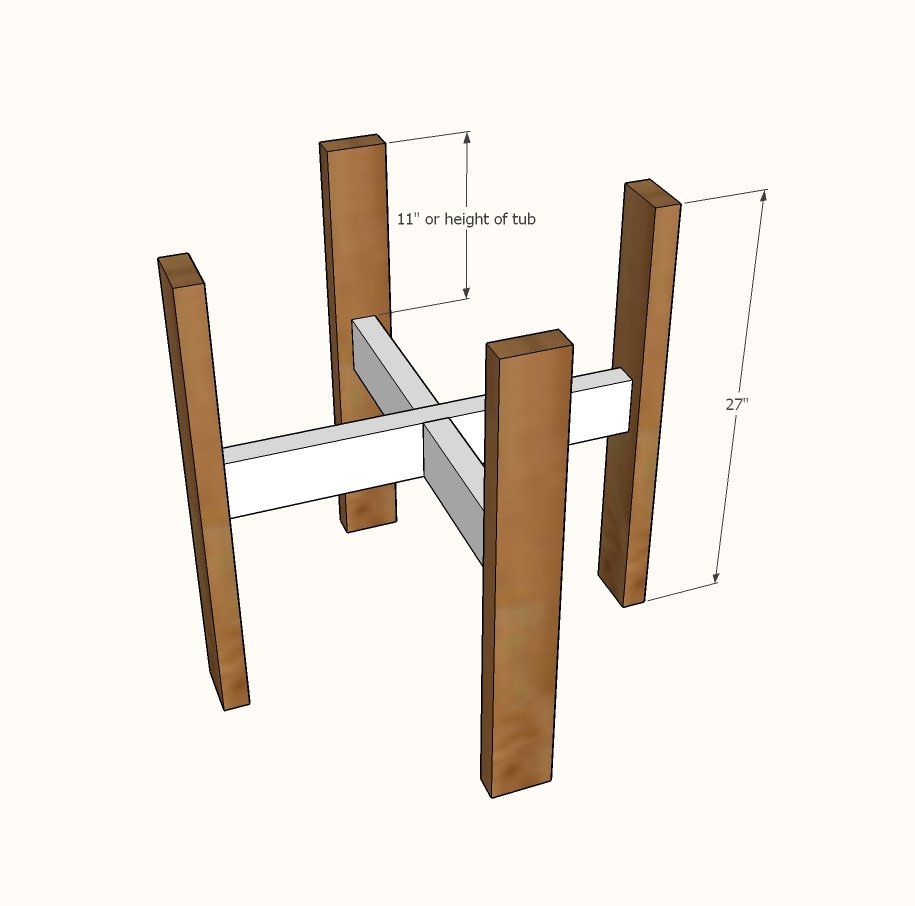
- 4 - 2x4 @ 27" - legs
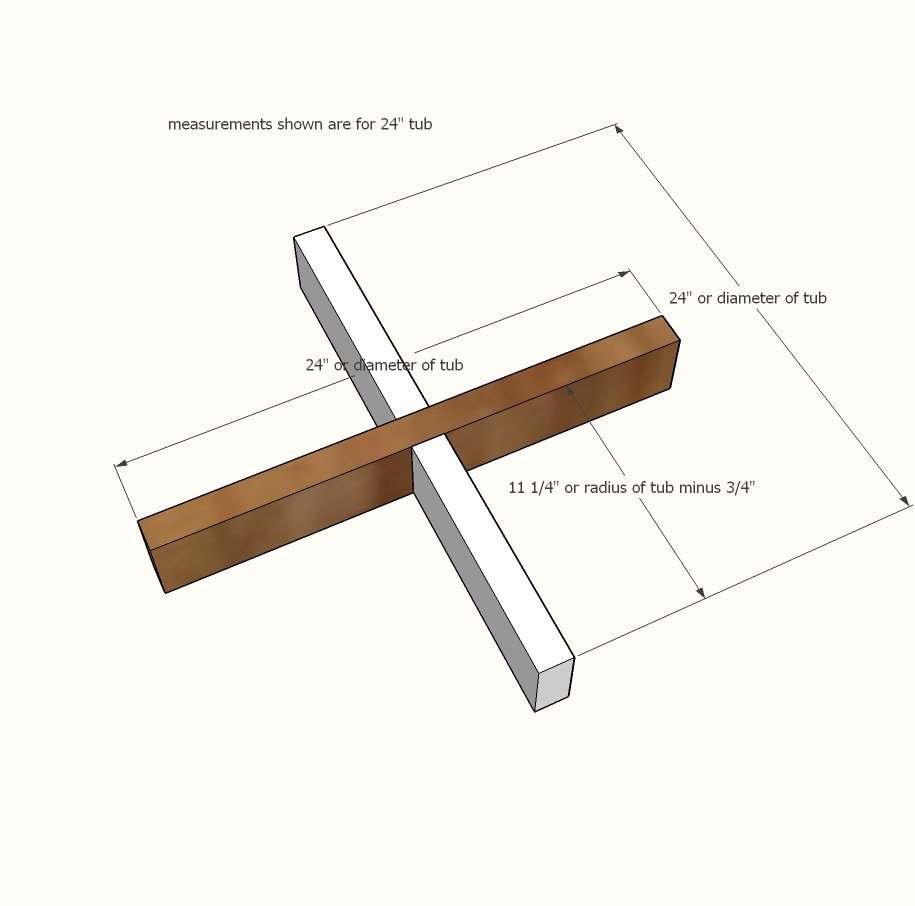
- 1 - 2x4 @ 24" - long cross piece
- 2 - 2x4 @ 11-1/4" - short cross pieces
Tools
- measuring tape
- square
- pencil
- safety glasses
- hearing protection
- kreg-jig
- drill
- compound miter saw
Step-by-step Instructions
Step 1
Drill two 1-1/2" pocket holes on each end of all three cross pieces. Attach the smaller cross pieces to the larger one at the center with 2-1/2" pocket hole screws and exterior wood glue. If using deck screws, you will need to drive screws in at an angle. Predrilling may help prevent splitting.
Step 2
Attach cross piece to the legs, centering ends on leg insides. If using deck screws, attach screws from outside.
Finishing
Sand all surfaces, starting with a medium grit and finishing with fine. Wipe off the dust, fill any holes or gaps with wood filler, and sand smooth once dry. Apply primer if you're painting, then finish with your choice of paint or stain and seal with a durable clear topcoat. For outdoor projects, use exterior-rated primer, paint or stain, and sealer so the piece stands up to the weather.
Source (temporary): https://www.ana-white.com/woodworking-projects/easy-diy-plant-stand-or-beverage-bucket-stand-free-wood-plans