Easy DIY Shoe Storage Console Table
Build a simple shoe storage console table that keeps your entryway organized without looking like a typical shoe rack. Three open slatted shelves hold everyday shoes and boots, while the spacious top works as an entryway drop zone for keys, bags and decor. At just 36" wide, this easy DIY console is a great fit for small entryways, mudrooms and closets.

Specifications
| Project type | Bookshelf and Bookcase Plans |
|---|---|
| Room | Entryway and Mudroom |
| Difficulty | Beginner Projects |
Dimensions
Use the size-specific shopping and cut lists below.
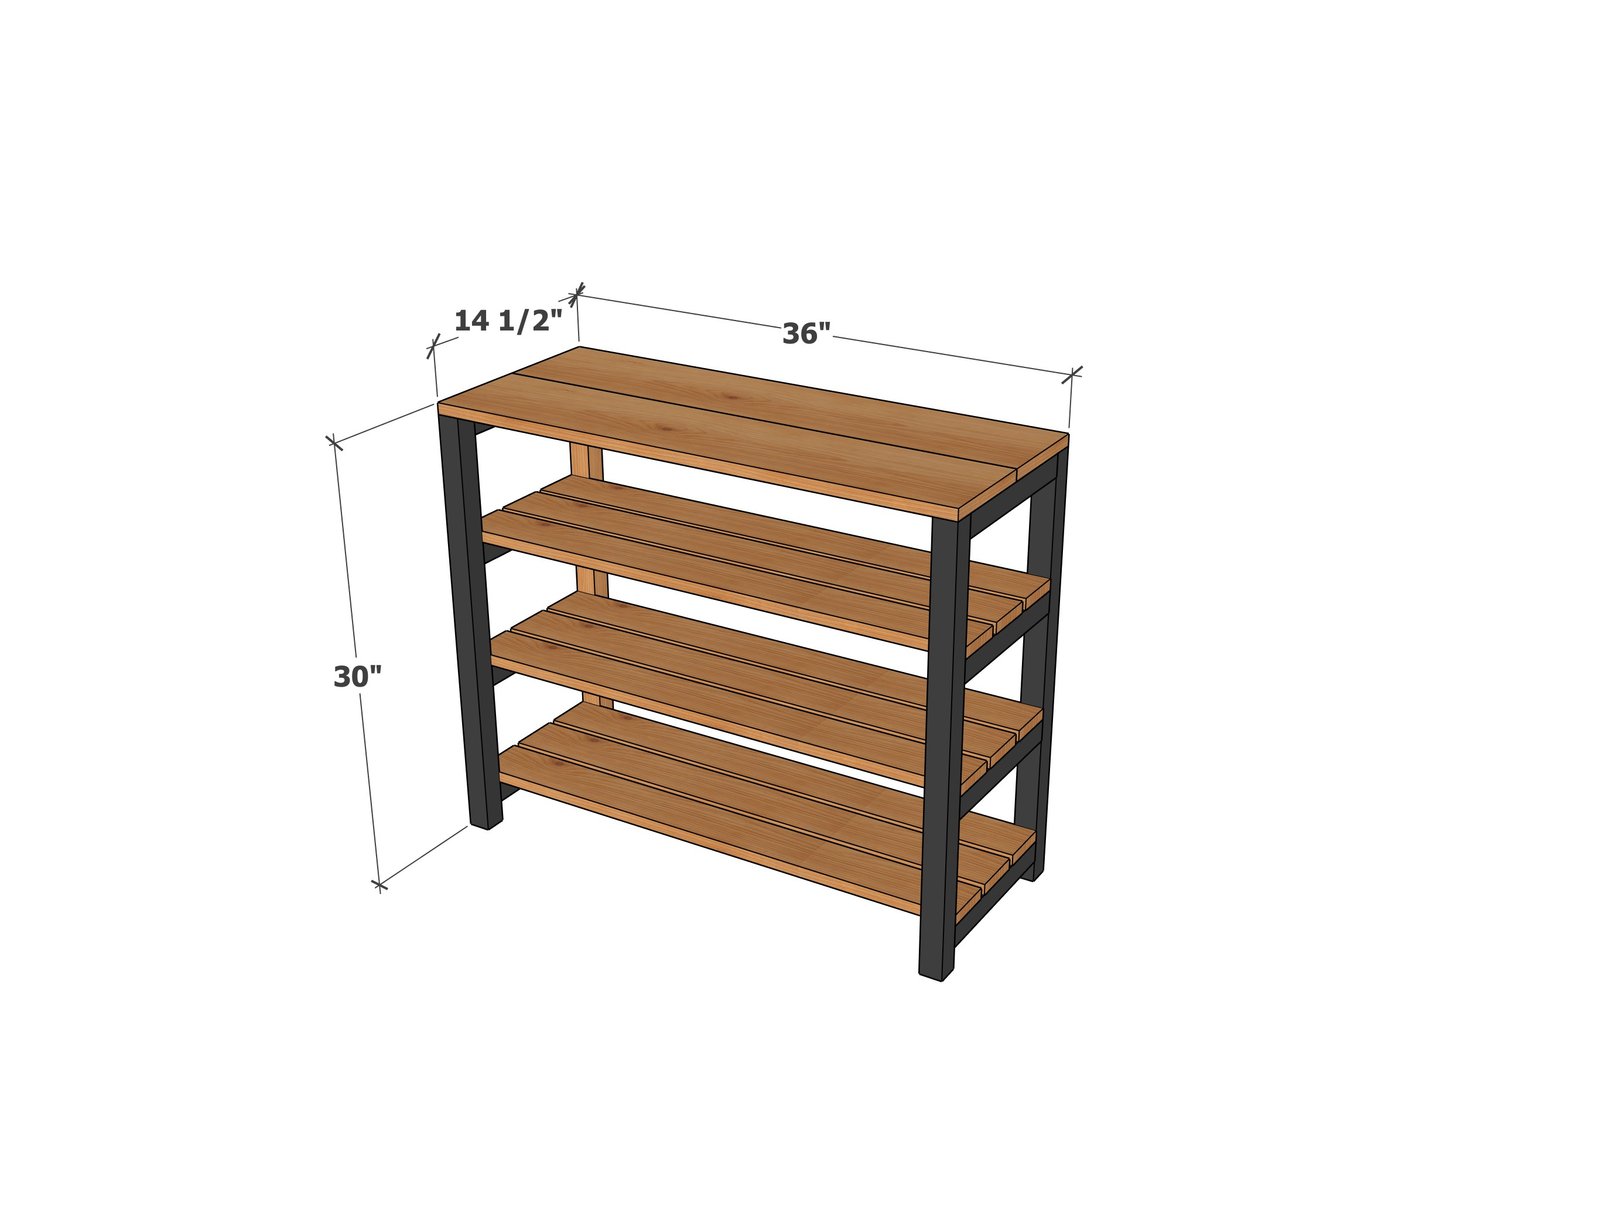
Shopping List
- 1 - 1x8 @ 6 feet long
- 5 - 1x3 @ 8 feet long
- 2 - 2x2 @ 8 feet long
- 2-1/2" and 1-1/4" fasteners
Cut List
2x2 Boards
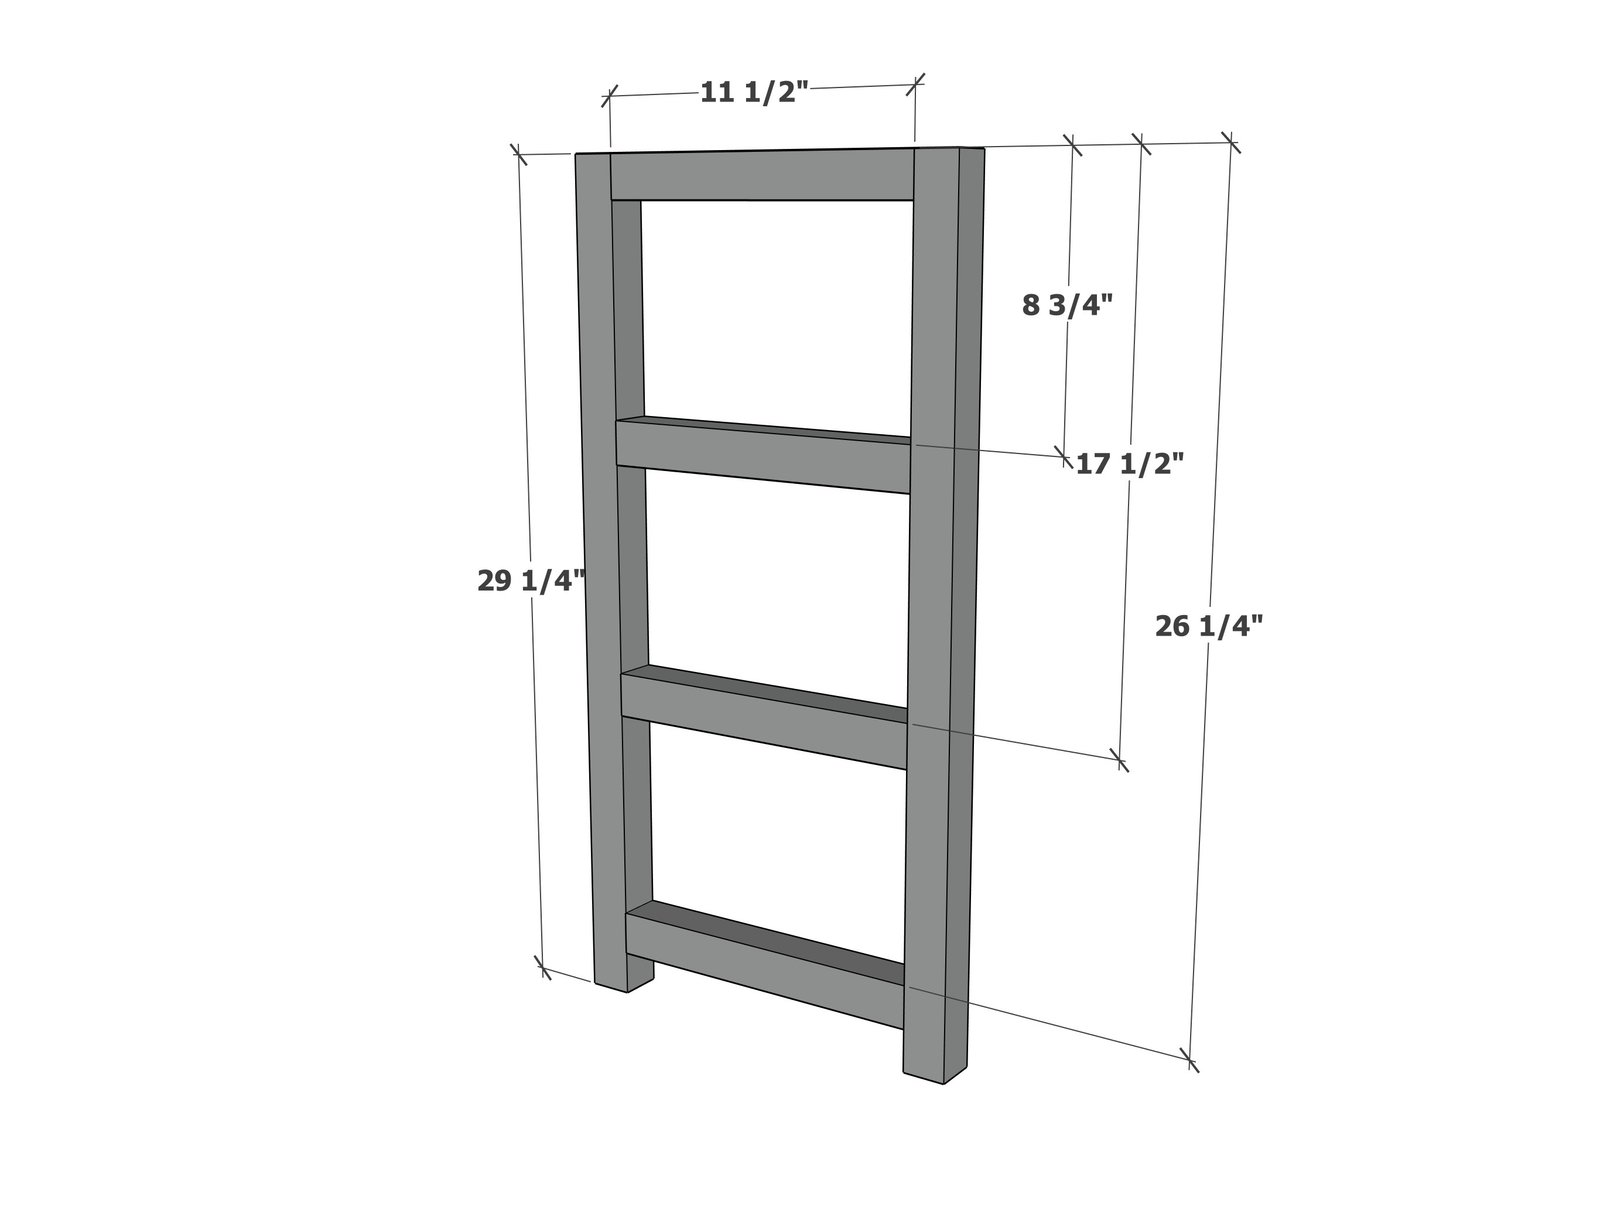
- 4 @ 29-1/4" — legs
- 8 @ 11-1/2" — ladder/shelf supports
Shelf Options — choose ONE
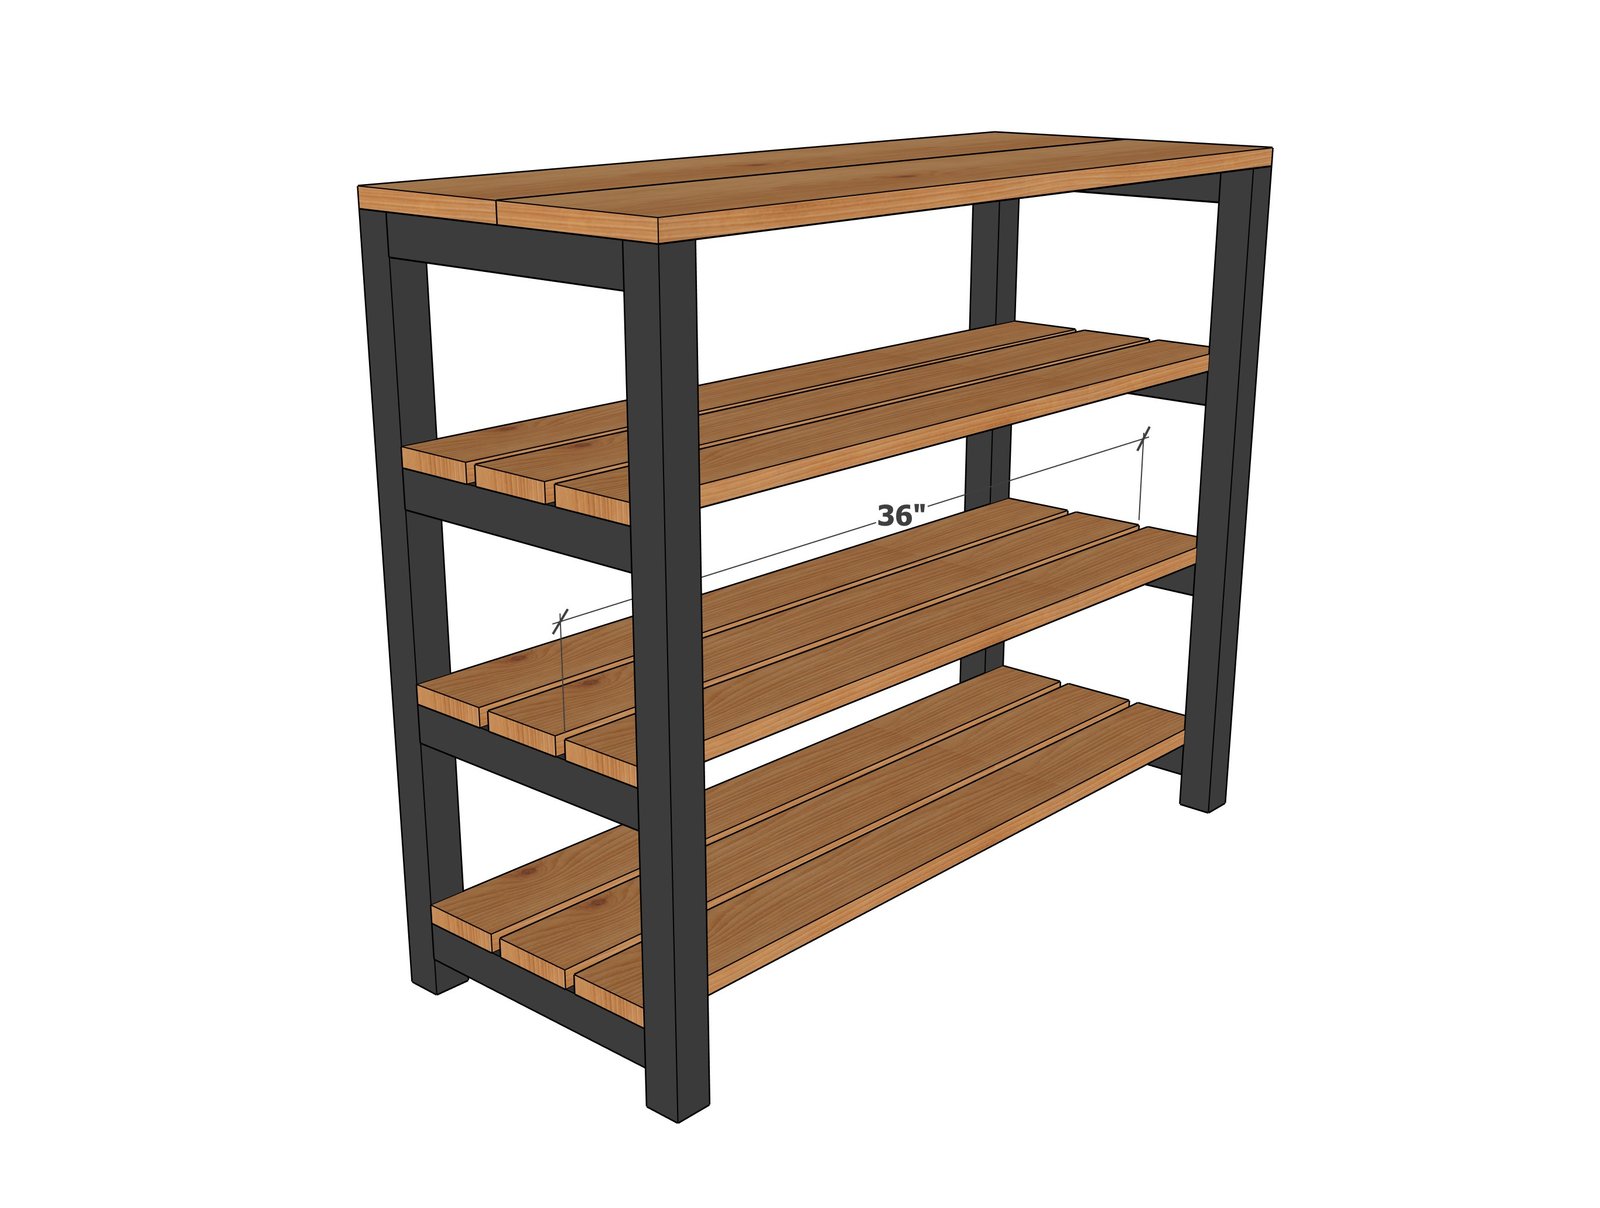
- 1x12 option: 3 @ 36" — one board per shelf
- 1x6 option: 6 @ 36" — two boards per shelf
- 1x4 option: 9 @ 36" — three boards per shelf
Top
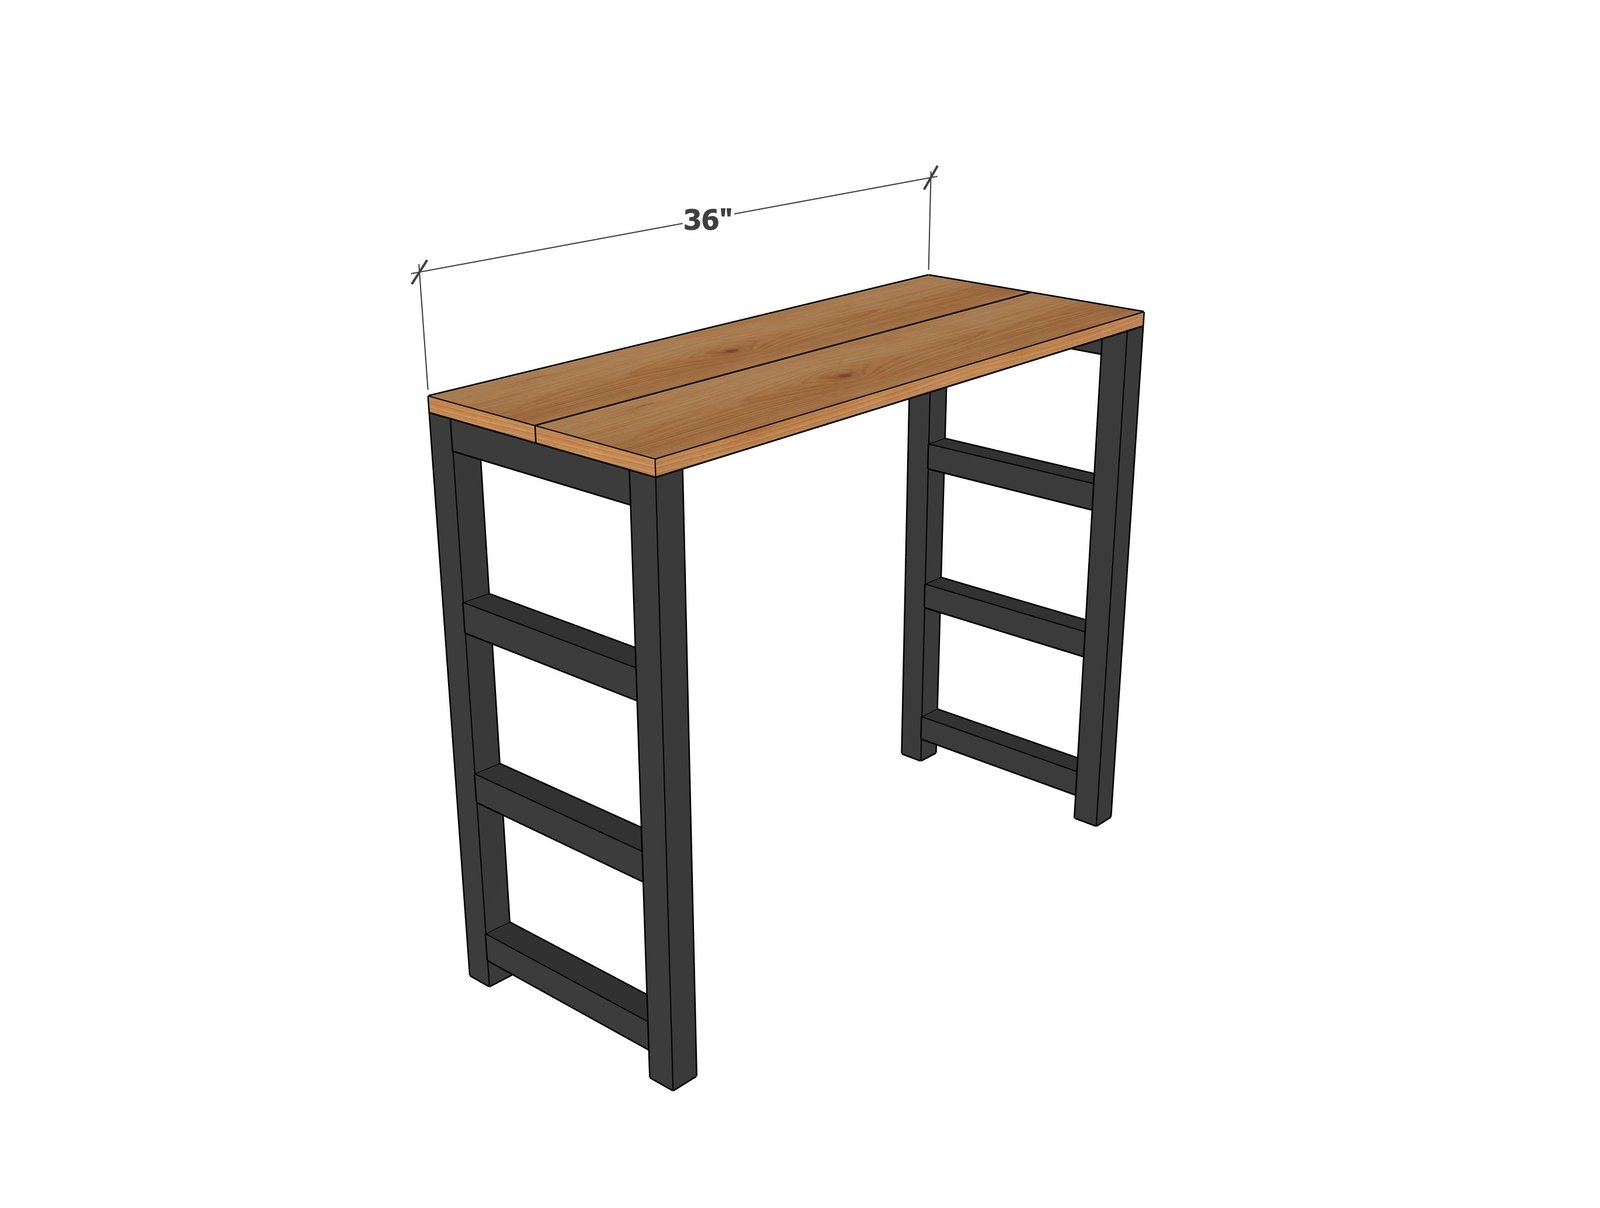
- 2 – 1x8 @ 36" (assuming we're keeping the 14-1/2" deep top shown in your drawing)
Step-by-step Instructions
Step 1
Step 2
Step 3
Finishing
Sand all surfaces, starting with a medium grit and finishing with fine. Wipe off the dust, fill any holes or gaps with wood filler, and sand smooth once dry. Apply primer if you're painting, then finish with your choice of paint or stain and seal with a durable clear topcoat. For outdoor projects, use exterior-rated primer, paint or stain, and sealer so the piece stands up to the weather.
Source (temporary): https://www.ana-white.com/woodworking-projects/easy-diy-shoe-storage-console-table