Easy Kitchen Island
Build Your Own DIY Kitchen Island Upgrade your kitchen with this beautiful DIY kitchen island made entirely from standard lumber! walk you through each step to build a sturdy island frame, with open shelving for storage and a stylish modern farmhouse vibe. Customize the look with a butcher block countertop for a seamless, durable finish that’s perfect for prep work or entertaining. Ideal for beginner to intermediate builders, this plan includes materials, cut lists, and step-by-step instructions. ✅ Built from 2x4s and 2x2s ✅ Optional slatted or solid lower shelves ✅ Easy-to-follow with diagrams and tips Perfect for kitchens, cabins, or even small commercial spaces!
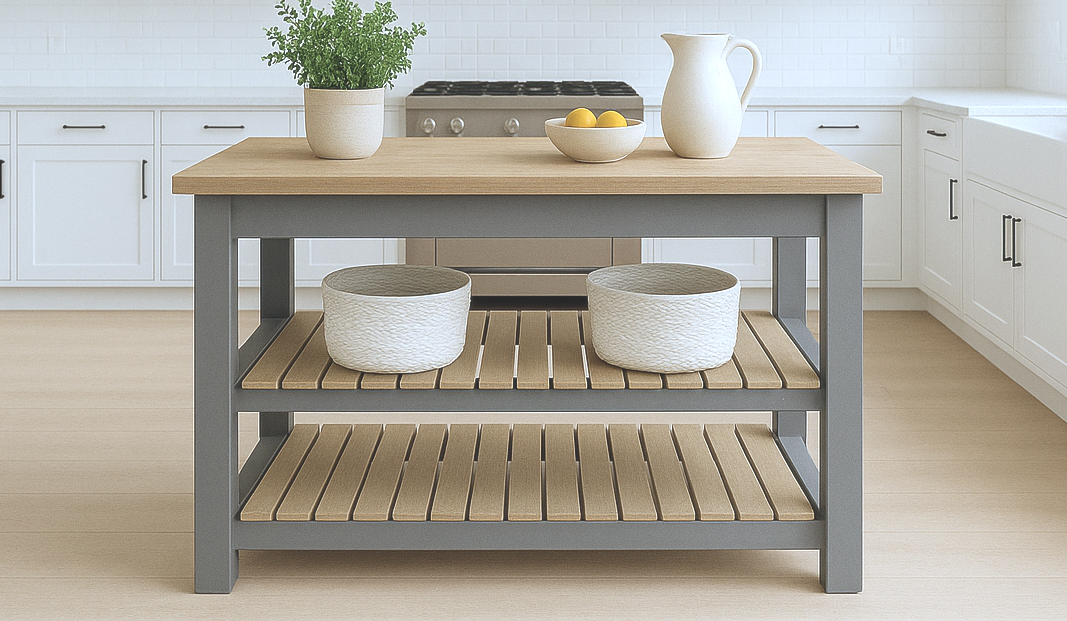
Specifications
| Project type | Kitchen Island Plans |
|---|---|
| Room | kitchen |
| Style | Farmhouse Furniture |
| Difficulty | Beginner Projects |
| Estimated cost | $100-$150 |
Dimensions
Use the size-specific shopping and cut lists below.
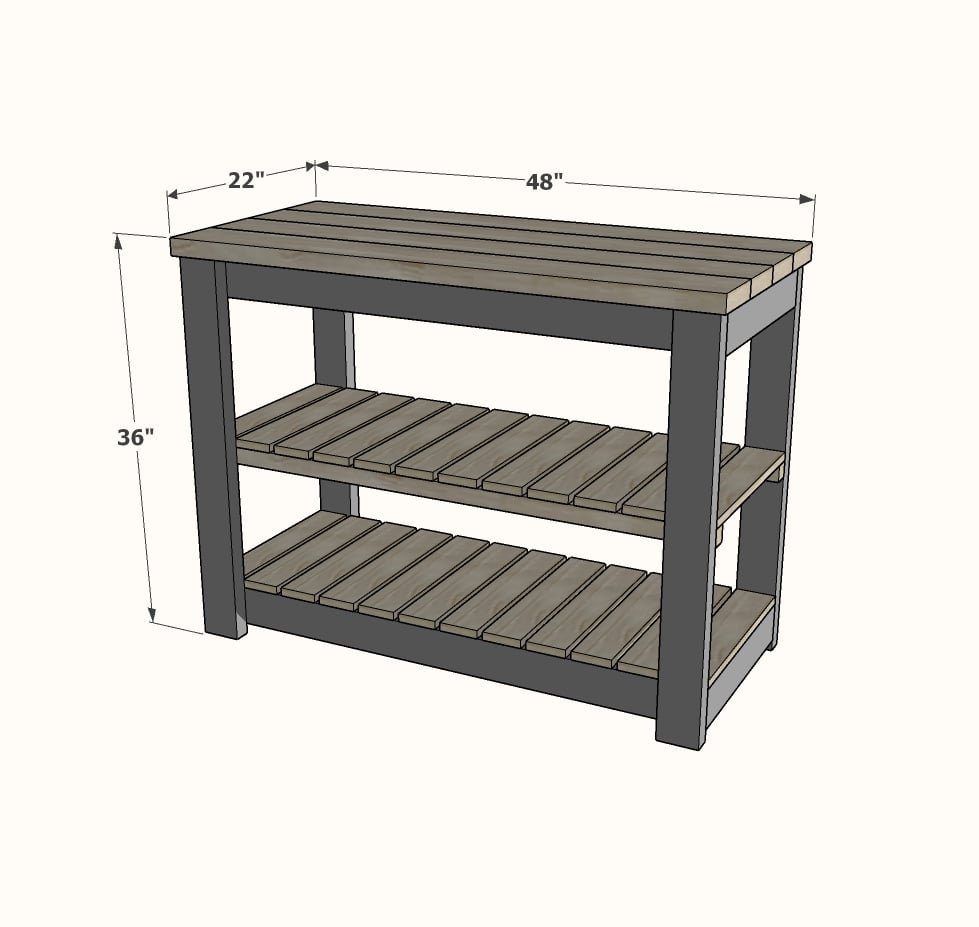
Shopping List
- 2 - 2x6 @ 8 feet long (can also use 1x6 for a smoother tabletop)
- 5 - 2x4 @ 8 feet long
- 1 - 2x2 @ 8 feet long
- 5 - 1x4 @ 8 feet long
- 2-1/2" long screws (Kreg screws for pocket holes, or star bit self tapping construction screws for no Kreg Jig)
- 1-1/4" brad nails
Cut List
- 4 - 2x4 @ 44" - frame
- 4 - 2x4 @ 18" - frame
- 4 - 2x4 @ 34-1/2" - legs
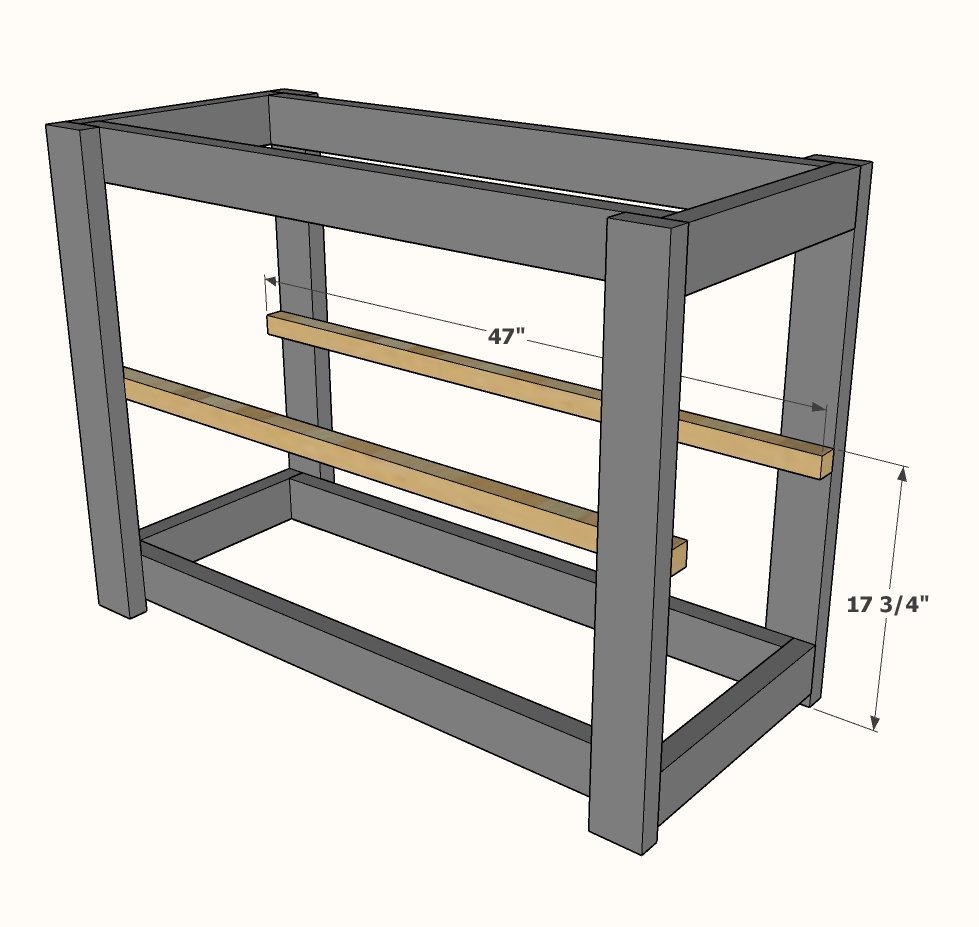
- 2 - 2x2 @ 47" - shelf supports
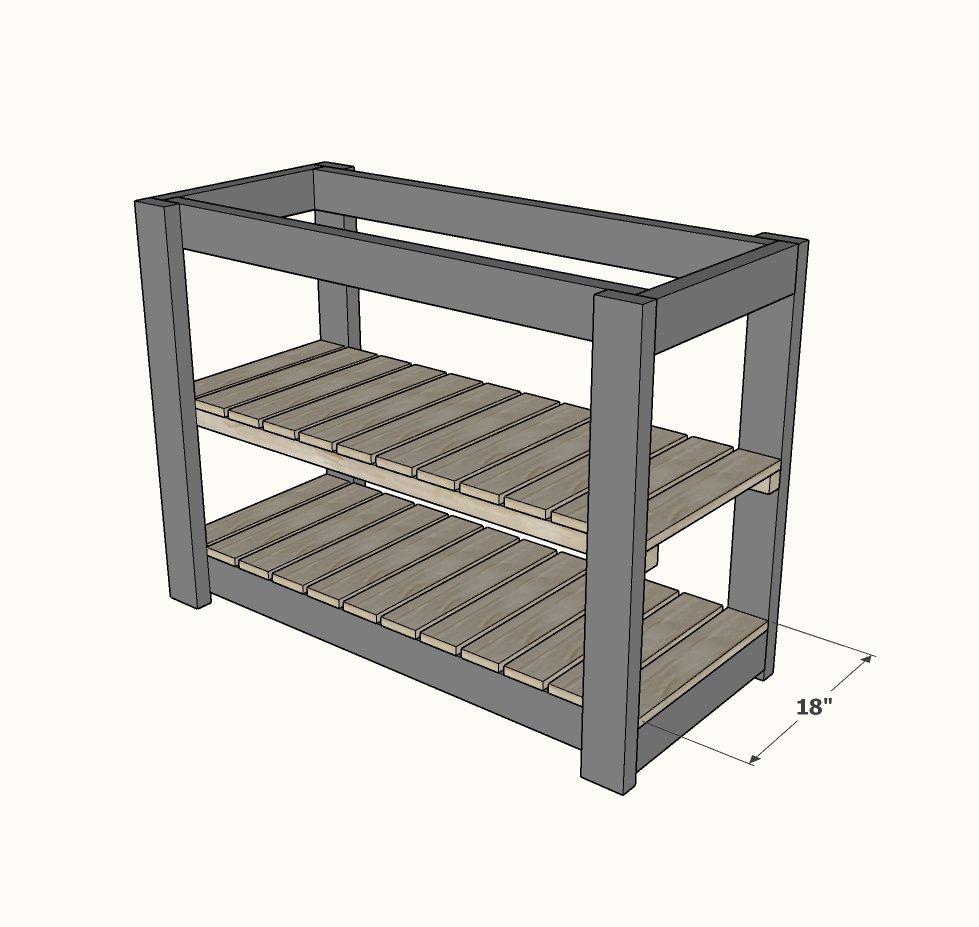
- 24 - 1x4 @ 18" - shelf slats
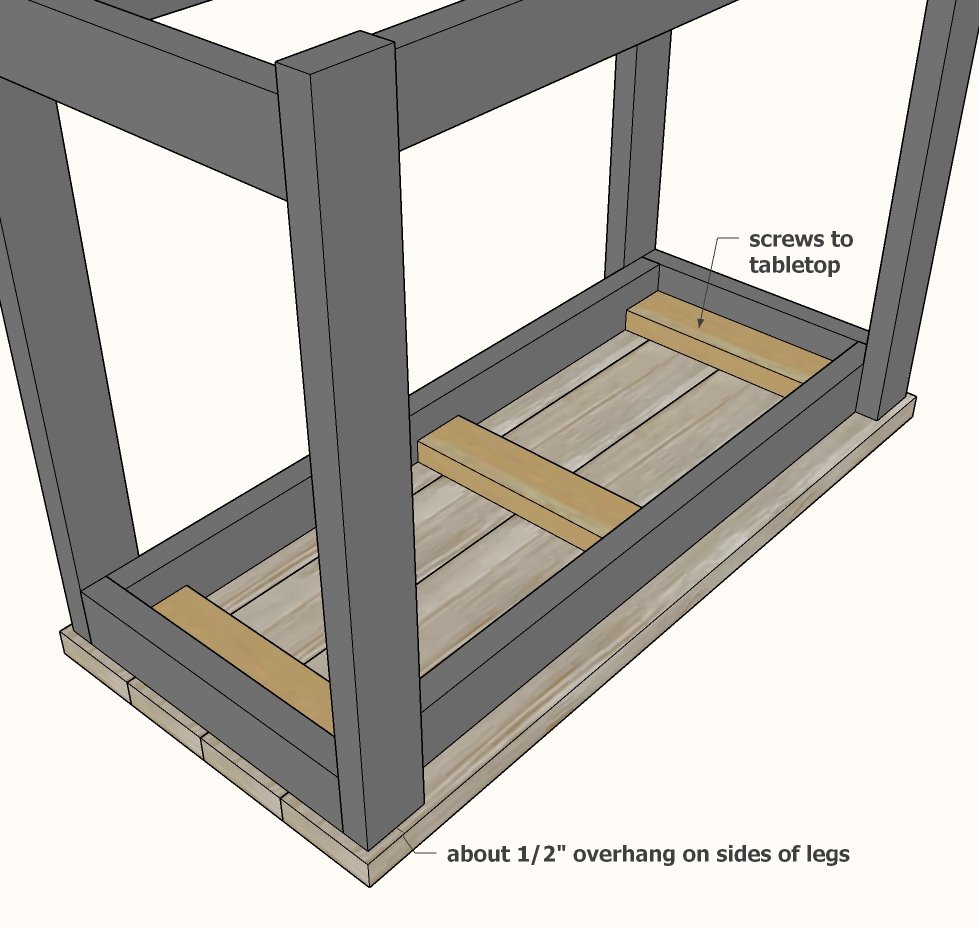
- 4 - 2x6 @ 48" - tabletop
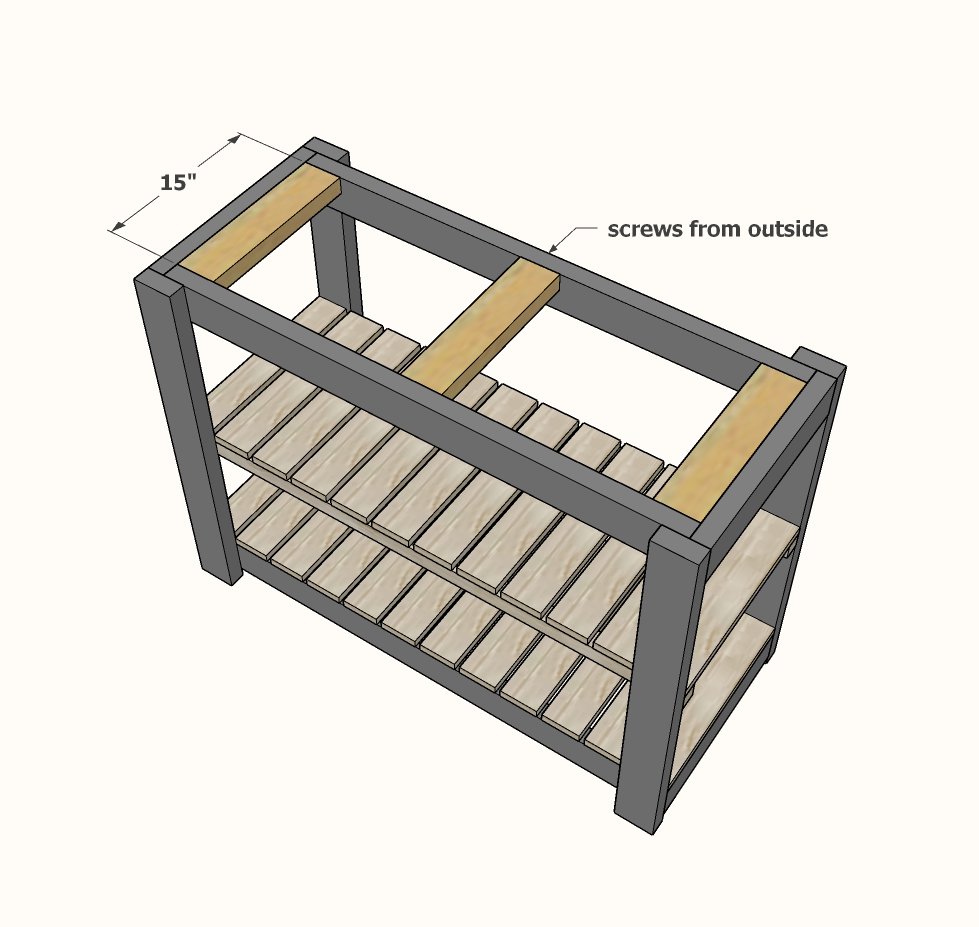
- 3 - 2x4 @ 15" - tabletop supports
Tools
- measuring tape
- square
- safety glasses
- drill
- compound miter saw
- nailer
- sander
Step-by-step Instructions
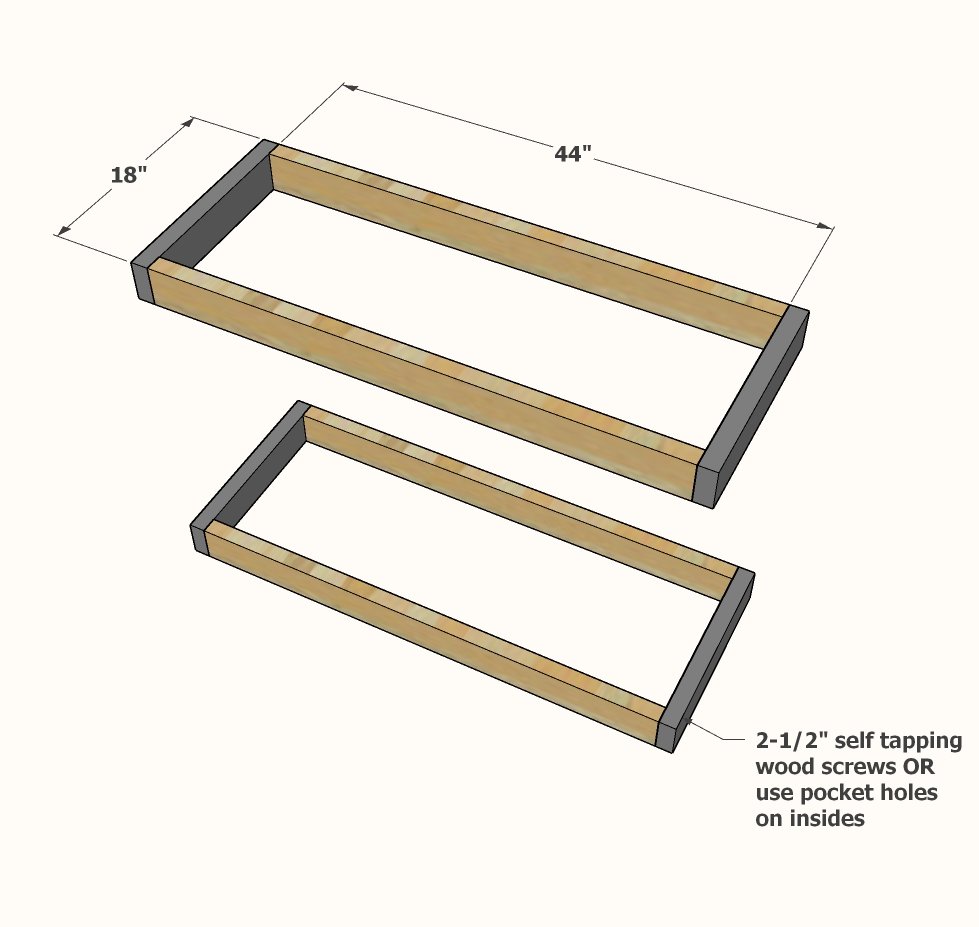
Build two frames, either with pocket holes or with the 2-1/2" self tapping star bit screws.
Adjust the frame to square by taking opposite diagonals, and adjusting until the opposite diagonal measurements match. TIP: You can add the boards from step 5 now to help keep the frames square.
Add the legs by attaching from the inside with 2-1/2" long screws.
Kreg Jig users can simply use the Kreg screws to attach. Attach at a slight angle - this creates a better structural joint.
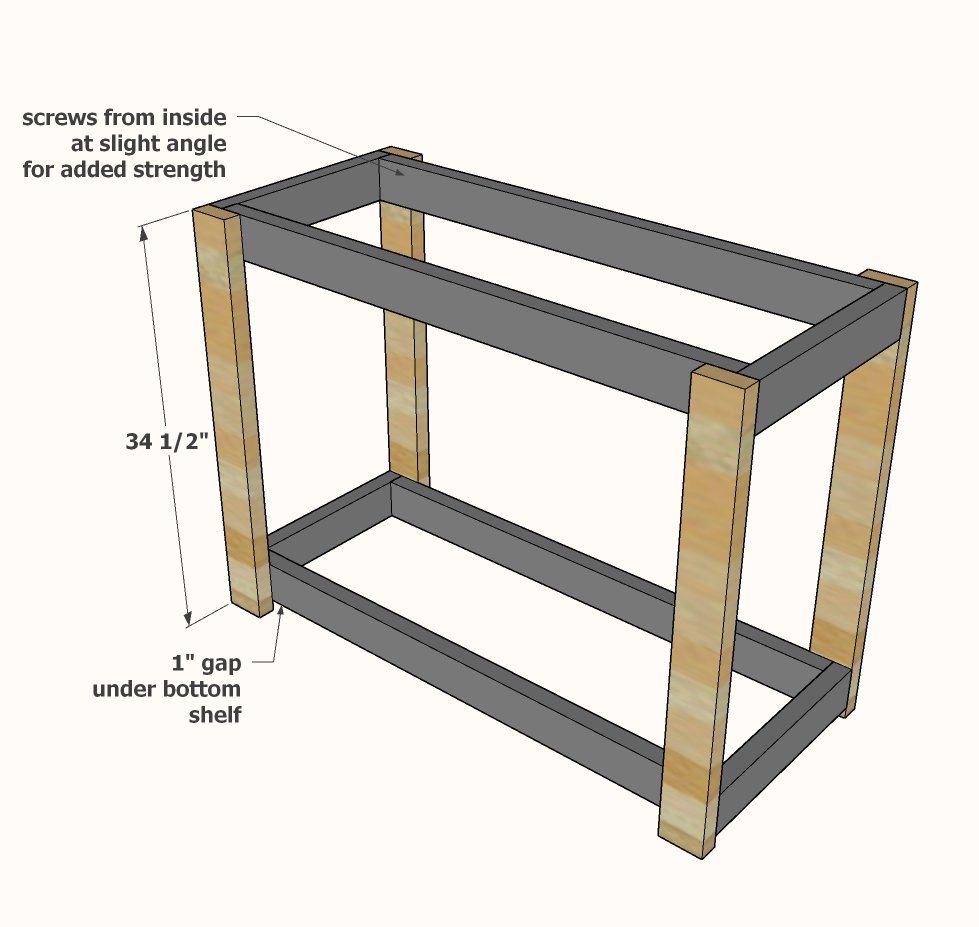
Step 3
Measure and mark the placement of the 2x2s and attach with 2-1/2" screw (yes, you can use Kreg screws here too)
Shelf slats
Prefinish the slat boards before cutting, so you only have to touch up the ends on final finish. Lay out the slats so gaps are similar in width. Nail and glue to the frame boards. You can use other materials for the slats, like 1x3s, 1x2, or even 1x6s or 1x8 etc.
Top supports
These top boards will help give lateral support to the island, and also an attachment point for the tabletop. Attach from inside with pocket holes facing upward if using a Kreg Jig. Otherwise, screw from outsides.
Tabletop
For the best top, build the top first with a Kreg Jig. Then attach from underneath with 2-1/2" screws.
Finishing
Sand all surfaces, starting with a medium grit and finishing with fine. Wipe off the dust, fill any holes or gaps with wood filler, and sand smooth once dry. Apply primer if you're painting, then finish with your choice of paint or stain and seal with a durable clear topcoat. For outdoor projects, use exterior-rated primer, paint or stain, and sealer so the piece stands up to the weather.
Source (temporary): https://www.ana-white.com/woodworking-projects/easy-kitchen-island-plans