Eco Office File Base
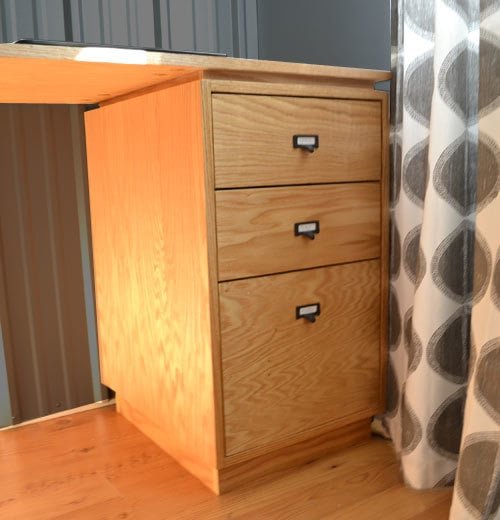
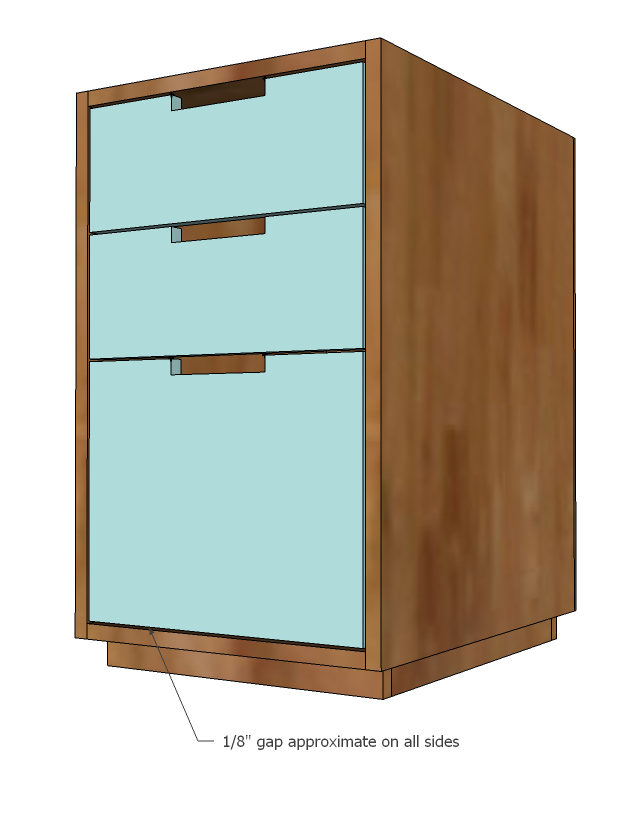
Base cabinet inspired by West Elm Modular Office Collection, made with PureBond Formaldehyde Free Plywood. Bottom drawer sized for files.
Specifications
| Project type | Desk, Desk Systems and Project Table Plans |
|---|---|
| Room | Storage Solutions |
| Style | Green or Eco-Friendly Style Furniture |
| Difficulty | Advanced |
| Estimated cost | $100-$150 |
Dimensions
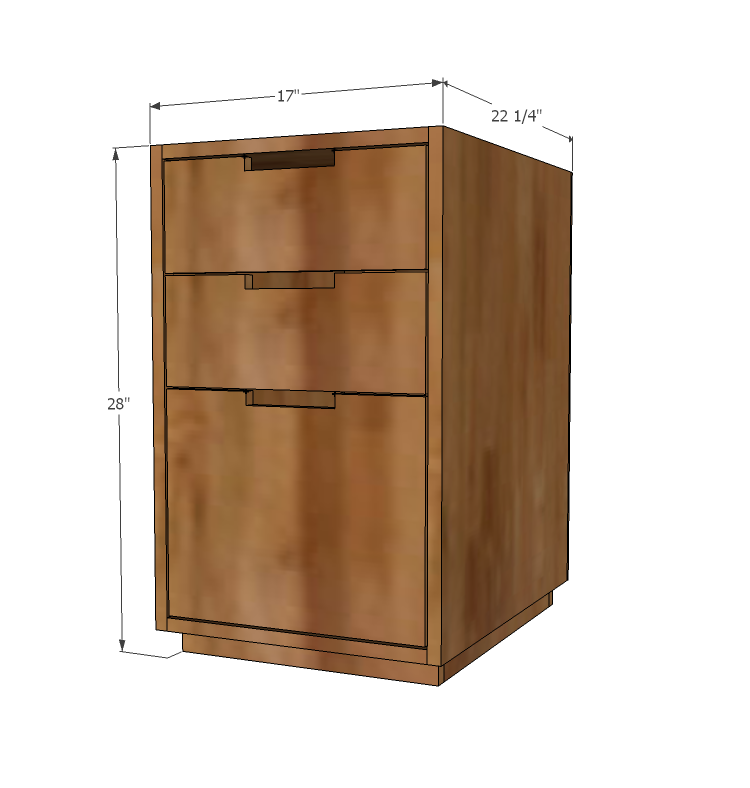
Use the size-specific shopping and cut lists below.
Shopping List
1 - Sheet 3/4" PureBond Hardwood Plywood (Available at the Home Depot)
1 - Sheet 1/4" PureBond Hardwood Plywood (Available at the Home Depot)
3 - 21" Drawer Slides, Euro Style (the cheapo white ones)
1 - 1x2 @ 6 feet long in matching hardwood (Optional - you can use plywood for this step)
1 - 25' long roll Edge Banding in matching veneer
Cut List
2 - 3/4" PureBond Formaldehyde Free Plywood @ 15 1/2" x 22" (Top/Bottom)
2 - 3/4" PureBond Formaldehyde Free Plywood @ 26 1/2" x 22" (Sides)
1 - 3/4" PureBond Formaldehyde Free Plywood @ 12 1/2" x 15 1/4" (Drawer Face)
2 - 3/4" PureBond Formaldehyde Free Plywood @ 6" x 15 1/4" (Drawer Face)
2 - 3/4" PureBond Formaldehyde Free Plywood @ 21" x 11 1/2" (File Drawer Sides)
2 - 3/4" PureBond Formaldehyde Free Plywood @ 13" x 11 1/2" (File Drawer Front/Back)
4 - 3/4" PureBond Formaldehyde Free Plywood @ 21" x 5" (Small Drawer Sides)
4 - 3/4" PureBond Formaldehyde Free Plywood @ 13" x 5" (Small Drawer Sides)
1 - 1/4" PureBond Formaldehyde Free Plywood @ 17" x 26 1/2" (Back)
3 - 1/4" PureBond Formaldehyde Free Plywood @ 14 1/2" x 21" (Drawer Bottoms)
2 - 1x2 @ 19" (Footer)
2 - 1x2 @ 15 1/2" (Footer)
Tools
- measuring tape
- square
- pencil
- safety glasses
- hearing protection
- kreg-jig
- drill
- nailer
- sander
- level
- countersink drill bit
Step-by-step Instructions
Step 1
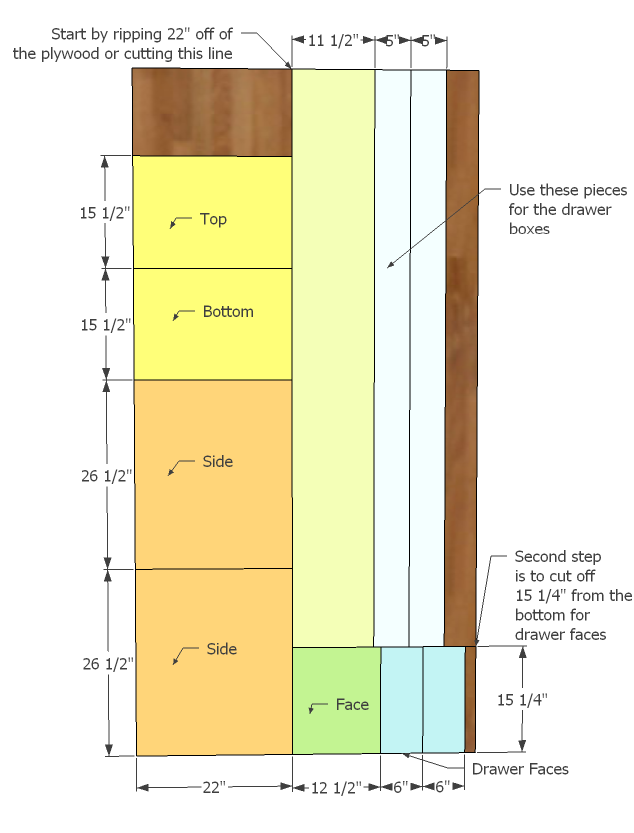
I'd say the most intimidating thing about working with plywood is knowing how to cut it. You want to be very careful, because plywood has a wood grain, and if your pieces aren't cut correctly, you'll end up with mis matched wood grains. And then of course there's taking into account the width of a saw blade, and understanding that a saw blade doesn't cut corners... So follow this plywood cutout as shown above. You can ask your Home Depot to make the rip cuts and then take the strips home - that's what I do to fit everything in my car. Start by ripping 22" off of the plywood. From this piece, you will cut yoru top, bottom and sides. Then from the remaining piece, cut 15 1/4" off of it, approximately 26" wide, as shown in the diagram. You will cut your drawer faces from these pieces. Finally, rip the remaining plywood piece into one 11 1/2" wide strip and two 6" wide strips. If you are using plywood for the footer and not 1x2s, rip the remaining scrap into a 1 1/2" wide strip. Cut out all pieces now according to the cut list.
Step 2
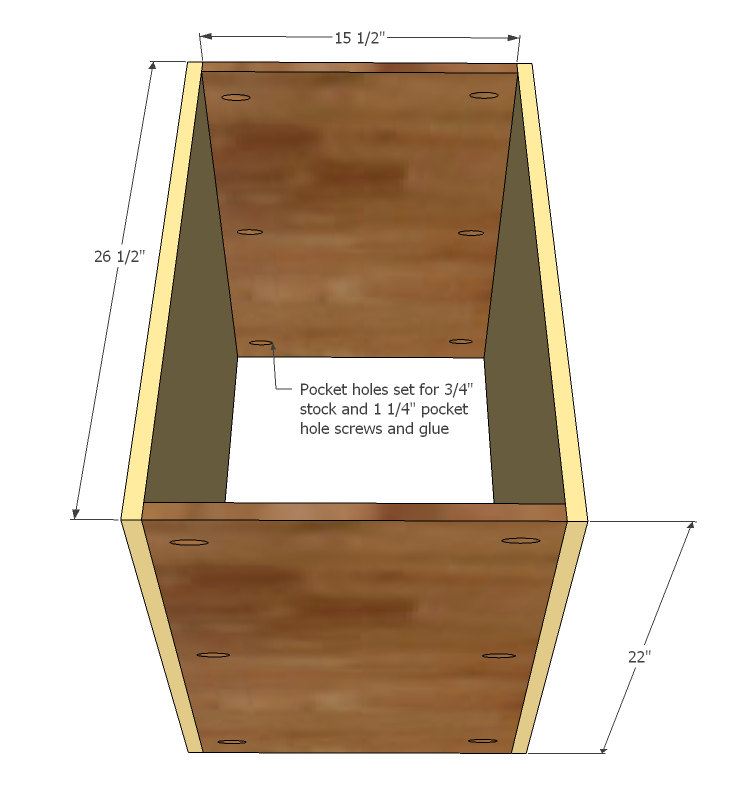
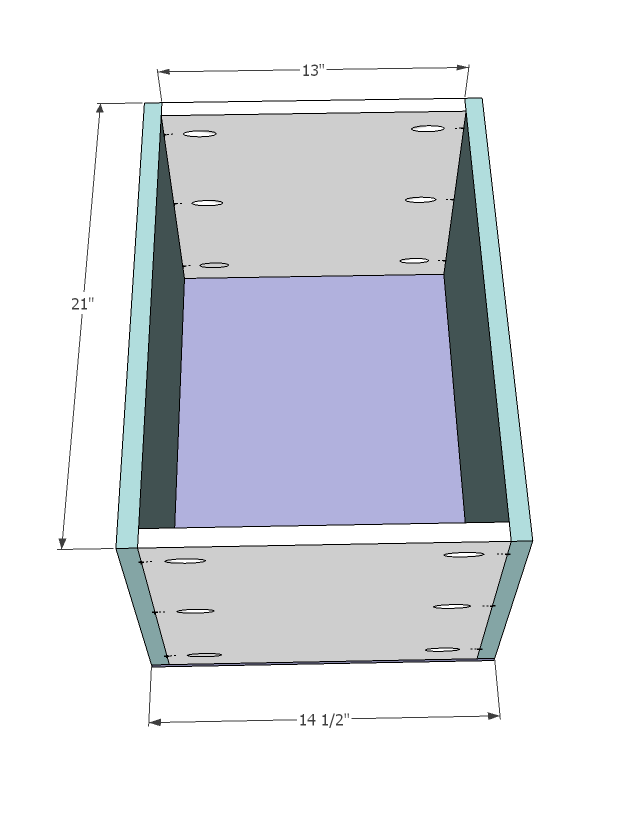
I've given instructions to use both a Kreg Jig and simple screws throughout. For Kreg Jig users, you will want to set your jig for 3/4" stock and use 1 1/4" pocket holes. If you are using screws, use a countersink bit and 2" screws and glue and take extra measures to check for square. Build your box as shown above.
Step 3
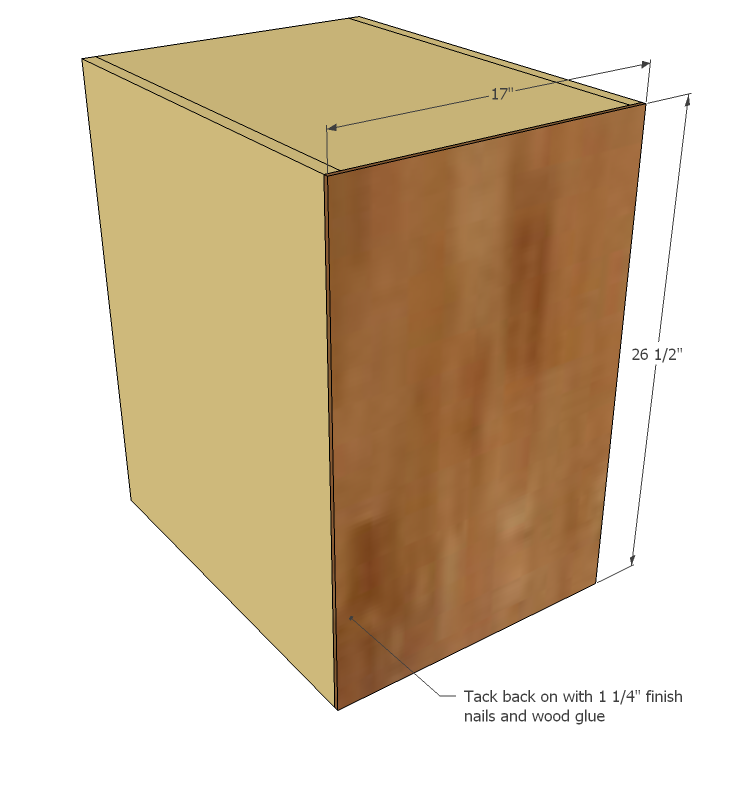
Adjust the box for square and glue and nail the back on.
Step 4
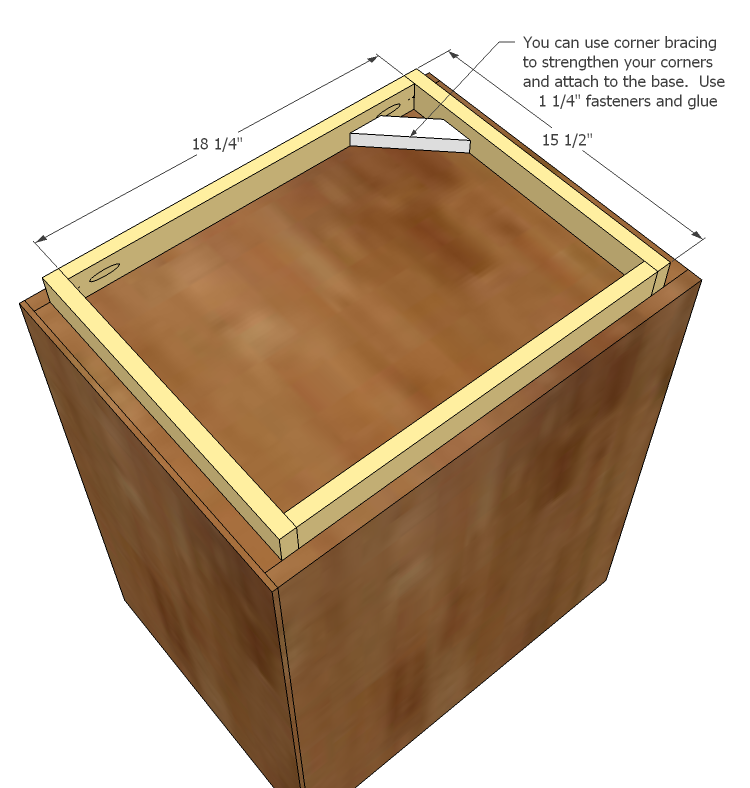
You can use either 1x2s or strips of the 3/4" plywood cut into 1 1/2" widths here. If you have a pocket hole jig, attach with the pocket hole jig, or otherwise, use corner bracing to attach to base.
Step 5
Step 6
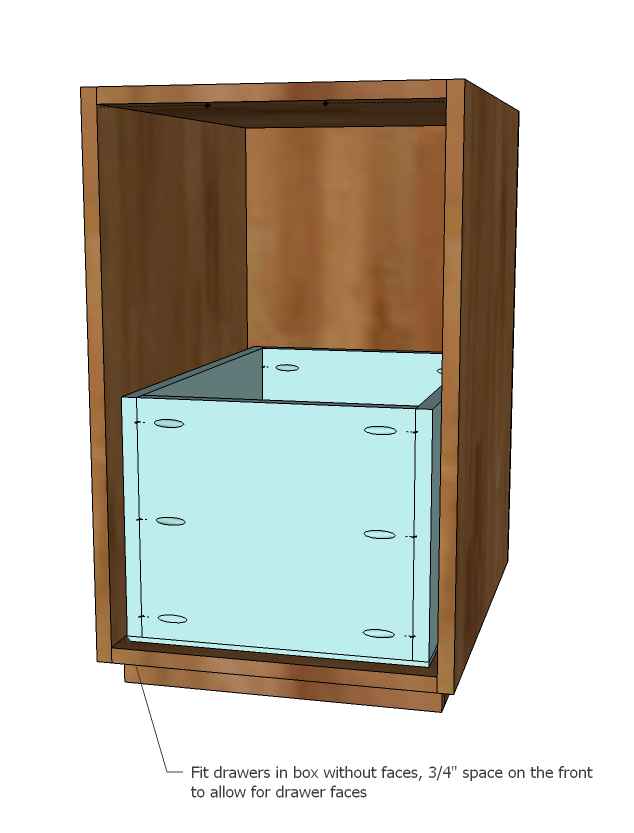
Install drawers using the drawer slides. Start with the bottom drawer, install it as close to the bottom as possible and work your way upwards. Note that all drawers need to be installed 3/4" inset from the front to allow for drawer faces.
Step 7
Once all of your drawer boxes are intalled, line the drawer faces up so there is an even gap and attach with 1 1/4" finish nails. Remove drawers and further attach faces with 1 1/4" screws from the inside of the drawers.
Finishing
Sand all surfaces, starting with a medium grit and finishing with fine. Wipe off the dust, fill any holes or gaps with wood filler, and sand smooth once dry. Apply primer if you're painting, then finish with your choice of paint or stain and seal with a durable clear topcoat. For outdoor projects, use exterior-rated primer, paint or stain, and sealer so the piece stands up to the weather.
Source (temporary): https://www.ana-white.com/woodworking-projects/eco-office-file-base-made-purebond-formaldehyde-free-plywood