Eco Office Large Bookshelf
to build a large contemporary style bookcase for a modern home office. Featuring step by step diagrams, cut list and shopping list, these beginning do it yourself furniture plans are designed for anyone to build with simple tools and off the shelf materials.
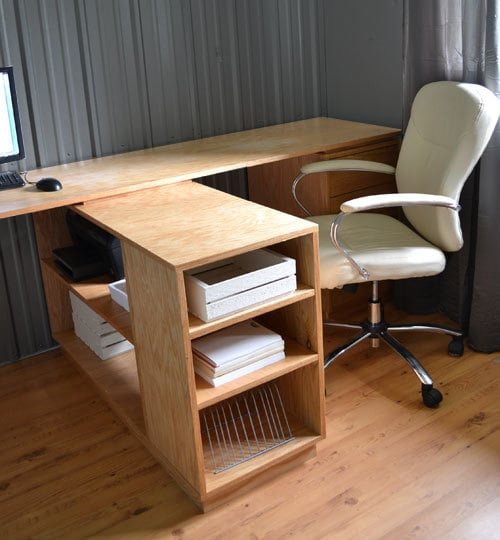
Specifications
| Project type | Bookshelf and Bookcase Plans |
|---|---|
| Room | Storage Solutions |
| Style | Green or Eco-Friendly Style Furniture |
| Difficulty | Beginner Projects |
| Estimated cost | $50 - $100 |
Dimensions
Use the size-specific shopping and cut lists below.
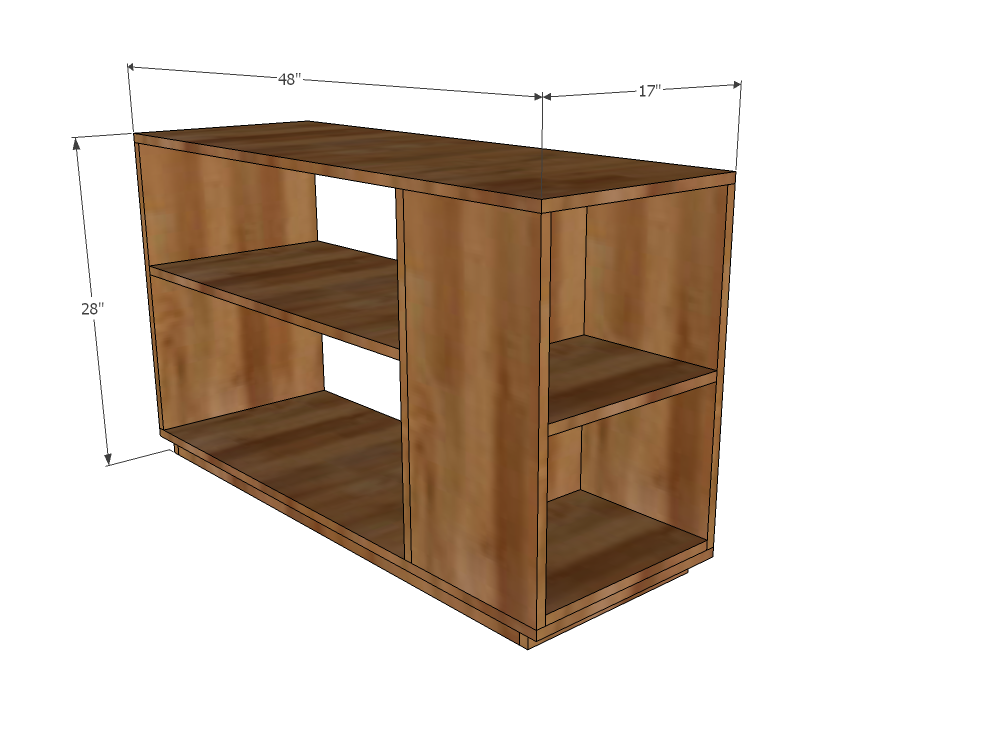
Shopping List
1 - Sheet 3/4" PureBond Hardwood Plywood (available at The Home Depot) 2 - 1x2 @ 6 feet long (optional, see step 6)
3 - 25' long rolls Edge Banding, in matching wood grain
Cut List
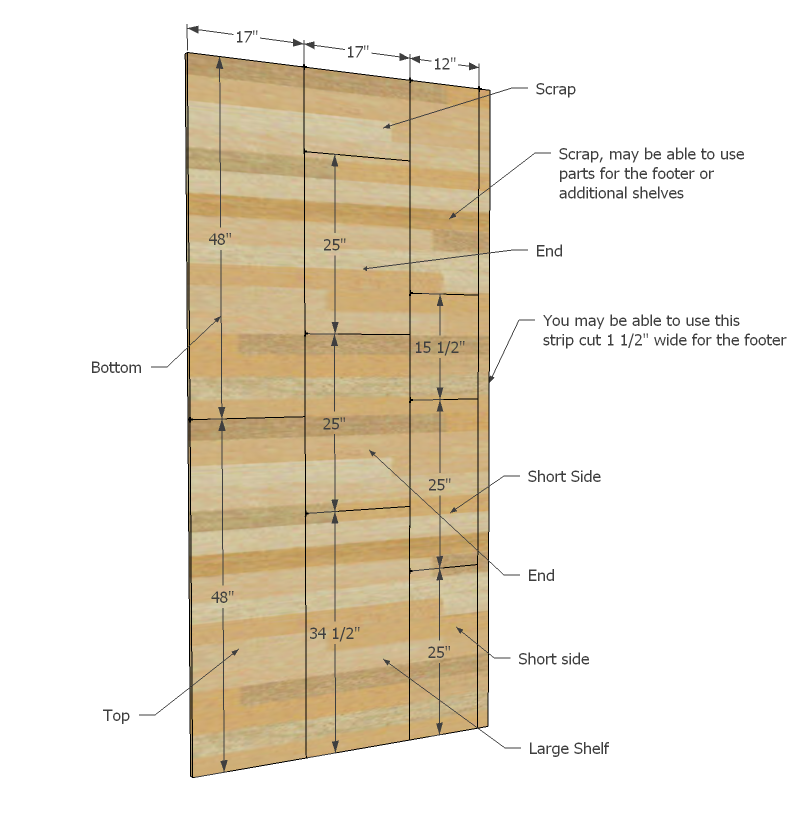
2 - 1x17 @ 48" (Top/Bottom)
1 - 1x17 @ 34 1/2" (Shelf)
2 - 1x17 @ 25" (Ends)
2 - 1x12 @ 25" (Small Bookshelf Sides)
1 - 1x12 @ 12" (Small Bookshelf Shelf)
2 - 1x2 @ 45"
2 - 1x2 @ 15 1/2"
Tools
- measuring tape
- square
- pencil
- safety glasses
- hearing protection
- kreg-jig
- drill
- circular saw
- sander
- countersink drill bit
Step-by-step Instructions
Step 1
As mentioned with the Open Bookshelf Base it is important to cut your plywood square and with the grain of the plywood, also taking into account how a circular saw works, and the easiest method to cut. Have your Home Depot cut the plywood into 3 strips, 17" wide, and one strip 12" wide. Save the scrap strip - you may be able to use it for the footer if it's square and 1 1/2" wide. Once your strips are cut, you can use them like boards - I will refer to the strips as 1x17 and 1x12, although the strips are not true 1xs.
Step 2
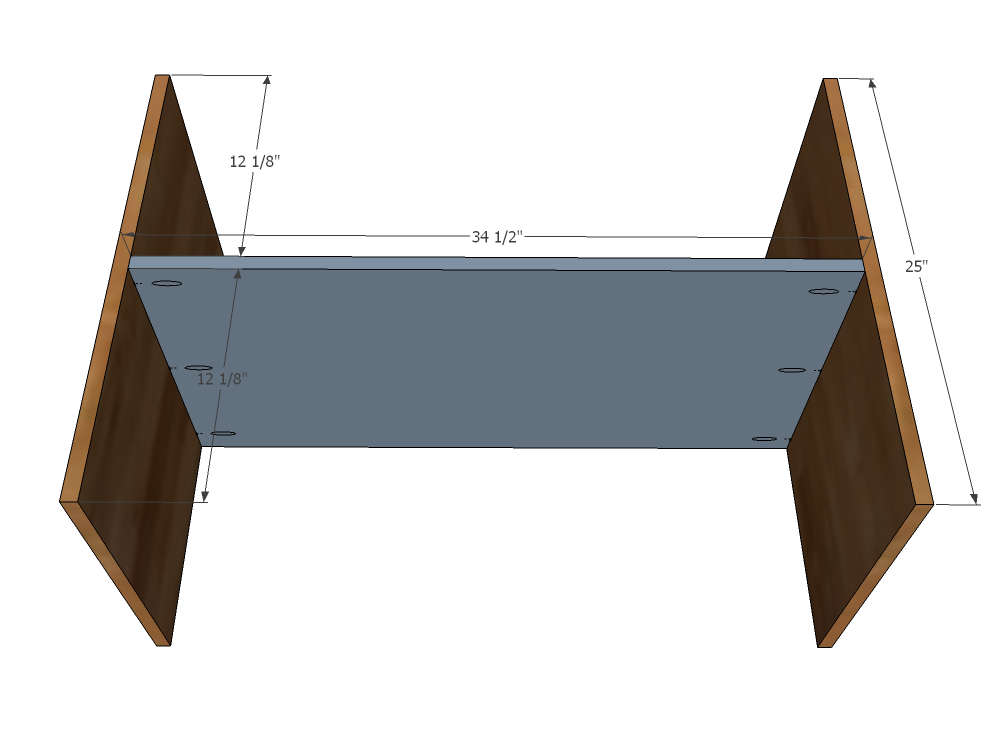
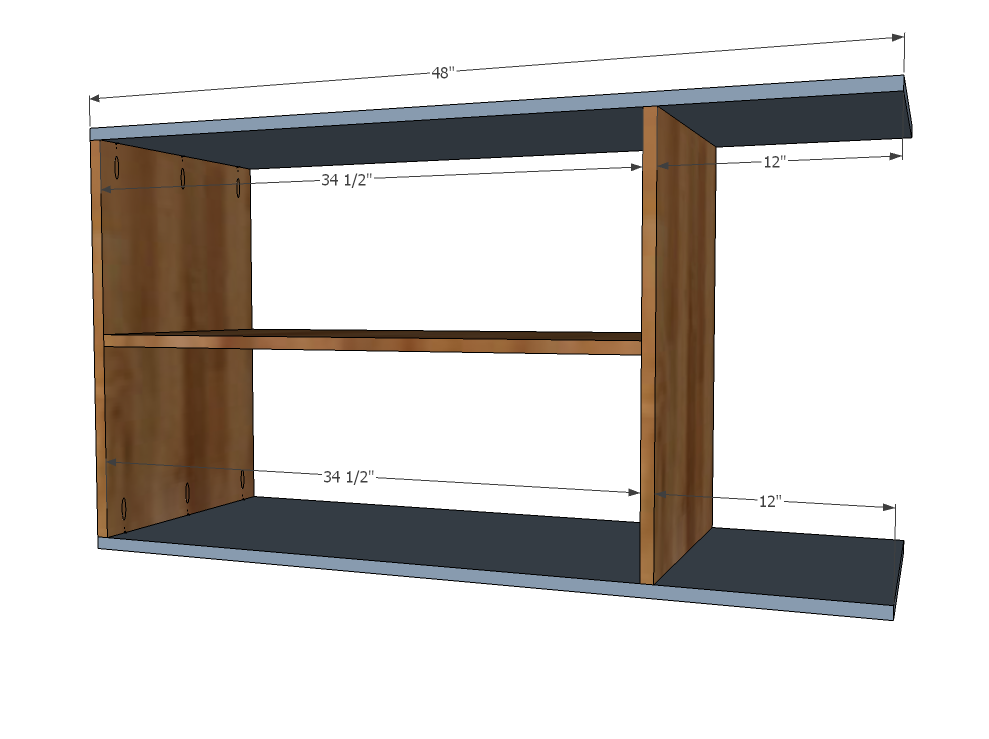
I've included in the diagrams pocket holes for Kreg Jig users. For those of you without, you can countersink 2" screws from the outside for joints with glue. Attach shelf to ends as shown above.
Step 3
Now add top and bottom as shown above. Adjust for square.
Step 4
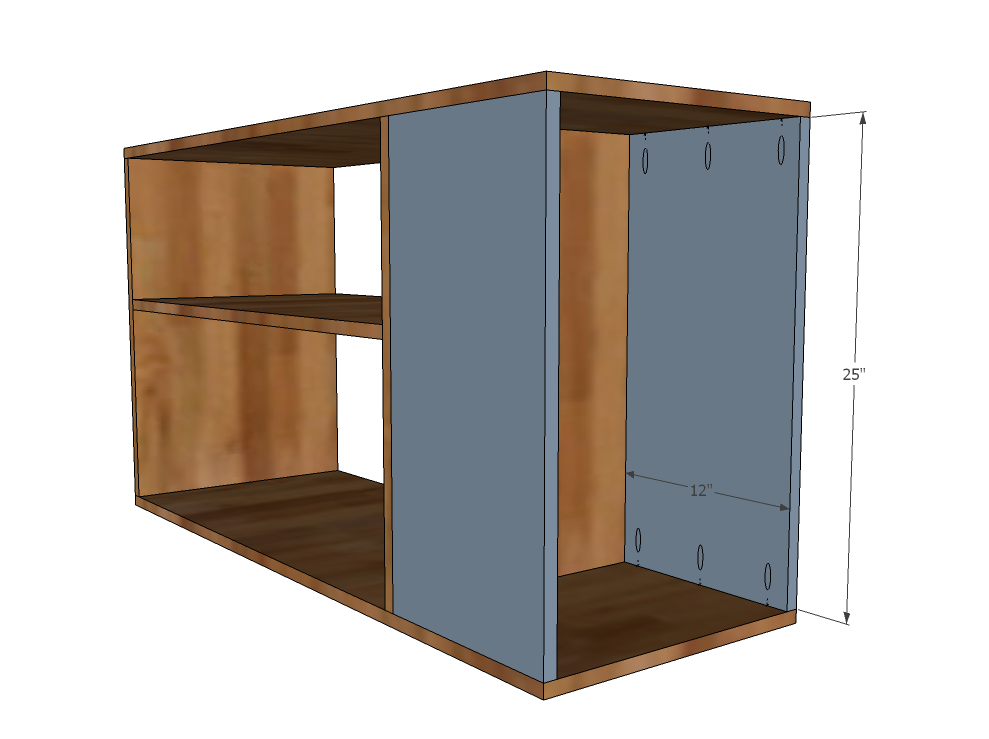
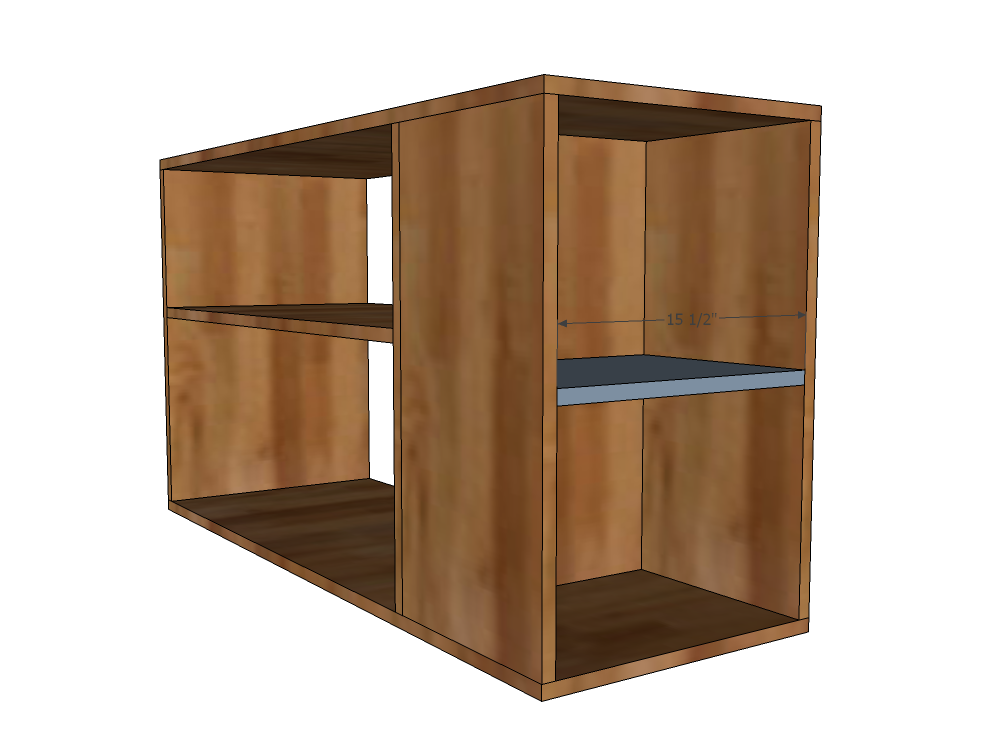
And now the small bookshelf sides - also attach from the back.
Step 5
Step 6
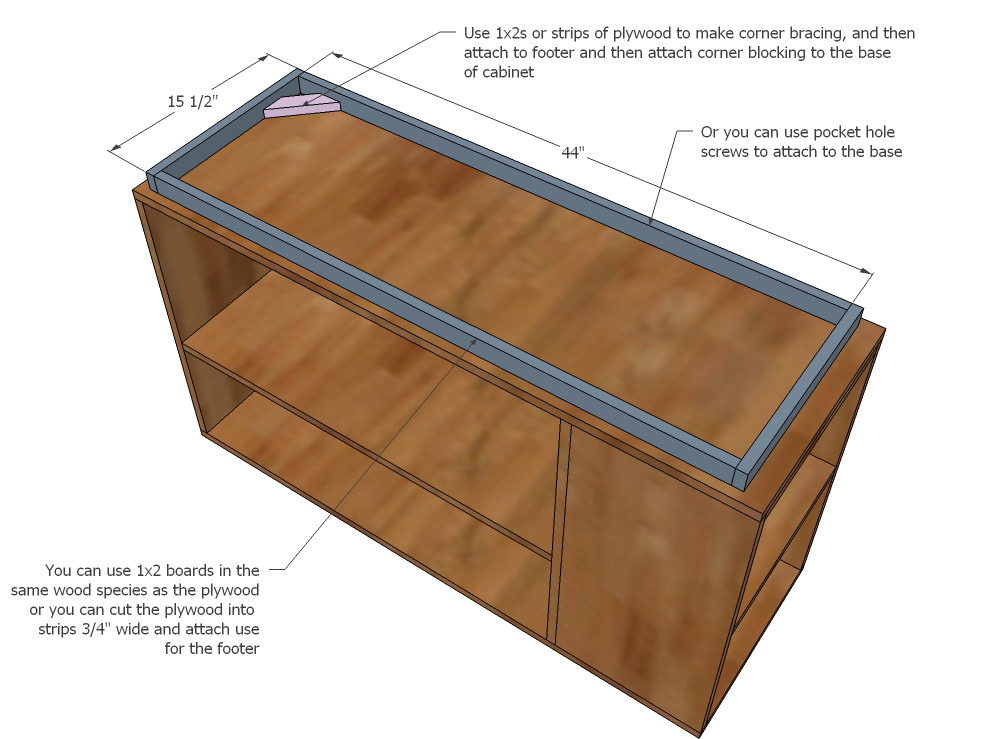
Finally, build your footer, and attach. I used pocket holes to attach mine, but if you don't have a pocket hole jig, you can cut corner bracing at 45 degree angles on both sides, and then attach as shown in the diagram above.
Step 7
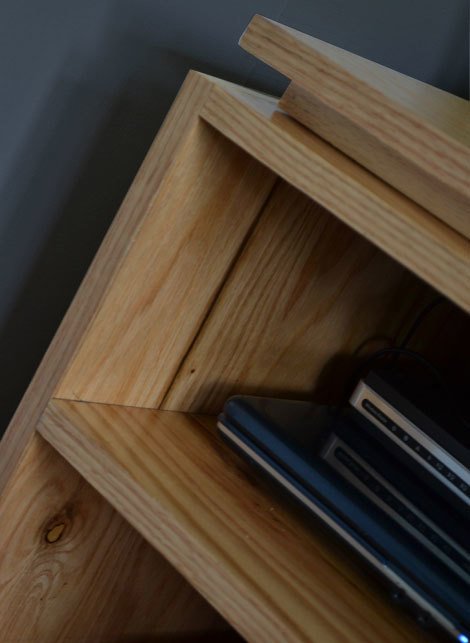
Apply edge banding to all exposed plywood edges as recommended by the manufacturer. The edge banding we used was iron on, and it's very simple to do. We trimmed the excess off with a utility knife and then sanded outside corners for a smooth joint. Results? You can't tell what's the original plywood and what we ironed on!
Finishing
Sand all surfaces, starting with a medium grit and finishing with fine. Wipe off the dust, fill any holes or gaps with wood filler, and sand smooth once dry. Apply primer if you're painting, then finish with your choice of paint or stain and seal with a durable clear topcoat. For outdoor projects, use exterior-rated primer, paint or stain, and sealer so the piece stands up to the weather.
Source (temporary): https://www.ana-white.com/woodworking-projects/eco-office-large-bookshelf-made-purebond-formaldehyde-free-plywood