Elevated Planter Box
Blog Link:

Specifications
| Project type | Planters, Garden Beds, and Greenhouses |
|---|---|
| Room | Outdoor |
| Style | Green or Eco-Friendly Style Furniture |
| Difficulty | Beginner Projects |
| Estimated cost | $50 - $100 |
Dimensions
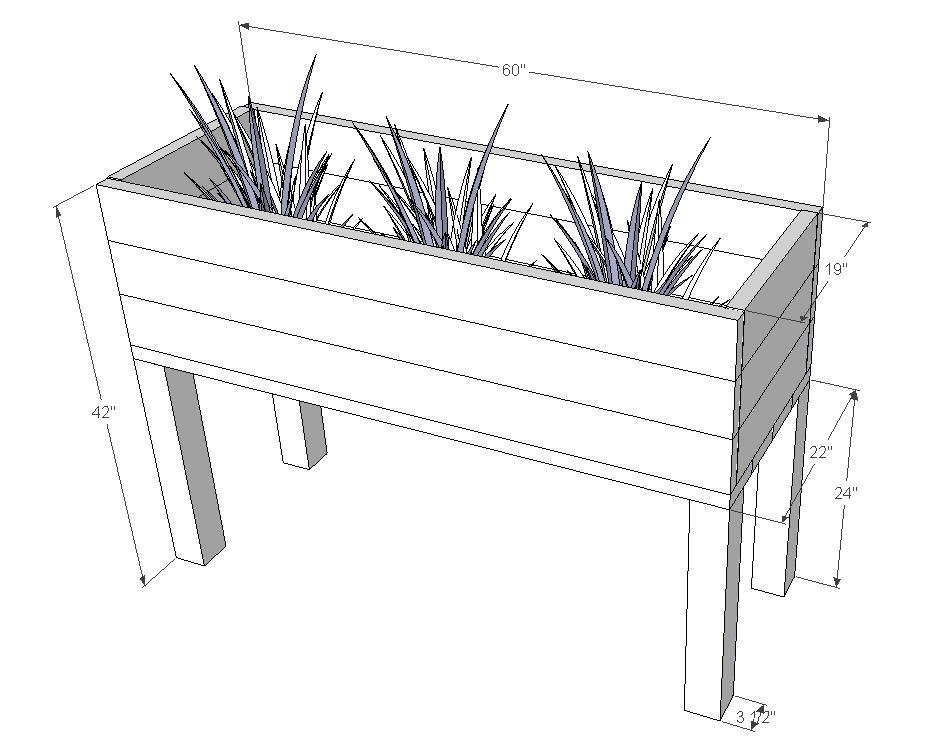
Use the size-specific shopping and cut lists below.
Shopping List
- 4 – 2×6 @ 16 feet long (untreated lumber for health of vegetation; I used pine) $9.30 each=$37.20
- 1 – 4×4 @ 8 feet long (I used treated cedar to last longer) $6.97 each
- 40 – 2″ wood screws (I used 14#) $5.58 box/25 x2=$11.16 24
- metal strap-ties (16 straight to attach the box walls together; 8 bent to a 90-degree angle to use as support to attach legs to box base) $0.88 each=$21.12
- Screws or finish nails to attach the strap-ties
- Wood glue $5.47
- Total Cost = $81.92 (as of 2/12/2011)
Cut List
10 – 2×6 @ 60″ (box base & wall sides)
6 – 2×6 @ 19″ (box end walls)
4 – 4×4 @ 24″ (legs)
Tools
- measuring tape
- square
- pencil
- safety glasses
- hearing protection
- kreg-jig
- drill
- circular saw
- sander
- level
- countersink drill bit
Step-by-step Instructions
Step 1
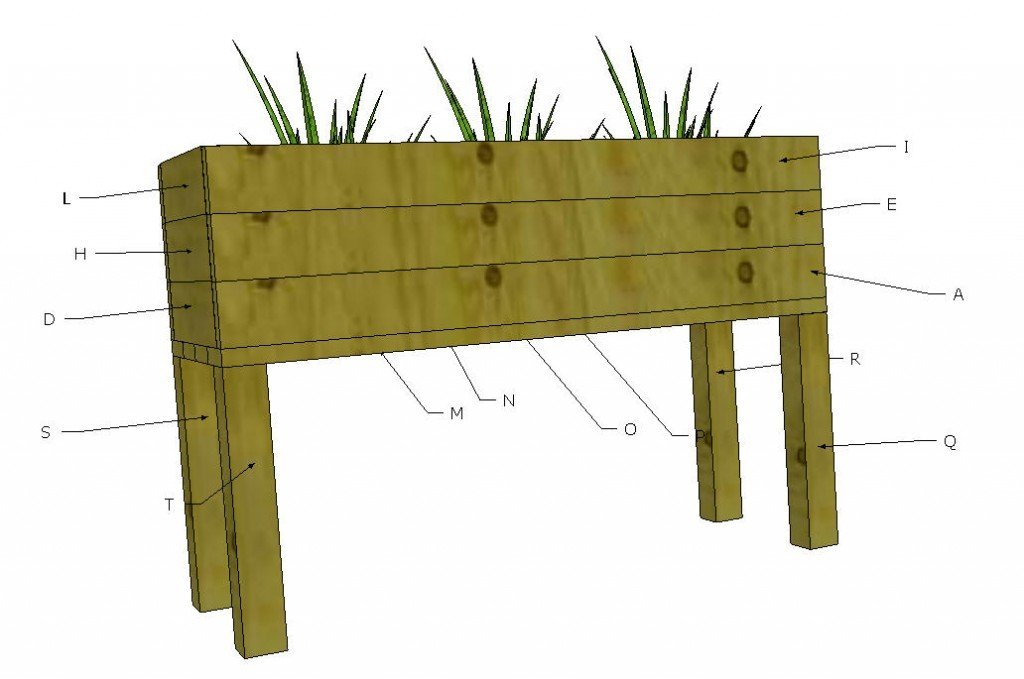
Drill two holes for screws on one end of A (2×6 @ 60”). We spaced ours at ¾” from the end and 1 ½” from the sides. Set one B (2×6 @ 19”) at a 90-degree angle lining up the ends of A & B; screw one 2” wood screw into each hole, forming an L-shape. Repeat on C & D, E & F, G & H, I & J, and K & L, so that each side has and piece on it.
Step 2
Connect the A/B piece to the C/D piece drilling two more holes and using two wood screws so that the two L-shapes become a box. Repeat for E/F and G/H and for I/J and K/L. You will have three 22”x60” boxes when done and should have used six 2×6 @ 60” and six 2×6 @ 19” pieces.
Step 3
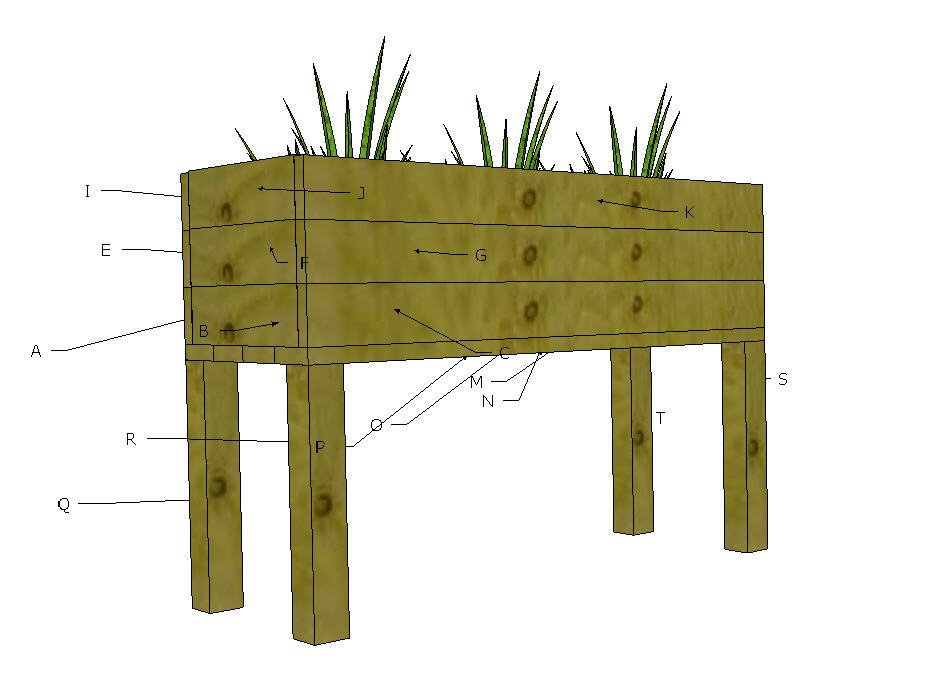
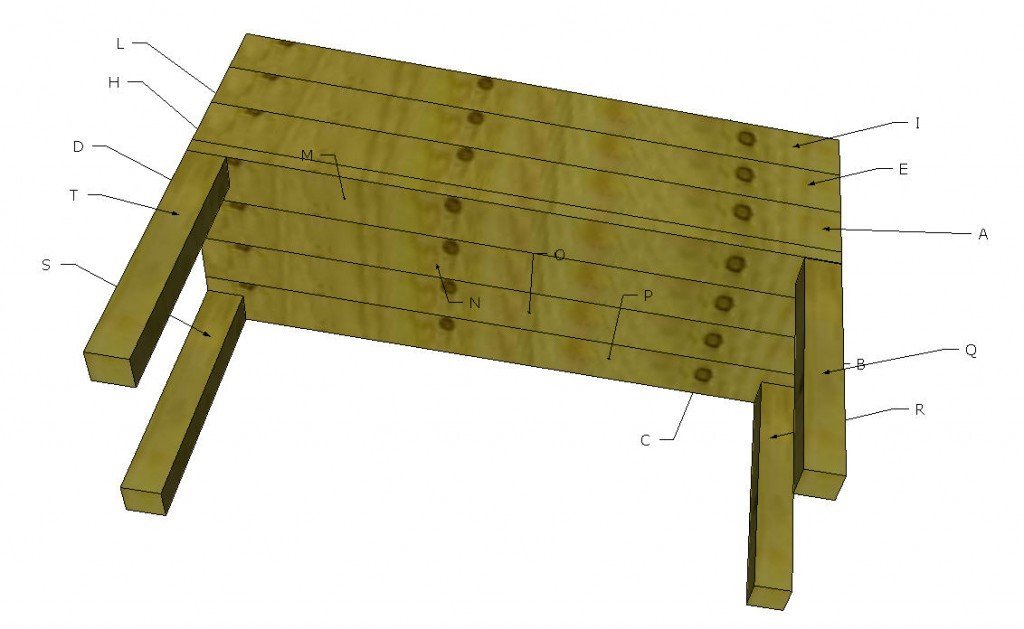
On one of the boxes, line up four 2×6 @ 60” (box base, M, N, O & P) pieces side by side. Drill two holes in each piece from the bottom piece into the box end piece. Repeat for all four boards so that one of the three boxes has a solid base. Flip the box over so the base is facing the ground. Wedge each leg (Q, R, S & T) under the base or prop one side up so you can attach one leg or lay the box on a side; use a helper! Line up one 4×4 @ 24” on the end and side of the base and drill a hole through the base into the leg and use one wood screw to attach the leg to the base. Use two bent strapties, one on each side of the leg that touches the base, and additional screws and/or nails to attach the straptie. Repeat for each leg, for a total of 8 strapties. Flip unit over so that it is standing on its legs. You should now have a base box on legs. You will now attach the two remaining box walls to the base. Apply a layer of wood glue to the top of the box wall on the base unit. Using 8 straight strapties on each box wall, attach one straptie from the base box wall to the loose box wall with screws and/or nails on each end, near each corner. Repeat for We’re leaving the box untreated so as not to harm any vegetation that will be growing in it. You can use treated lumber on the legs for durability. I also add the disclaimer that I am NOT a woodworker or designer so use at your own risk!
Finishing
Sand all surfaces, starting with a medium grit and finishing with fine. Wipe off the dust, fill any holes or gaps with wood filler, and sand smooth once dry. Apply primer if you're painting, then finish with your choice of paint or stain and seal with a durable clear topcoat. For outdoor projects, use exterior-rated primer, paint or stain, and sealer so the piece stands up to the weather.
Source (temporary): https://www.ana-white.com/woodworking-projects/elevated-planter-box