Emersen Nightstand
Build a West Elm Emmerson inspired nightstand - from
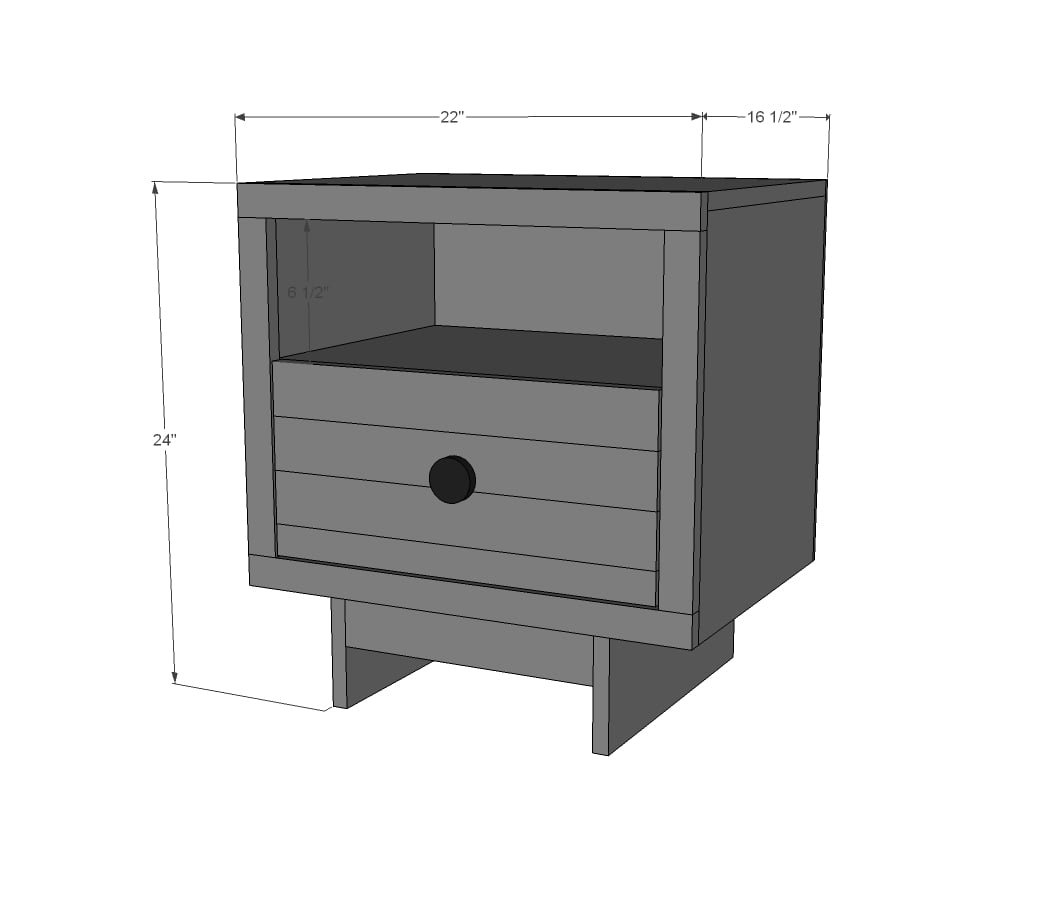
Specifications
| Project type | Nightstands |
|---|---|
| Room | Bedroom |
| Style | Modern Style Furniture Plans |
| Difficulty | Intermediate |
Dimensions
Use the size-specific shopping and cut lists below.
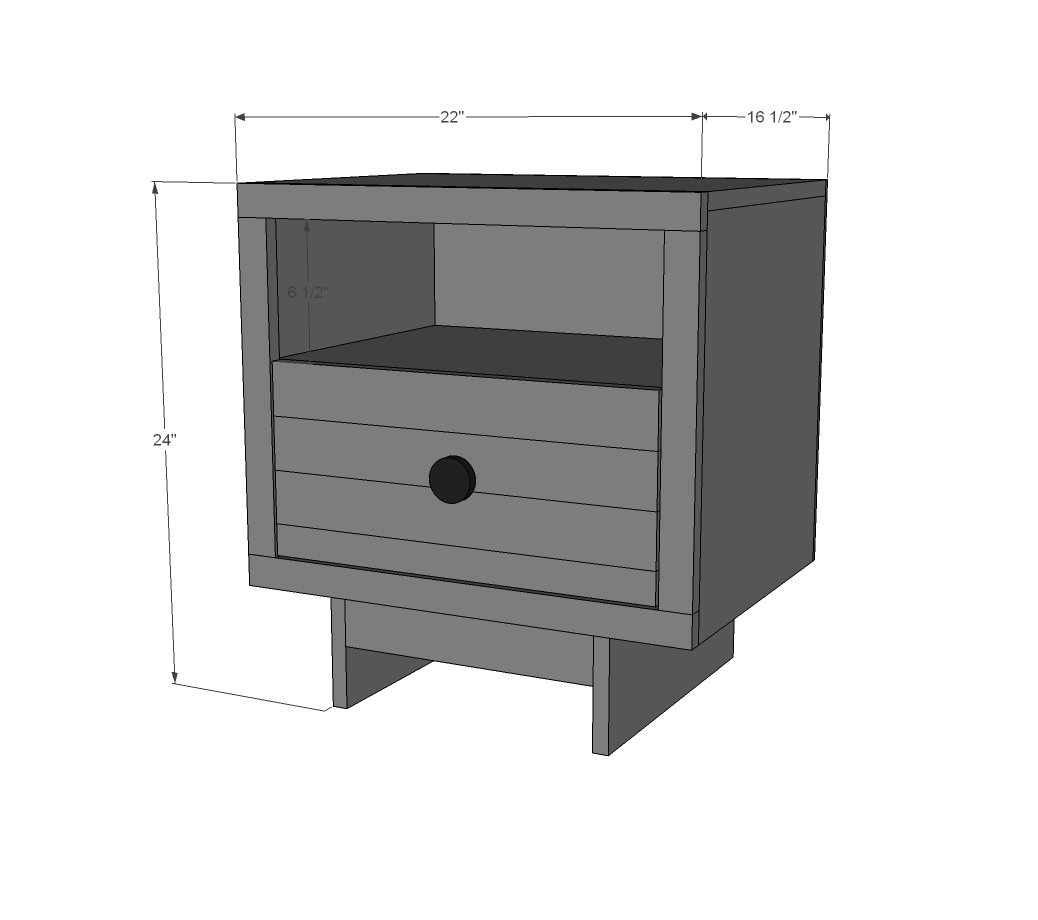
Shopping List
4x4 sheet of 3/4" plywood ripped into width of 15 1/2" x 4 feet long (three strips) OR 10 feet of any wide width board (for example a 1x12) if alterning the depth of nightstand
2x4 sheet of 1/4" plywood
1 - 1x6 @ 10 feet long
1 - 1x3 @ 8 feet long
2 - 1x2 @ 8 feet long
Recommended assembly with 1-1/4" pocket hole screws
1 1/4" finish nails
wood glue
knob or pull
may need edge banding to finish off exposed plywood ends of top
Cut List
BOX
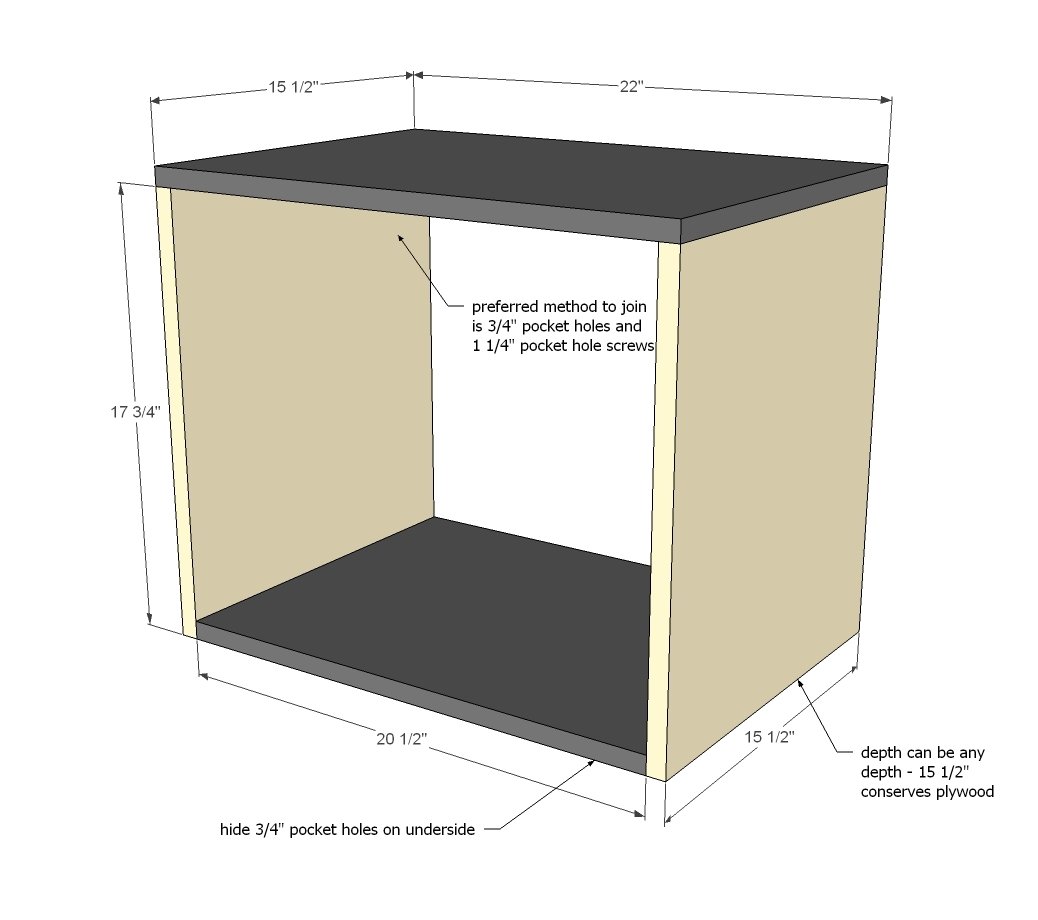
2 - 3/4" plywood @ 15-1/2" x 17-3/4" (sides)
2 - 3/4" plywood @ 15-1/2" x 20-1/2" (shelf and bottom)
1 - 3/4" plywood @ 15-1/2" x 22" (top)
1 - 1/4" plywood @ 22" x 18" (back)
BASE
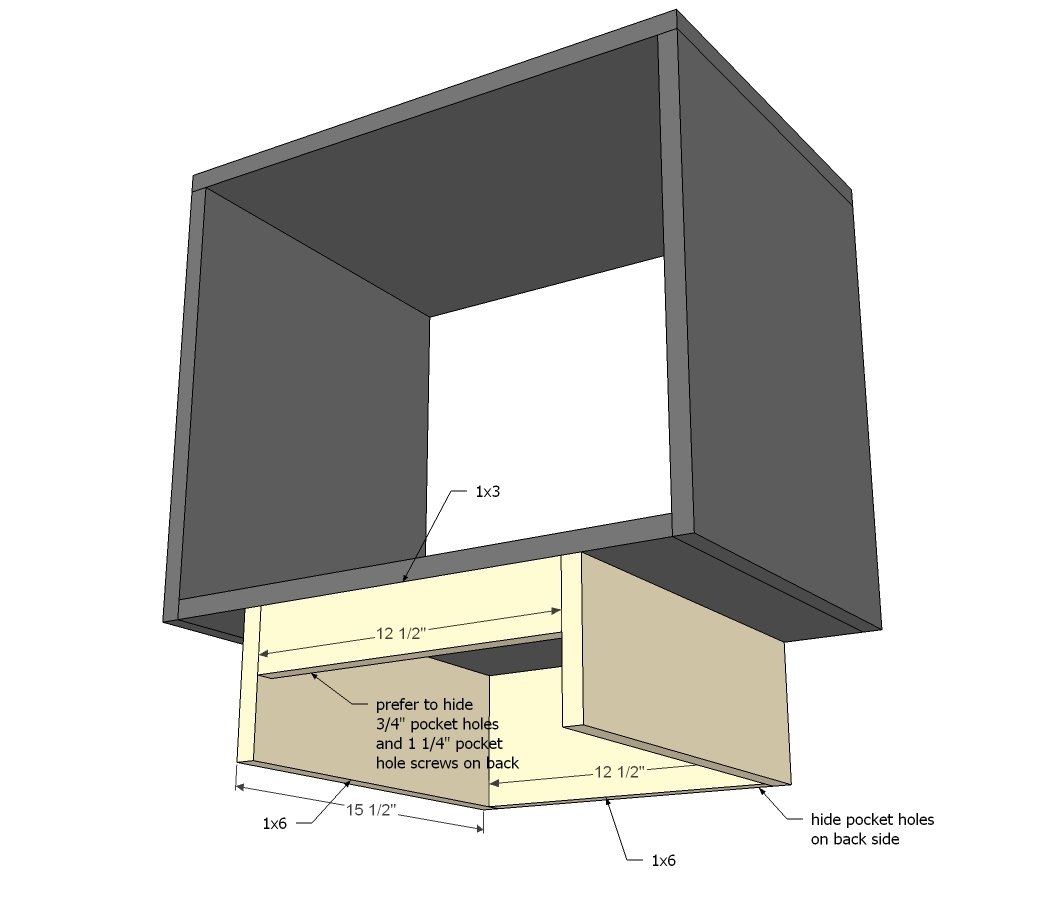
2 - 1x6 @ 15-1/2" (base sides)
1 - 1x6 @ 12-1/2" (base back)
1 - 1x3 @ 12-1/2" (base front)
FACE FRAME
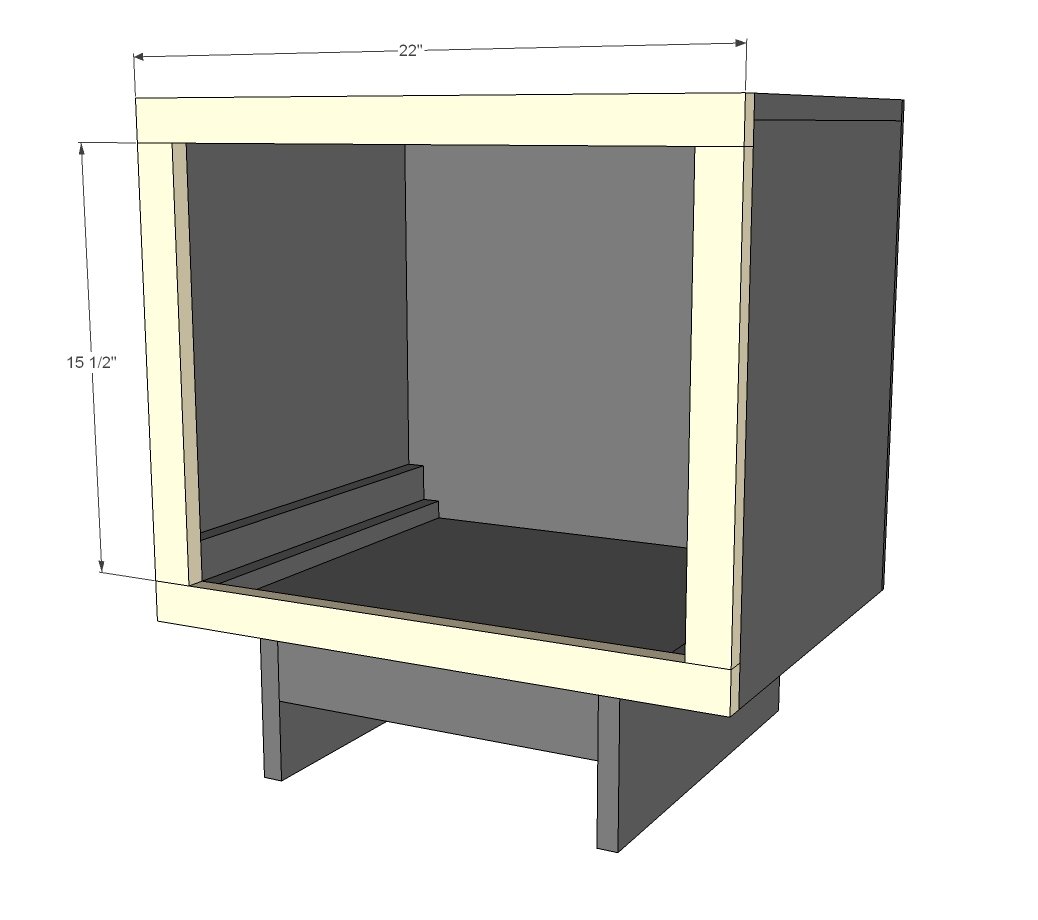
2 - 1x2 @ 22"
2 - 1x2 @ 15 1/2"
DRAWER
4 - 1x2 @ 15-1/2" (drawer slide pieces)
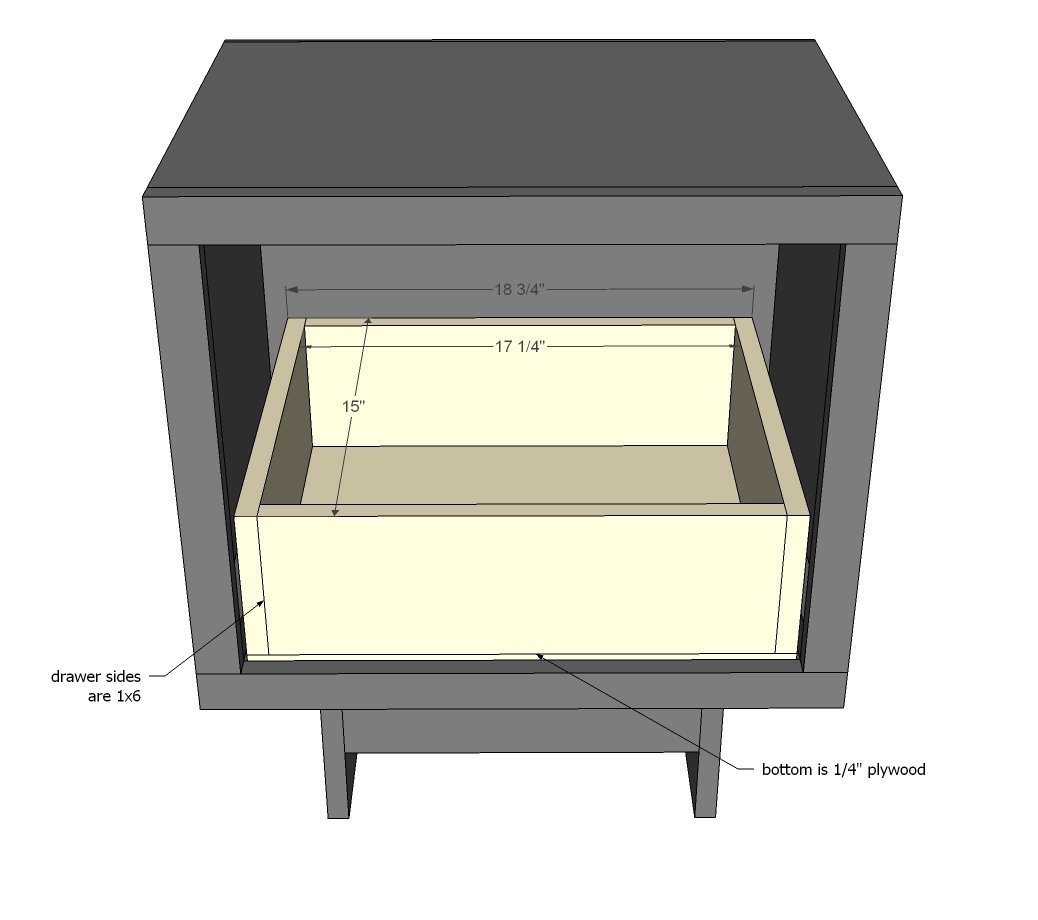
2 - 1x6 @ 17-1/4" (cut these to fit so there is an 1/8" gap on each side of drawer - Expected 17-1/4" length + 1-1/2" for drawer sides + 1/4" for two side gaps = overall opening of 19")
2 - 1x6 @ 15" (drawer sides - made these a little smaller than the opening so the drawer isn't pusing against back)
Cut drawer bottom to fit - expected 15" x 18-3/4"
DRAWER FACE PIECES
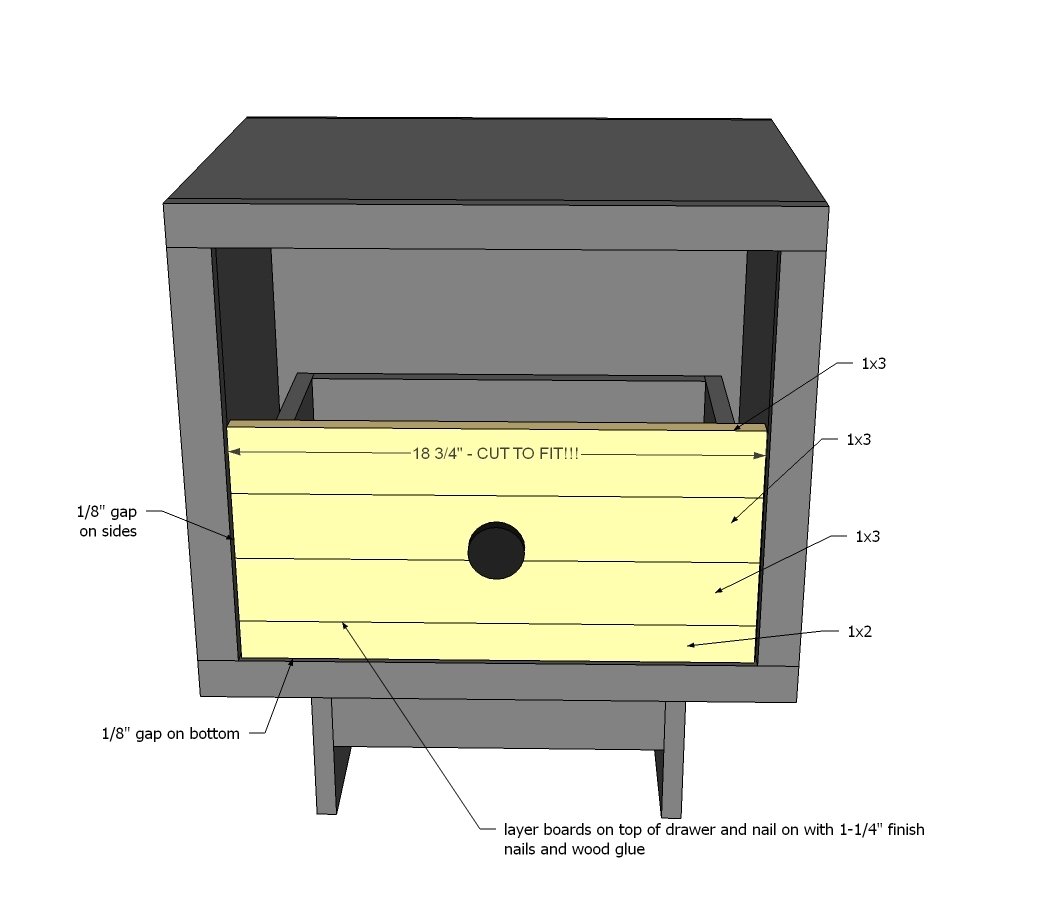
3 - 1x3 @ 18 3/4" (cut to fit drawer width!!!)
1 - 1x2 @ 18 3/4" (cut to fit drawer width!!!)
Tools
- measuring tape
- square
- pencil
- safety glasses
- hearing protection
- kreg-jig
- drill
- circular saw
- compound miter saw
- nailer
- sander
Step-by-step Instructions
Step 1
Start by building the basic box for the nightstand. Preferred method - you'll thank me later, I promise - is to use a Kreg Jig set for 3/4" thick material and attaching with 1-1/4" pocket hole screws. You can also assemble with 2" nails or screws, but the screw or nail holes will be visible on top, and it won't have the same lateral strength.
Step 2
Build your base seperately, then attach to base of nightstand. If you are using pocket holes, also drill a couple of holes on the inside facing upward so you can easily attach the base to the box.
Step 3
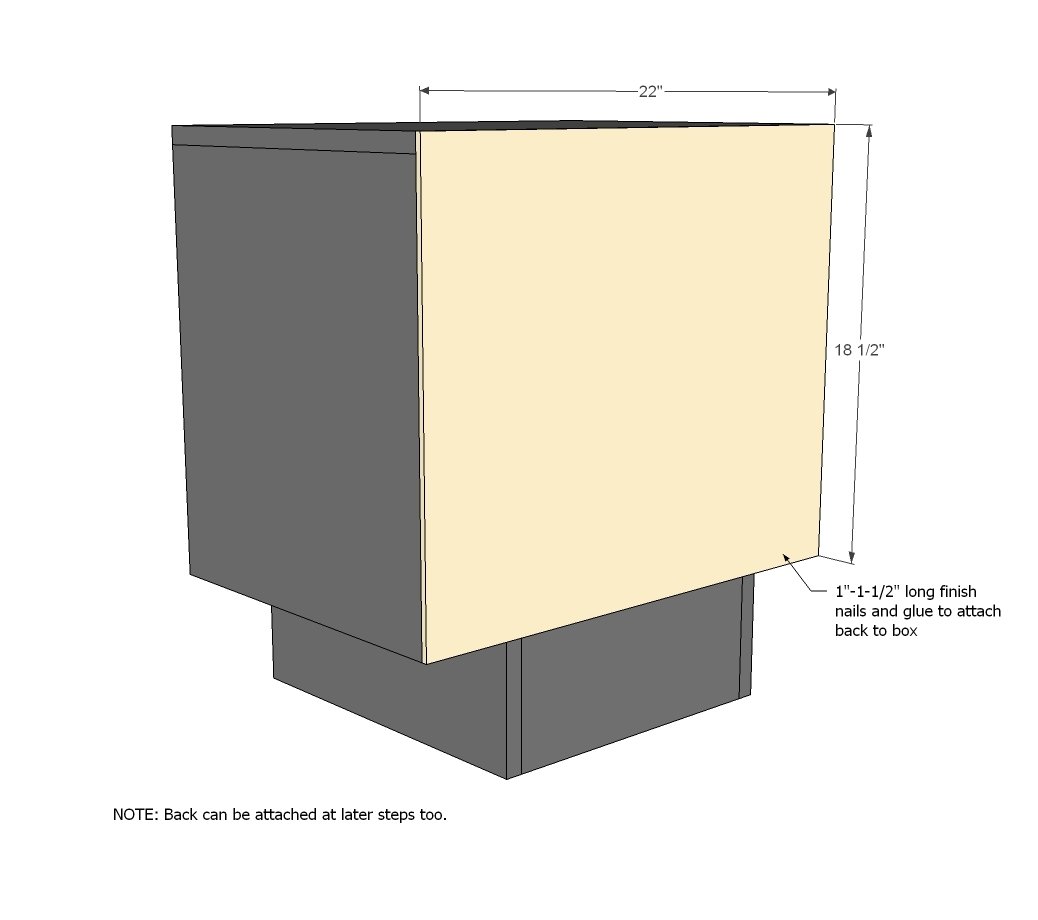
You can attach the back at any stage, but if you put it on now, it will help square up your box. But also, it will make reaching in to install the drawer a little snug - so your choice here.
Step 4
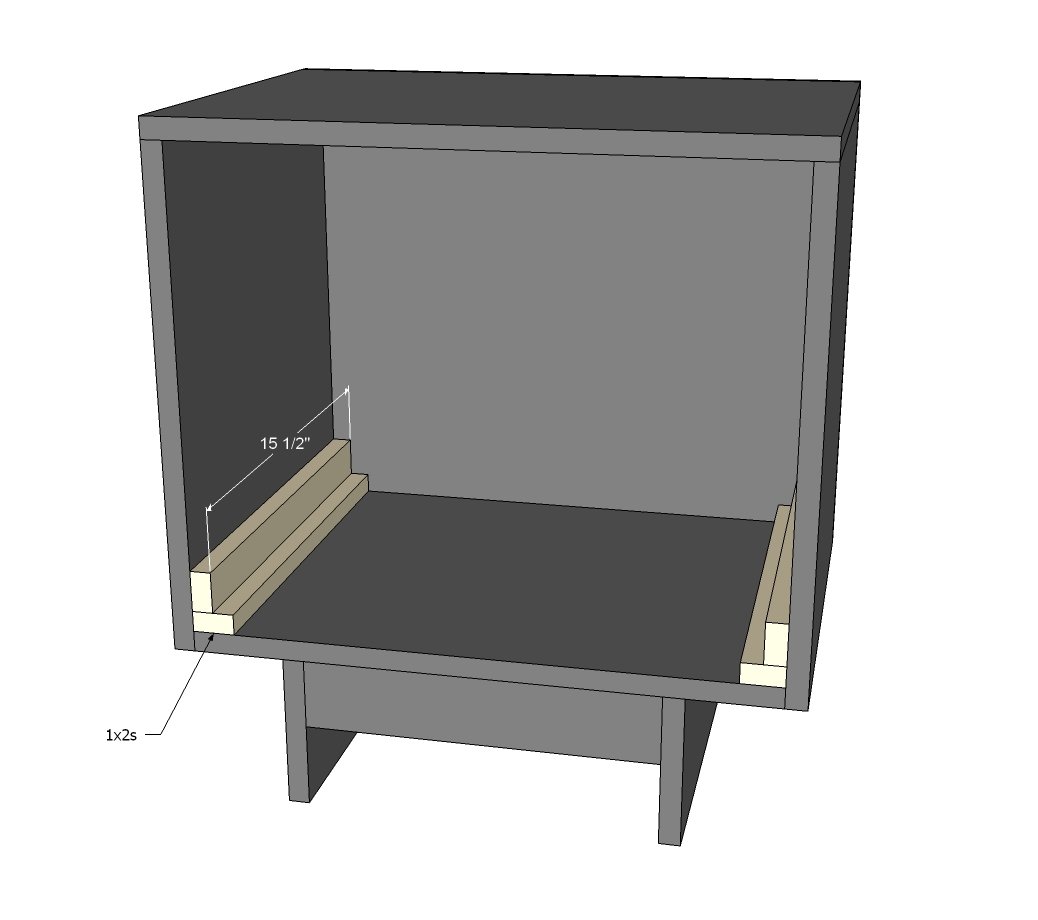
These guys are for helping the drawer slide inside the box after we add the face frame. Apply candle wax to these boards (after finsh is applied) so the drawer will slide easily (also apply to bottom edges of drawer). Just glue and nail in place with 1-1/4" finish nails.
Step 5
Step 6
The drawer should be build to fit, leaving an 1/8" gap to the sides so the drawer can slide easily in and out. So measure your overall opening, and build to fit the opening. TIP: Cut the 1/4" bottom plywood first to the opening width (19" x 15"). Test to see how the plywood slides and trim down until it slides perfectly. Then build the drawer sides to fit the bottom dimensions. The bottom can be just nailed to the sides with glue and nails. Pocket hole users should place 3/4" pocket holes on the front and back boards, on the outsides. The false drawer face will cover them up! Test fit and adjust as needed.
Step 7
Next, add the drawer face boards, starting at the bottom and working upward. Leave 1/8" gap all the way around.
Step 8
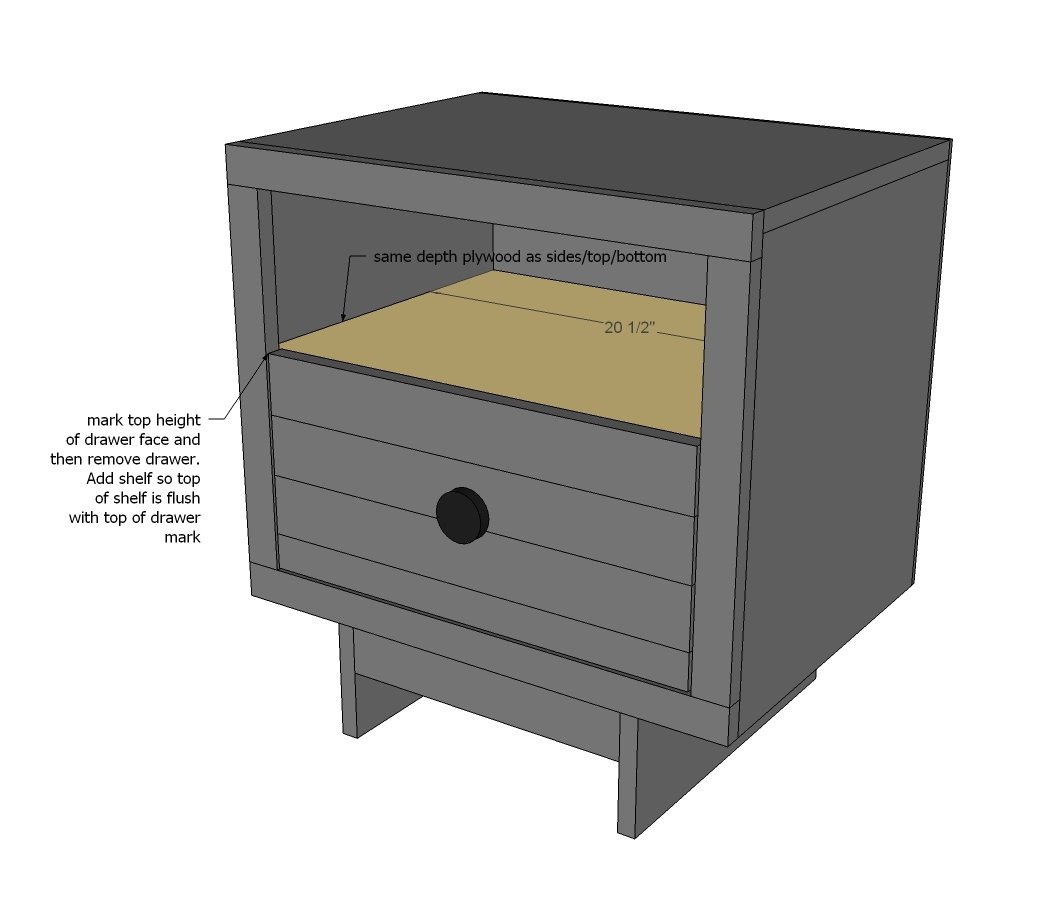
Finally, go back and add the shelf by marking the top height of your drawer face. Then remove the drawer, and mark attach shelf level to top of mark, so front plywood edge is hidden when drawer is closed.
Finishing
Sand all surfaces, starting with a medium grit and finishing with fine. Wipe off the dust, fill any holes or gaps with wood filler, and sand smooth once dry. Apply primer if you're painting, then finish with your choice of paint or stain and seal with a durable clear topcoat. For outdoor projects, use exterior-rated primer, paint or stain, and sealer so the piece stands up to the weather.
Source (temporary): https://www.ana-white.com/woodworking-projects/emersen-nightstand