Emily Dresser
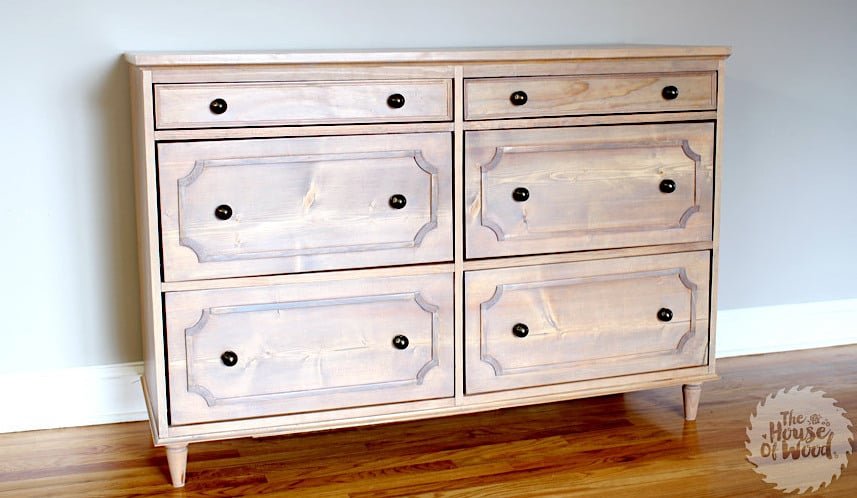
Build this beautiful dresser! from Features four large drawers and two smaller drawers.
Specifications
| Project type | Dresser Plans |
|---|---|
| Room | Bedroom |
| Style | Cottage Style Furniture Plans |
| Difficulty | Advanced |
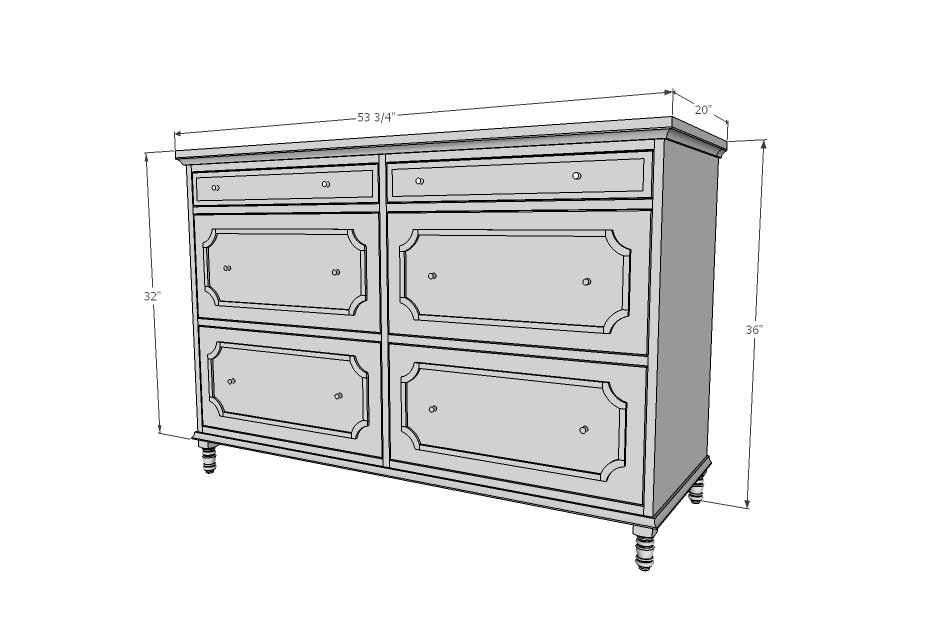
Dimensions
Use the size-specific shopping and cut lists below.
Shopping List
- 1 - 1/2 sheets of ¾” plywood
- 1 sheet of ¼” plywood or other hardboard
- 4 – 1x2 @ 8 feet long
- 27 feet of 1x8 boards
- 2 – 1x3 @ 8 feet long
- 1 – 1x4 (MUST be 3-1/2” wide) @ 6 feet long
- 1 – 1x12 board (MUST be 11-1/4” wide) @ 10 feet long (can also use scrap ¾” plywood)
- 6 – 16” long white euro drawer slides
- 4 – 4” turned feet 20 feet of cove moulding (3/4”)
- 10 feet of edge banding in matching species to plywood
- Knobs or handles
Cut List
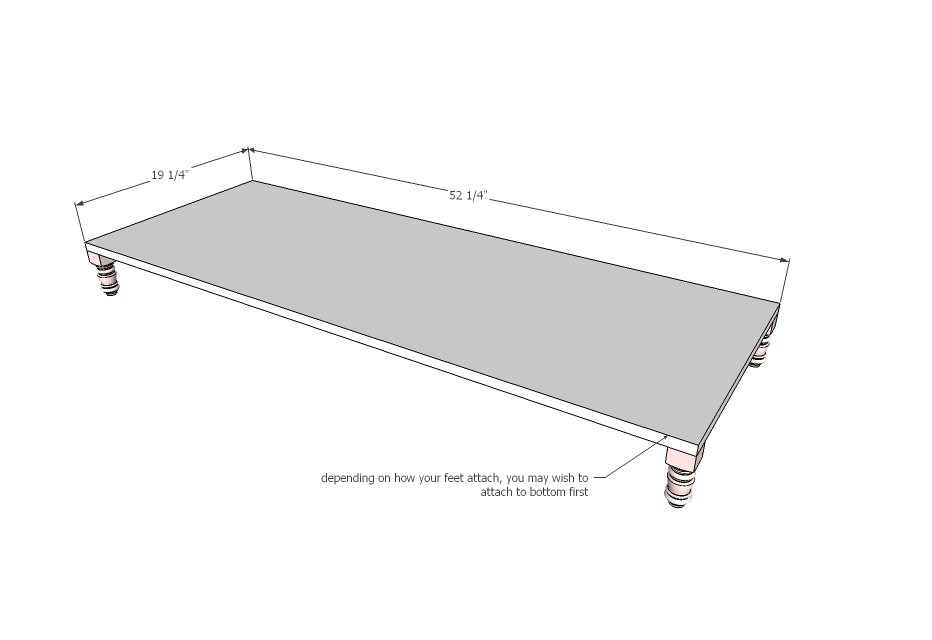
- 1 – 3/4” plywood @ 19-1/4” x 52-1/4” (bottom)
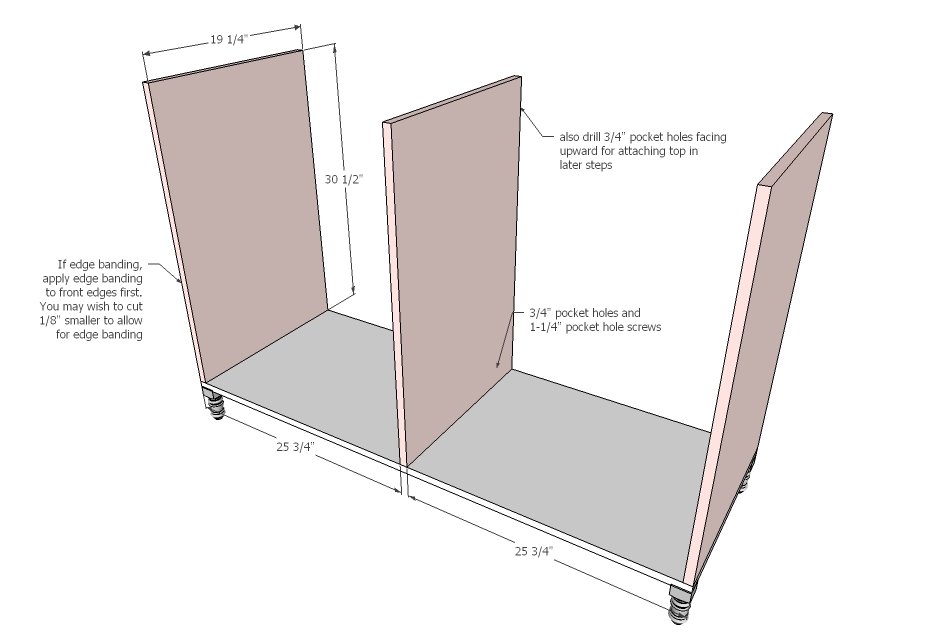
- 3 – 3/4” plywood @ 19-1/4” x 30-1/2” (sides and divider)
- 10 – 1x2 @ 25” (trim)
- 1 – 3/4” plywood @ 20” x 53-3/4" (top)
- 8 – 1x8 @ 16” (large drawer sides)
- 8 – 1x8 @ 22-1/2” (large drawer fronts and backs)
- 4 – 1x3 @ 16” (small drawer sides)
- 4 – 1x3 @ 22-1/2” (small drawer front and backs)
- 6 – 1/4” plywood @ 16” x 24”
- 2 – 1x4 @ 24-3/4” (small drawer fronts)
- 4 – 1x12 @ 24-3/4” (large drawer fronts)
- 1 – 1/4” plywood @ 52-1/4” (back)
Tools
- measuring tape
- square
- pencil
- safety glasses
- hearing protection
- kreg-jig
- drill
- compound miter saw
- table saw
- nailer
- sander
- scroll saw
- Iron
Step-by-step Instructions
Step 1
Depending on how your bun feet attach, you may wish to attach at this stage or later on.
Step 2
For a stained finish, apply edge banding to the fronts of the three upright plywood pieces and trim off excess. Then attach with 3/4" pocket holes to the bottom. Also drill 3/4" pocket holes facing upward for attaching the top in later steps. Hide all pocket holes.
Step 3
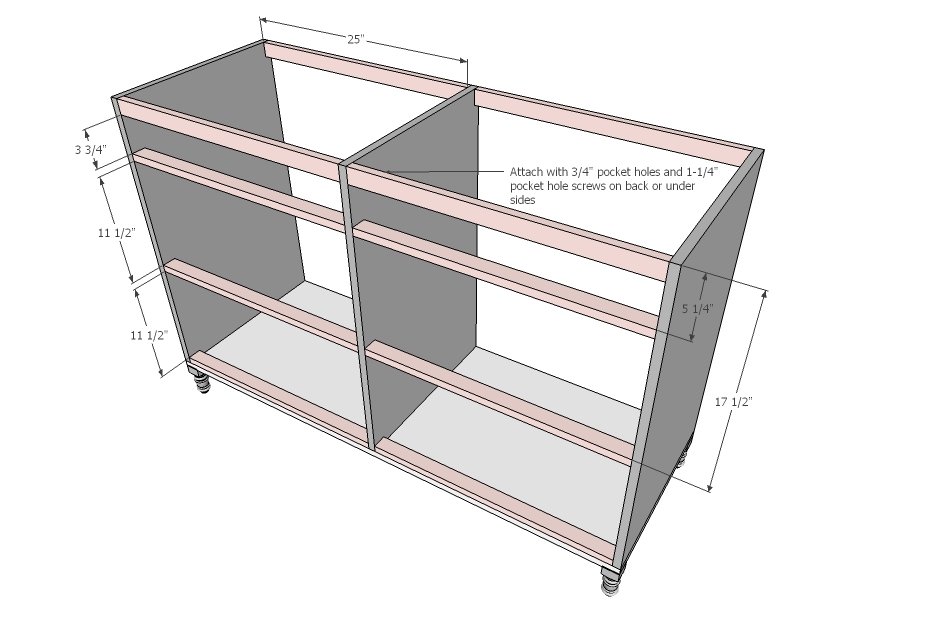
Carefully attach all front trim and back supports with 3/4" pocket holes and 1-1/4" pocket hole screws. It is very important to get the distances right between the 1x2 front pieces as the drawer faces will fit in between.
Step 4
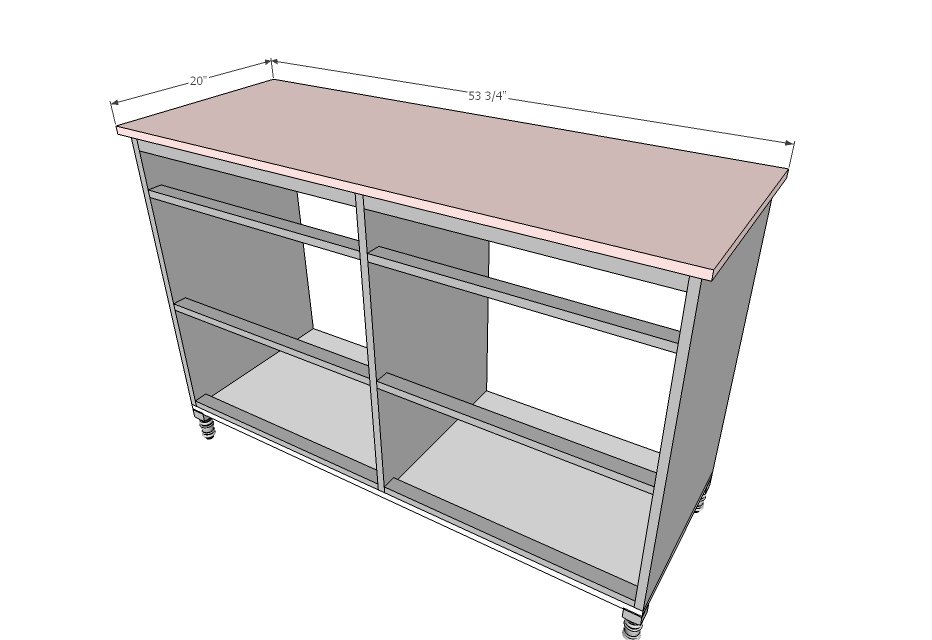
Apply edge banding (if applicable) around the front and sides of the top. Then attach to top of project through pocket holes drilled in earlier steps with 3/4" pocket hole screws.
Step 5
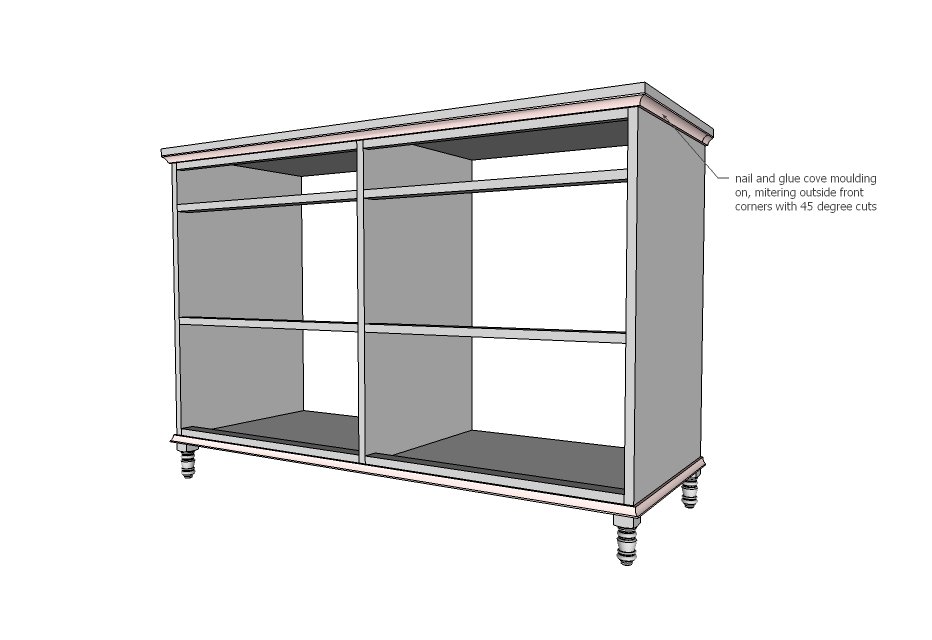
Step 6
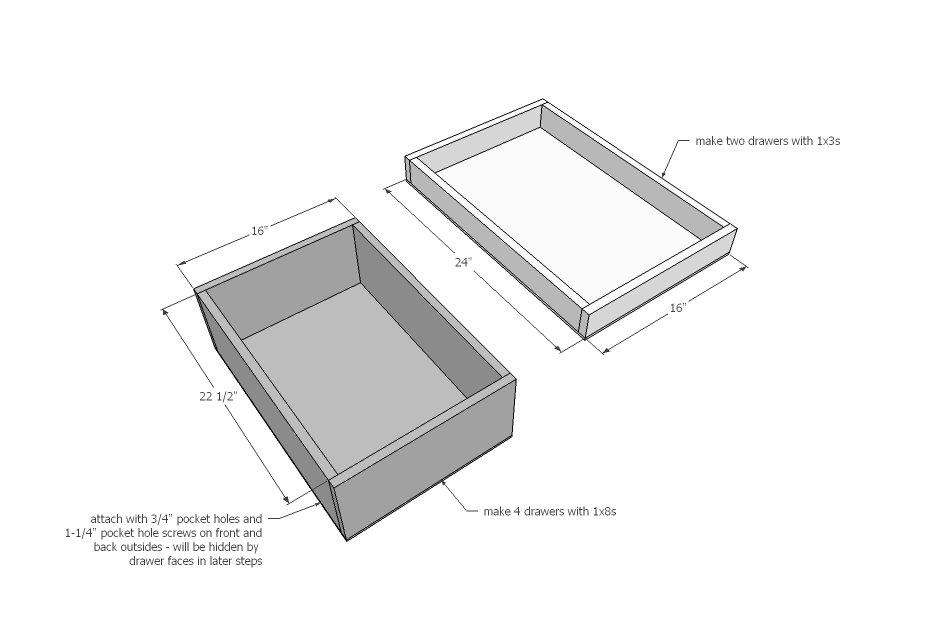
Build your drawers to fit your openings and drawer slides. You can only nail the bottom 1/4" plywood to the bottom if you use the white euro bottom corner mount slides. If you are using side mount slides, you will need to screw the bottom on. Drawer video - please watch this quick video on how to measure, build and install drawers
Step 7
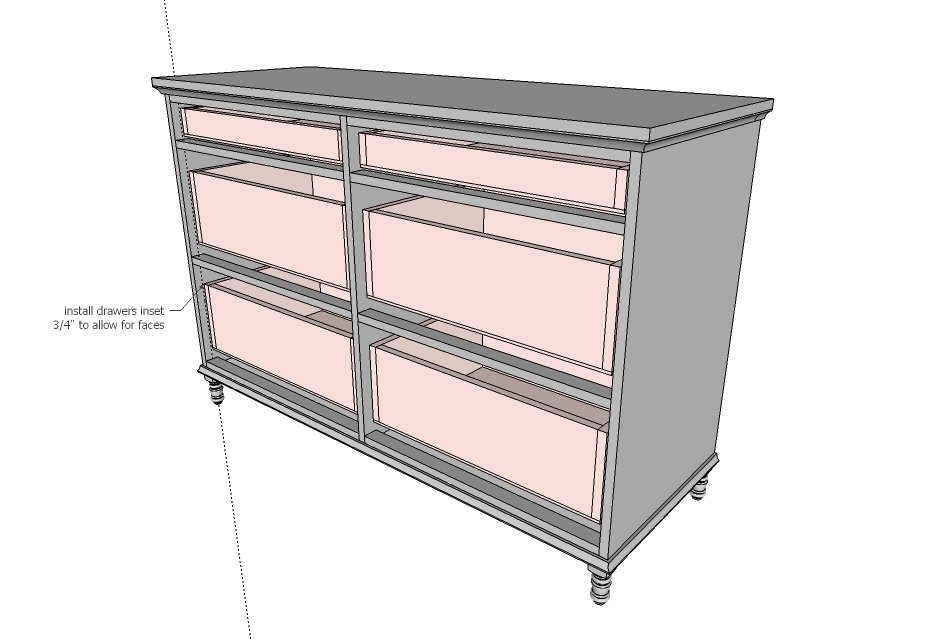
Install all drawers inset 3/4" from the front of the cabinet (to allow drawer faces to sit inset).
Step 8
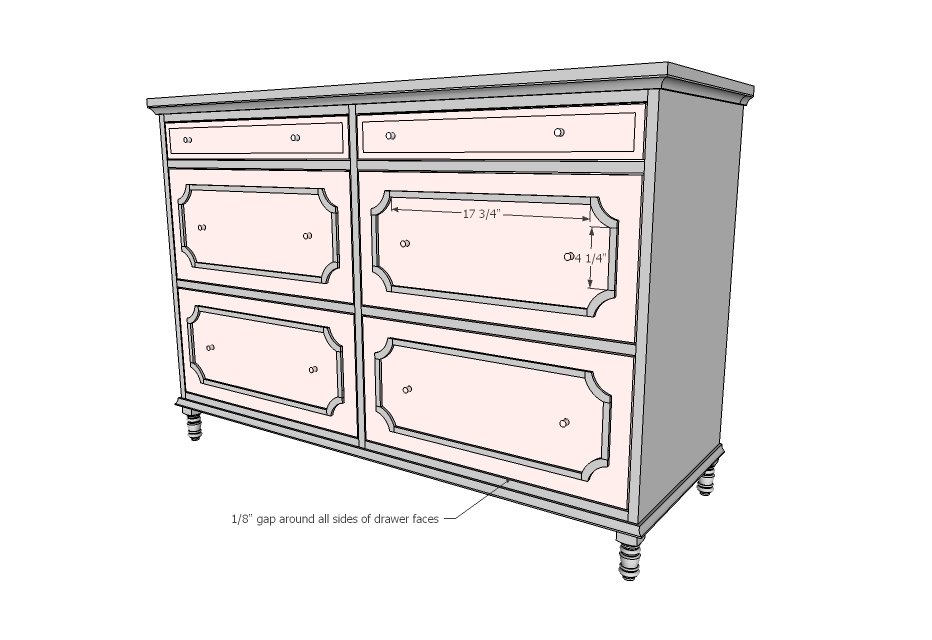
Cut drawer faces to fit, giving 1/8" gap on all sides. Nail drawer faces on with 1-1/4" nails from the front when centered on the opening. Then remove the drawer and add a few screws from the inside. Moulding pattern is in next step - Attach moulding to drawer faces with 3/4" finish nails and glue.
Step 9
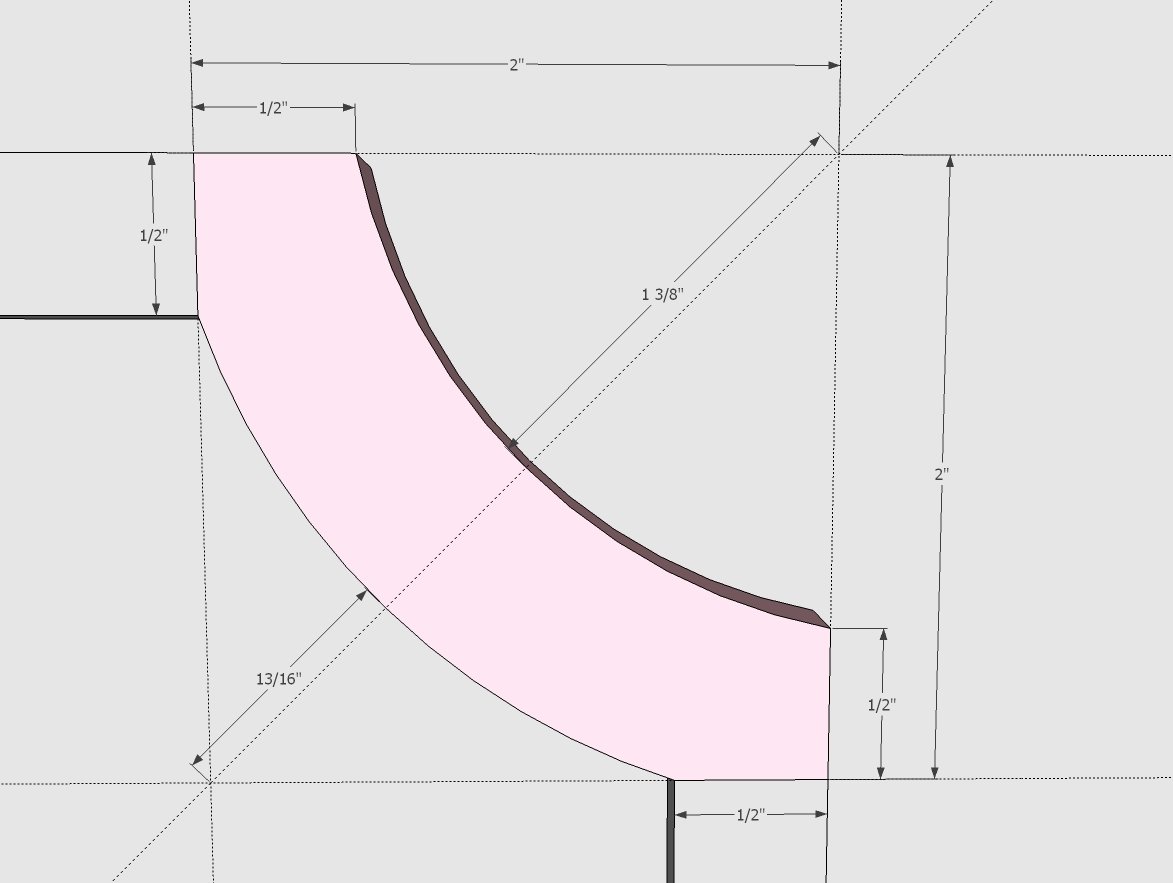
Use a scroll saw or jigsaw to cut out moulding pieces from 1/4" plywood. Long moulding strips are 1/4" plywood pieces 1/2" wide. Other moulding can work as well.
Step 10
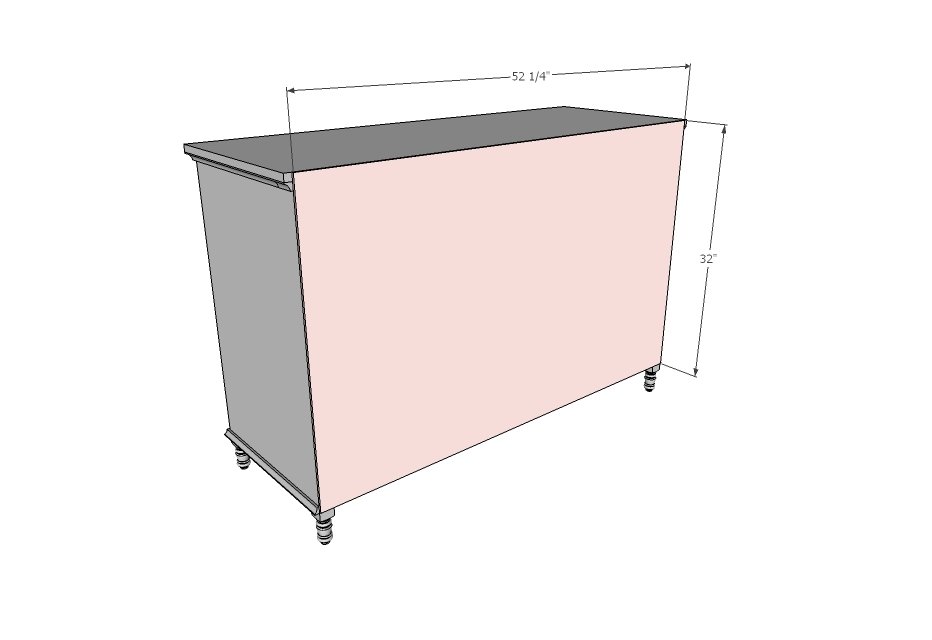
Attach 1/4" plywood to back with 3/4" nails and glue.
Finishing
Sand all surfaces, starting with a medium grit and finishing with fine. Wipe off the dust, fill any holes or gaps with wood filler, and sand smooth once dry. Apply primer if you're painting, then finish with your choice of paint or stain and seal with a durable clear topcoat. For outdoor projects, use exterior-rated primer, paint or stain, and sealer so the piece stands up to the weather.
Source (temporary): https://www.ana-white.com/woodworking-projects/emily-dresser