Enclosed Workbench with Wood Storage
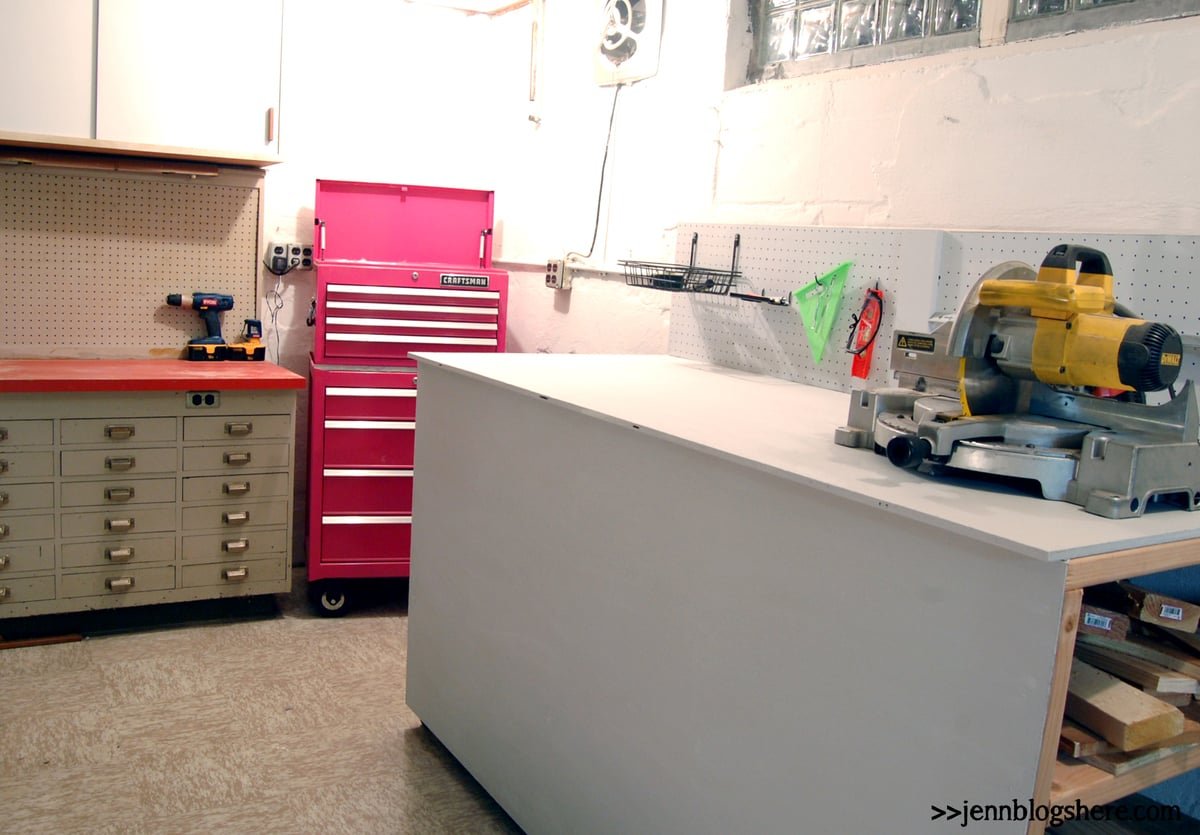
Build your own workbench with wood storage! This features side storage for wood, to keep your space looking tidy. The top is great for bench tools or working. With an added back, this is a great addition to any workshop. with diagrams, shopping and cut list from
Specifications
| Project type | Workshop and Garage Plans |
|---|---|
| Room | Garage and Workshop |
| Style | Industrial Style Furniture Plans |
| Difficulty | Intermediate |
Dimensions
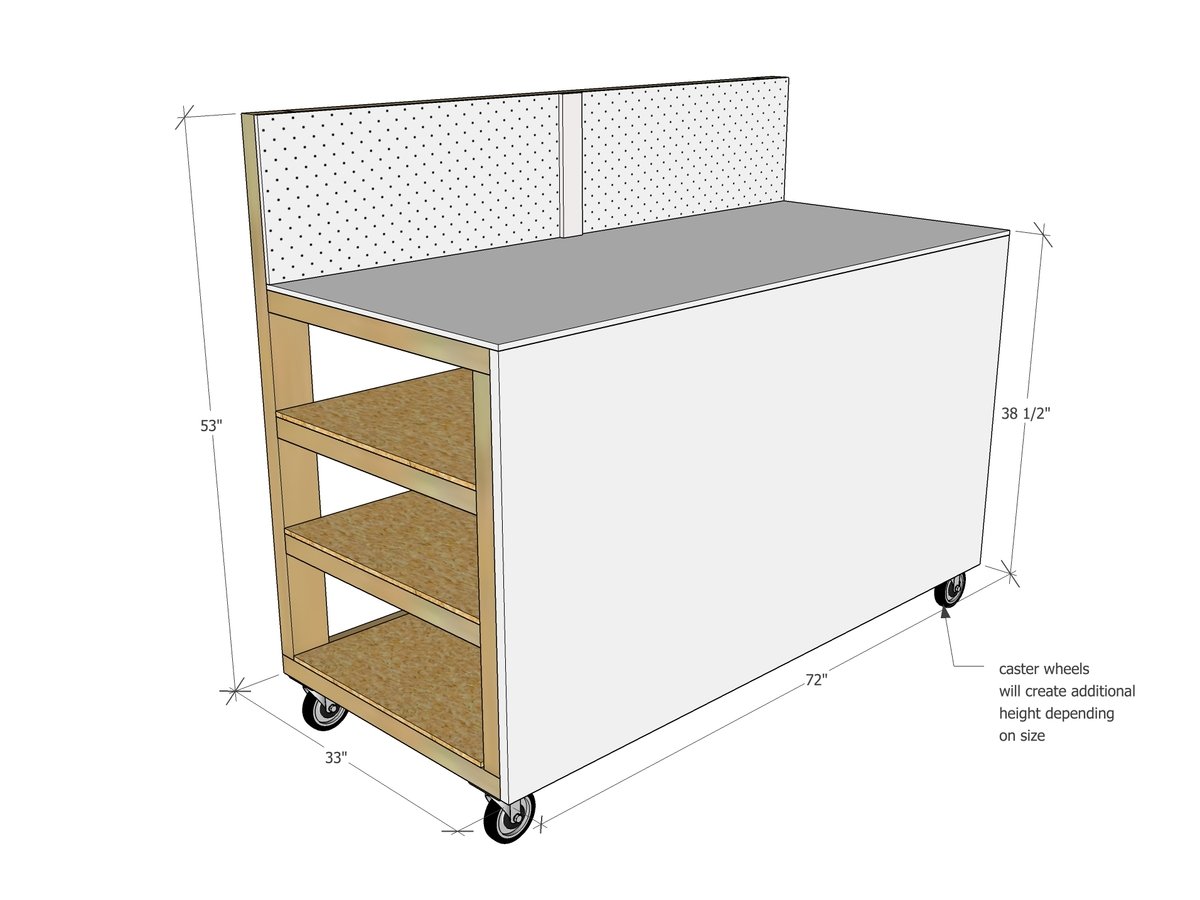
Use the size-specific shopping and cut lists below.
Shopping List
- 8 - 2x4 @ 8 feet long
- 2 - sheets of 1/2" plywood (can also use 1x3 boards for shelving)
- 1 - sheet of 1/4" plywood (optional front, can be omitted for open front shelving)
- 1 - 3/4" plywood for tabletop
- 4 caster wheels
Cut List
- 2 - 2x4 @ 51"
- 2 - 2x4 @ 30"
- 2 - 2x4 @ 32"
- 2 - 2x4 @ 34"
- 4 - 2x4 @ 28"
- 6 - 2x4 @ 64"
- 3 - 1/2" plywood or OSB @ 72" x 28" (shelving, could be 24" wide to conserve plywood or you could also slat shelves with 1x3 or similar boards cut 72" long)
- 1 - 1/4" plywood @ 72"x38" (front - optional, shelving can be exposed as well)
- 1 - 3/4" plywood @ 72" x 31" (tabletop)
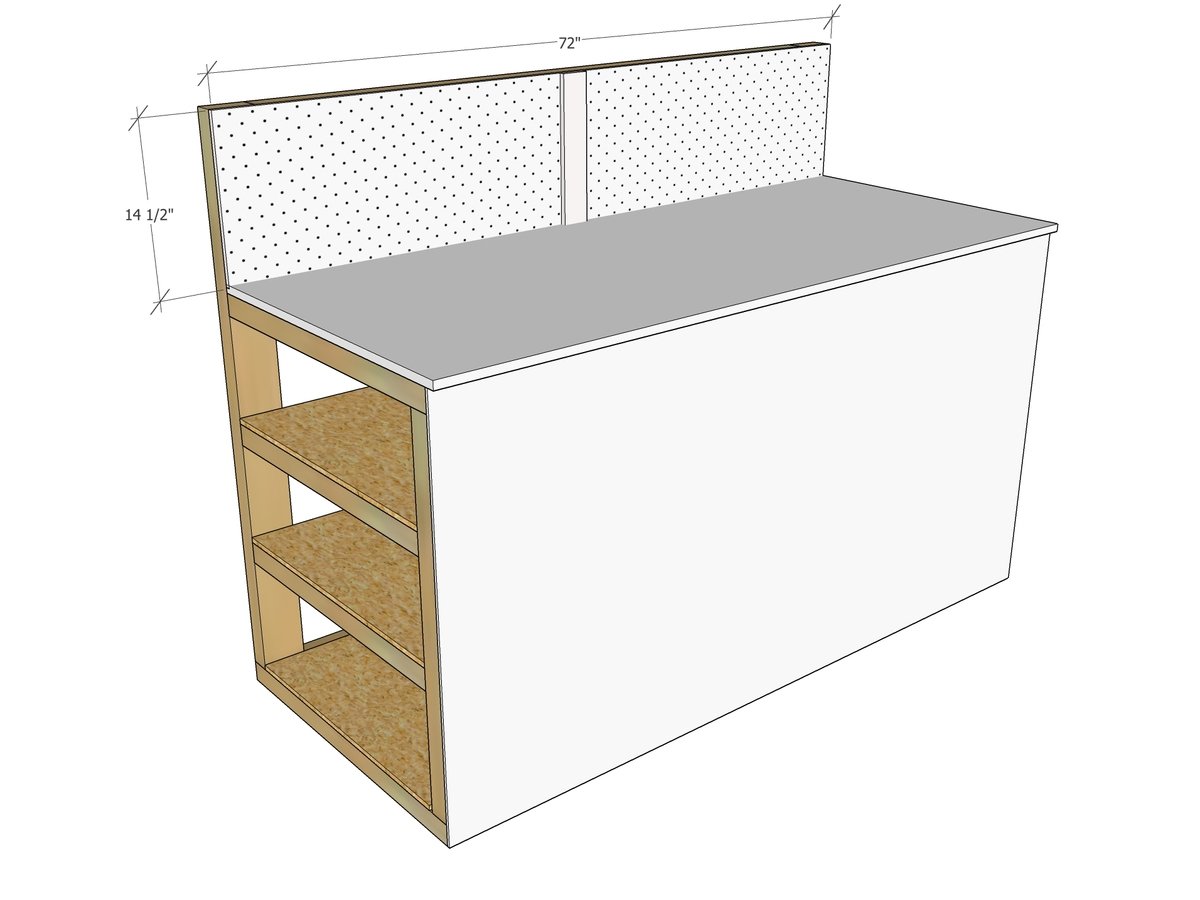
- 1 - pegboard or plywood scrap 72" x 14-1/2" (back splash)
Tools
- measuring tape
- square
- pencil
- safety glasses
- hearing protection
- kreg-jig
- drill
- circular saw
- nailer
Step-by-step Instructions
Step 1
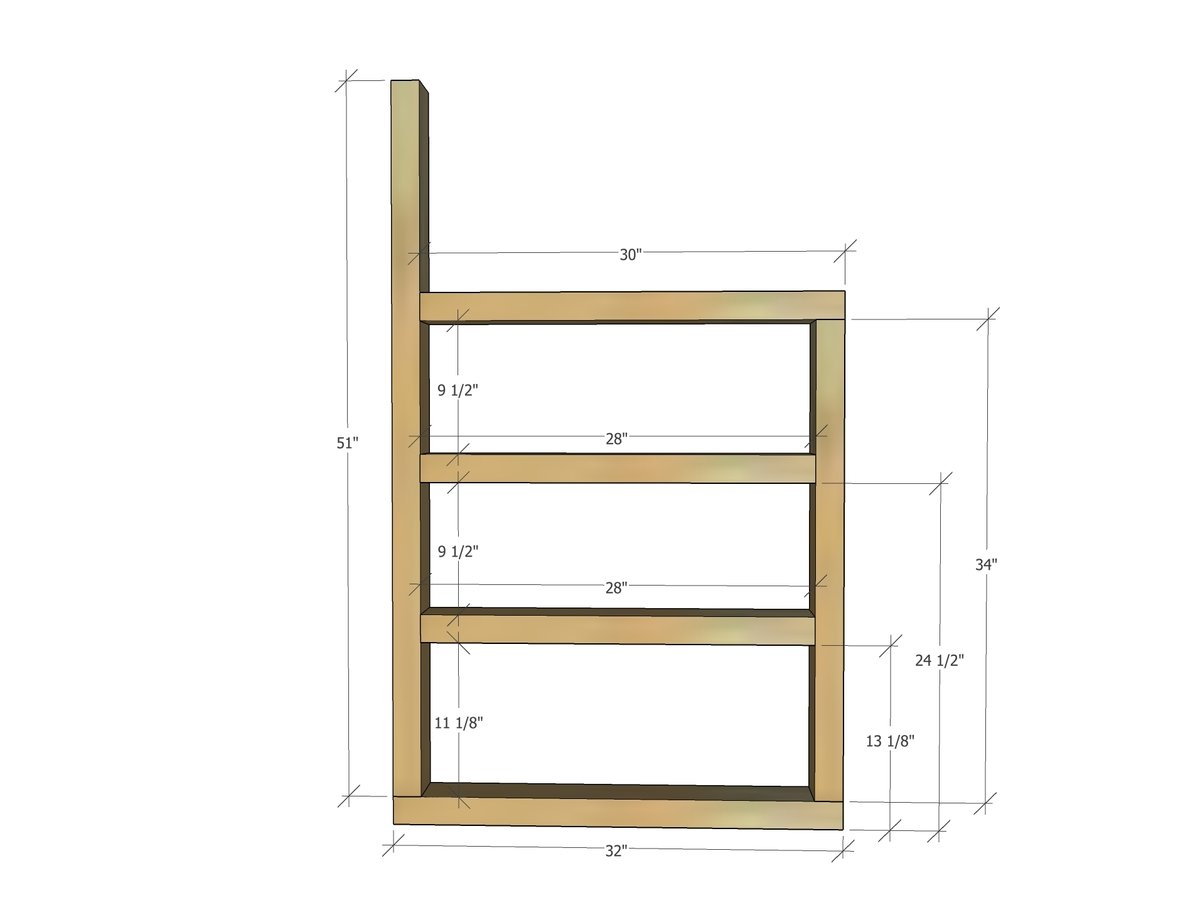
Start by building two of the side pieces. I recommend using your Kreg Jig here to attach these boards together with 1-1/2" pocket holes and 2-1/2" pocket hole screws.
Step 2
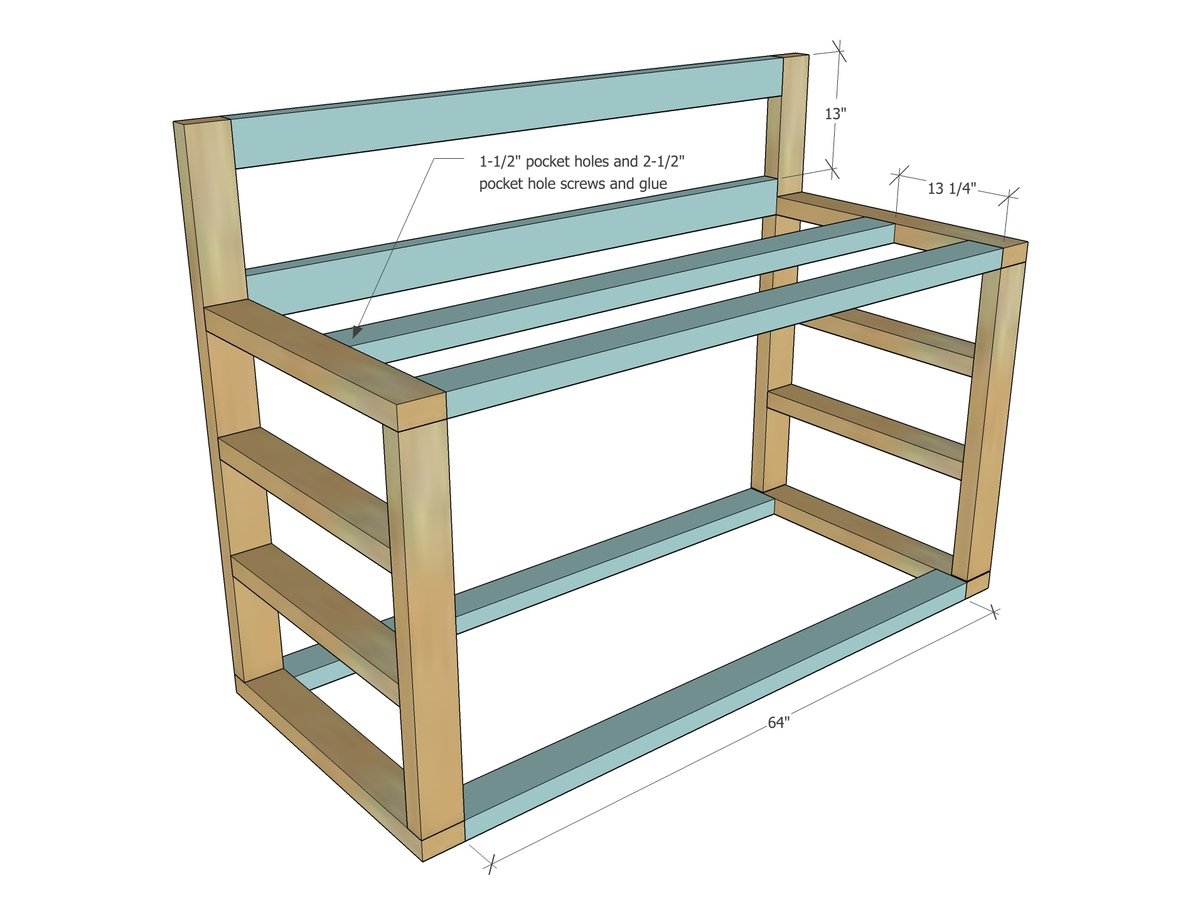
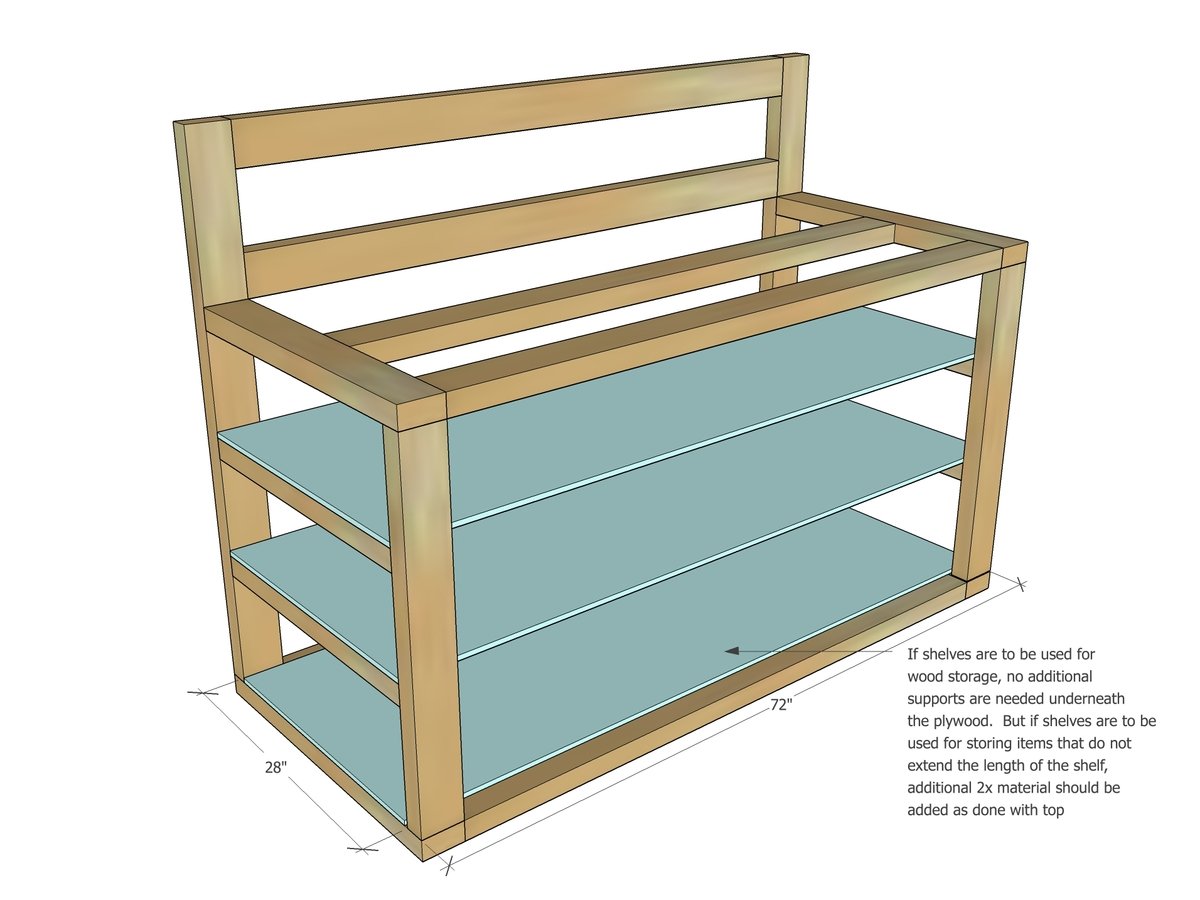
Create the overall frame of the project by adding the longer 2x4s cross wise. Use your pocket hole jig to attach with 1-1/2" setting, 2-1/2" pocket hole screws. If your shelves will need additional support, add it now. If you will be storing long pieces of lumber, they won't need additional support underneath.
Step 3
Lay shelving pieces on top and nail down with glue. Use 1-1/4" brad nails.
Step 4
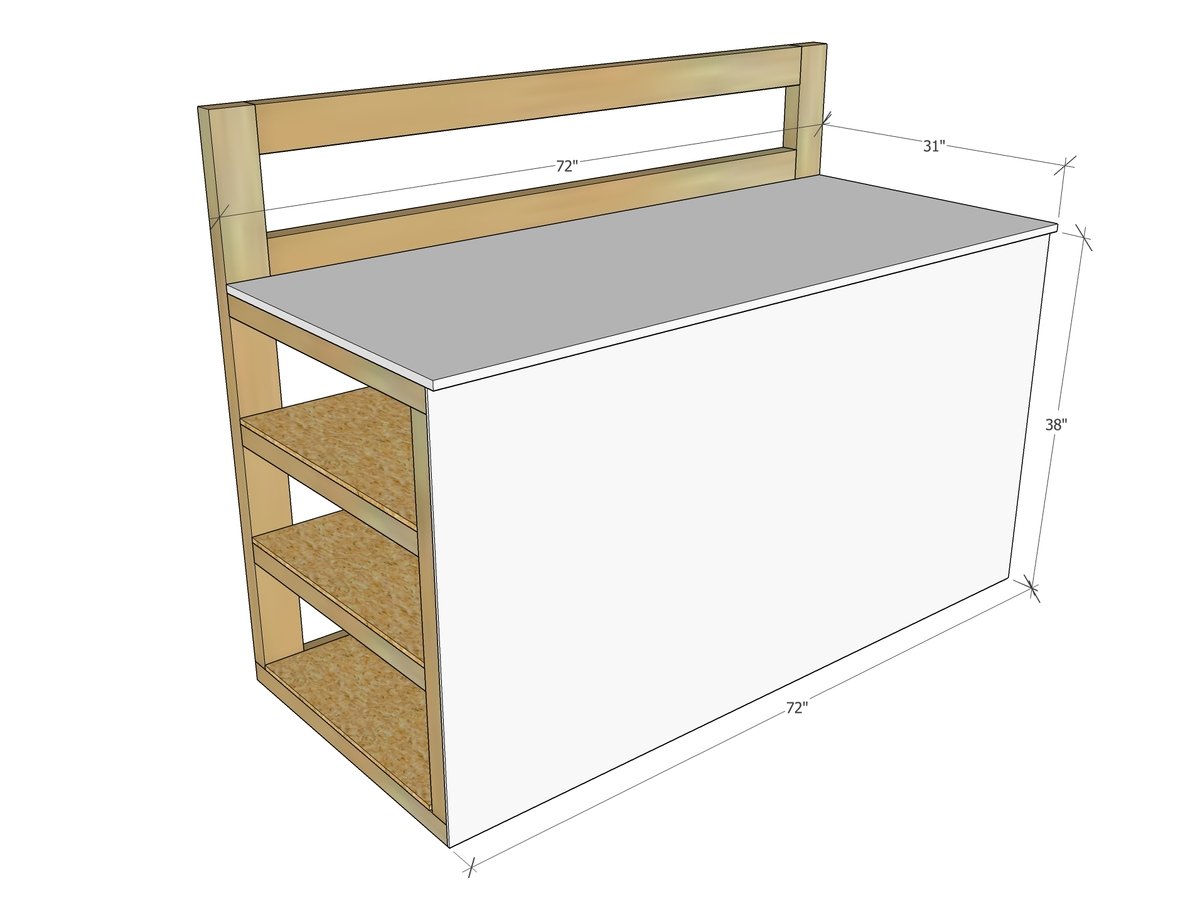
If you are adding 1/4" plywood to front, screw or nail down with glue. If you omit this piece, you may need to add some cross bracing to prevent racking to the front. Attach countertop with glue and screws (2").
Step 5
Step 6
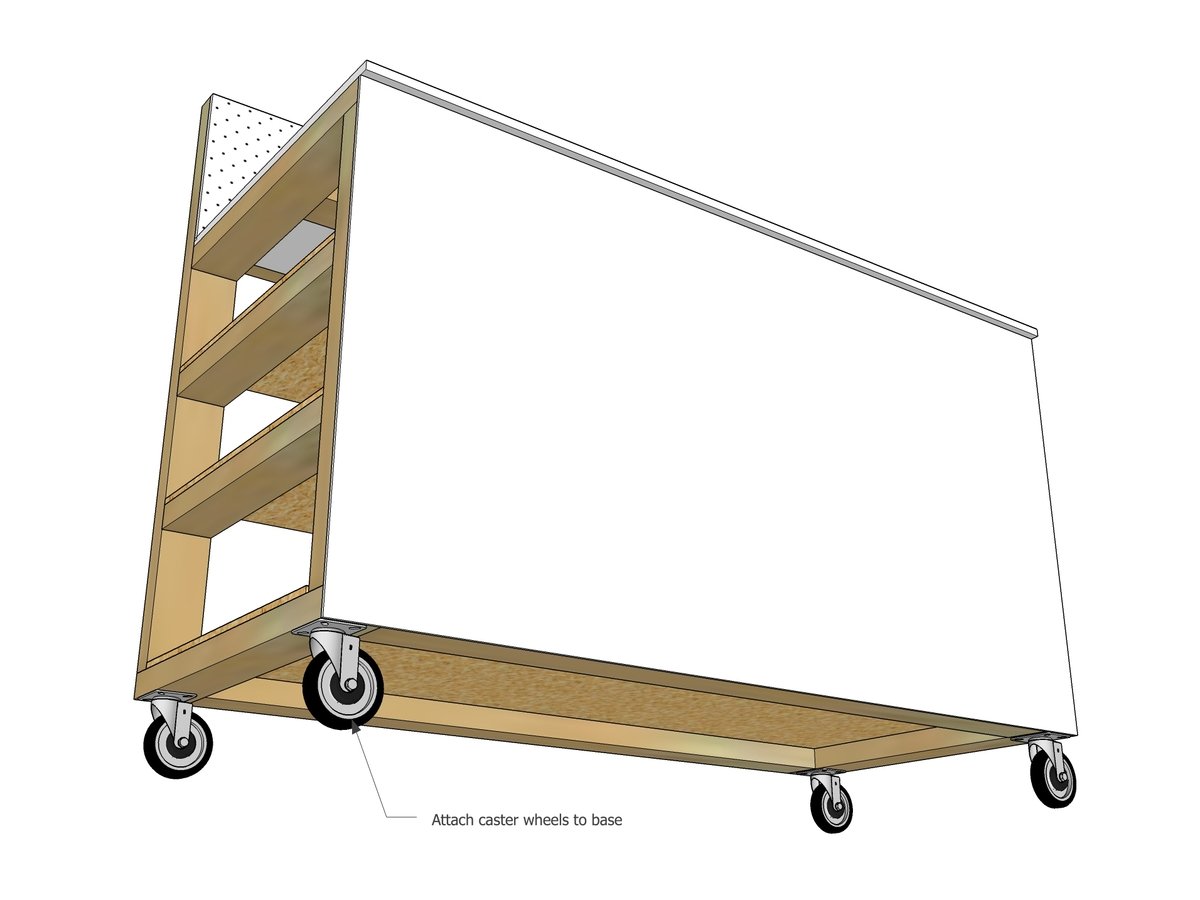
Attach caster wheels to base of cabinet with screws.
Finishing
Sand all surfaces, starting with a medium grit and finishing with fine. Wipe off the dust, fill any holes or gaps with wood filler, and sand smooth once dry. Apply primer if you're painting, then finish with your choice of paint or stain and seal with a durable clear topcoat. For outdoor projects, use exterior-rated primer, paint or stain, and sealer so the piece stands up to the weather.
Source (temporary): https://www.ana-white.com/woodworking-projects/enclosed-workbench-wood-storage