Entryway Bench and Storage Shelf with Hooks
Simple entryway organizer bench and shelf with hooks set - Free
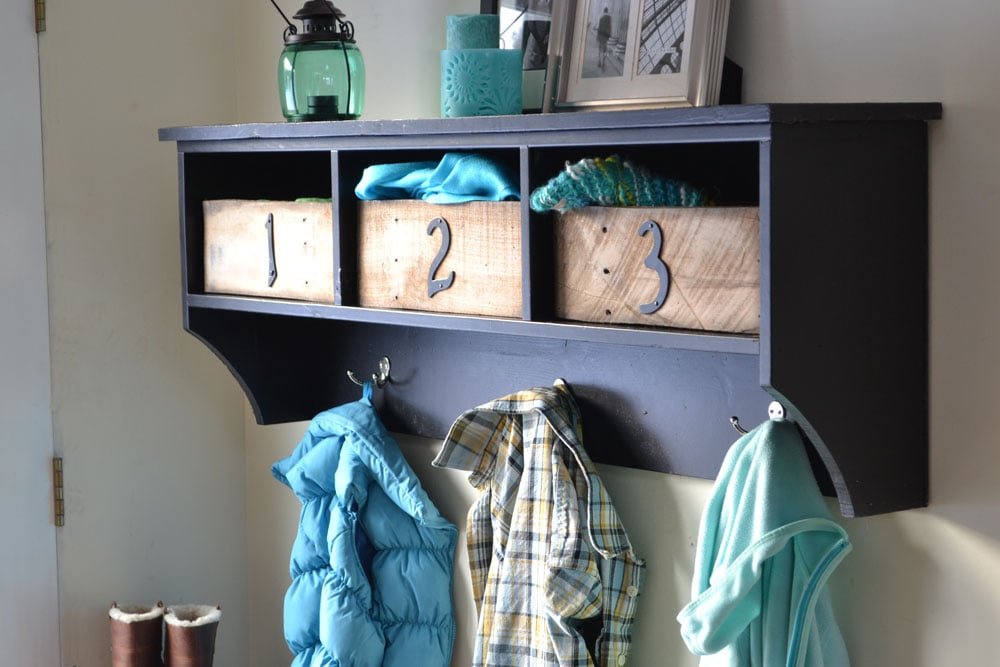
Specifications
| Project type | Bench |
|---|---|
| Room | Storage Solutions |
| Style | Farmhouse Furniture |
| Difficulty | Intermediate |
| Estimated cost | $50 - $100 |
Dimensions
Use the size-specific shopping and cut lists below.
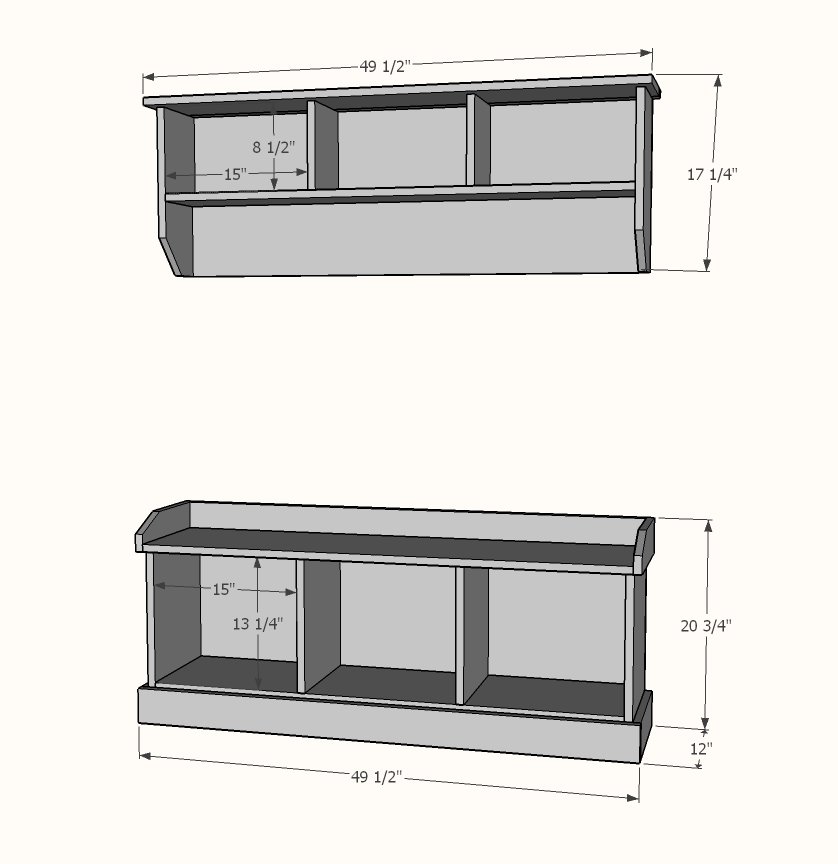
Shopping List
Shopping List for the Bench
1 - 1x12 @ 8 feet long - cut the 46-1/2" and 48" pieces from this
1 - 1x12 @ 6 feet long
2 - 1x4 @ 8 feet long
Shelf Shopping List
1 - 1x8 @ 8 feet long - cut the two 46-1/2" pieces from this
1 - 1x8 @ 10 feet long
1 - 1x2 @ 6 feet long
Backs for both shelf and bench
1 - 1/4" plywood @ 48" x 24"
3 Double Hooks
Cut List
BENCH
1 - 1x12* @ 46-1/2" - bottom
2 - 1x12* @ 13-1/4" - dividers
2 - 1x12* @ 17-1/4" - sides
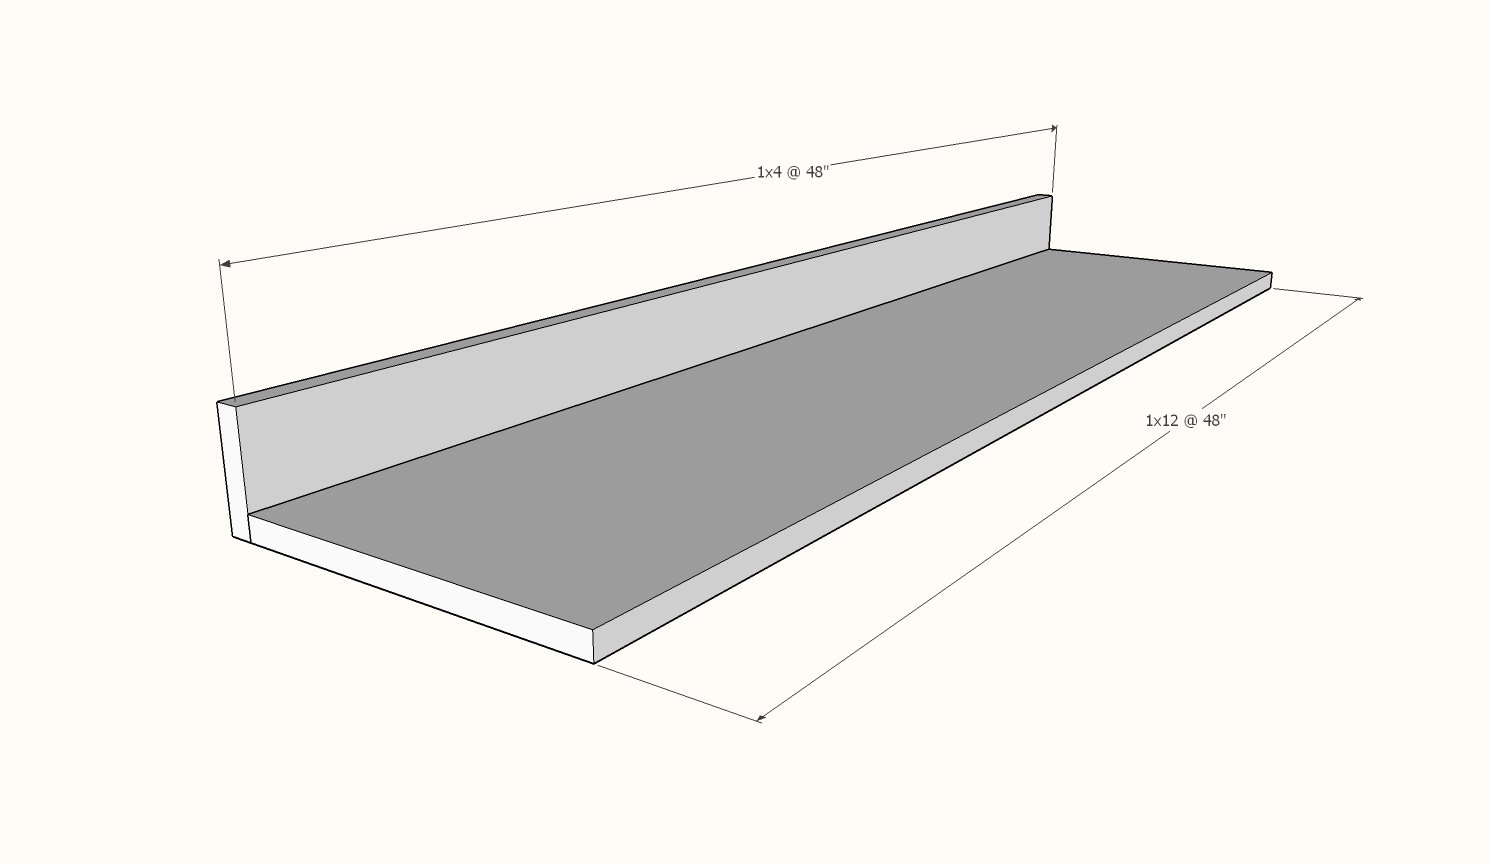
1 - 1x12* @ 48" - top
1 - 1x4 @ 48" - top back
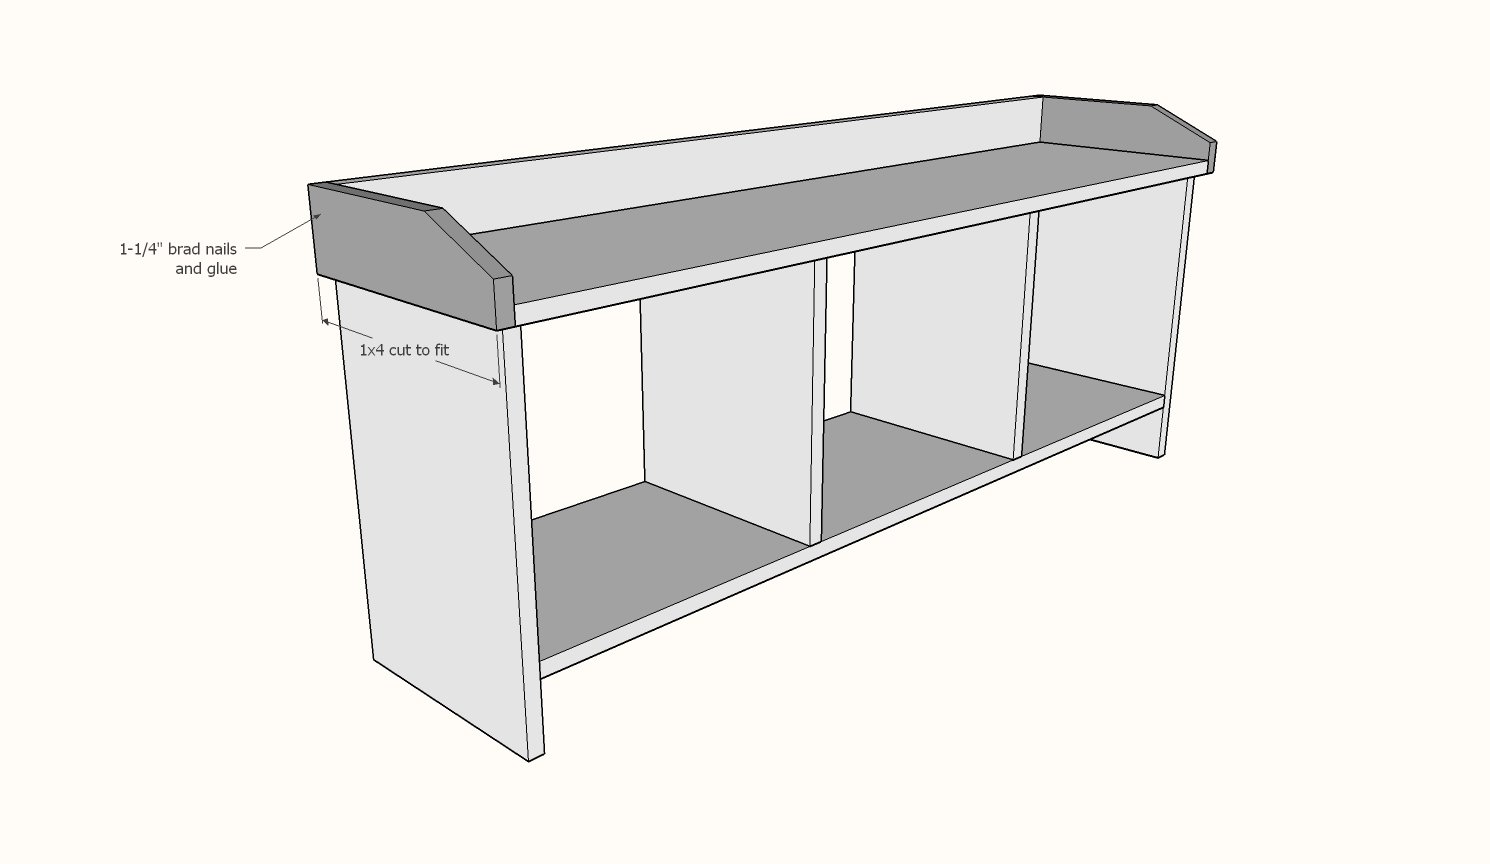
2 - 1x4 @ ~12" - top sides - CUT TO FIT
2 - 1x4 @ ~ 11-1/4" - footer sides - CUT TO FIT
1 - 1x4 @ 49-1/2" - footer front - CUT TO FIT
1 - 1/4" plywood @ 14" x 48" - back
*The bench built with 1x12s will be pretty narrow. You can easily make the bench deeper by substituting a wider width board for all the 1x12s, for example a 16" wide project panel. Just substitute all the boards with the *
SHELF
2 - 1x8 @ 46-1/2" - main shelf/back
2 - 1x8 @ 8-1/2" - dividers
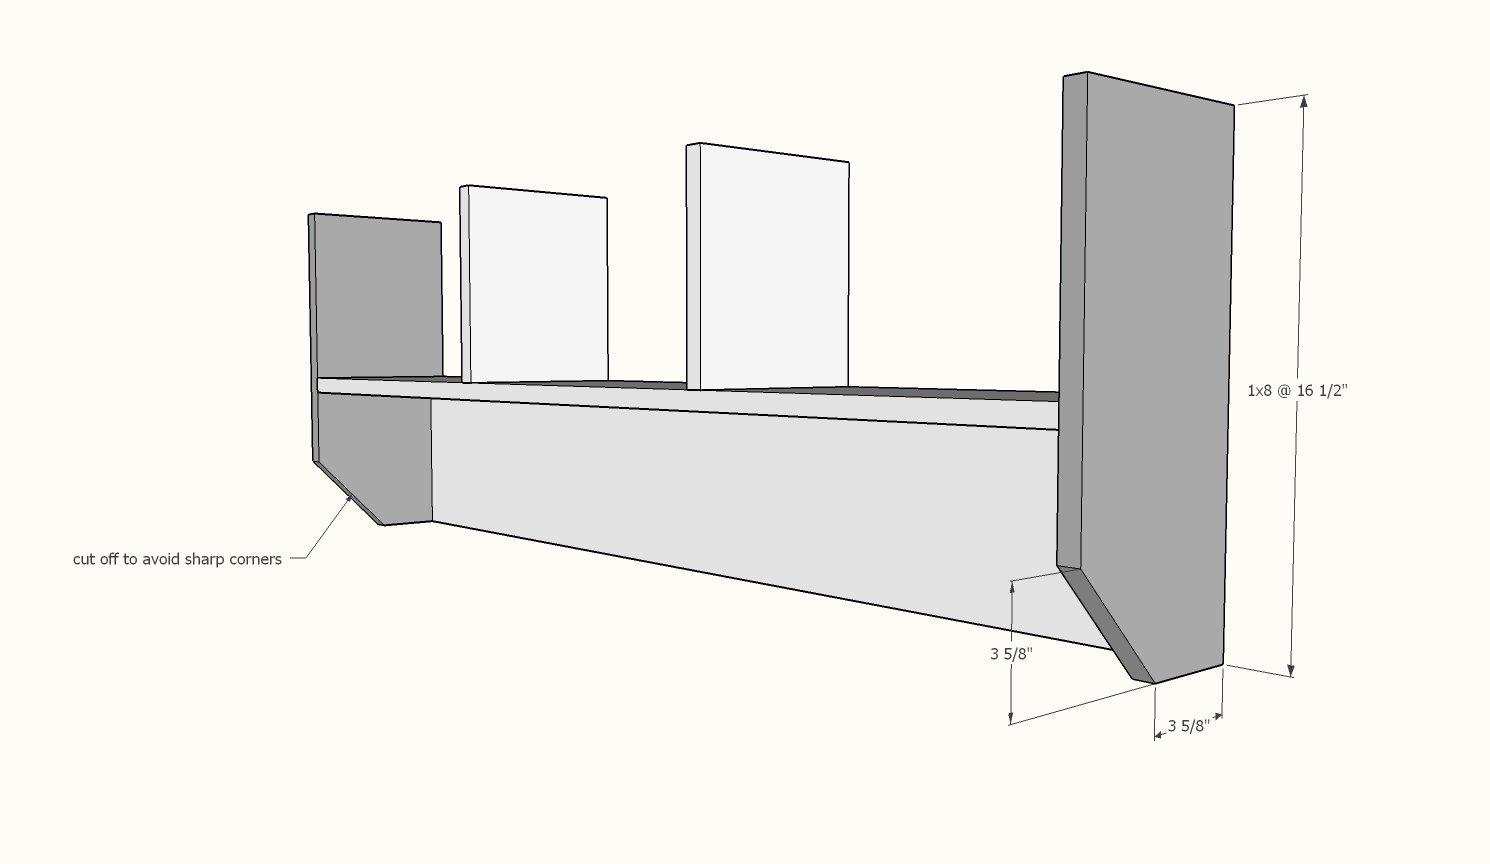
2 - 1x8 @ 16-1/2" - sides
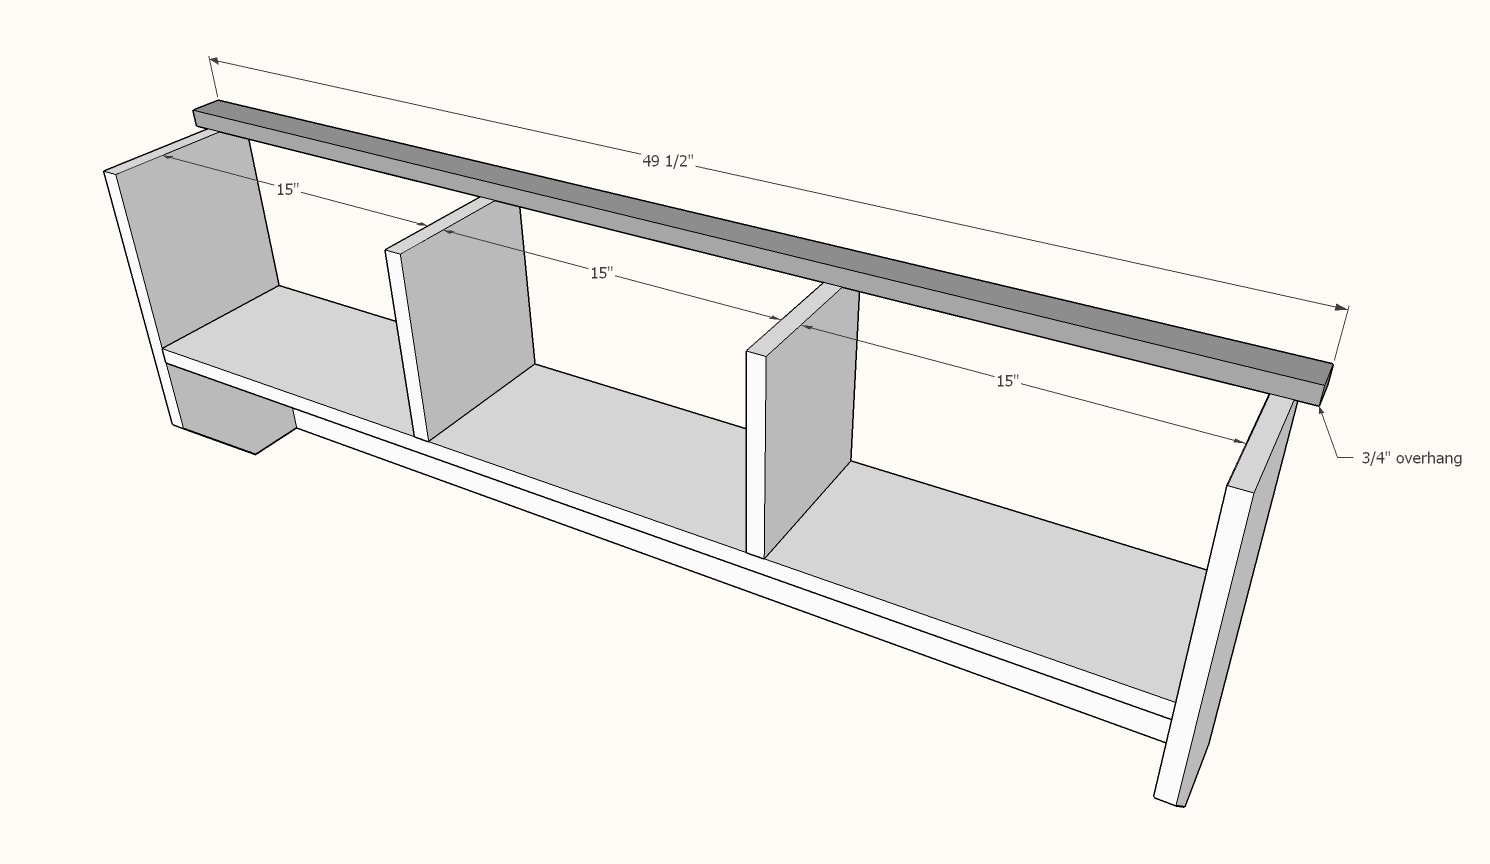
1 - 1x2 @ 49-1/2" - top back
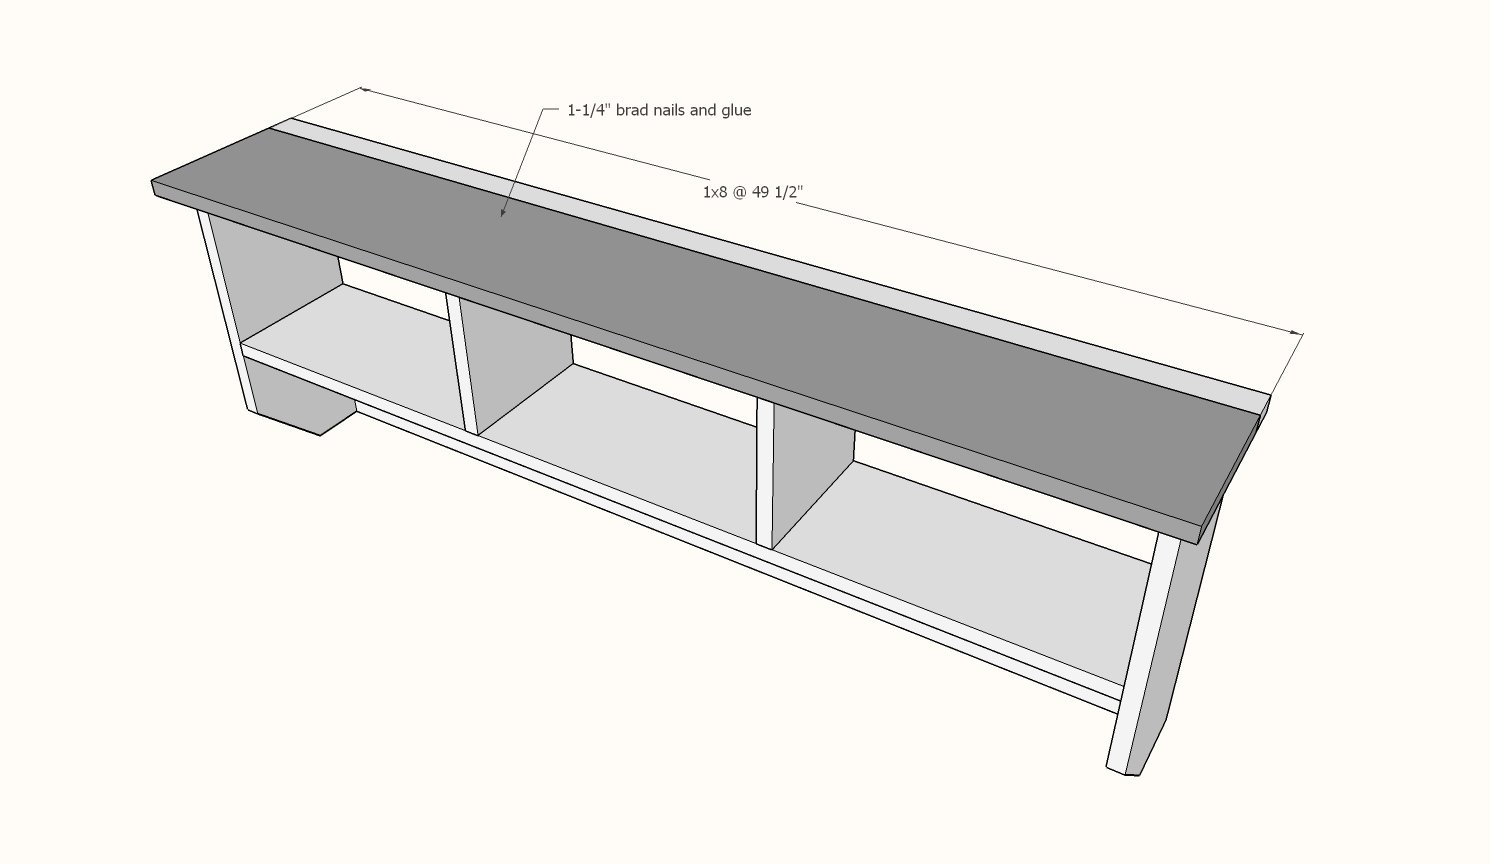
1 - 1x8 @ 49-1/2" - top front
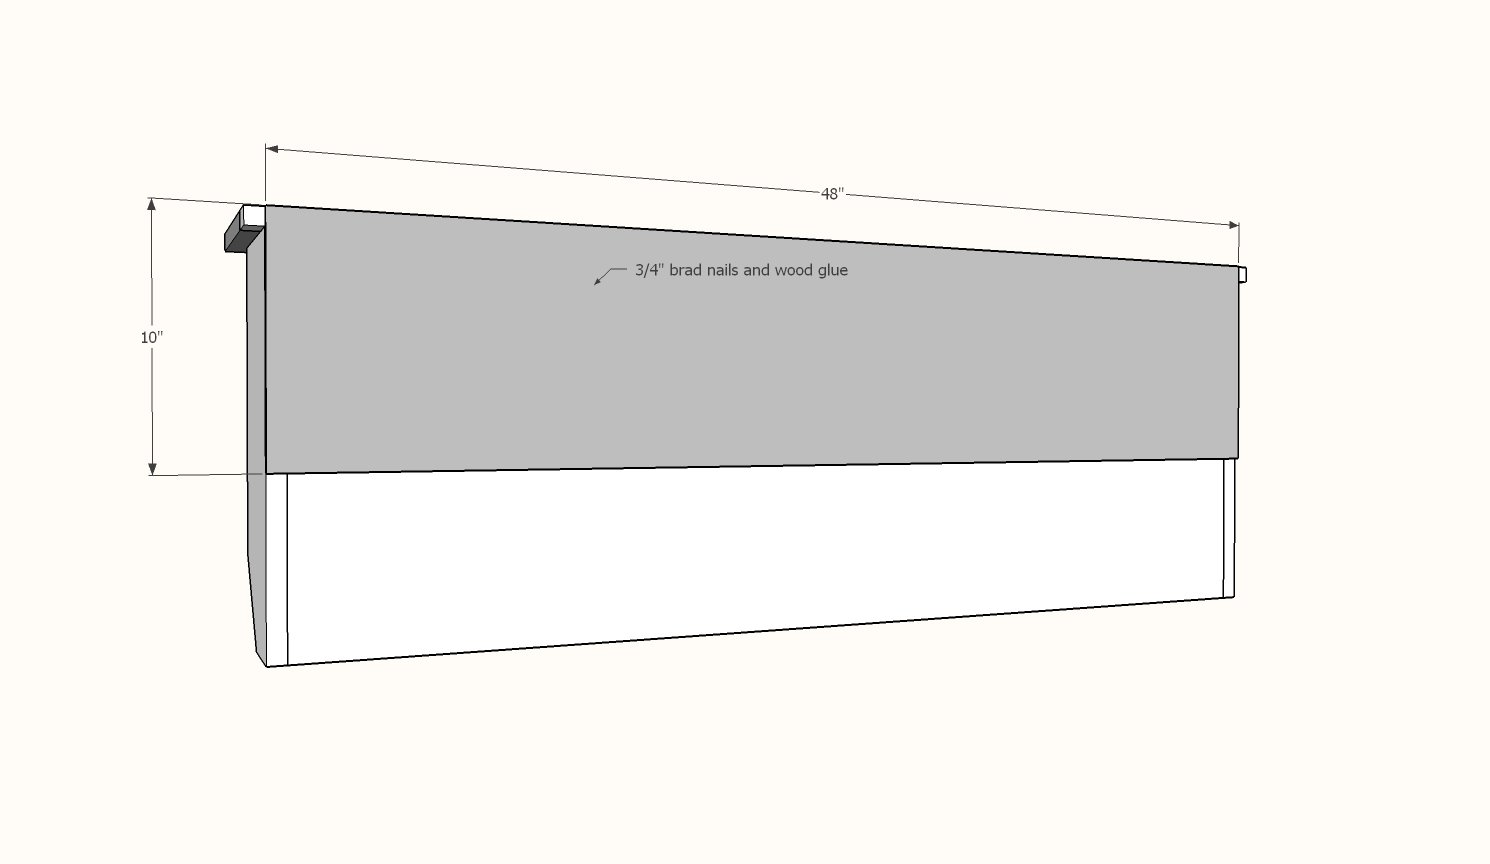
1 - 1/4" plywood @ 10" x 48" - back
Tools
- measuring tape
- square
- pencil
- safety glasses
- hearing protection
- drill
- circular saw
- nailer
- sander
Step-by-step Instructions
Step 1
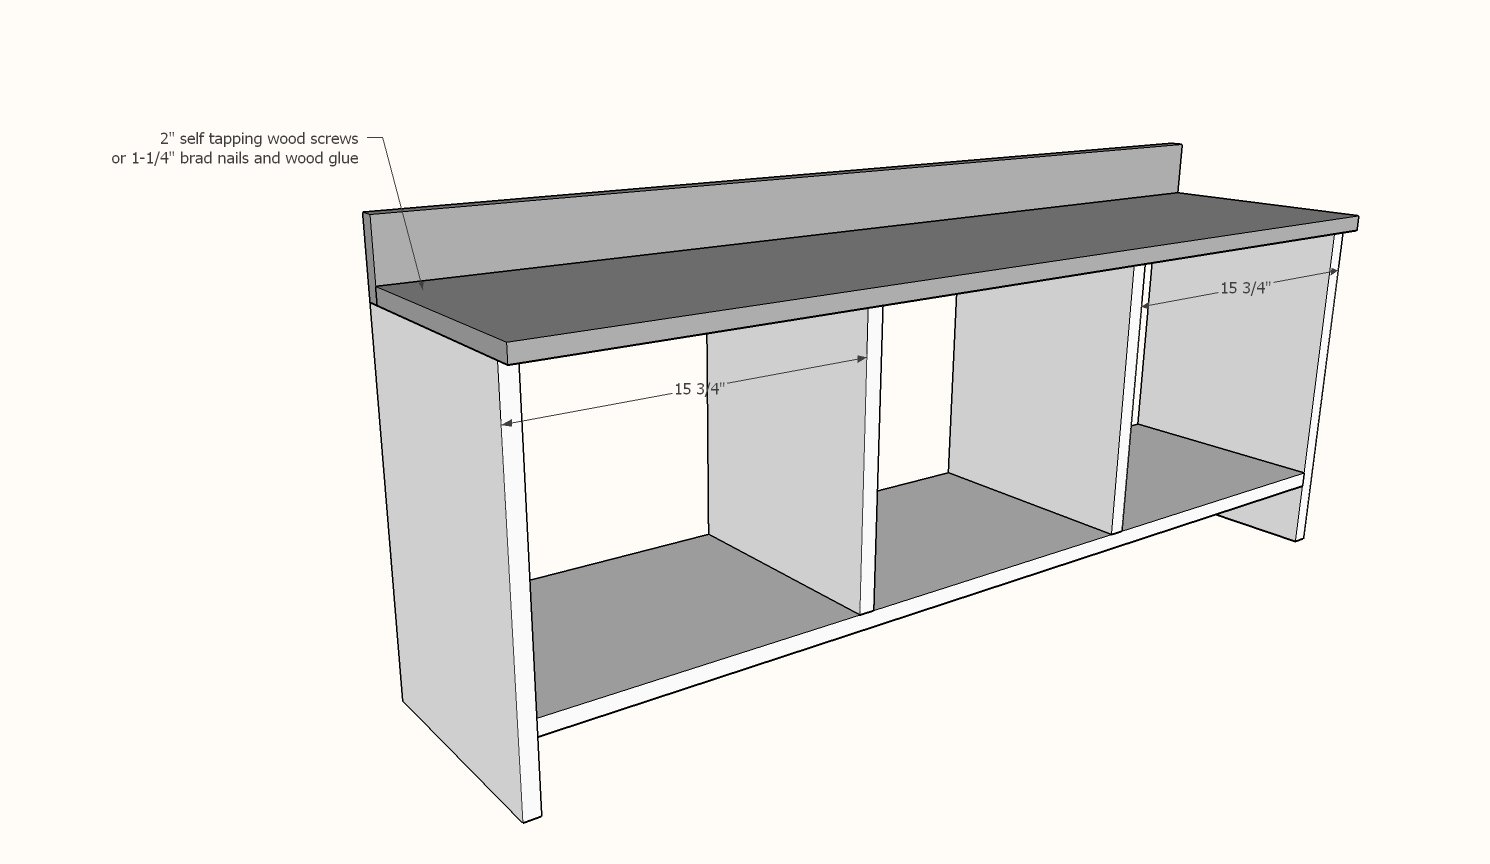
BENCH: Since people will be sitting on the bench, I recommend attaching the main boards (the 1x12s) with either 2" self tapping wood screws or 1-1/4" pocket hole screws (drill holes on the 3/4" setting) and glue. The trim boards (the 1x4s) can be added with 1-1/4" brad nails and wood glue) Measure and mark out the dividers and attach.
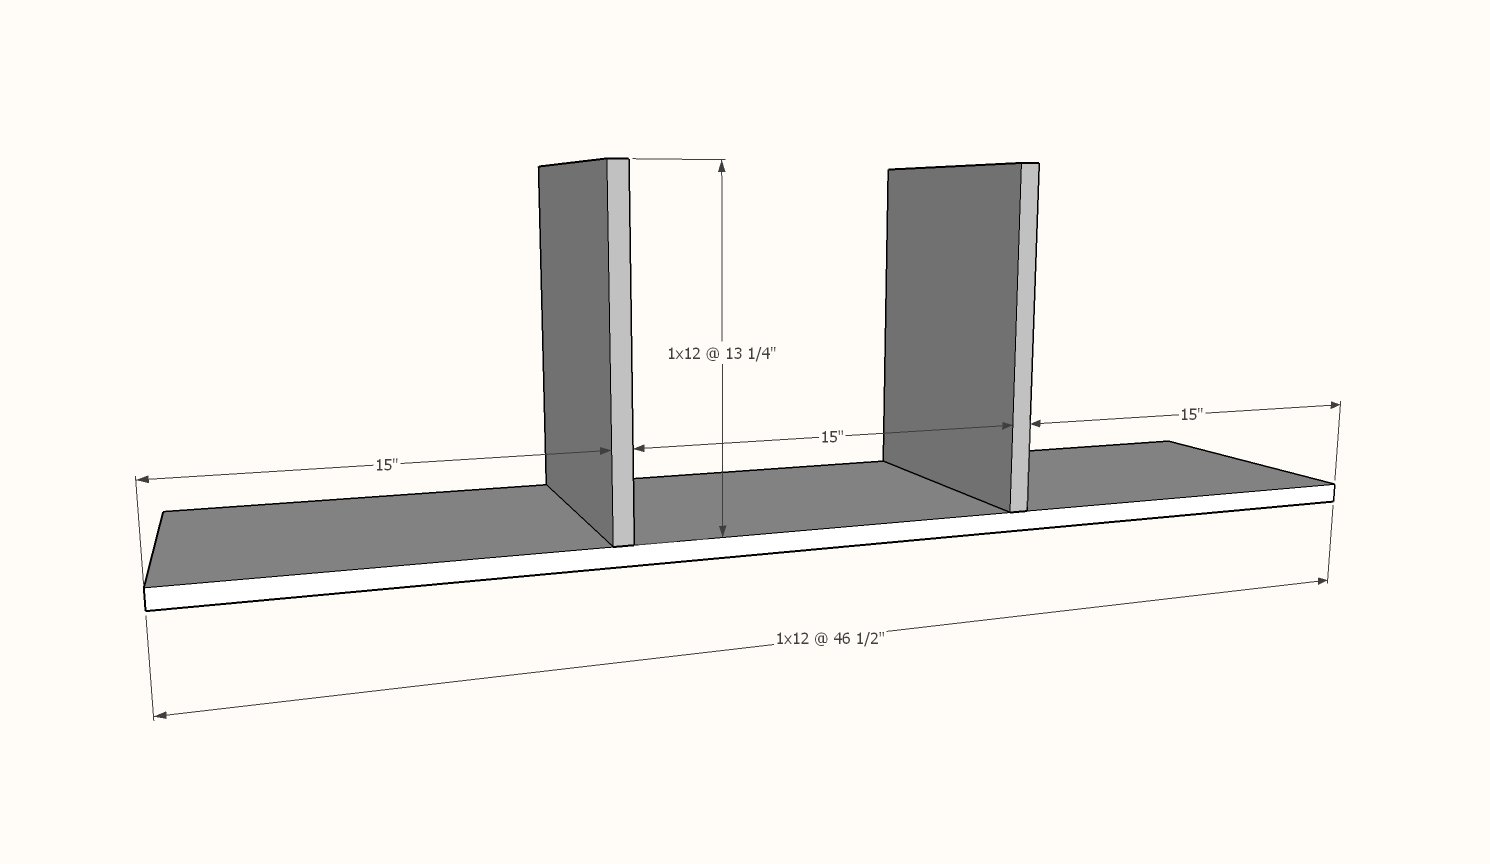
Step 2
Attach sides to the bottom.
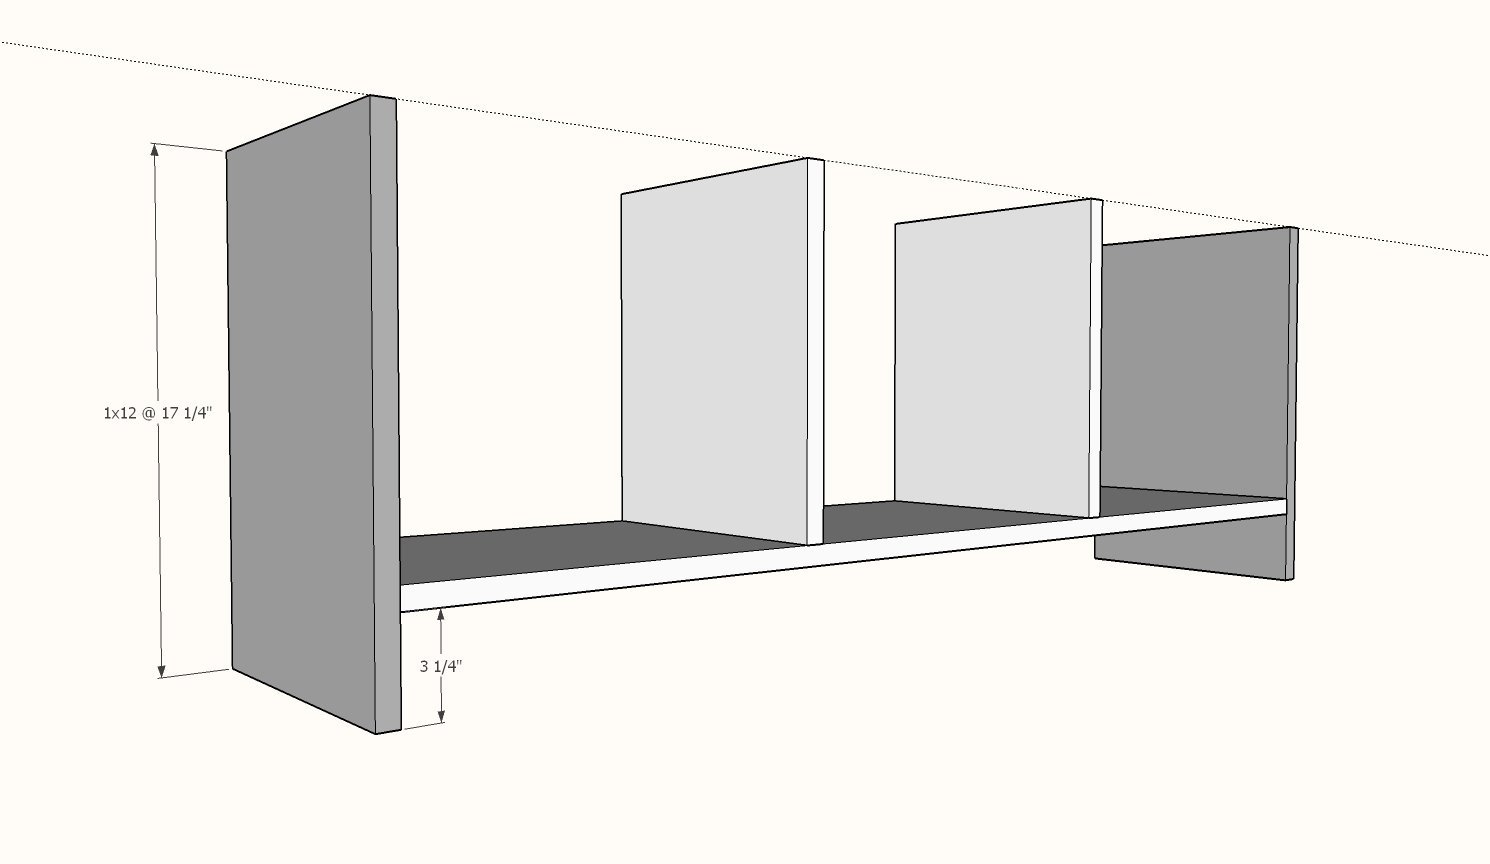
Step 3
1-1/4" nails to attach 1x4 to back of seat.
Step 4
Attach seat to the base with 2" screws or pocket holes.
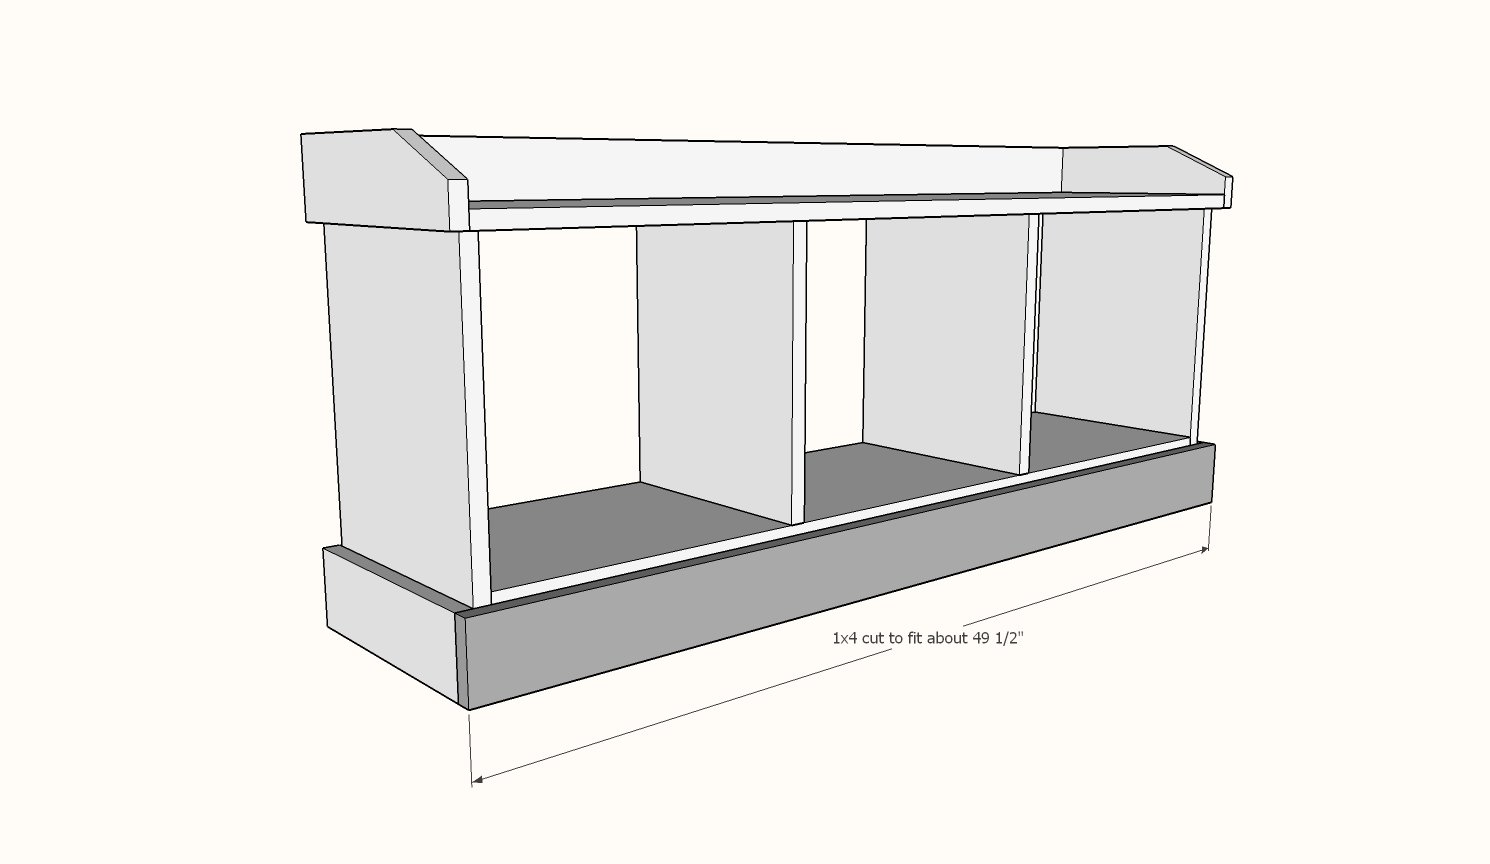
Measure and cut to fit the 1x4 trim boards.
Attach all with 1-1/4" brad nails and glue.
Step 6
Measure and cut the sides.
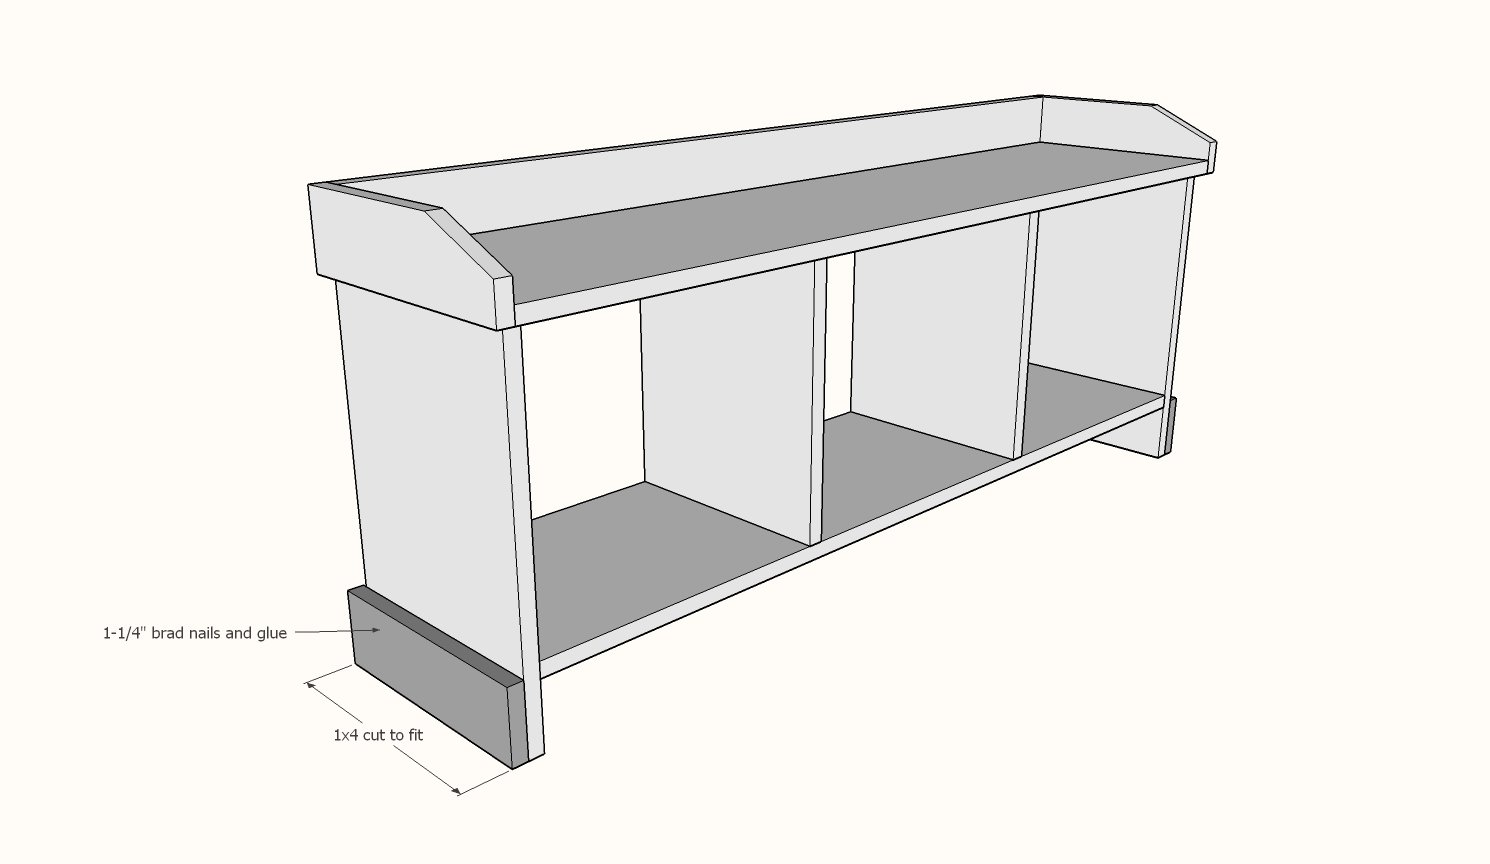
Repeat for the front footer.
NOTE: If you are having trouble attaching the footer in the center to the bottom 1x12 you can simply add a scrap 1x4 block, flat nailed to the underside of the bottom shelf, flush to the front edge. You don't need the 1x4 all the way down, just in the center area.
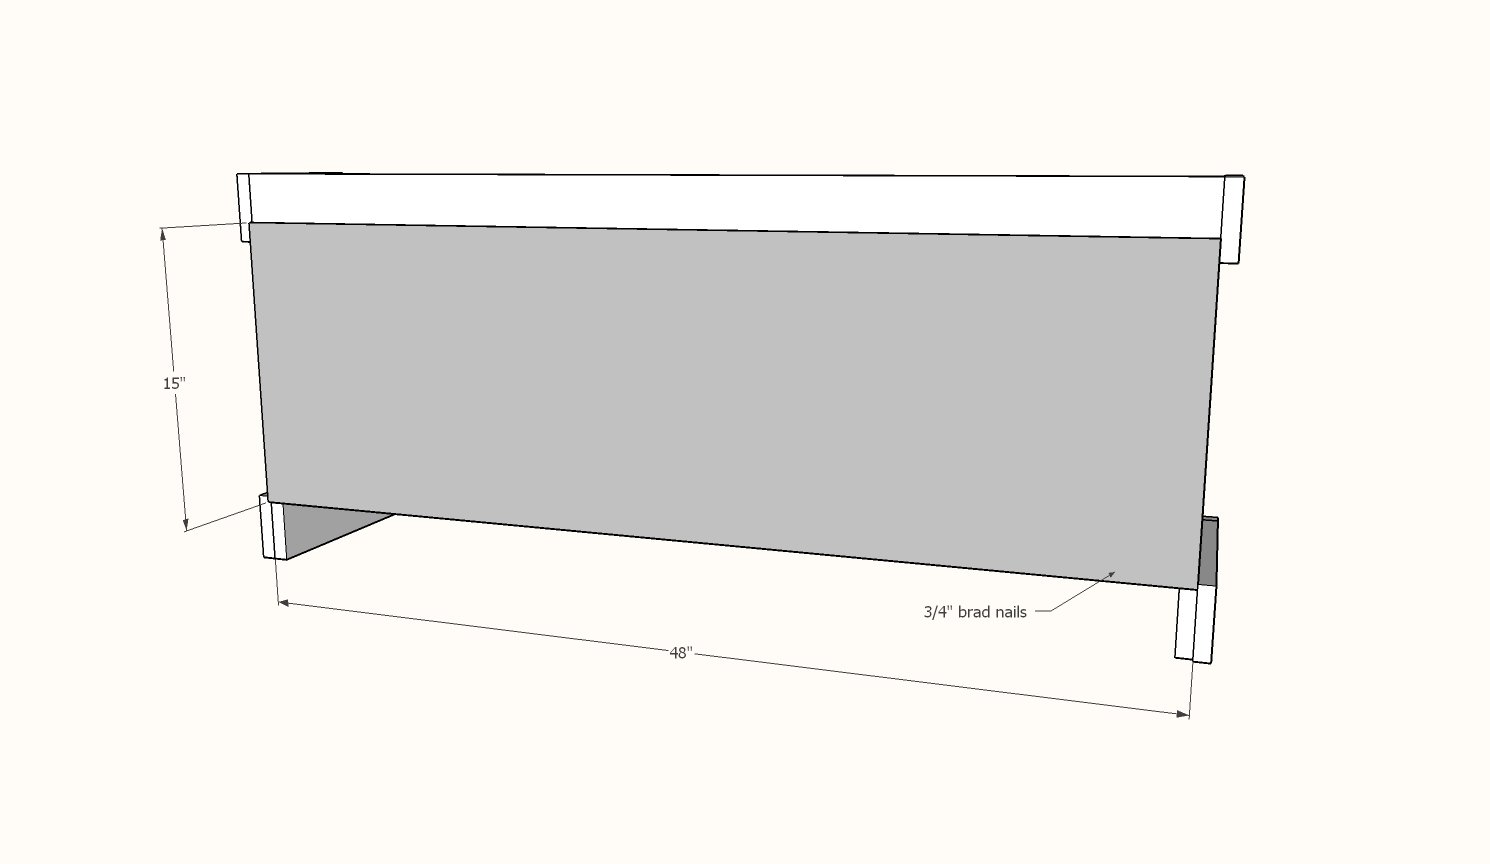
Cut back with circular saw. Save scrap for the shelf back.
Use 3/4" brad nails to attach back.
Step 9
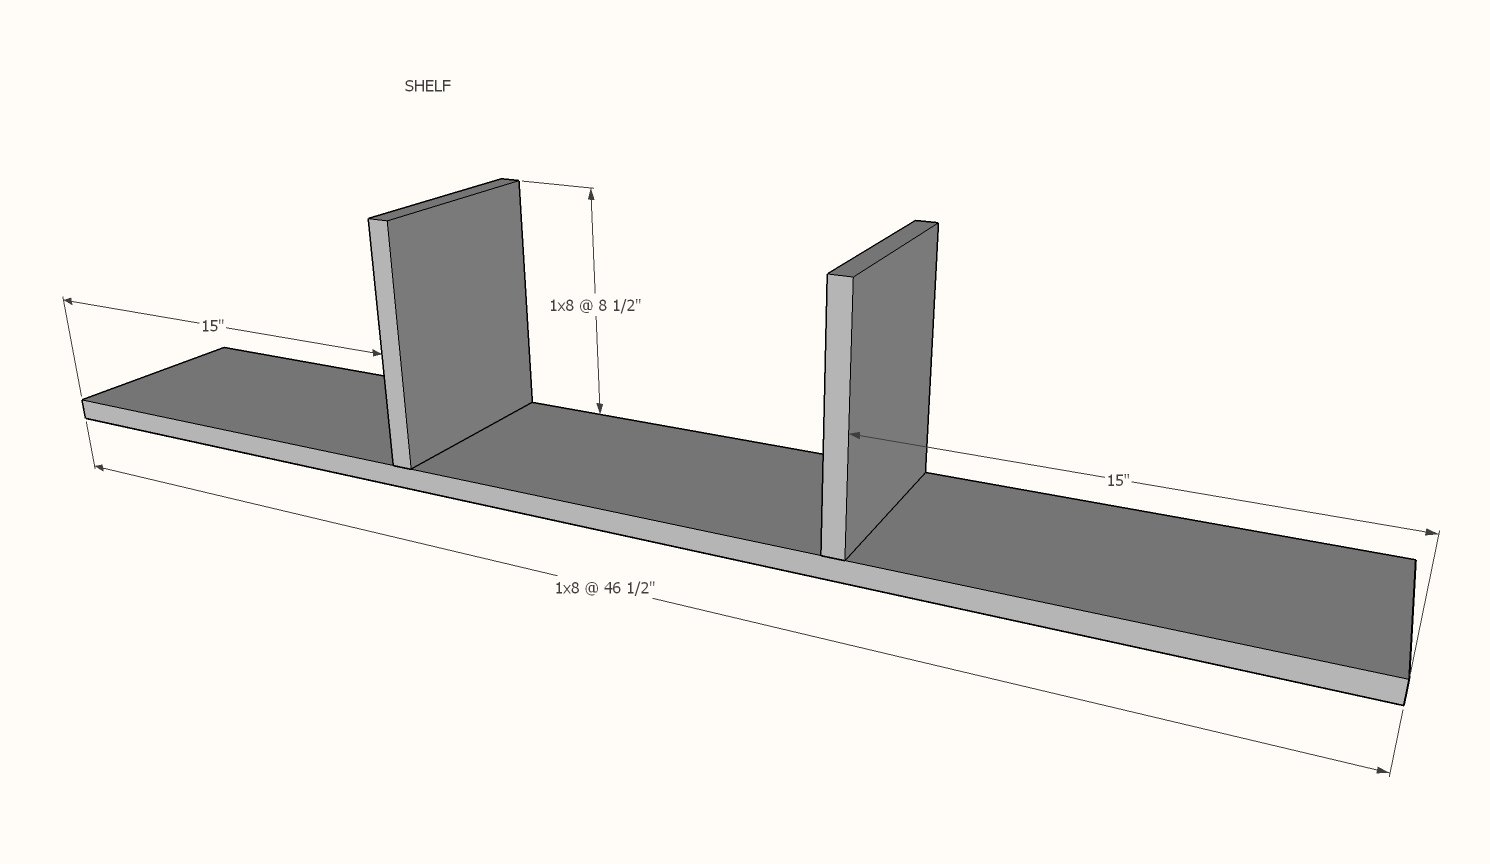
The shelf can be nailed together. Use glue and 1-1/4" brad nails.
Step 10
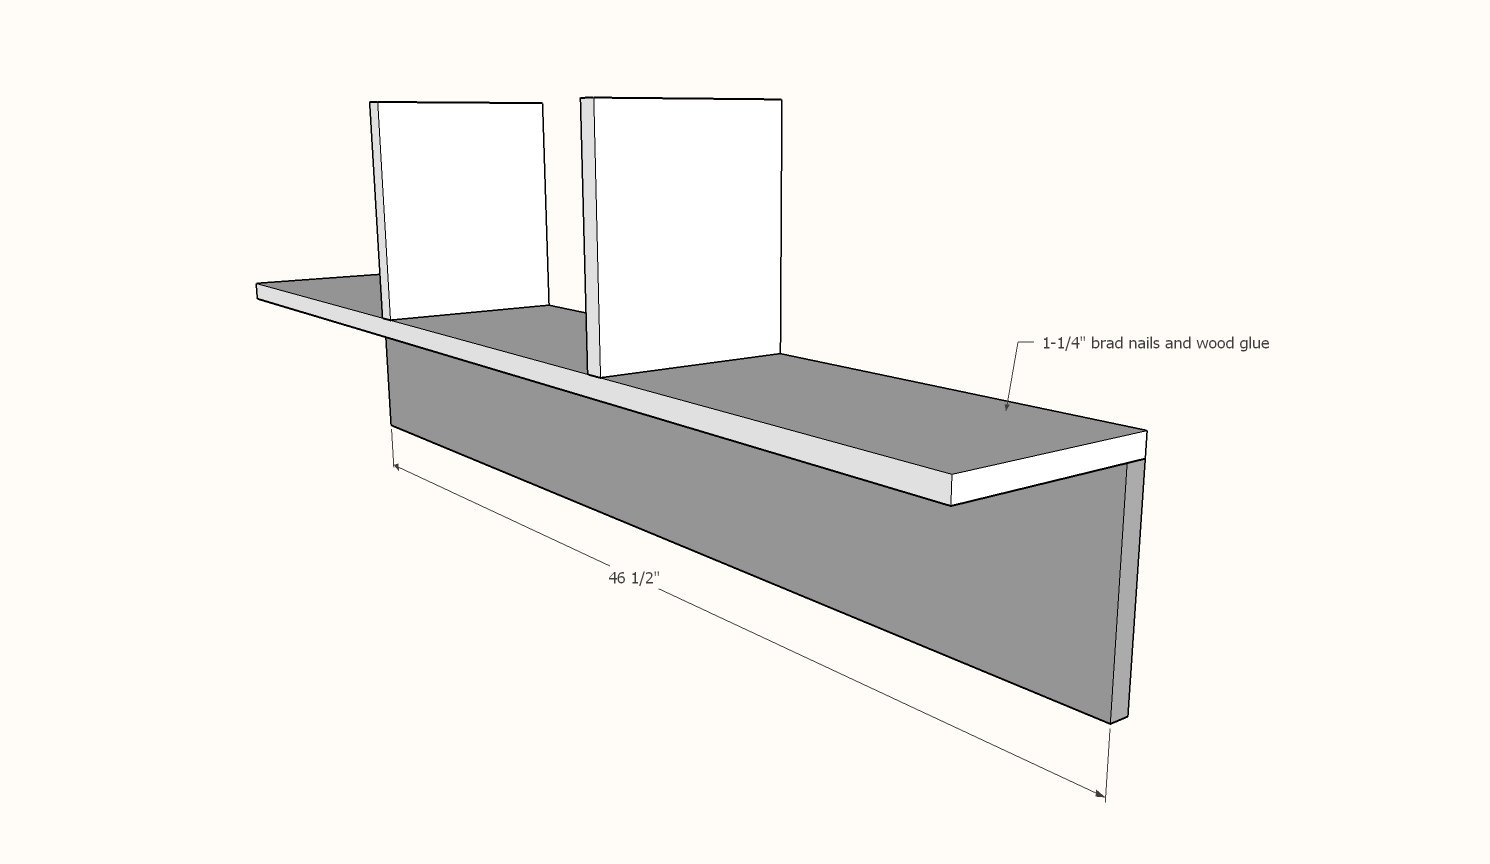
Nail and glue together.
Step 11
Cut sides off with circular saw at an angle to prevent a sharp corner at eye level. Attach to the project with nails and glue.
Step 12
Attach top back with 1-1/4" brad nails and wood glue.
Step 13
Repeat for the front of the top.
Attach back with 3/4" brad nails and wood glue.
Attach hooks to the hook board. To hang the shelf, locate a stud in the wall and screw through the 1x8 hook board into the stud in the wall. You can hide the hanging hole with wood filler and paint/stain.
Finishing
Sand all surfaces, starting with a medium grit and finishing with fine. Wipe off the dust, fill any holes or gaps with wood filler, and sand smooth once dry. Apply primer if you're painting, then finish with your choice of paint or stain and seal with a durable clear topcoat. For outdoor projects, use exterior-rated primer, paint or stain, and sealer so the piece stands up to the weather.
Source (temporary): https://www.ana-white.com/woodworking-projects/entryway-bench-and-storage-shelf-hooks