Entryway Cabinet with Hooks
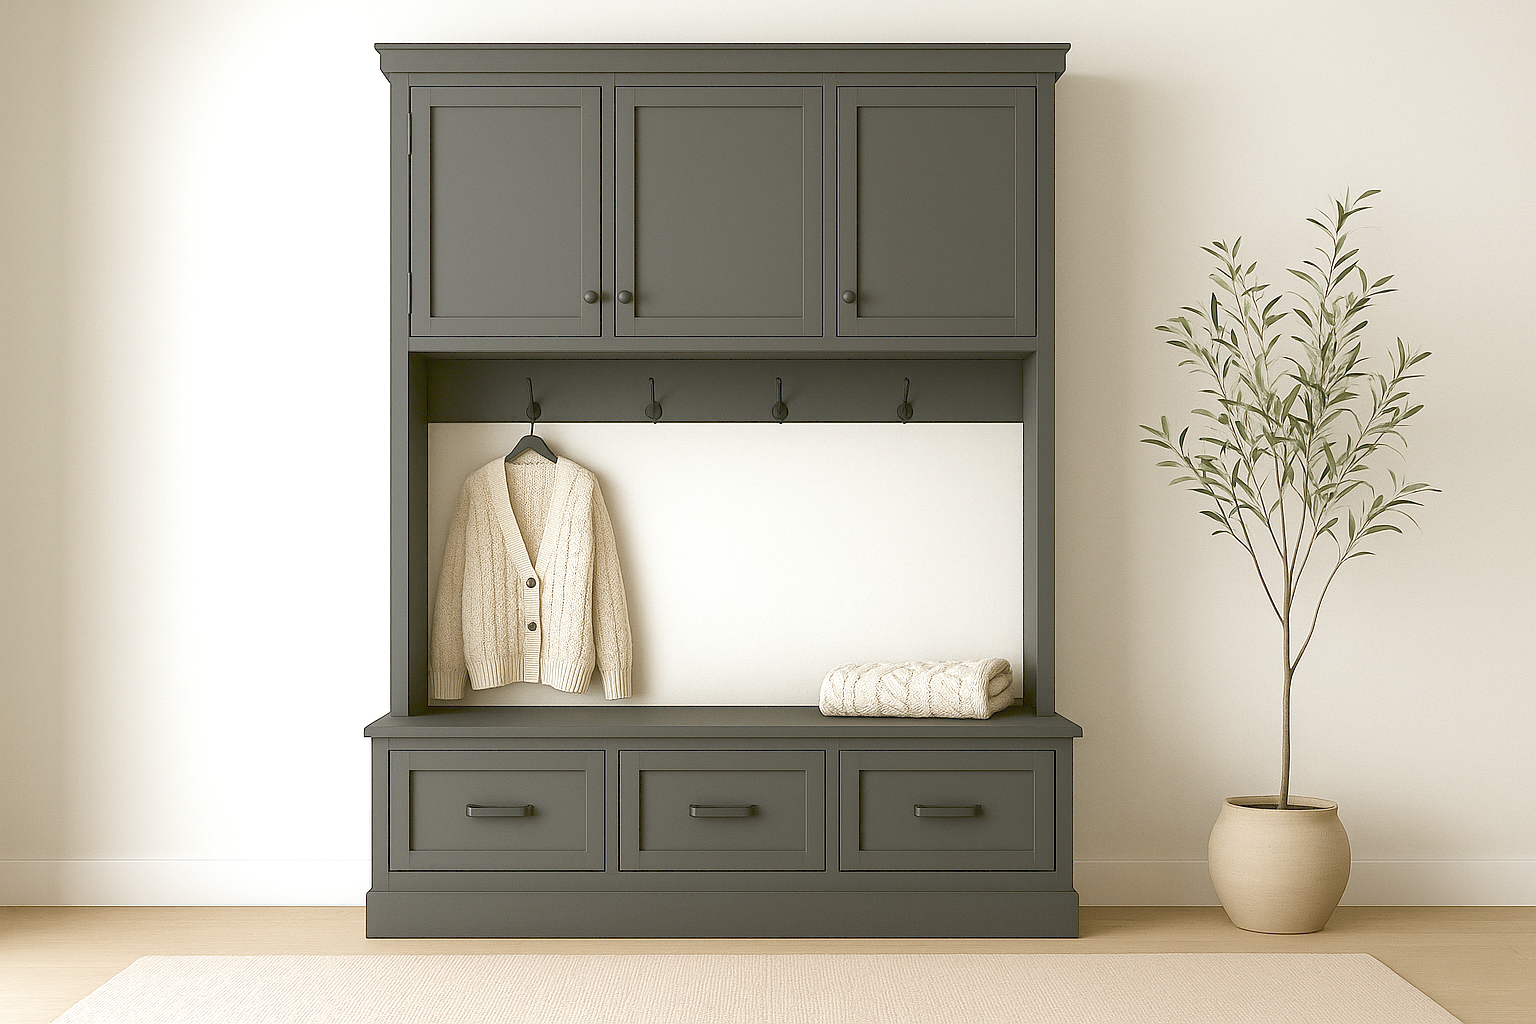
This entryway cabinet with hooks adds tons of storage in a stylish way. This project fits over a bench ( we built this one ) and creates both cabinet storage and hook space. You can build with 1x12s or plywood - your choice! Free lans feature video tutorial and build photos, step by step diagrams, shopping list and cut list.
Specifications
| Project type | Hutch Plans |
|---|---|
| Room | Entryway and Mudroom |
| Style | Farmhouse Furniture |
| Difficulty | Intermediate |
| Estimated cost | $150 - $200 |
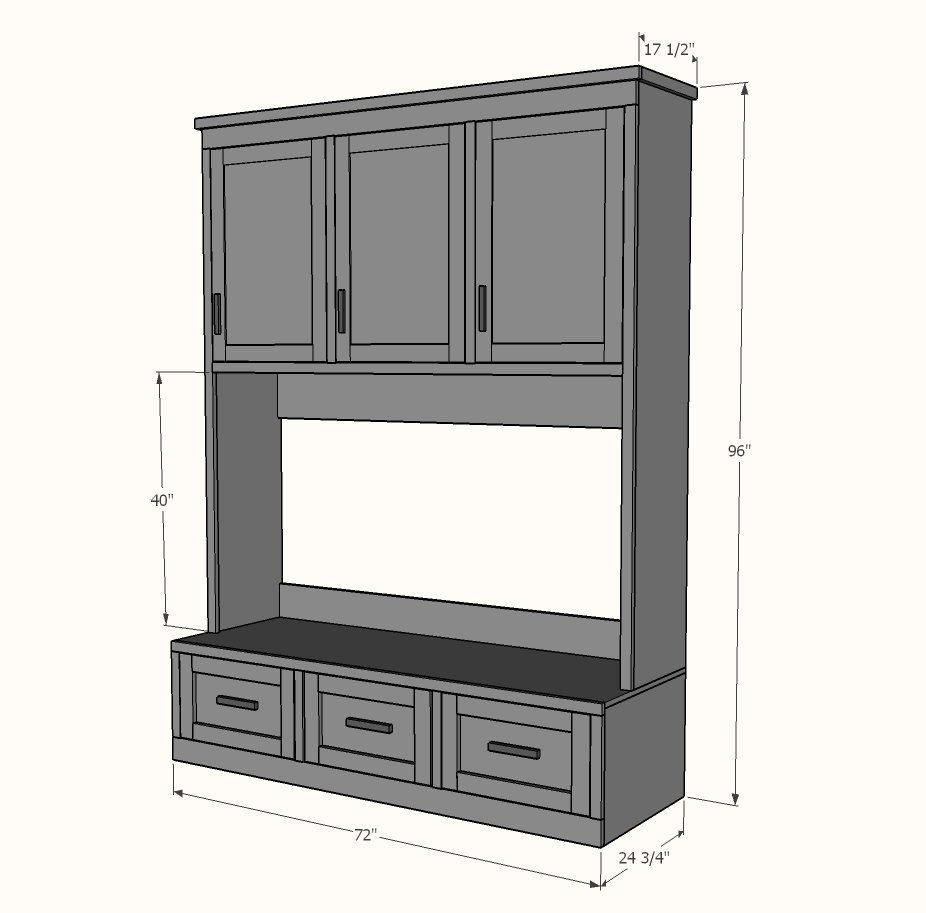
Dimensions
Use the size-specific shopping and cut lists below.
Shopping List
- 2 - sheets 3/4" plywood, ripped into strips 8 feet long x 15-3/4" wide (can also use 1x12s, cabinet will be less deep)
- 2 - 1x6 @ 6 feet long
- 2 - 1x4 @ 6 feet long
- 4 - 1x2 @ 8 feet long
- 4 - 1x3 @ 8 feet long
- 3 sets of hinges for inset doors
- 6 magnetic clasps
- 3 knobs or pulls
- hooks
Cut List
CARCASS
- 2 - 3/4" plywood 15-3/4" x 77"
- 3 - 3/4" plywood @ 15-3/4" x 70-1/2"
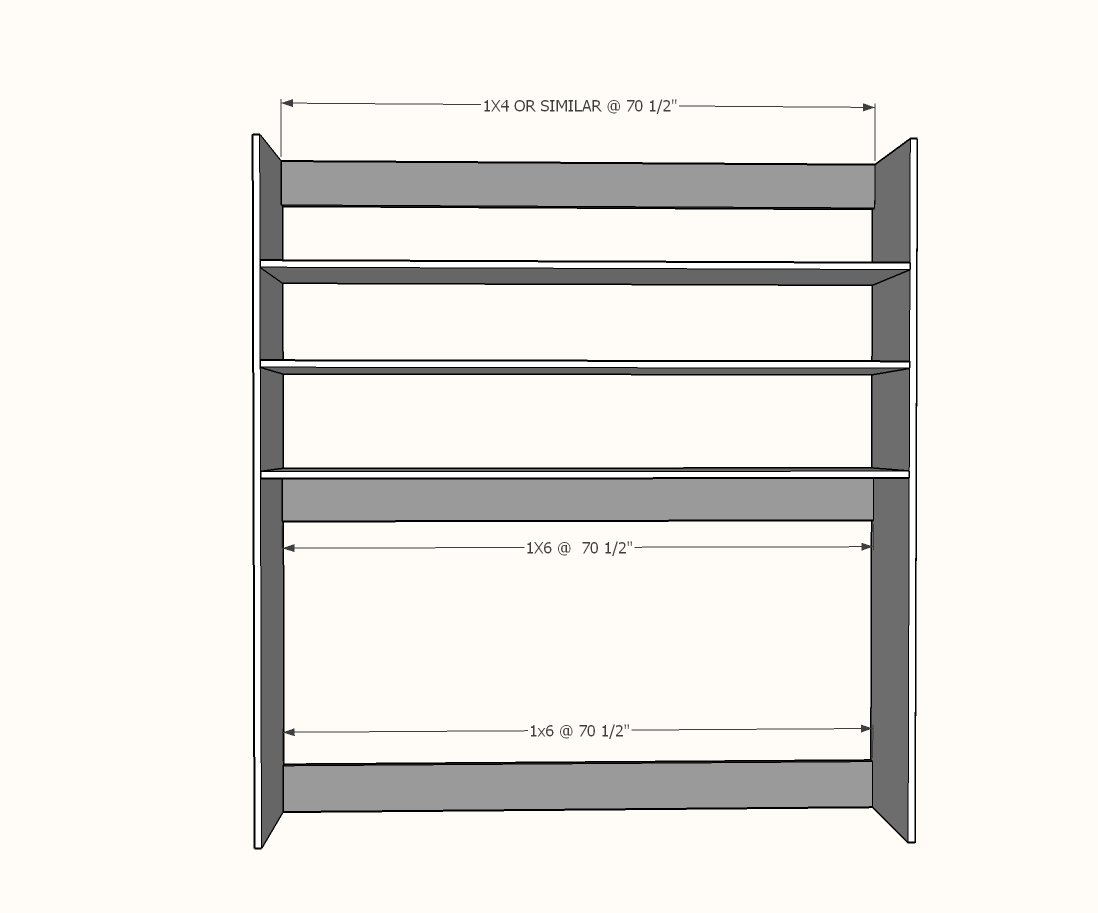
- 2 - 1x6 @ 70-1/2"
- 1 - 1x4 or similar (1x3 or plywood strip) @ 70-1/2"
FACE FRAME
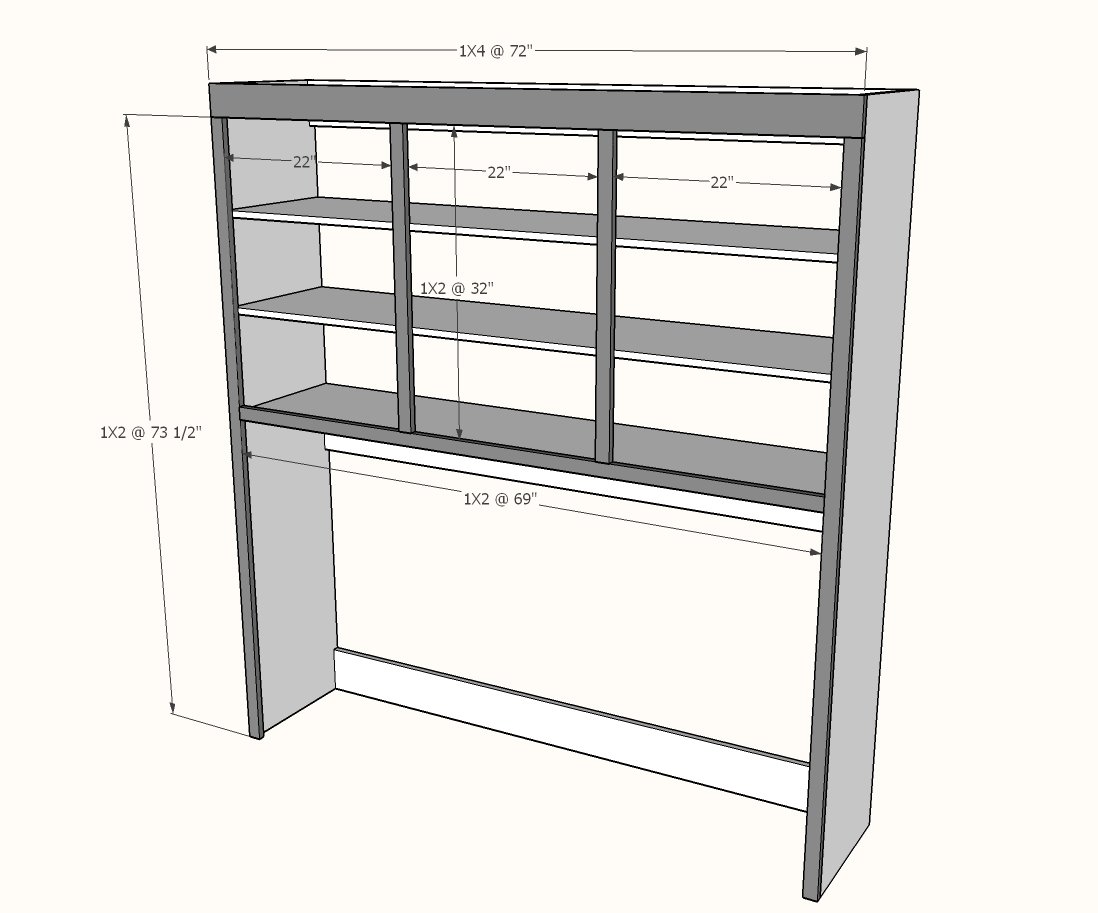
- 1 - 1x4 @ 72"
- 2 - 1x2 @ 73-1/2"
- 1 - 1x2 @ 69"
- 2 - 1x2 @ 32"
DOORS
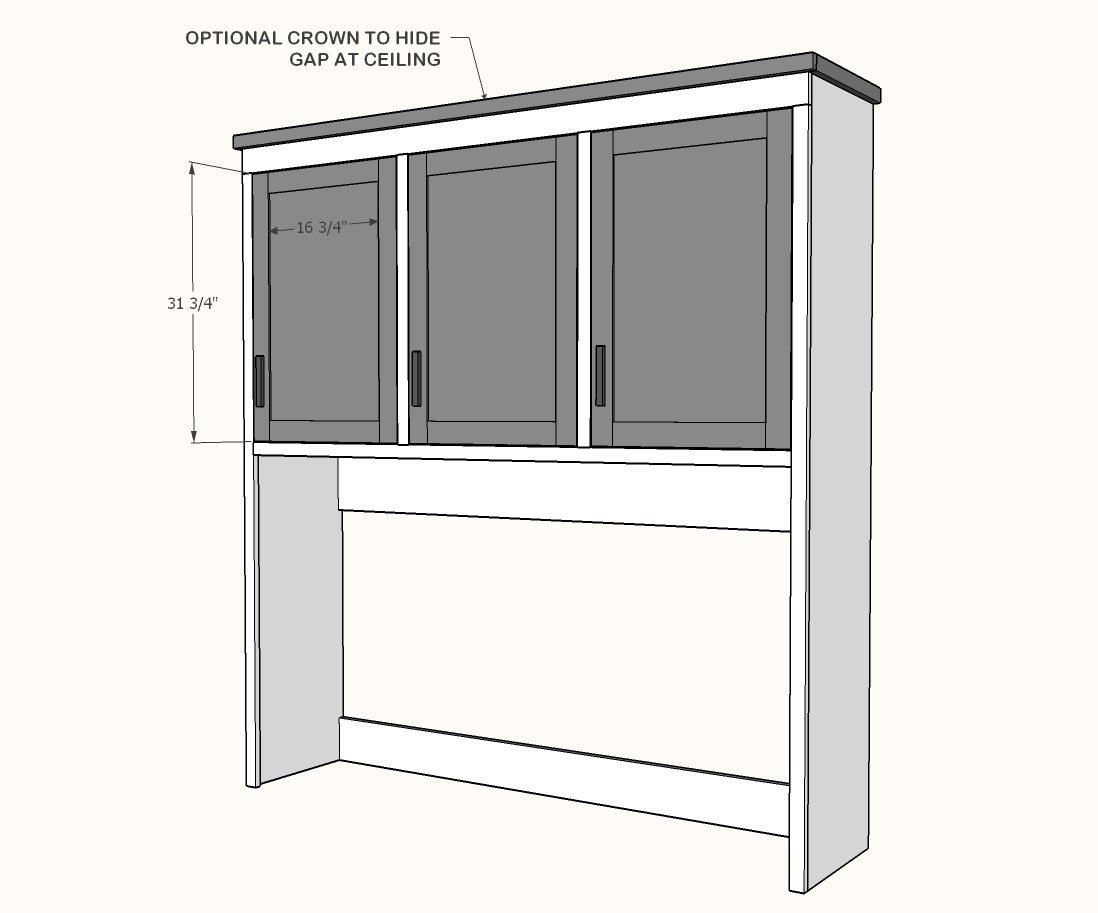
Build to fit with 1x3s and 1/4" plywood
Tools
- measuring tape
- square
- pencil
- safety glasses
- hearing protection
- kreg-jig
- drill
- circular saw
- compound miter saw
- nailer
- sander
Step-by-step Instructions
Step 1
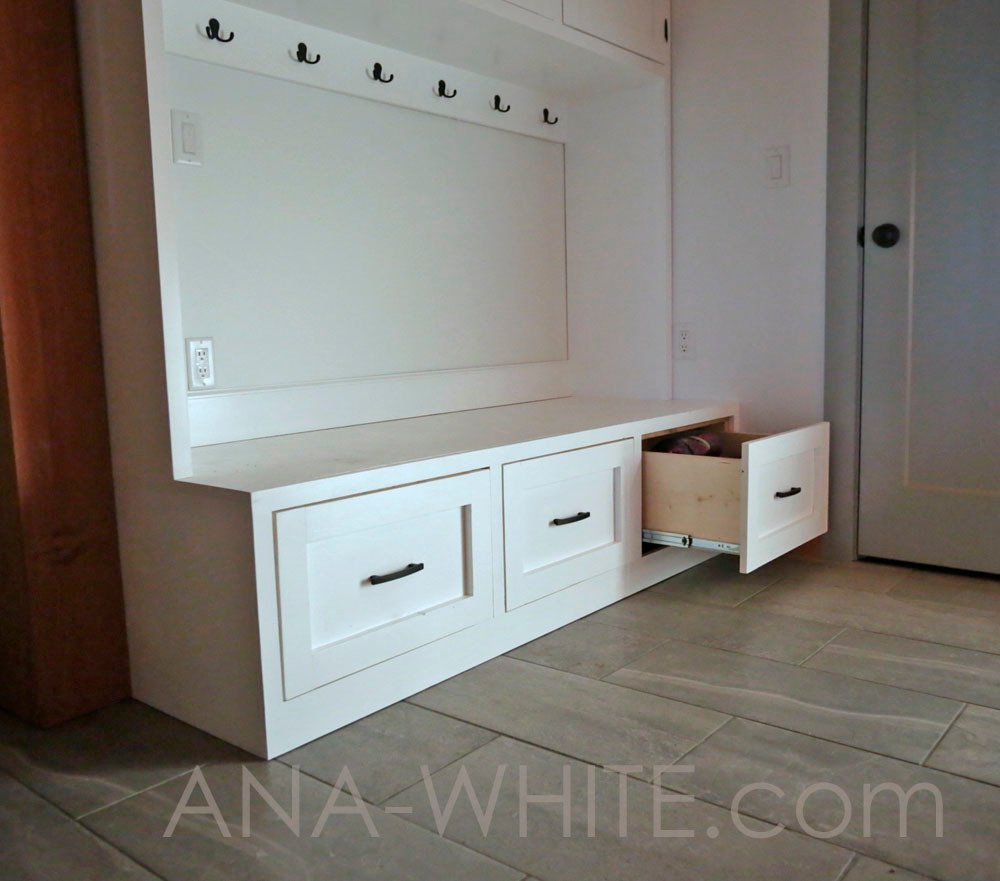
This project is designed to fit on top of this drawer bench - the plans are here.
Step 2
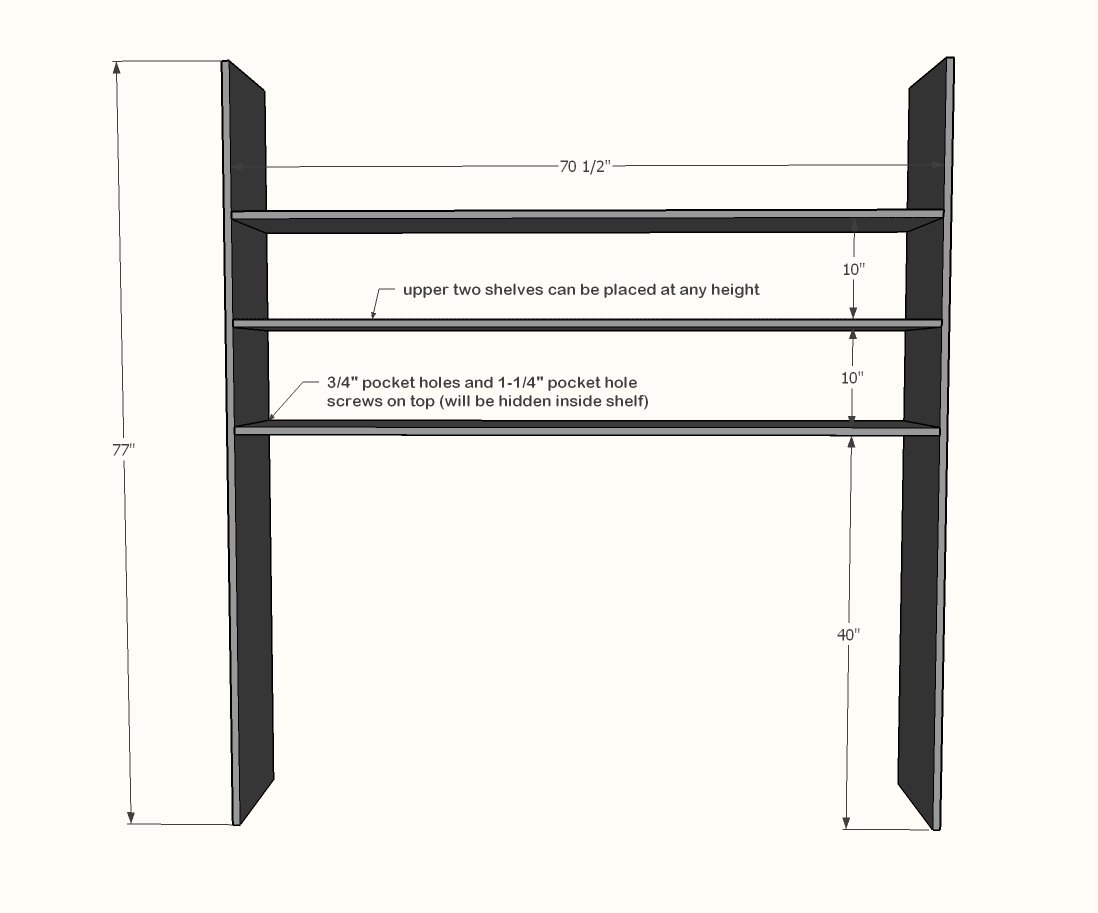
Drill three 3/4" pocket holes on each end of all the shelf boards. Attach to the sides with 1-1/4" pocket hole screws and glue. NOTE: For attaching to the bench, you may want to drill 3/4" pocket holes on bottoms of the sides.
Step 3
Drill two 3/4" pocket holes on each end of all the 1x6 and 1x4 boards. Attach to the sides as shown in the diagram. Also nail the bottom shelf to the top edge of the middle 1x board (where the hooks go) with 1-1/4" brad nails and glue. NOTE: If you expect heavy loads on the top two shelves, add a 1x3 under the back edge of the top two shelves (same as you did for the board that will hold the hooks) this will add alot more support to the upper two shelves.
Step 4
Build the face frame seperately with 3/4" pocket holes and 1-1/4" pocket hole screws and glue. Attach to front of cabinet with 1-1/4" brad nails and glue. Make sure you nail to the shelves.
Step 5
Finishing
Sand all surfaces, starting with a medium grit and finishing with fine. Wipe off the dust, fill any holes or gaps with wood filler, and sand smooth once dry. Apply primer if you're painting, then finish with your choice of paint or stain and seal with a durable clear topcoat. For outdoor projects, use exterior-rated primer, paint or stain, and sealer so the piece stands up to the weather.
Source (temporary): https://www.ana-white.com/woodworking-projects/entryway-cabinet-hooks