Entryway Mail Sort and Charging Hutch
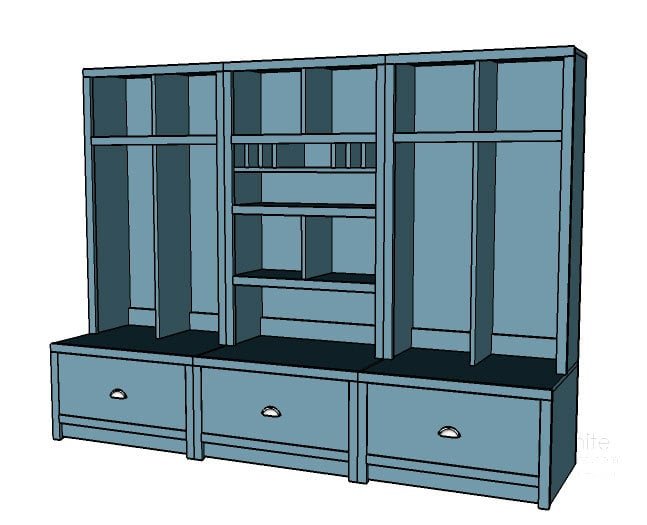
This hutch works with our Braden Collection and features four large cubbies, a mail sort shelf, and two large shelves.
Specifications
| Project type | Bookshelf and Bookcase Plans |
|---|---|
| Room | Entryway and Mudroom |
| Style | Farmhouse Furniture |
| Difficulty | Intermediate |
| Estimated cost | $50 - $100 |
Dimensions
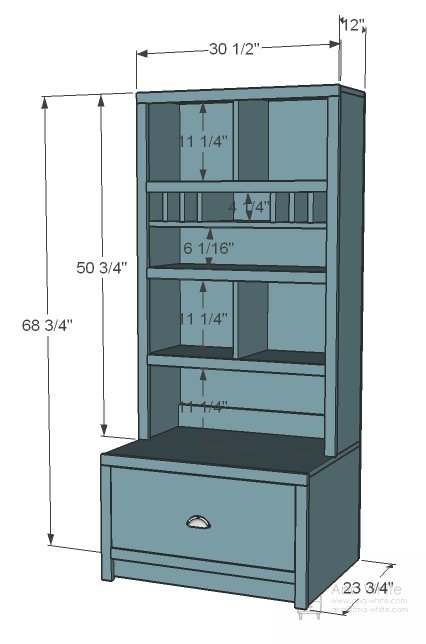
Use the size-specific shopping and cut lists below.
Shopping List
4 – 1x12s, 8 feet long
3 – 1x2s, 8 feet long
1/4″ Plywood, 1 sheet
1×4 30″ long
2″ Screws
Wood Glue
2″ finish Nails
1 1/4″ finish nails (for nailing the back on)
Wood filler and finishing supplies, including 120 grit sandpaper and paint and primer
Tools
- measuring tape
- square
- pencil
- safety glasses
- hearing protection
- drill
- circular saw
- sander
- level
- countersink drill bit
Step-by-step Instructions
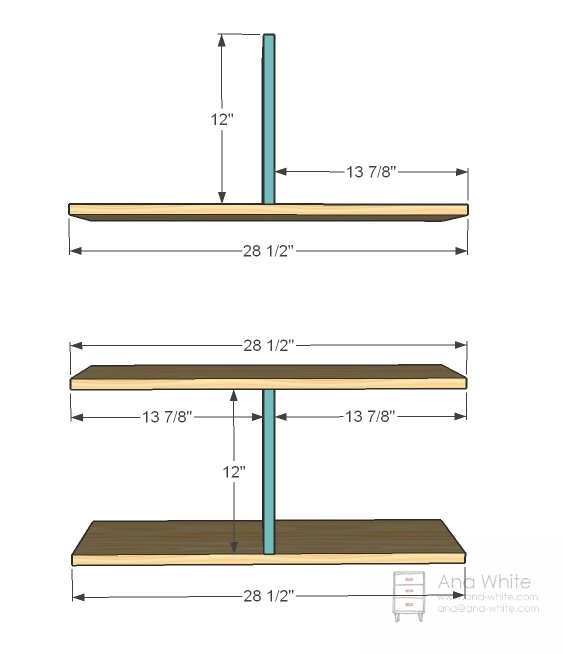
Cubby Dividers
Because of all the boards and the face framing and the back and the low use of this piece, you can use a nailer and 2″ nails to fasten. You can also use 2″ screws countersunk with glue or 1 1/4″ pocket hole screws. Measure and mark out all joints with a square before assembly.
Mail Sorts
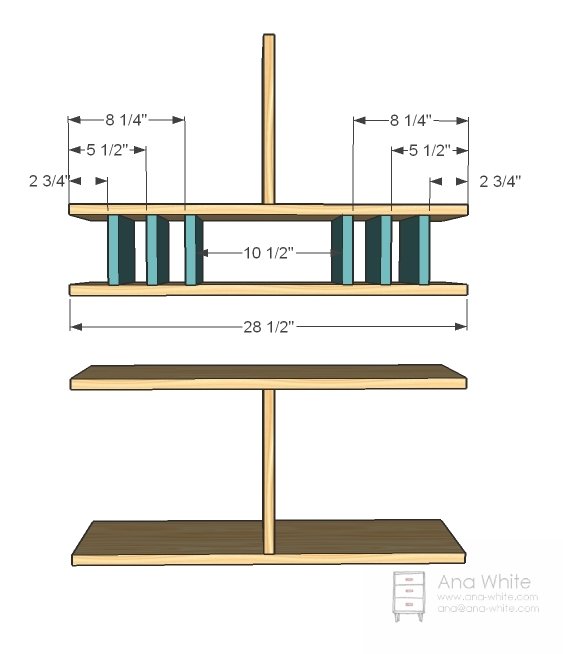
Now mark out the location of the mail sorts on the shelves. And then fasten the mail sorts to the shelves as shown above.
Sides
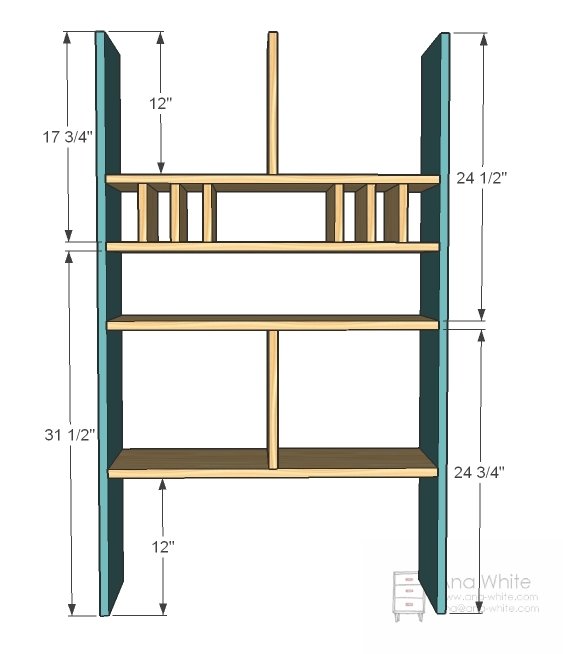
Mark the joints for the sides on both the inside and outside (so you know where to line boards up and also where to start your fasteners). Apply glue and fasten the sides to the shelves as shown in the diagram.
Top
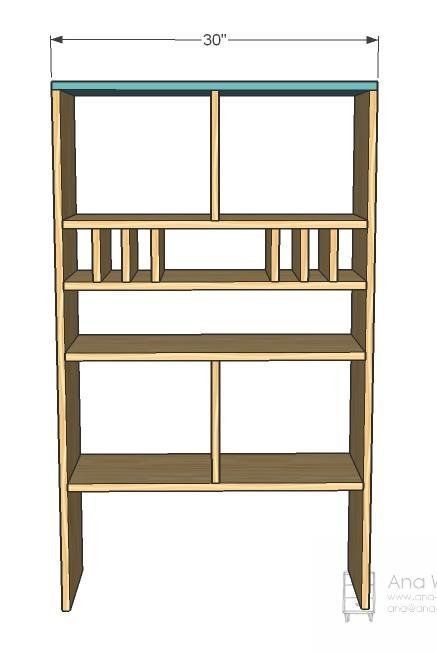
Now attach the top to the sides and center cubby divider.
Step 5
Back
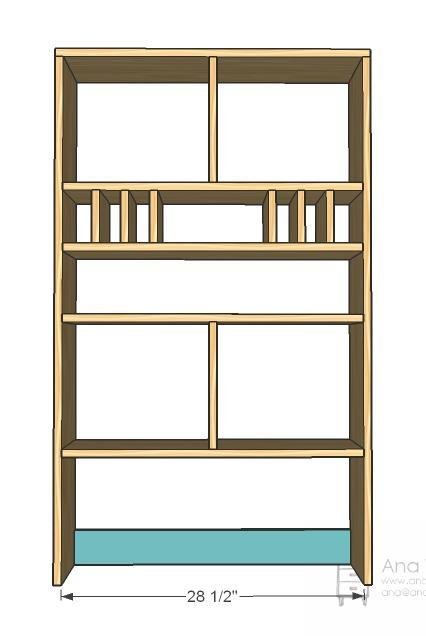
Then tack the back on with glue and 1 1/4″ nails. Especially if you put everything together with your nailer, make sure you also fasten into shelves.
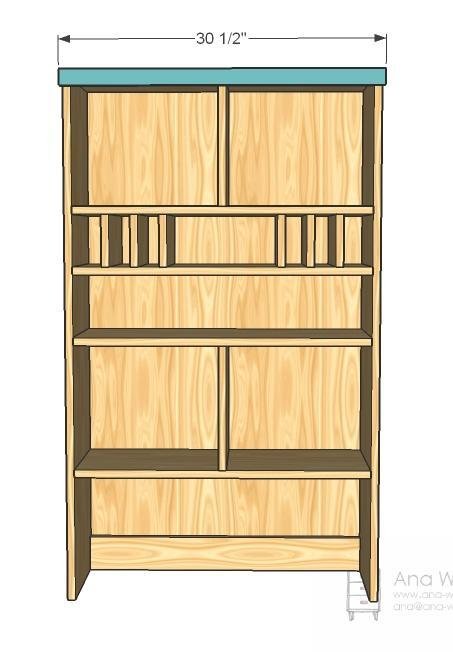
Top Trim
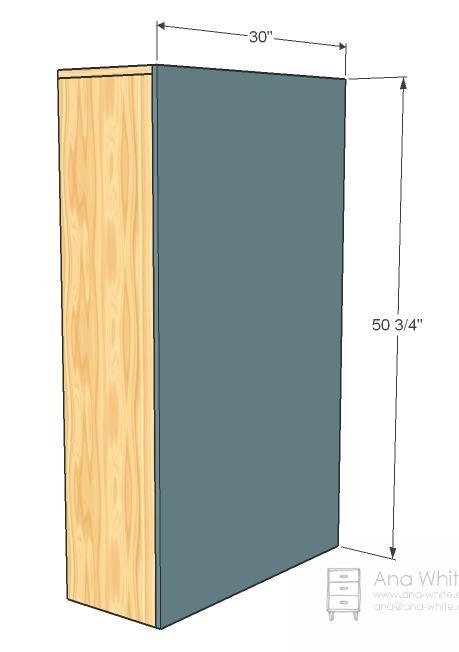
Nail the top trim on with glue and 2″ finish nails. Keep top flush and outsides overhang by 1/4″ on each end.
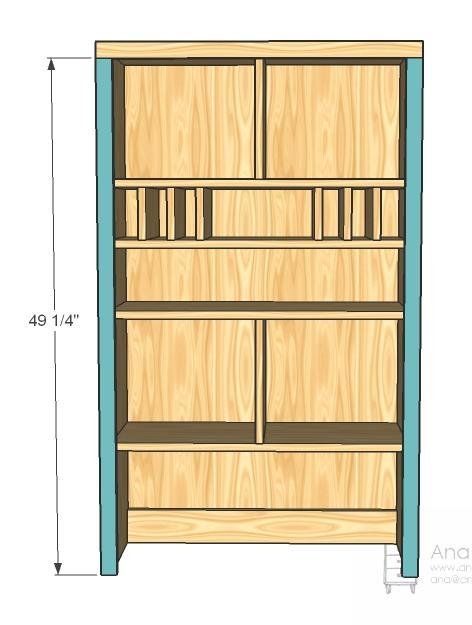
Side Trim
The side trim will also overhang the side by 1/4″. Use finish nails and glue to secure in place.
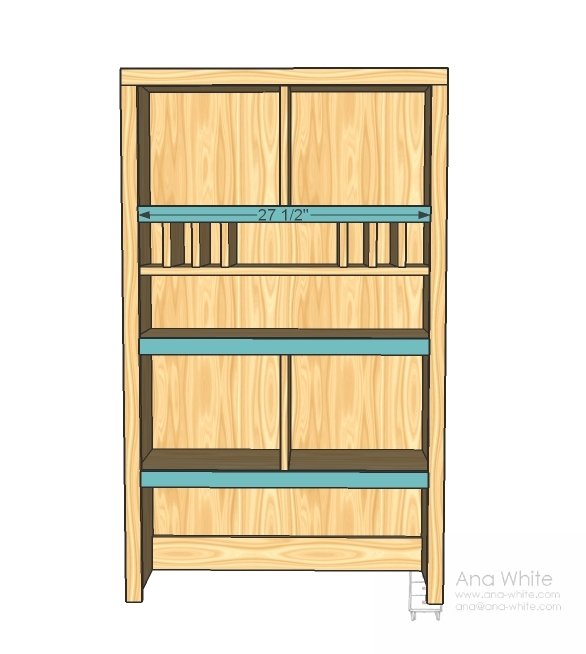
Shelf Trim
Finally, add the shelf trim as shown above. Keep tops flush. I also like to put a nail or predrilled screw through the edge of the side trim into the ends of the shelf trim, just to keep the joint nice and tight.
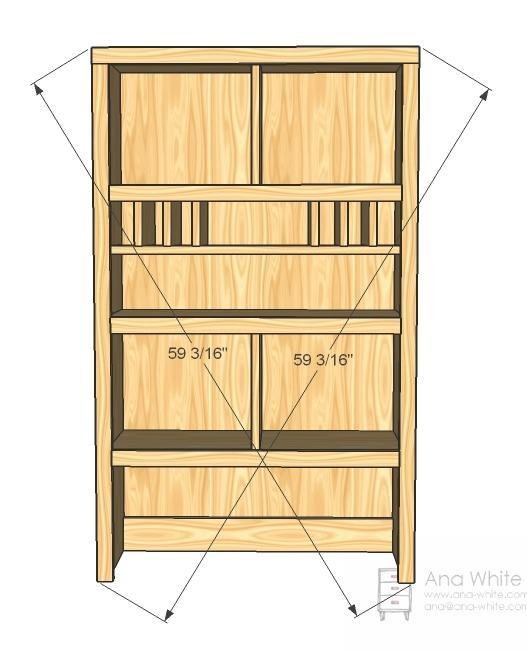
Squaring
One of the most important parts of building big projects – especially big projects where multiples are lined up – is building square. Measure diagonally and check to see if the measurements match. If not, from opposite corners of the longer measurement, push the two opposing corners together until the measurement matches.
Finishing
Sand all surfaces, starting with a medium grit and finishing with fine. Wipe off the dust, fill any holes or gaps with wood filler, and sand smooth once dry. Apply primer if you're painting, then finish with your choice of paint or stain and seal with a durable clear topcoat. For outdoor projects, use exterior-rated primer, paint or stain, and sealer so the piece stands up to the weather.
Source (temporary): https://www.ana-white.com/woodworking-projects/entryway-mail-sort-and-charging-hutch