Essential Entryway Bench
Build your own entryway bench in a custom size. This tutorial will walk you through the steps, with a video of the build, step by step diagrams, and even a free configurator to help you design your own! This entryway bench is a classic design, turning any entry into a mudroom! RELATED: Matching wall organizer plan is available here.
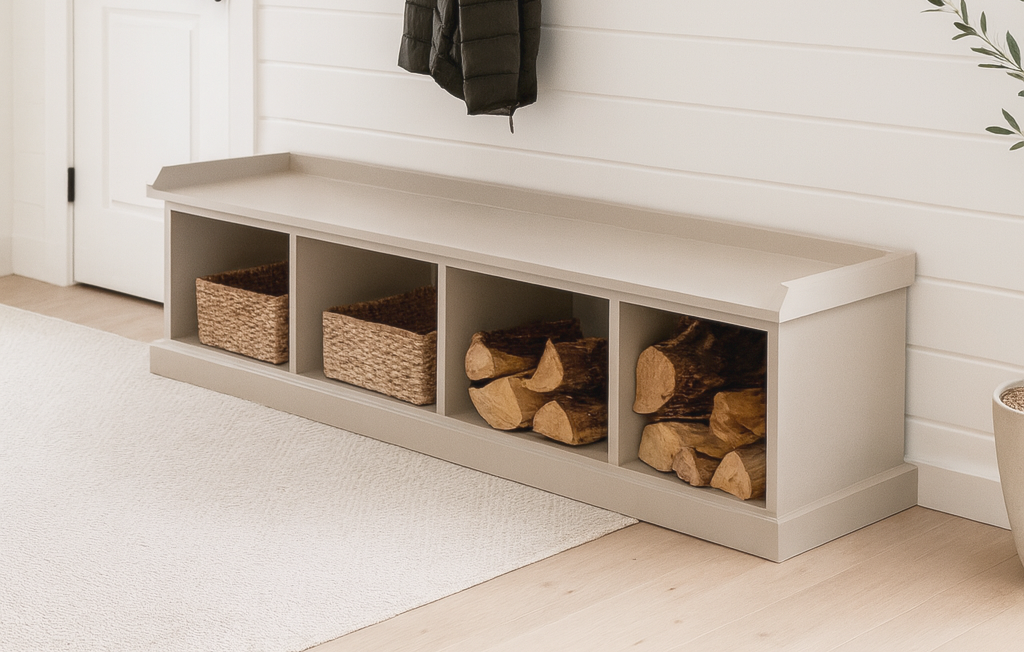
Specifications
| Project type | Bench |
|---|---|
| Room | Storage Solutions |
| Difficulty | Intermediate |
Dimensions
Use the size-specific shopping and cut lists below.
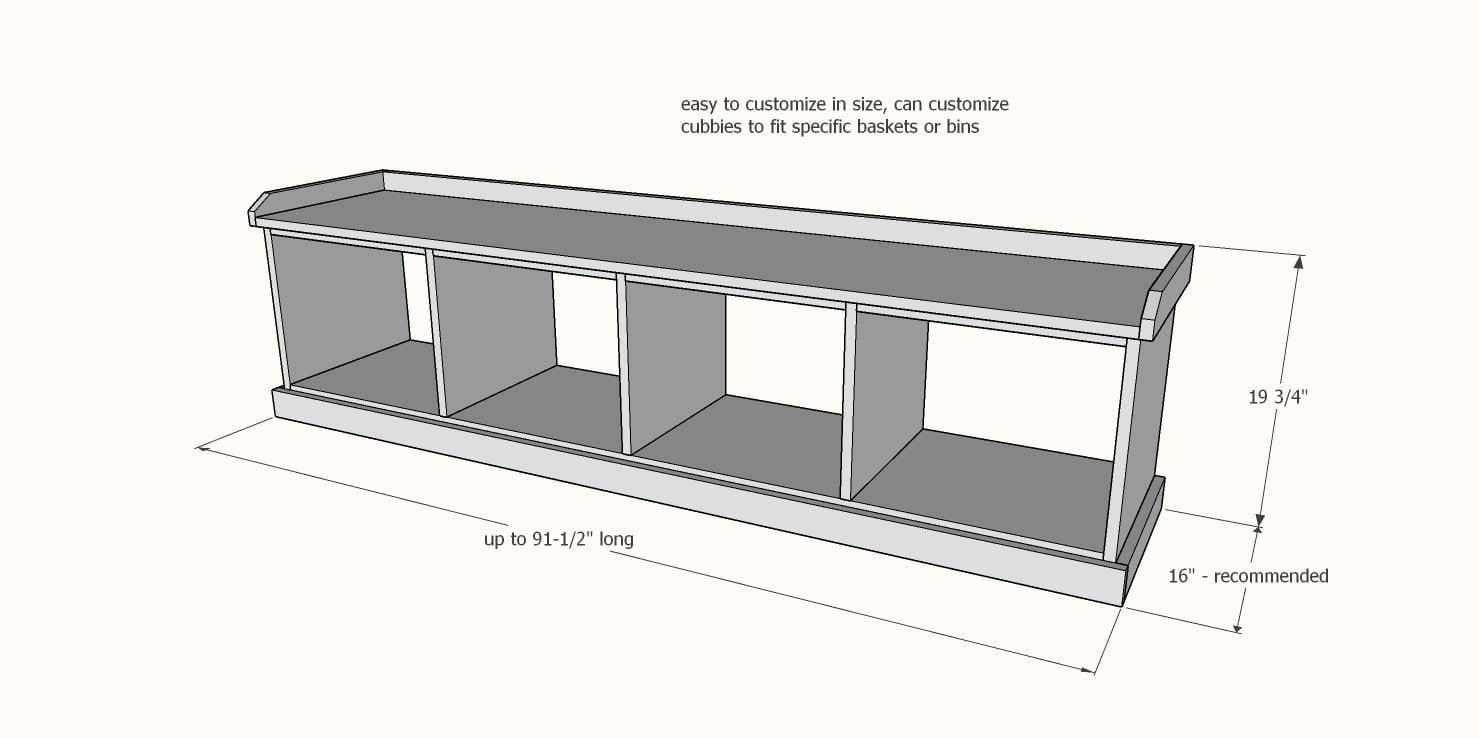
Shopping List
- Plywood Pieces for Carcass (see step 1)
- 1x3s for bay supports and trim, you'll need approximately 5 times the overall width of the bench
- 1-1/4" pocket hole screws
- 1-1/4" brad nails
- wood glue
- Primer and paint or stain for finishing
Cut List
Carcass cuts are determined through the configuration Ana's Design App in Step 1.
Bay supports are equal to the width of your bays.
Top and bottom trim should be cut to fit for a perfect trimout.
Tools
- measuring tape
- square
- pencil
- safety glasses
- kreg-jig
- drill
- compound miter saw
- table saw
- nailer
- Iron
Step-by-step Instructions
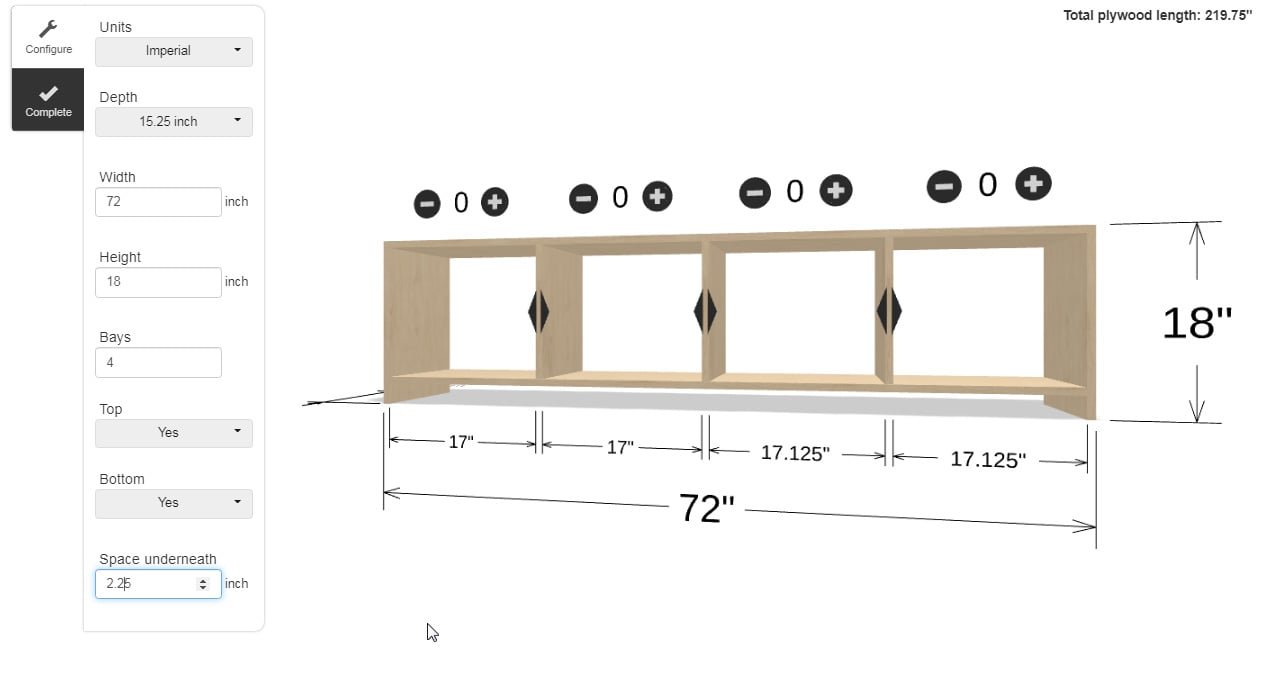
Design Your Bench
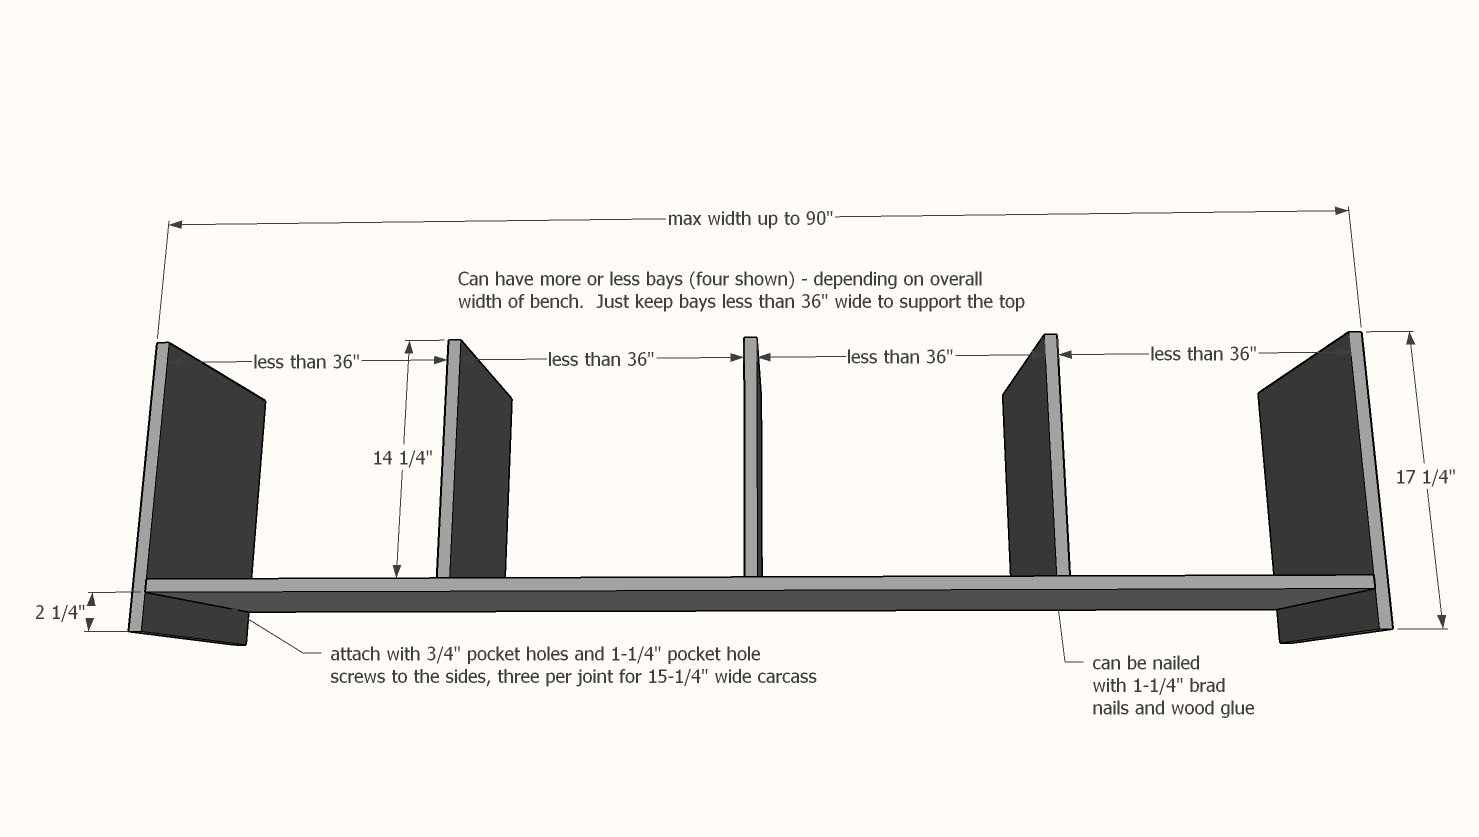
Use our free configurator tool here to design your bench carcass, here are the parameters to set: • Depth - recommend 15-1/4" depth, but can use 20-1/4" and 23-1/4" too • Width - any width up to 90" • Height - recommend 18" • Bays - as many bays as desired, but keep bay width less than 36" as it is supportive of the top and will keep the top from sagging • Top - yes • Bottom - yes • Space Under Bottom - 2-1/4" for 1x3 base trim (as I did) or 3-1/4" for 1x4 base trim Click here to use this tool in a pop-up full page view
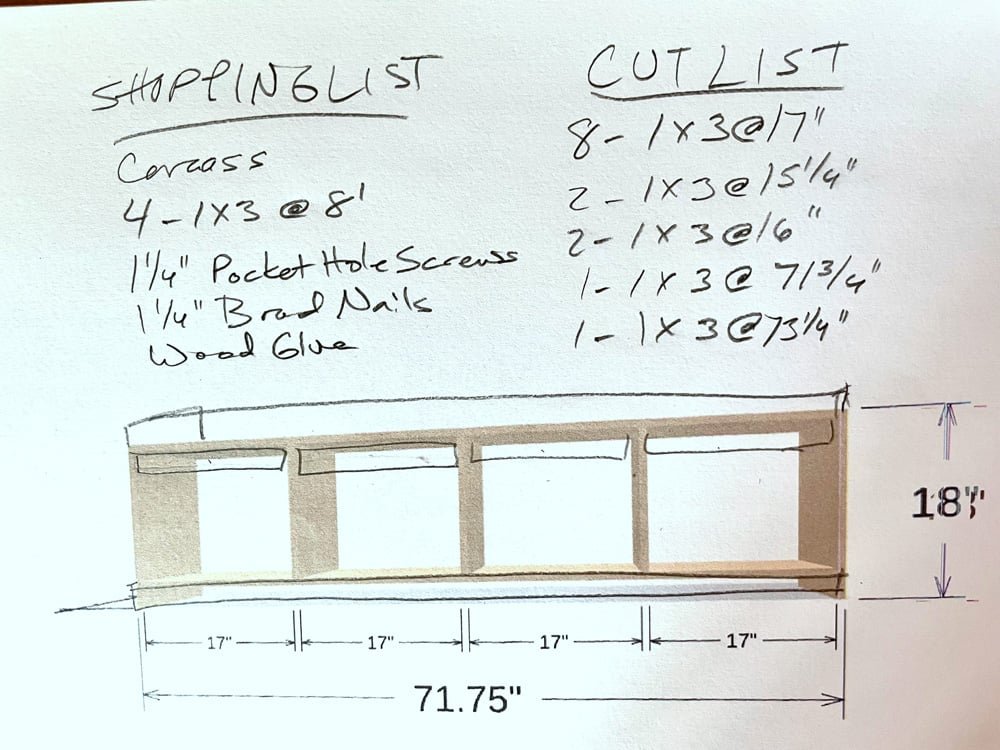
Creating a Cut List and Shopping List from Your Configuration
Once you have your configuration done and the drawing printed, use the drawing to create a cut list by printing it out, and drawing all the added parts on. Once you have a cut list, you can create a shopping list from the cut list. Cutting the Plywood Carcass Pieces Rip the 3/4" plywood into strips the desired depth of the bench. Then cross cut the strips to create the pieces needed in the plans. Apply edge banding to the front edges of the pieces and trim off with a razor. Sand rough edges.
Main Carcass Assembly
On the bottom shelf, drill three 3/4" pocket holes at each end (four if you went with a 23-1/4" wide carcass). Attach bottom shelf to the two sides, with 2-1/4" gap underneath, using 1-1/4" pocket hole screws. Then attach dividers to bottom shelf using 1-1/4" brad nails and wood glue. TIP: Use the bay supports as spacers to guide you in placing the dividers as shown in the video.
Top Bay Supports
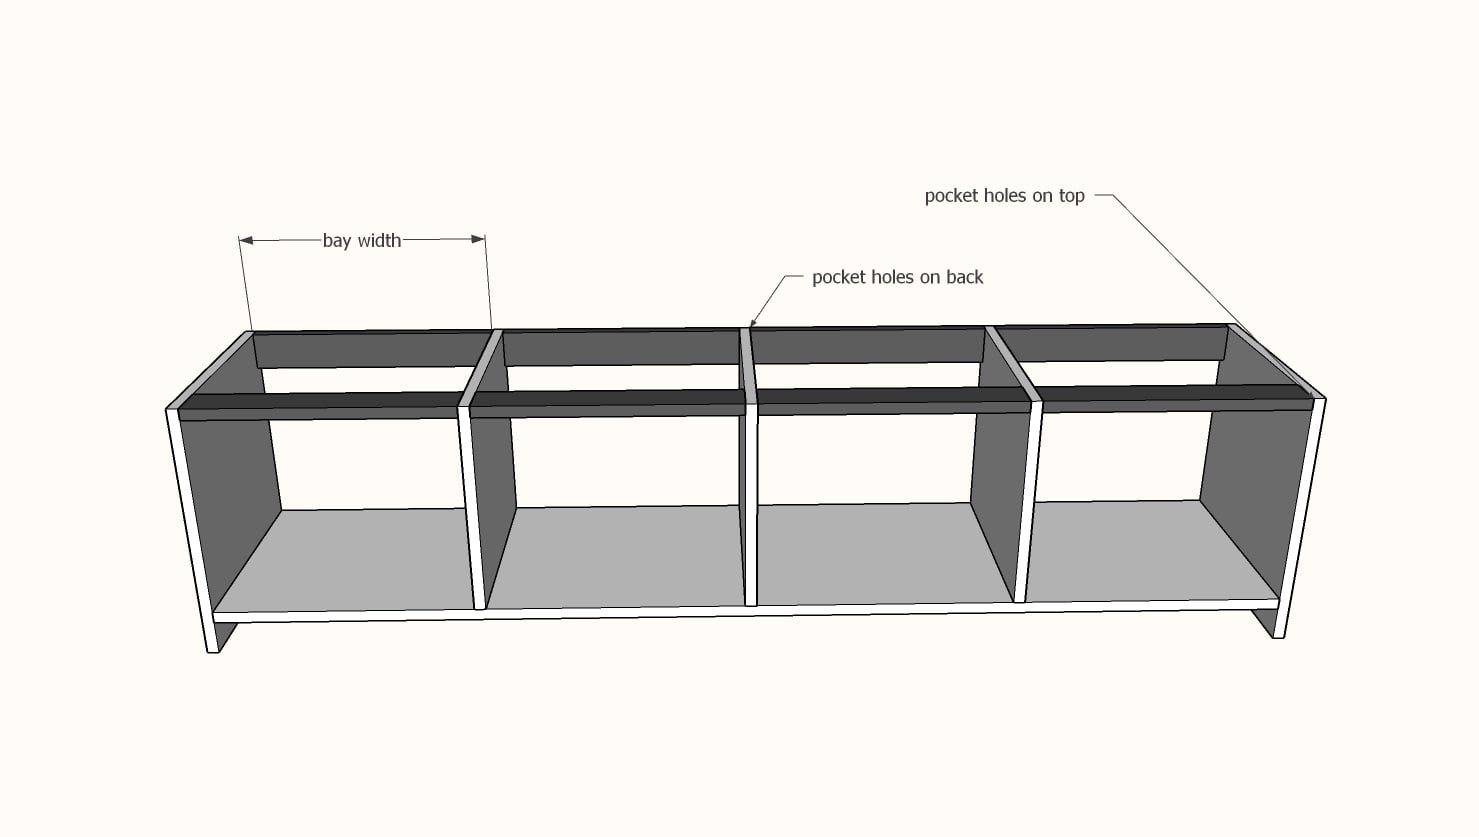
You'll need some support at the top. Cut 1x3s to match the bay widths and attach as shown with pocket holes. TIP: Also drill pocket holes facing upward on the back bay supports for attaching the top in later steps.
Bottom Support
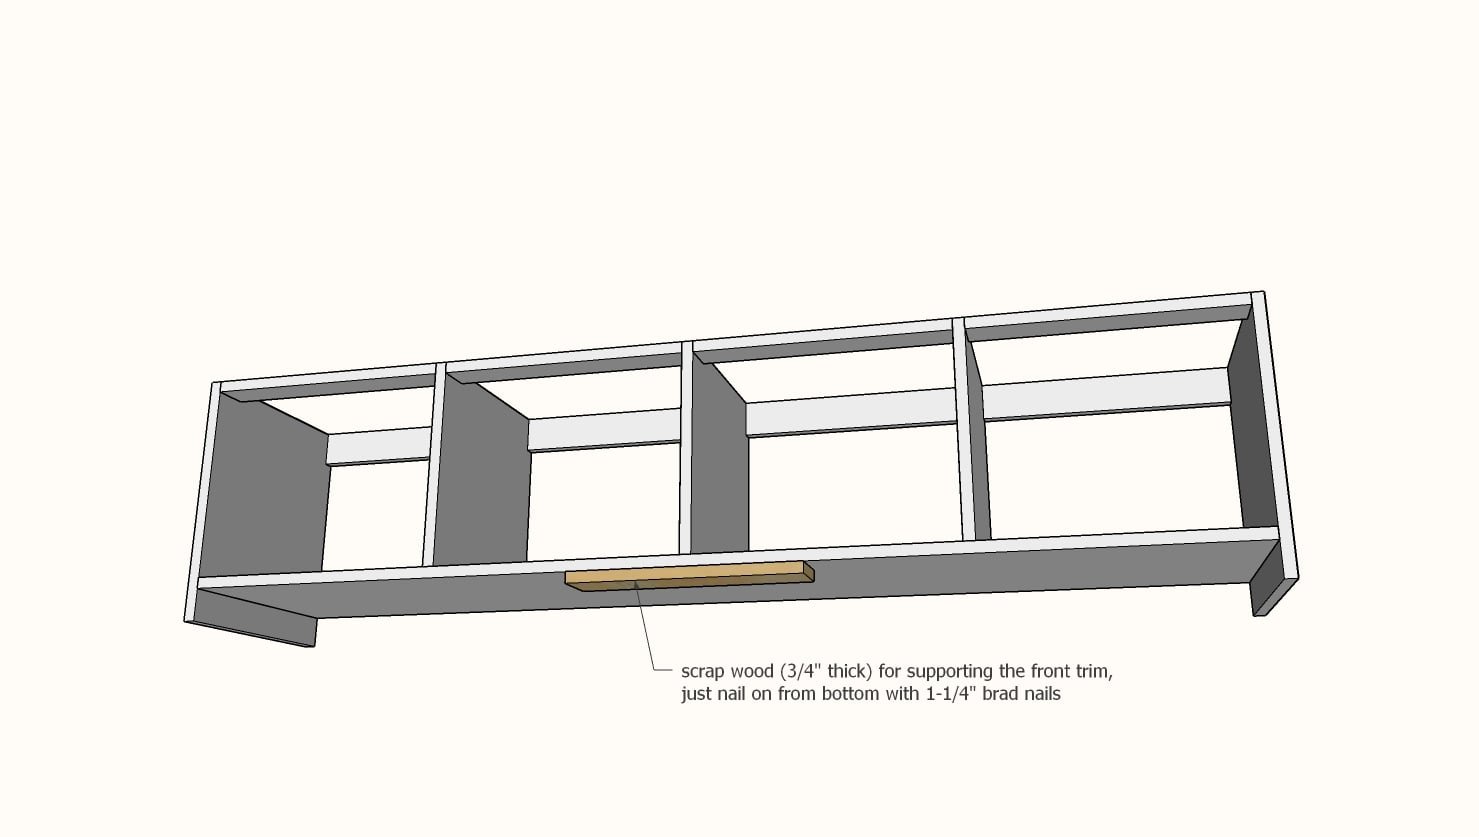
For longer benches, you may need additional support in the middle to keep the bench from sagging. You can either add a center "leg" as I did in the video, or add some blocking as shown here - the base trim will attach to it and work as the support.
Base Trim - Sides
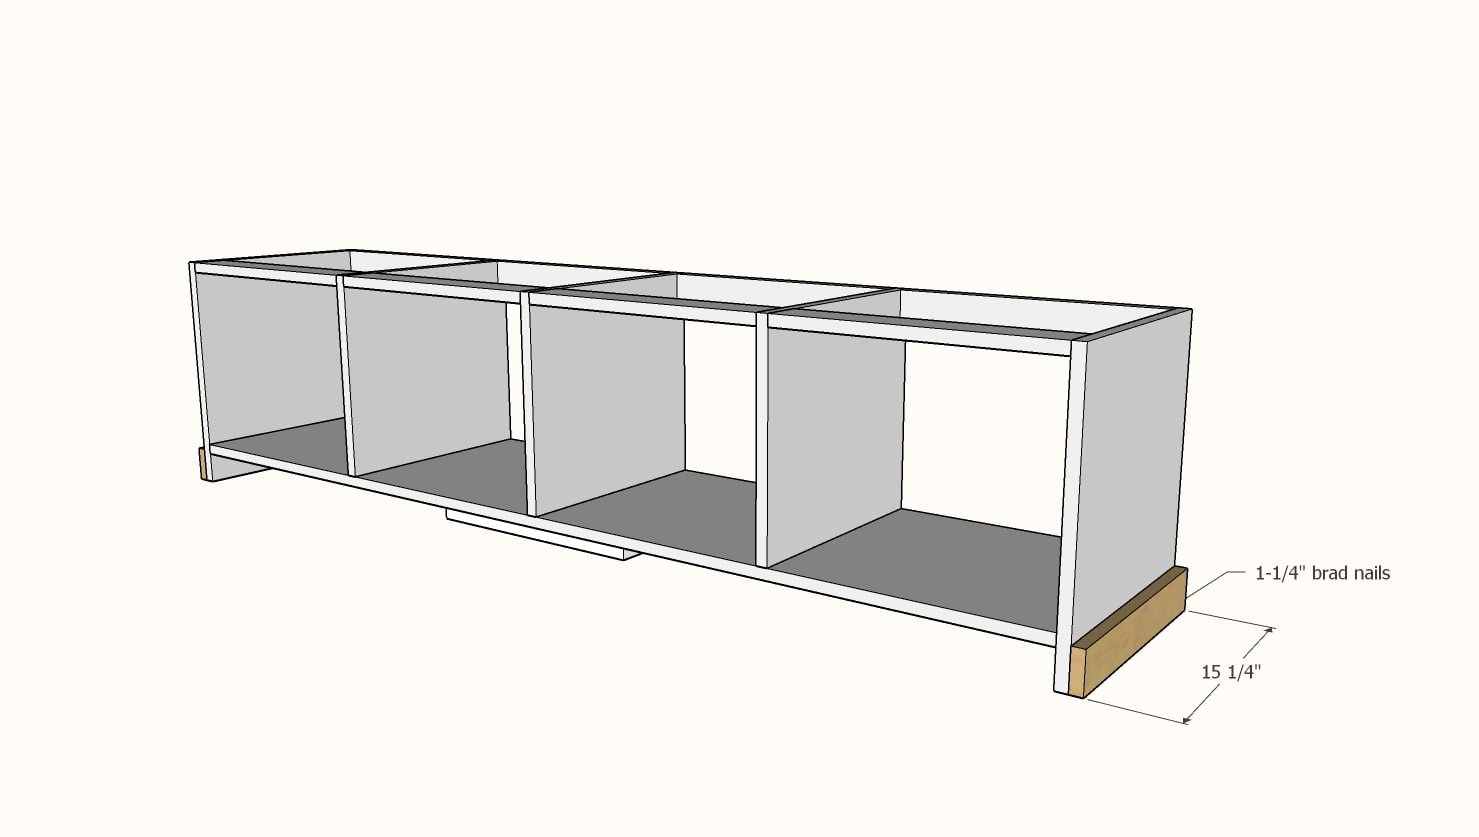
Measure and cut 1x3 base trim for the sides and nail and glue on with 1-1/4" nails.
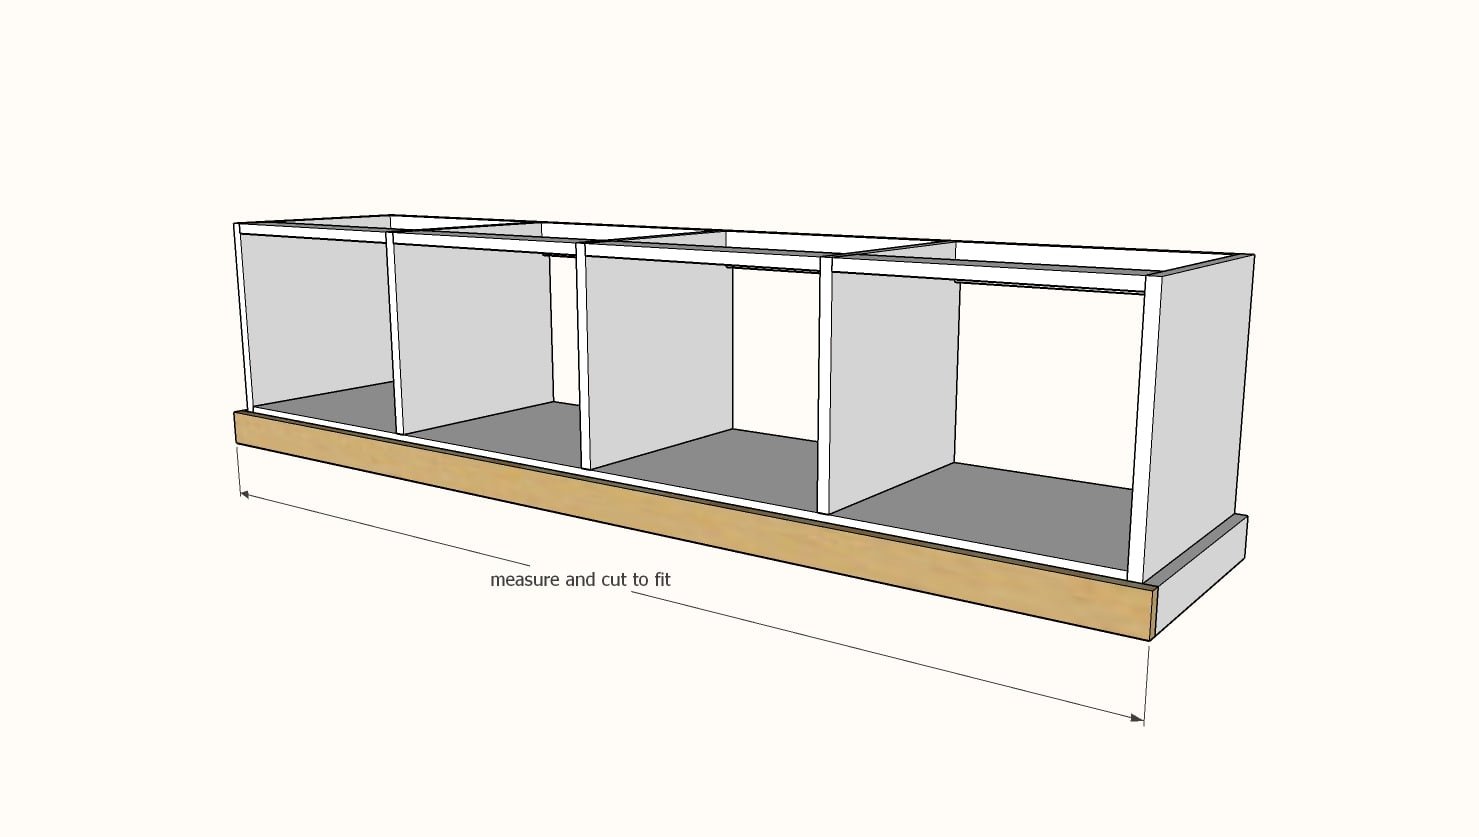
Base Trim - Front
Measure and cut the front base trim and nail and glue on, make sure you nail to the hidden support blocking (if used) and the side trim.
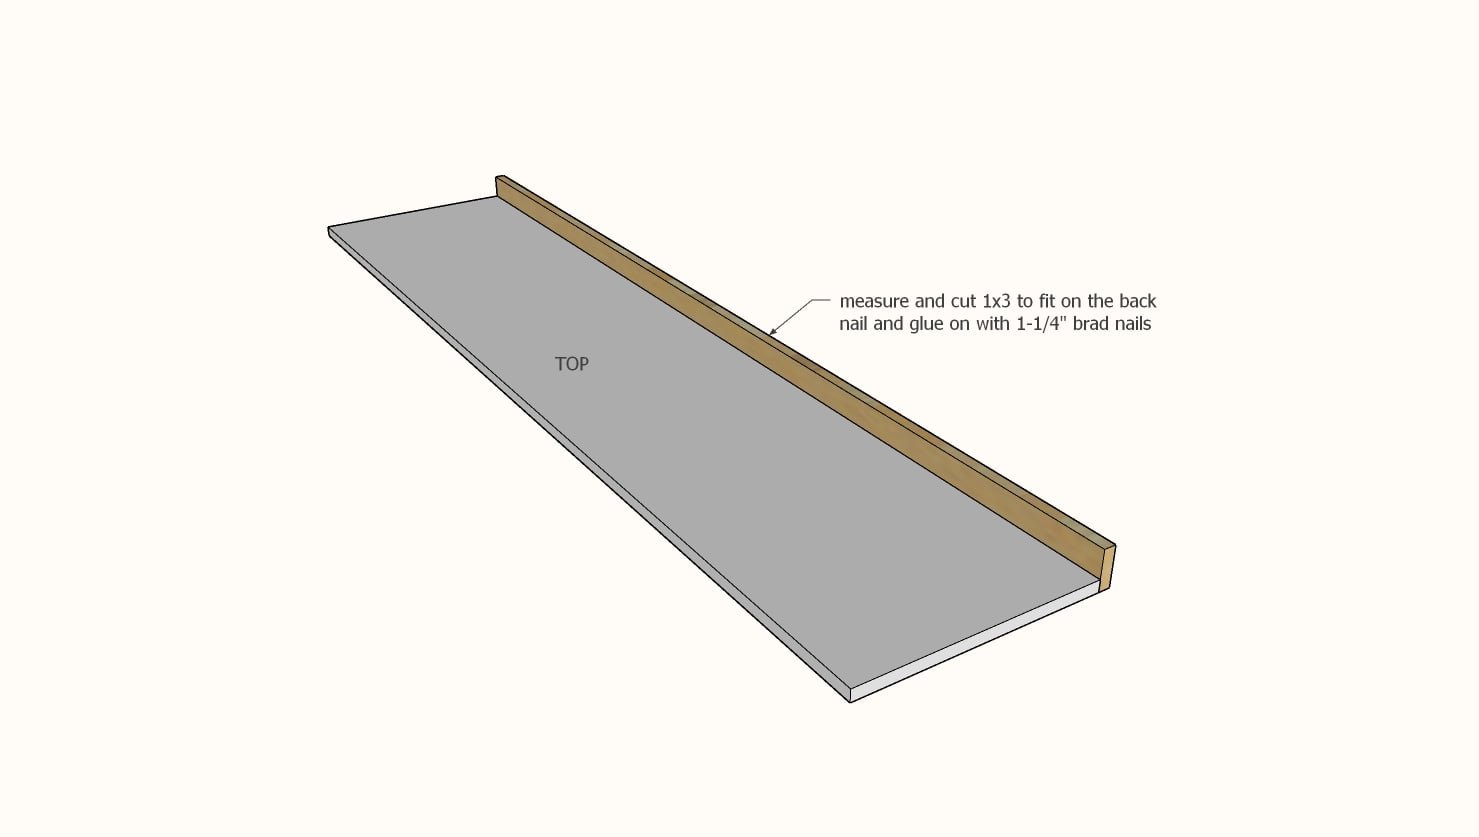
Top Back Trim
Measure and cut the back 1x3 trim and nail and glue to the back.
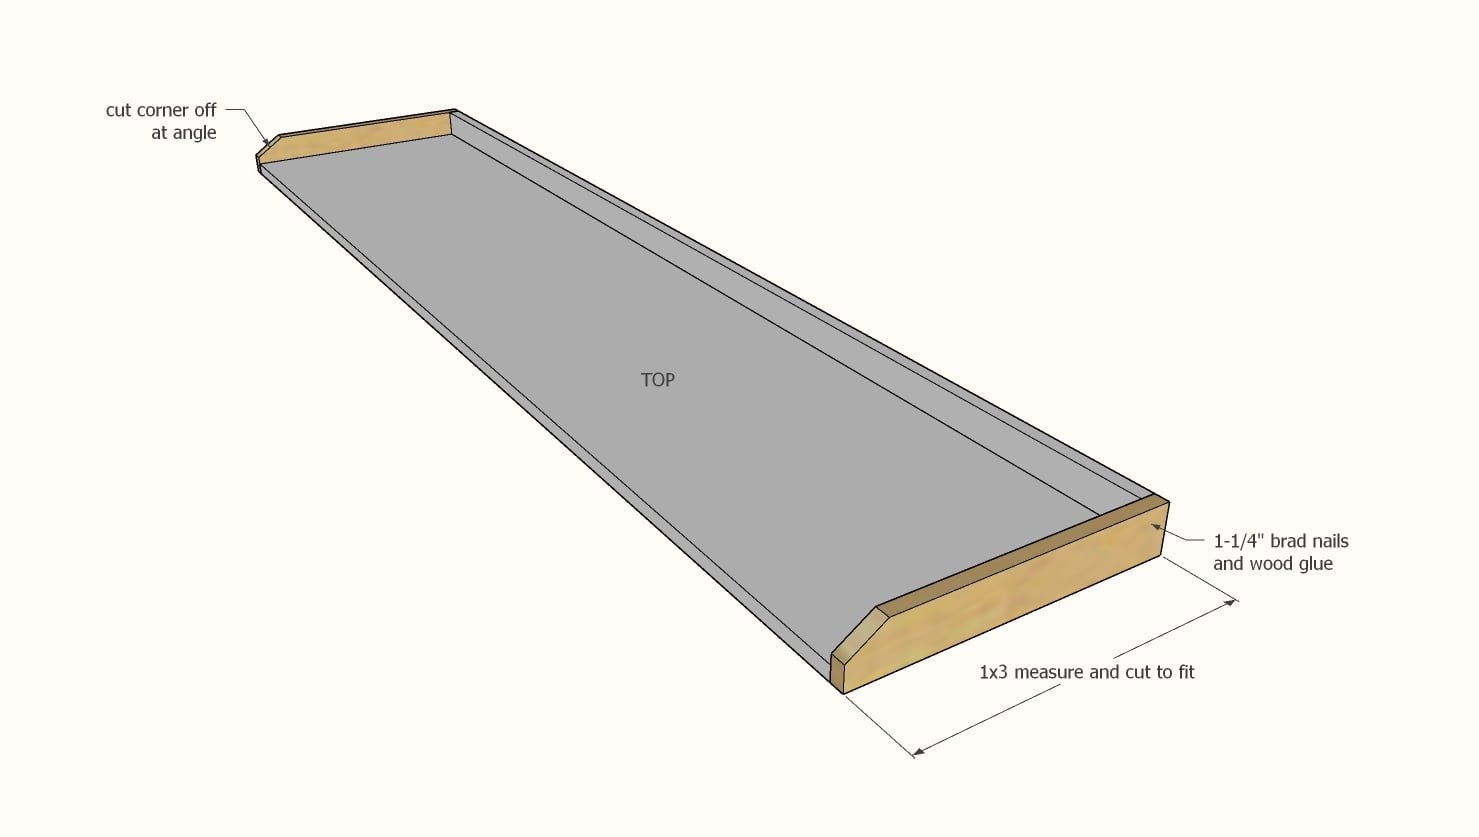
Top Side Trim
Measure and cut the side top trim. Cut the top front corner at an angle (optional). Nail and glue on with 1-1/4" brad nails.
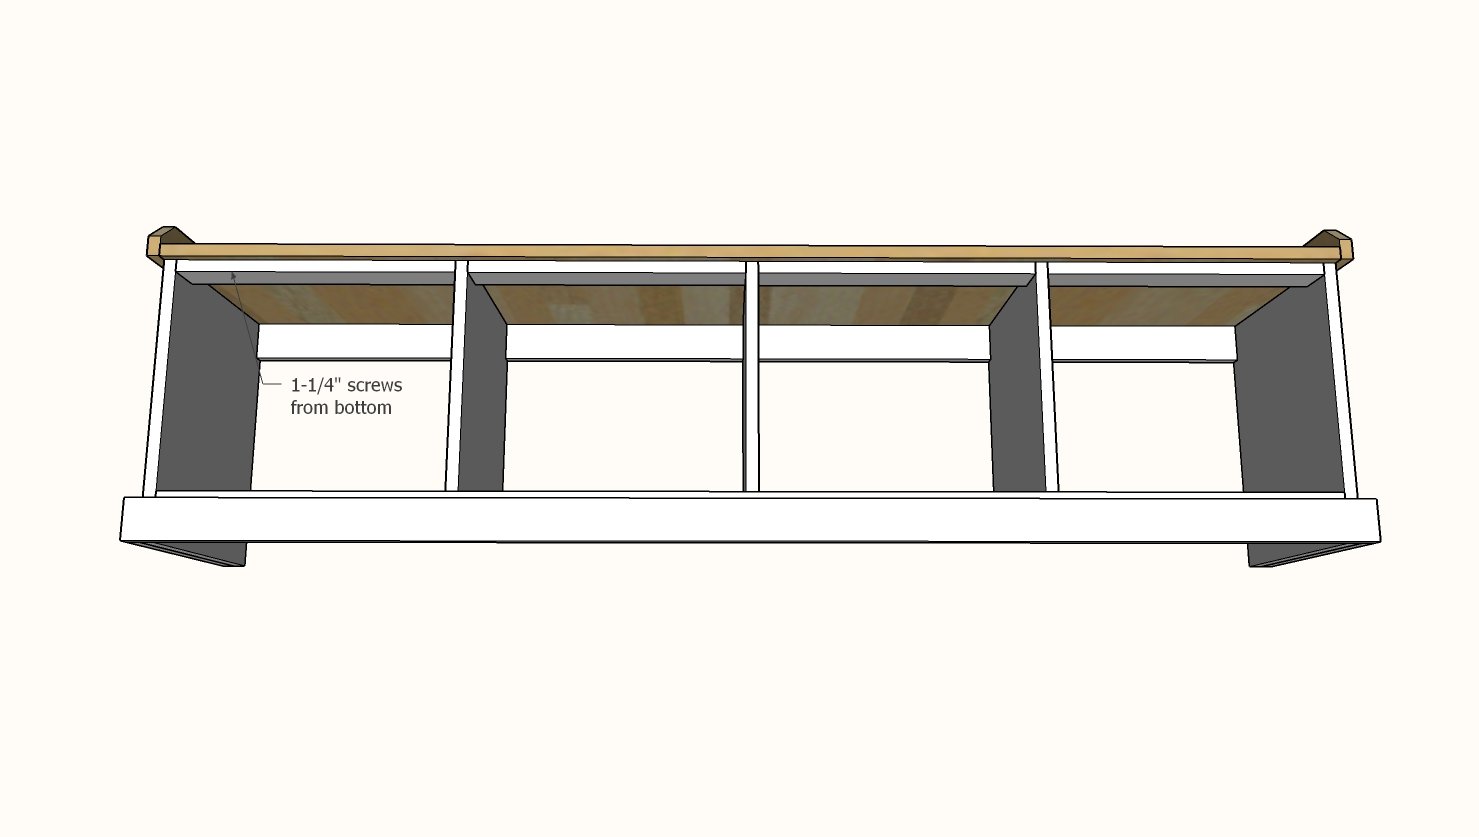
Attaching Top
TIP: It may be easier to attach the top after painting or staining. The top is attached with equal overhangs on the sides and flush on the back. Attach with 1-1/4" screws (yes you can use the pocket hole screws) through the bay supports.
Finishing
Sand all surfaces, starting with a medium grit and finishing with fine. Wipe off the dust, fill any holes or gaps with wood filler, and sand smooth once dry. Apply primer if you're painting, then finish with your choice of paint or stain and seal with a durable clear topcoat. For outdoor projects, use exterior-rated primer, paint or stain, and sealer so the piece stands up to the weather.
Source (temporary): https://www.ana-white.com/woodworking-projects/essential-entryway-bench