Essential Entryway Shelf with Hooks
Build your own entryway wall organizer with hooks. This essential piece is a tried and true option for mudrooms and entryways. Easy to adjust in size for a perfect fit for your space and needs. with build video by See Also: Essential Entryway Bench Plans
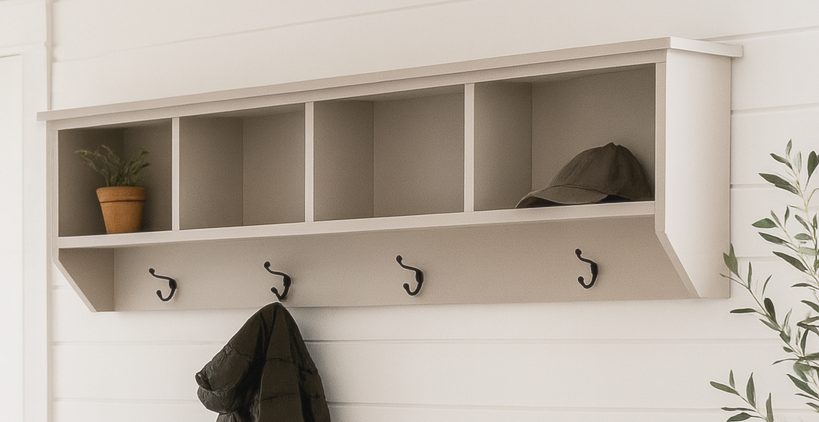
Specifications
| Project type | shelves |
|---|---|
| Room | Storage Solutions |
| Difficulty | Intermediate |
Dimensions
Use the size-specific shopping and cut lists below.
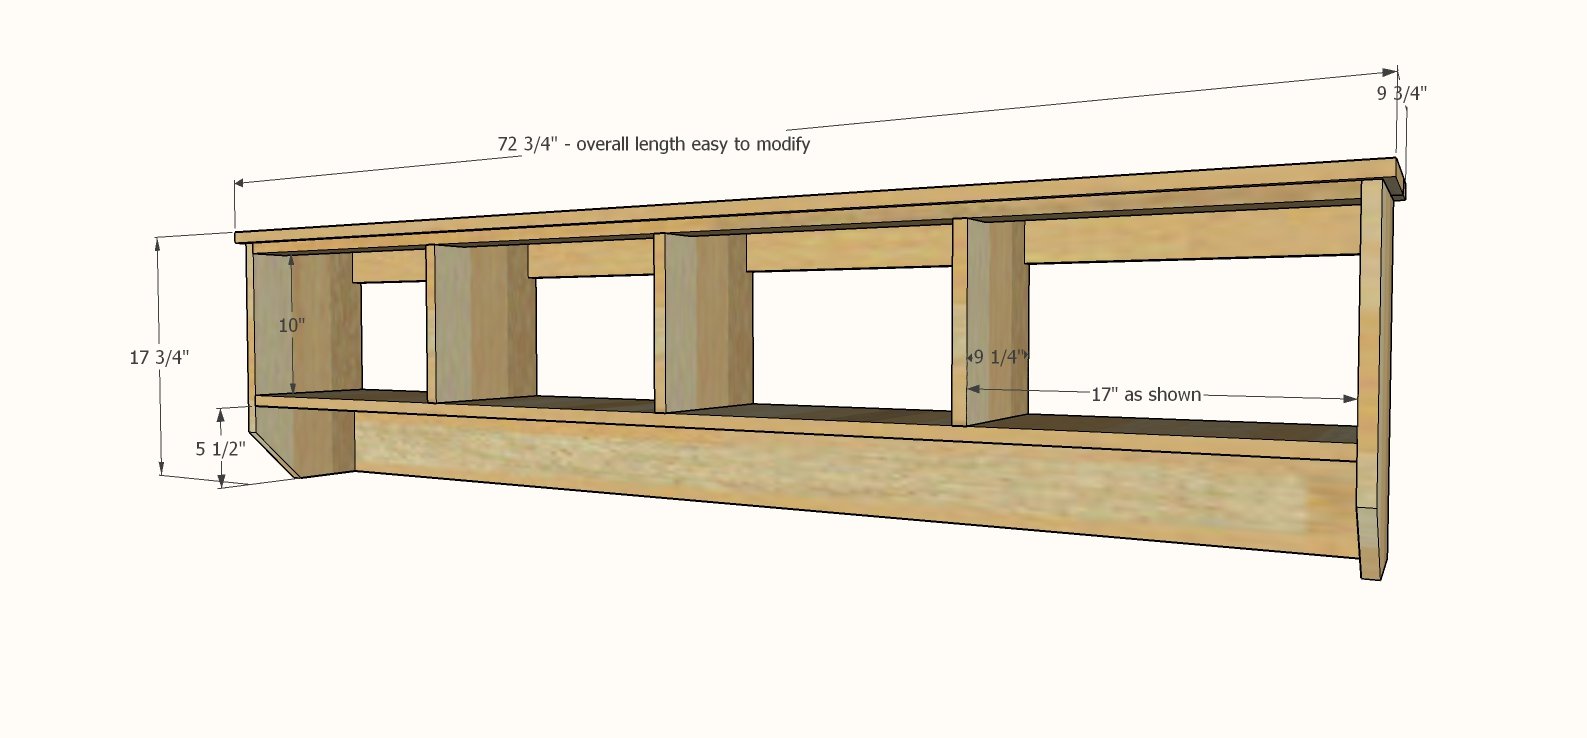
Shopping List
Shopping List as Shown in Photos (72-3/4" long)
- 1 - 1x10 @ 12 feet long
- 3 - 1x3 @ 8 feet long
- 1 - 1x6 @ 6 feet long
- 1 - 1x8 @ 8 feet long
- 1-1/4" brad nails and wood glue
- 2-1/2" or longer wood screws for hanging to studs in wall, at least 4
For a custom size, create a cut list first, and then figure your materials.
Cut List
Cut List for 72-3/4" long Shelf (as shown in photos) - but should be modified to fit your space
- 2 - 1x10 @ 17" - sides (same for all sizes)
- 2 - 1x3 @ 70-1/4" - top and back supports (Size Modification: 2-1/2" less than overall desired length of shelf)
- 1 - 1x6 @ 70-1/4" - bottom (Size Modification: 2-1/2" less than the overall desired length of shelf)
- 1 - 1x10 @ 70-1/4" - bottom shelf (Size Modification: 2-1/2" less than the overall desired length of the shelf)
- 3 - 1x10 @ 10-3/4" - dividers (Size Modification: 3 dividers for 4 bays, adjust number of dividers needed depending on number of bays)
- 1 - 1x3 @ 72-3/4" - top (Size Modification: overall desired length of shelf)
- 1 - 1x8 @ 72-3/4" - top (Size Modification: overall desired length of shelf)
Tools
- measuring tape
- square
- safety glasses
- jigsaw
- compound miter saw
- nailer
Step-by-step Instructions
Mark the sides with a carpenter's square and cut off at a 45 degree angle, 4" back and 4" up.
Then attach the back with 1-1/4" brad nails and glue to the two sides. Repeat for the top and back 1x3. TIP: If you have a pocket hole jig, you can also attach all boards in this step with 3/4" pocket holes and 1-1/4" pocket holes crews, placing pocket holes on the back or top sides so they are hidden when finished.
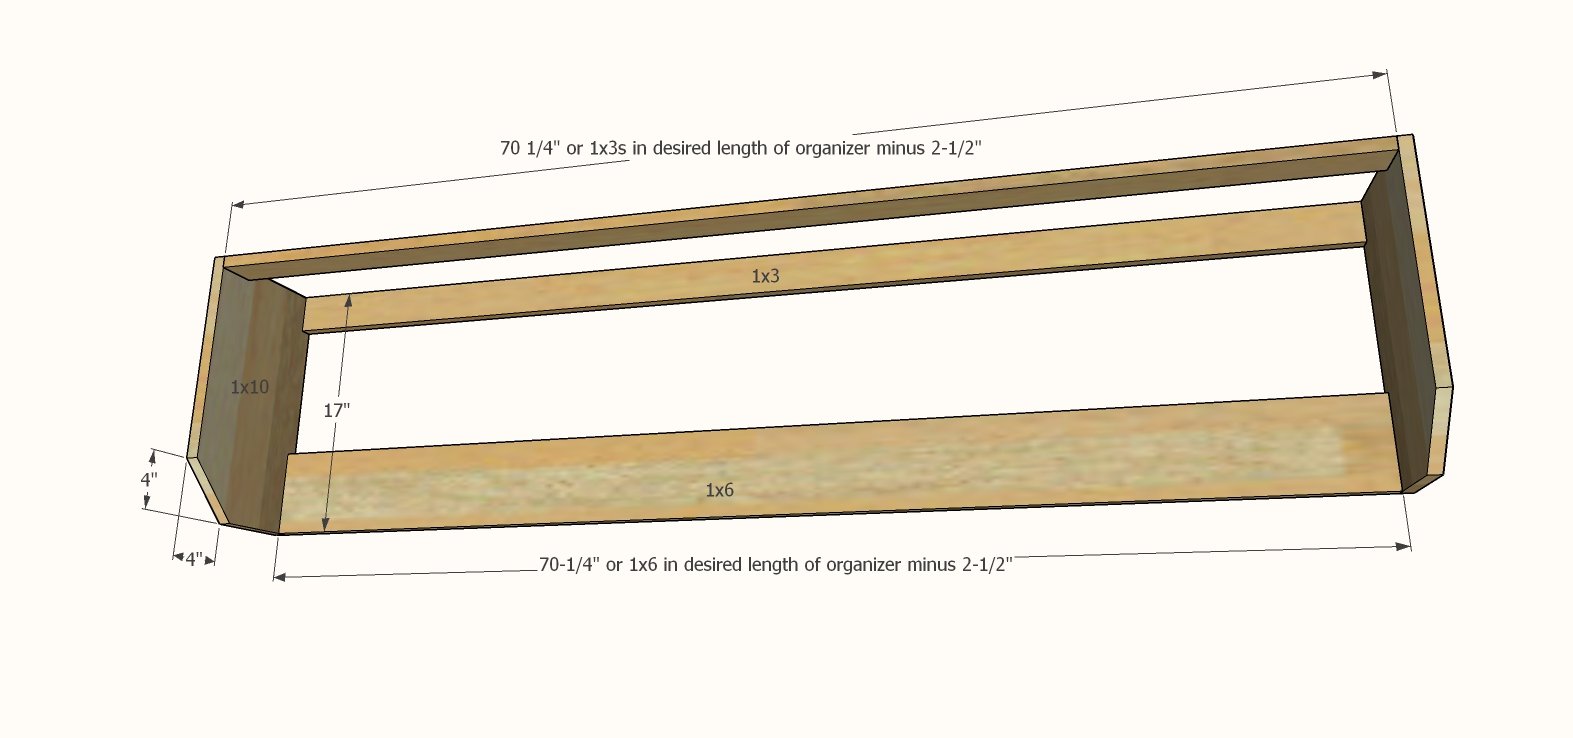
Step 2
Use your square to mark a square line at the top of your 1x6 board, across your 1x10 side boards (where the bottom of the shelf will be). Then attach bottom shelf to both the 1x6 bottom and sides with 1-1/4" brad nails and wood glue.
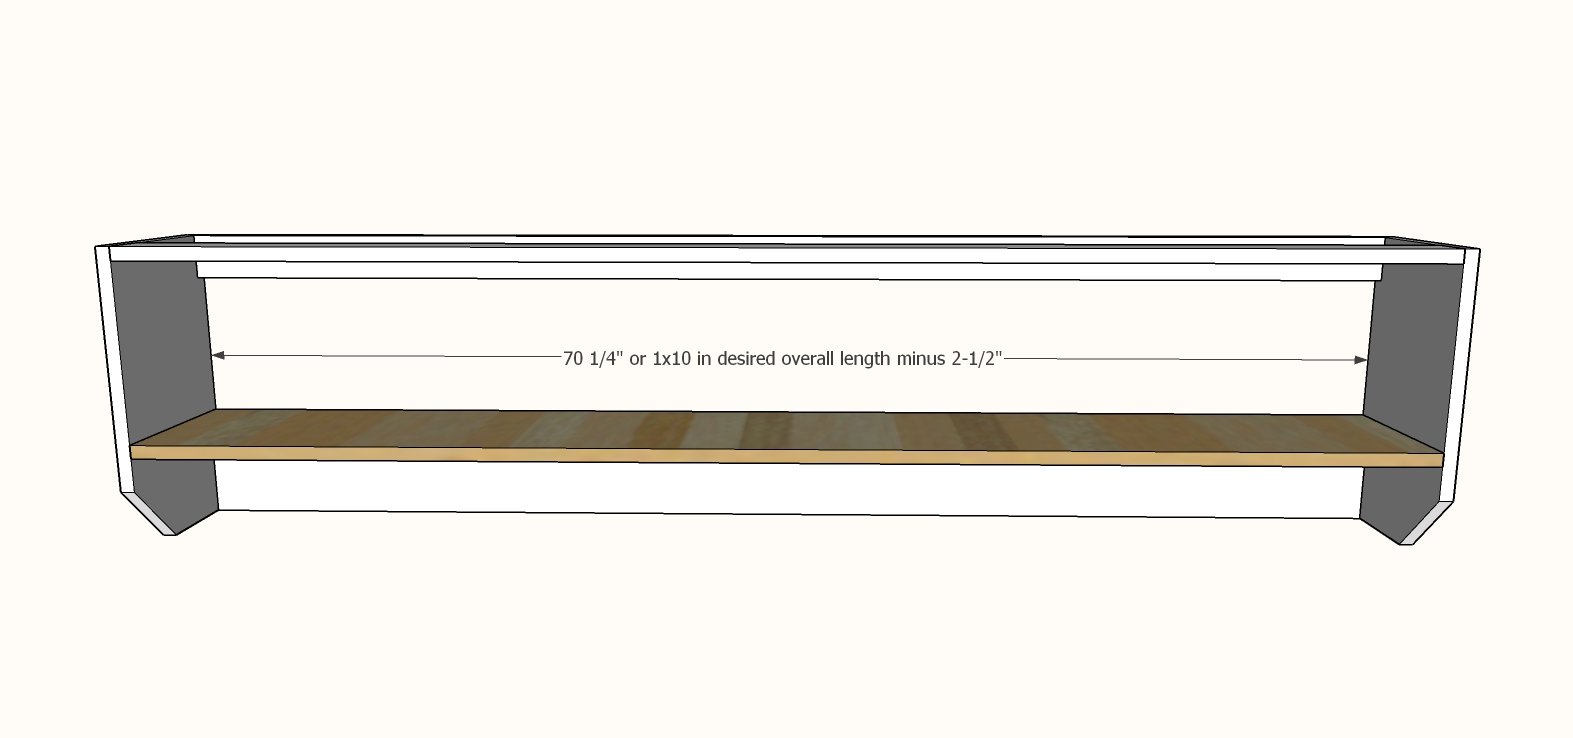
Step 3
Notch out the dividers at the top and back as shown, to allow a 1x3 to pass through.
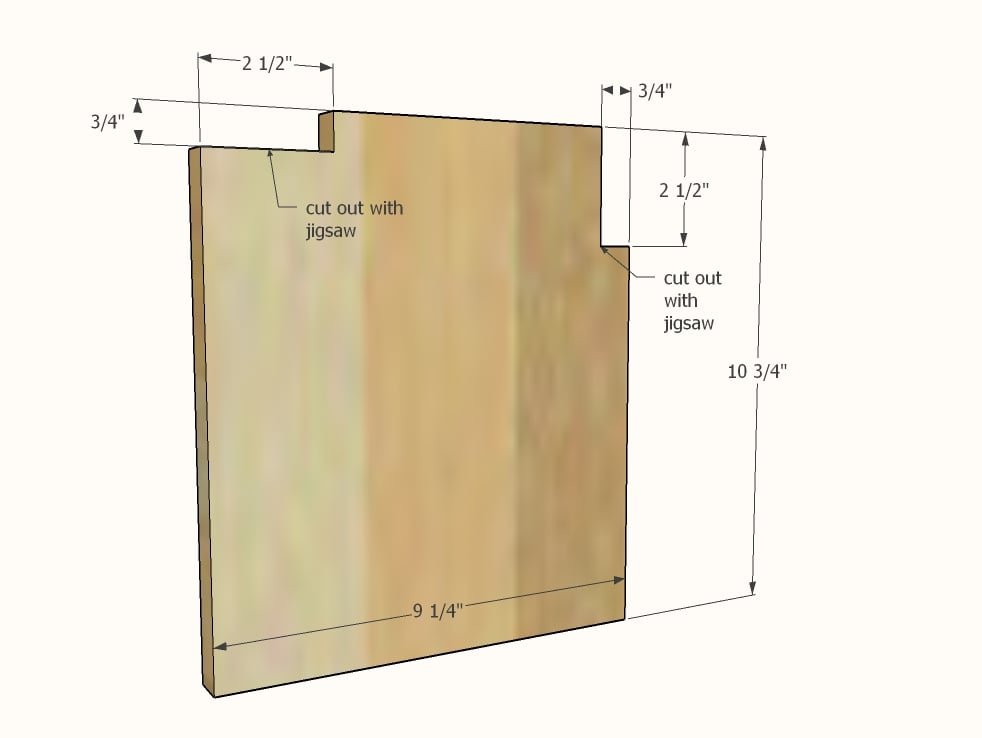
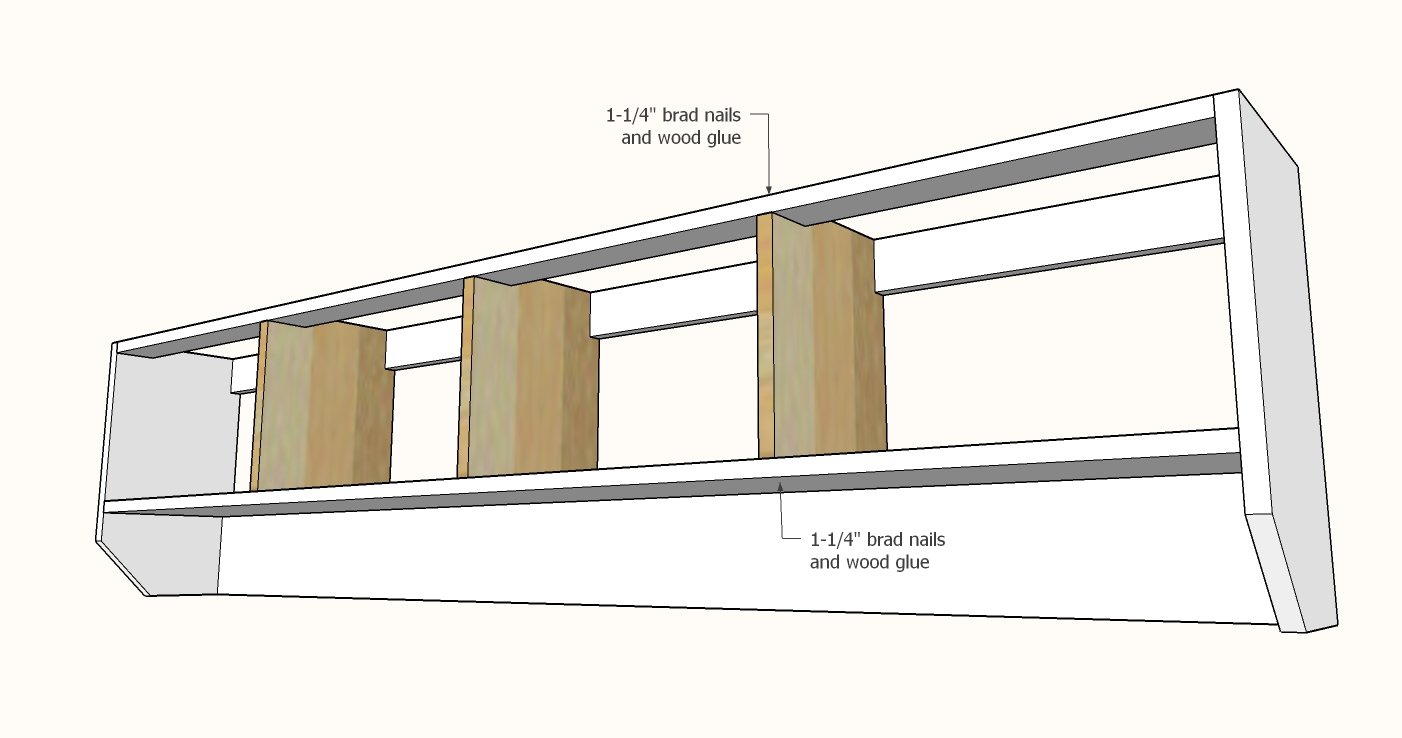
Place dividers inside the shelf and attach with 1-1/4" brad nails and glue.
You will be able to lay flat, and then rotate upwards to fit inside the shelf.
Step 5
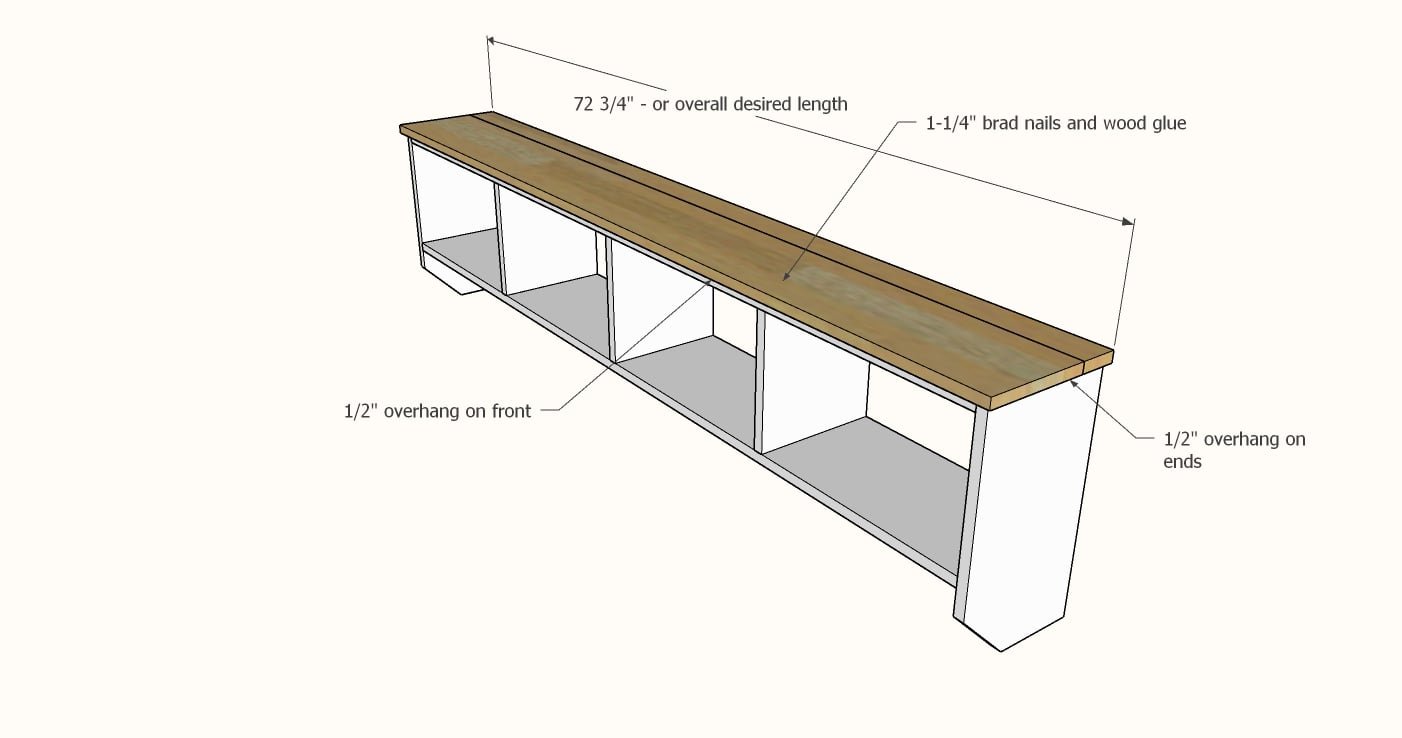
Attach 1x3 to the top, so it is flush to the back and 1/2" overhangs on the ends, with 1-1/4" brad nails and wood glue. Apply glue to the front edge of 1x3 and top and add the remaining 1x8 top board, so it overhangs 1/2" on sides and front. Attach with 1-1/4" brad nails and wood glue. Fill nail holes with wood filler. Lightly sand as needed with 120 grit sandpaper. Paint or stain as desired. Add hooks, I positioned my hooks centered on each bay, slightly lower than center to allow for easy use of hooks.
Step 6
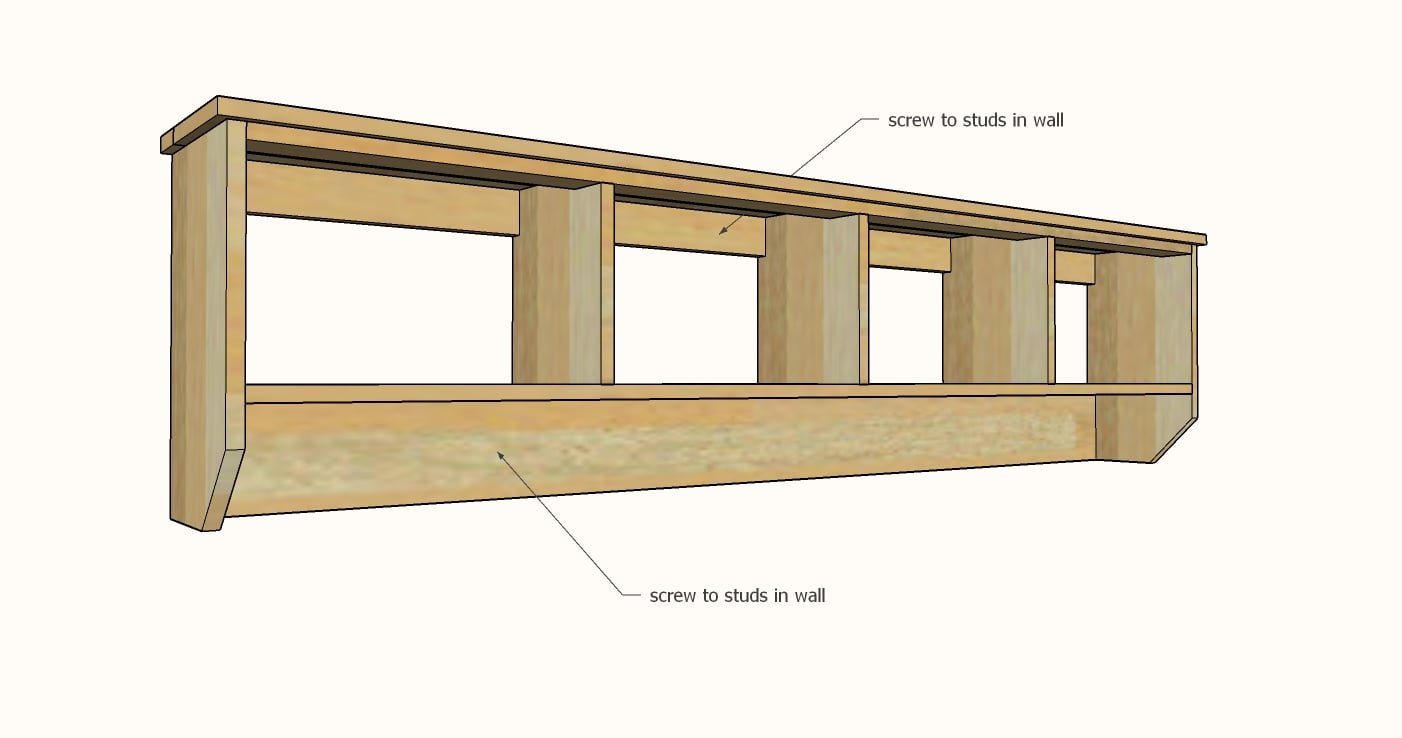
Locate studs in the wall and attach shelf to studs in wall. Use touch up paint to cover up any exposed screw holes.
Finishing
Sand all surfaces, starting with a medium grit and finishing with fine. Wipe off the dust, fill any holes or gaps with wood filler, and sand smooth once dry. Apply primer if you're painting, then finish with your choice of paint or stain and seal with a durable clear topcoat. For outdoor projects, use exterior-rated primer, paint or stain, and sealer so the piece stands up to the weather.
Source (temporary): https://www.ana-white.com/woodworking-projects/essential-entryway-shelf-hooks