Essential Loft Bed (Adjustable Heights)
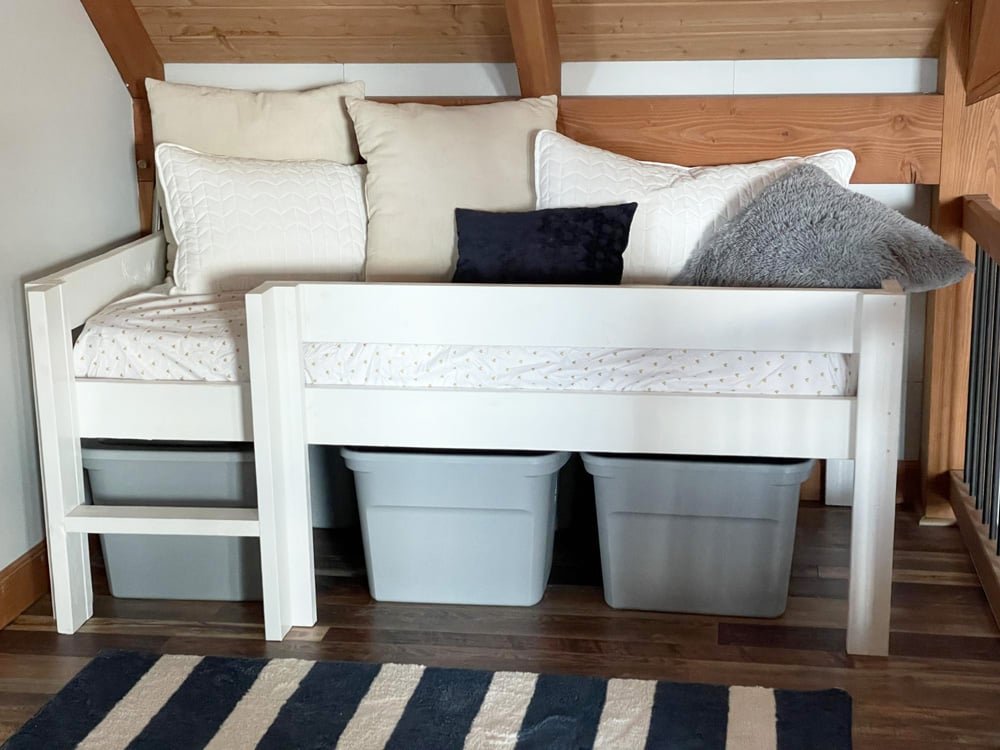
Build your own loft bed from Build this loft bed in your desired height, add storage or a play area underneath! This is a very simple build, no pocket holes required! The bed is sturdy and solid, and you can add storage underneath. We love it with totes for inexpensive, easy storage! Cost about $100. Plan includes step by step diagrams, build video, cut lists and shopping lists. Related: Bunk Bed Plans
Specifications
| Project type | Beds and Bed Frames |
|---|---|
| Room | Bedroom |
| Difficulty | Beginner Projects |
Dimensions
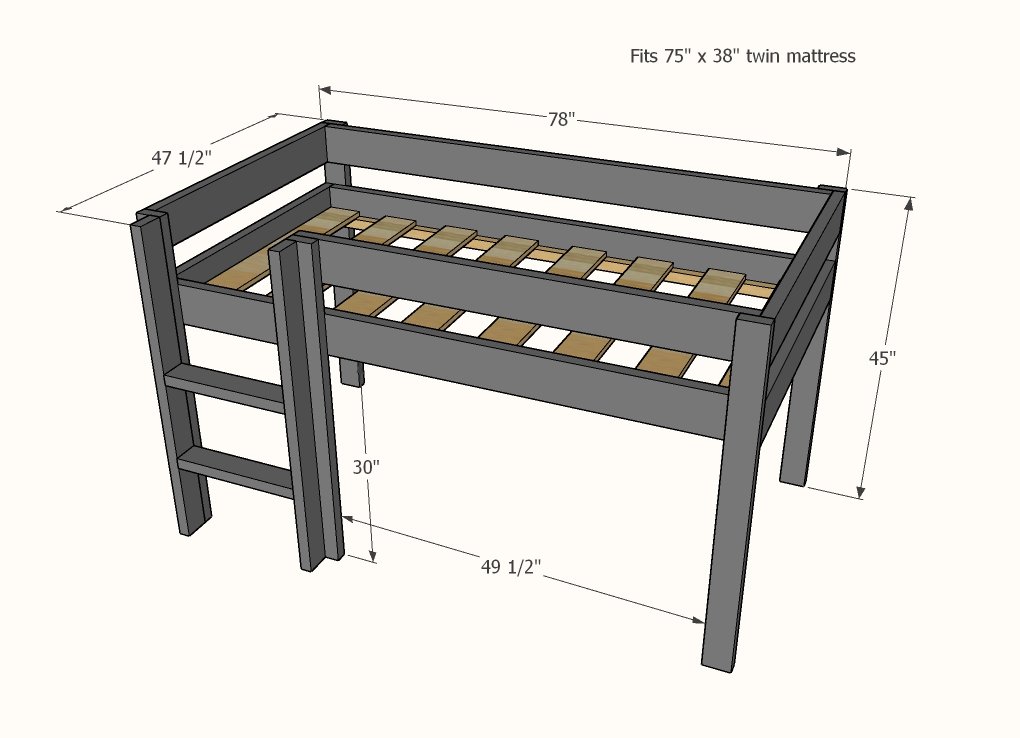
Use the size-specific shopping and cut lists below.
Shopping List
Shopping List for Low Loft Bed
- 3 - 2x4 @ 8 feet long
- 4 - 2x6 @ 10 feet long
- 2 - 2x2 @ 8 feet long
- 5 - 1x4 @ 8 feet long (for bed slats)
- About 70 - 2-1/2" long self tapping wood screws (star bit #8 recommended) - for main construction, can be as long as 3"
- 40 - 1-5/8" long self tapping wood screws (star bit #7 or #8 recommended) - for screwing slats down only
Shopping List for Mid Loft Bed
- 4 - 2x4 @ 8 feet long
- 4 - 2x6 @ 10 feet long
- 2 - 2x2 @ 8 feet long
- 5 - 1x4 @ 8 feet long (for bed slats)
- About 70 - 2-1/2" long self tapping wood screws (star bit #8 recommended) - for main construction, can be as long as 3"
- 40 - 1-5/8" long self tapping wood screws (star bit #7 or #8 recommended) - for screwing slats down only
Shopping List for Standard Height Loft Bed
- 7 - 2x4 @ 8 feet long
- 6 - 2x6 @ 10 feet long
- 2 - 2x2 @ 8 feet long
- 5 - 1x4 @ 8 feet long (for bed slats)
- About 100 - 2-1/2" long self tapping wood screws (star bit #8 recommended) - for main construction, can be as long as 3"
- 40 - 1-5/8" long self tapping wood screws (star bit #7 or #8 recommended) - for screwing slats down only
Cut List
TIP: Prefinish all 2x4 and 2x6 boards before cutting.
Cut List for Low Loft Bed
- 3 - 2x6 @ 75" - cut first
- 4 - 2x6 @ 41" - cut from leftovers after cutting the 75" pieces
- 1 - 2x6 @ about 55" measure and cut to fit - cut from leftovers after cutting the 75" pieces
- 7 - 2x4 @ 31-3/4" - legs, ladder sides (cut is 31-3/4" to fit all cuts on boards, instead of 32" as shown in diagrams)
- 2 - 2x4 @ 18" - ladder rungs
- 2 - 2x2 @ 75" - cleats for slat system
- 10 - 1x4 @ 38" - slats
Cut List for Mid Loft Bed
- 3 - 2x6 @ 75" - cut first
- 4 - 2x6 @ 41" - cut from leftovers after cutting the 75" pieces
- 1 - 2x6 @ about 55" measure and cut to fit - cut from leftovers after cutting the 75" pieces
- 7 - 2x4 @ 45" - legs, ladder sides
- 2 - 2x4 @ 18" - ladder rungs
- 2 - 2x2 @ 75" - cleats for slat system
- 10 - 1x4 @ 38" - slats
Cut List for Standard Height Loft Bed
- 4 - 2x6 @ 75" - cut first
- 6 - 2x6 @ 41" -
- 1 - 2x6 @ about 55" measure and cut to fit - cut from leftovers after cutting the 75" pieces
- 7 - 2x4 @ 70-1/2" - legs, ladder sides
- 4 - 2x4 @ 18" - ladder rungs
- 2 - 2x2 @ 75" - cleats for slat system
- 10 - 1x4 @ 38" - slats
Tools
- measuring tape
- square
- pencil
- safety glasses
- drill
- compound miter saw
Step-by-step Instructions
Step 1
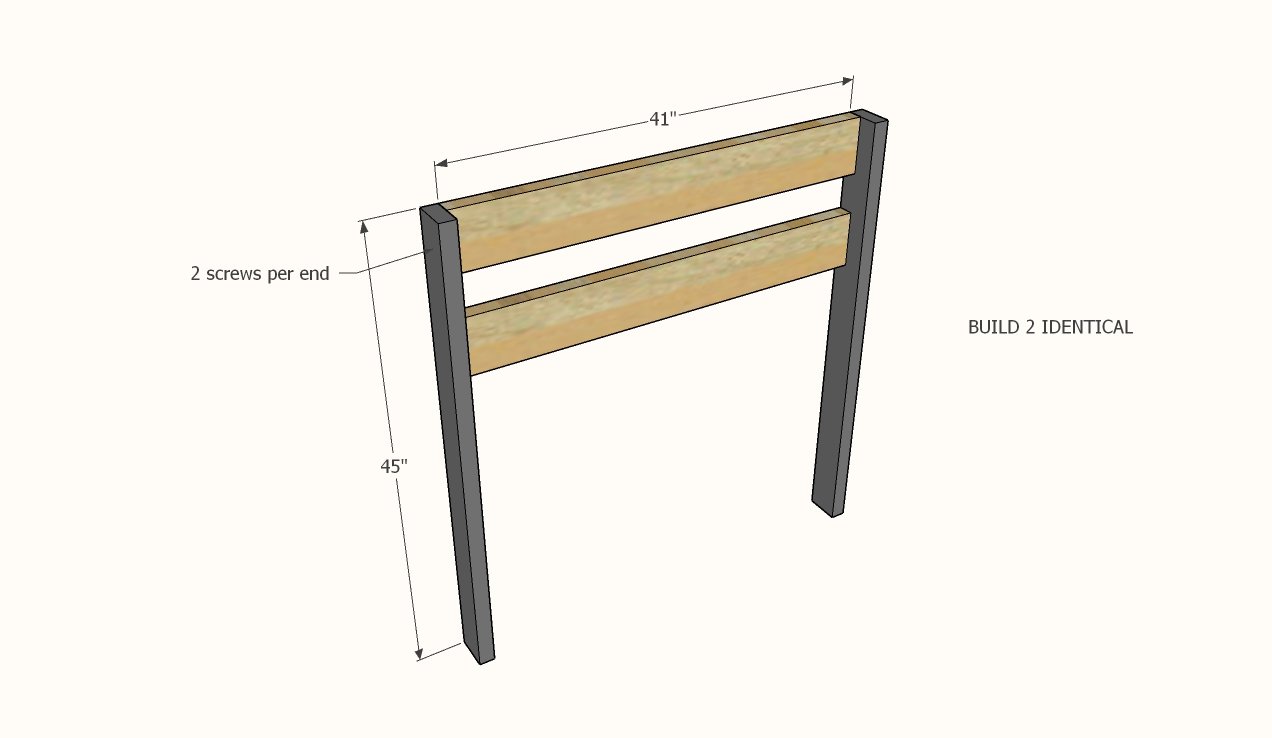
Build two of the ends by attach the legs (either the 45" long legs or the 32" long legs) to the 41" 2x6 boards. Leave a 3-1/2" space between the two horizontal slats. These screws will be removed if dismantling later on.
Step 2
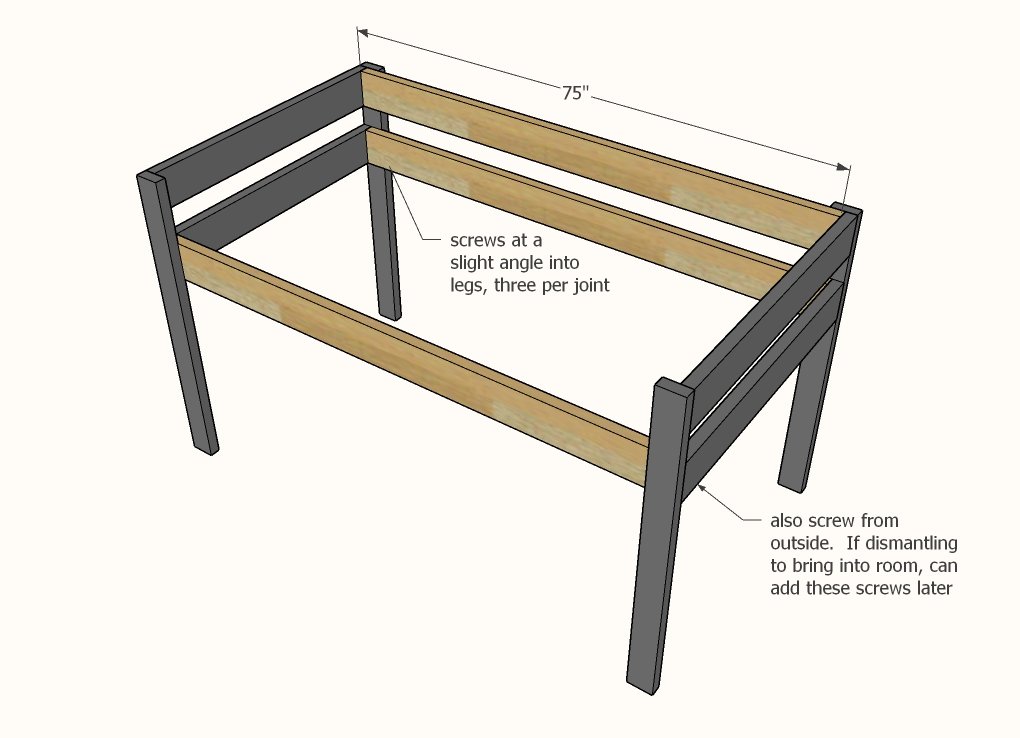
Attach the longer 2x6s to the two leg sets, with screws on the inside at a slight angle into the back side of the leg. Leave a 3-1/2" gap in between the 2x6s. I recommend three screws for the lower boards that will support the mattress. Only two are needed for the upper 2x6 as it does not support the mattress. Additional screws from outside are recommended, but can be added on final assembly.
Step 3
Build the ladder as shown with the longer screws.
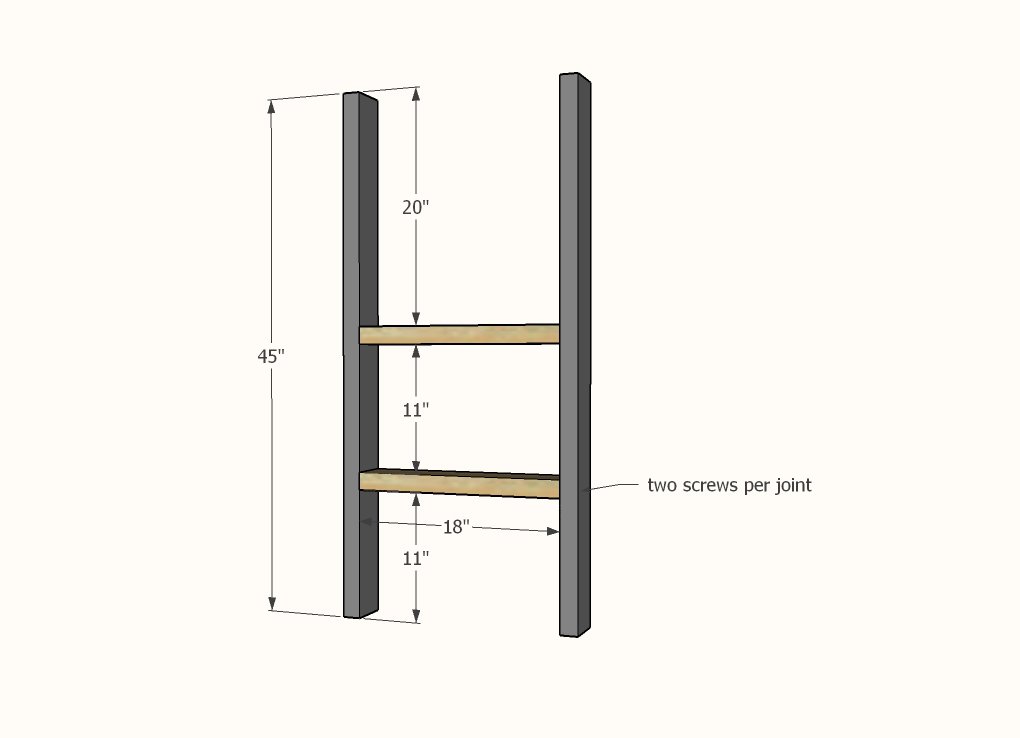
Determine what side the ladder should be placed on the bed.
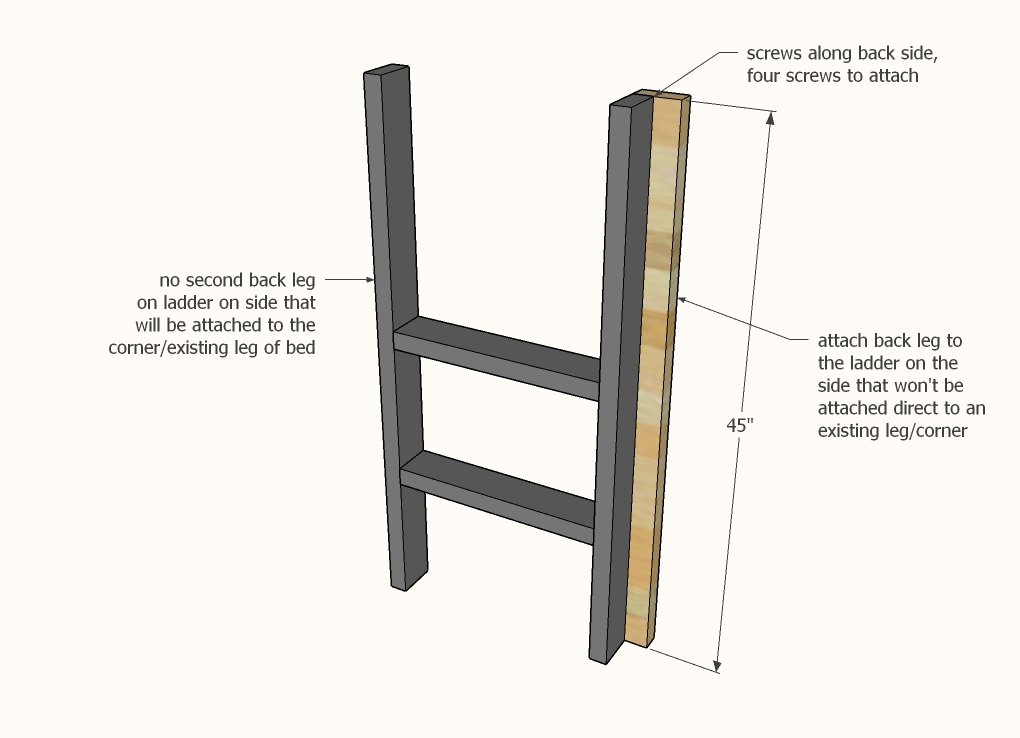
Attach the remaining 2x4 leg to the back of the ladder on the side that will not be attached to a bed leg.
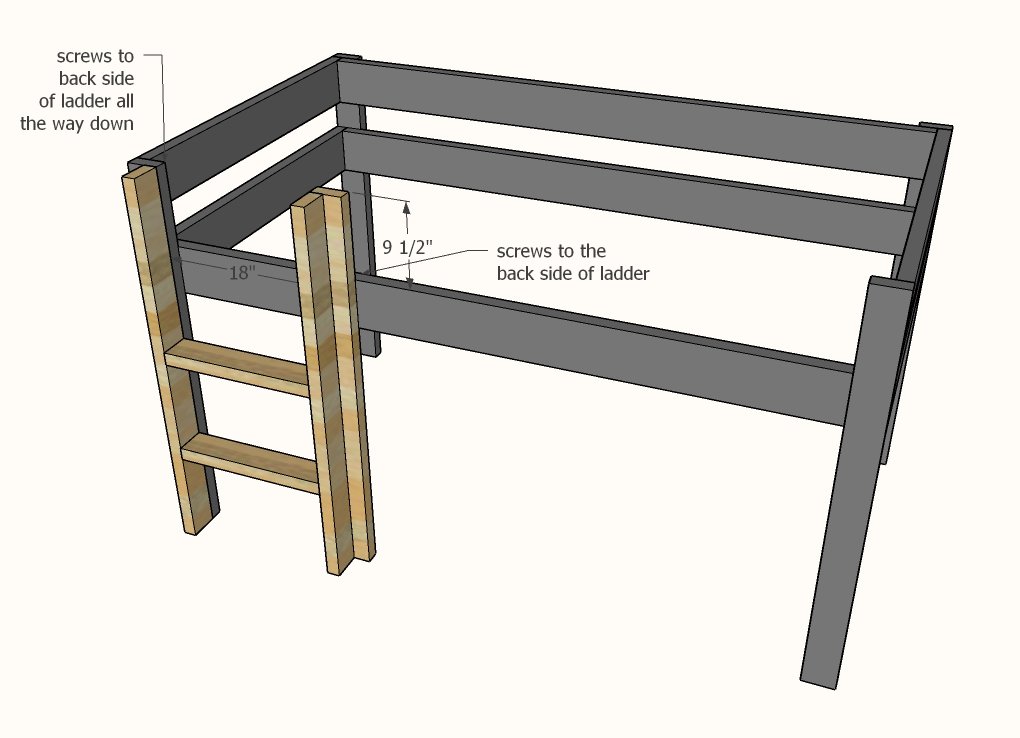
Attach the ladder to the bed with screws from the back side.
The double legs on the ladder are designed to increase strength and durability of the ladder and bed.
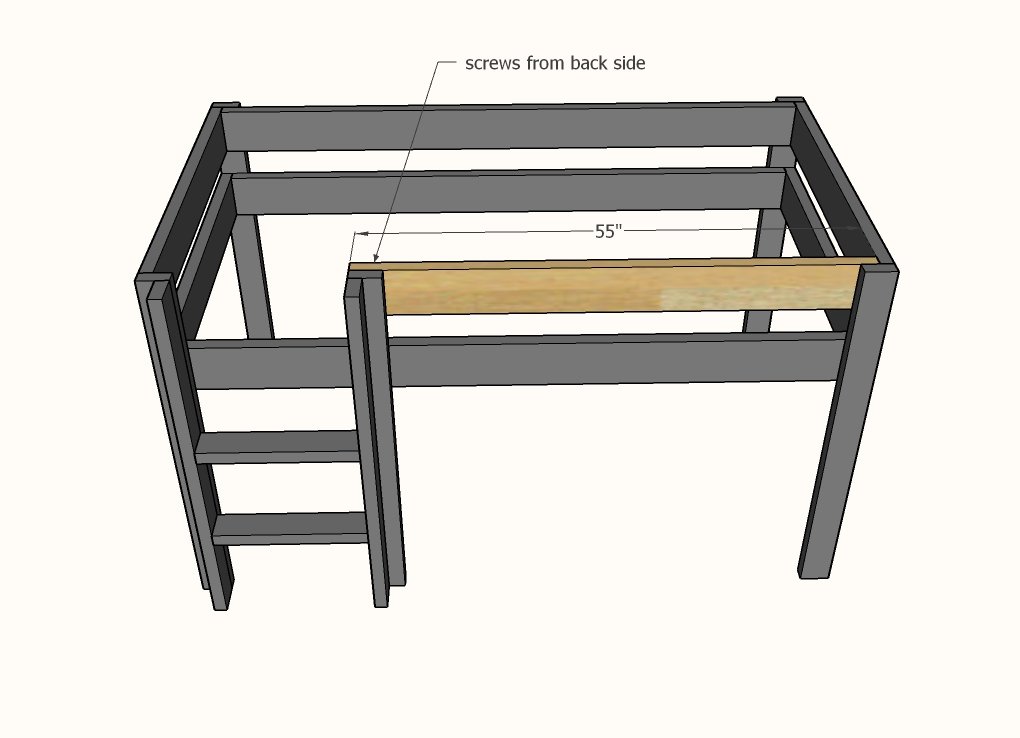
Step 6
Attach the remaining 2x6 at the top from the inside.
Step 7
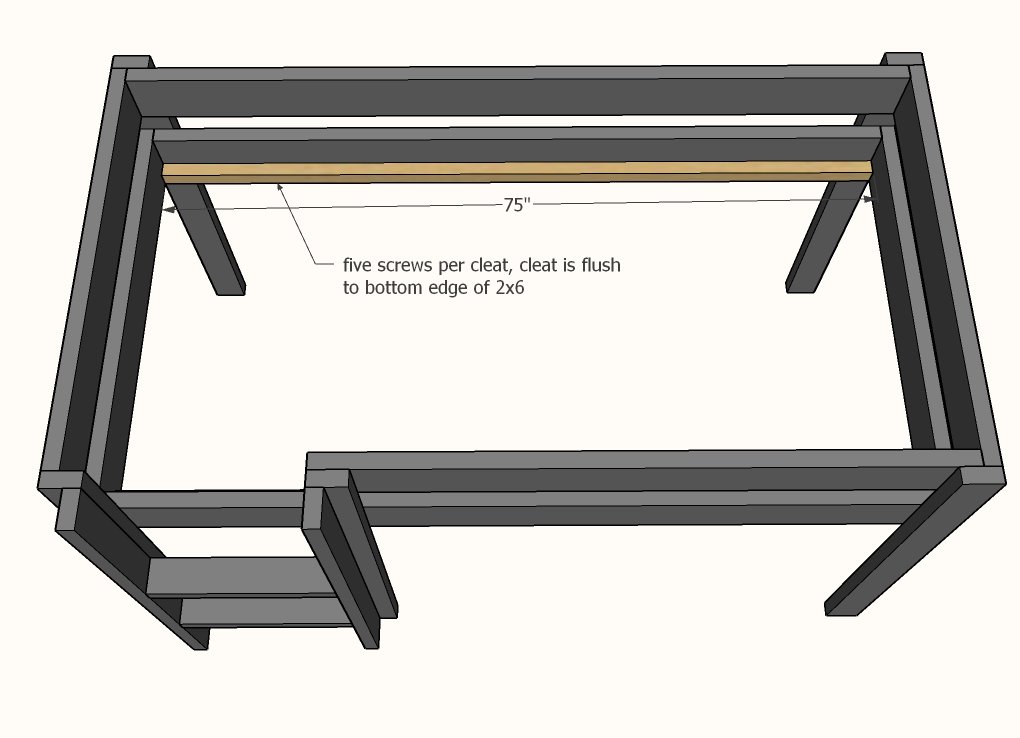
Attach 2x2 cleats to the inside of the bed, flush to the bottom of the bottom 2x6s.
Step 8
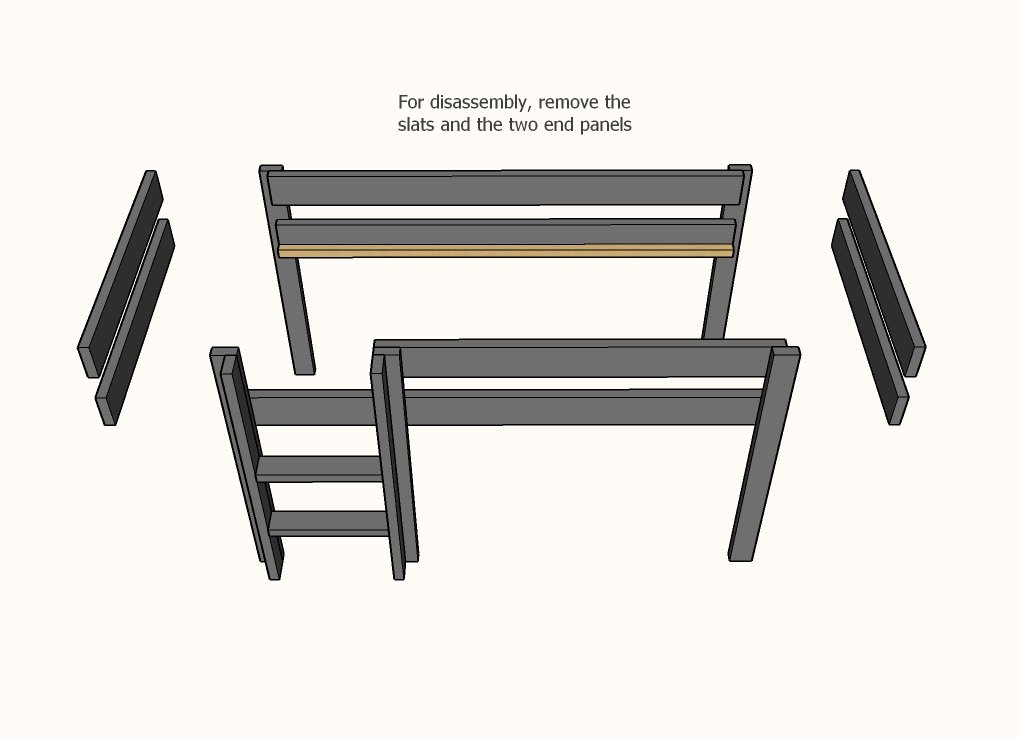
The shorter legged bed may be able to be moved into a room without disassembly. The taller bed will most likely need to be disassembled and reassembled. To disassemble, remove only the end 2x6 boards. This will break the bed down into two main flat panels, and four end pieces.
Step 9
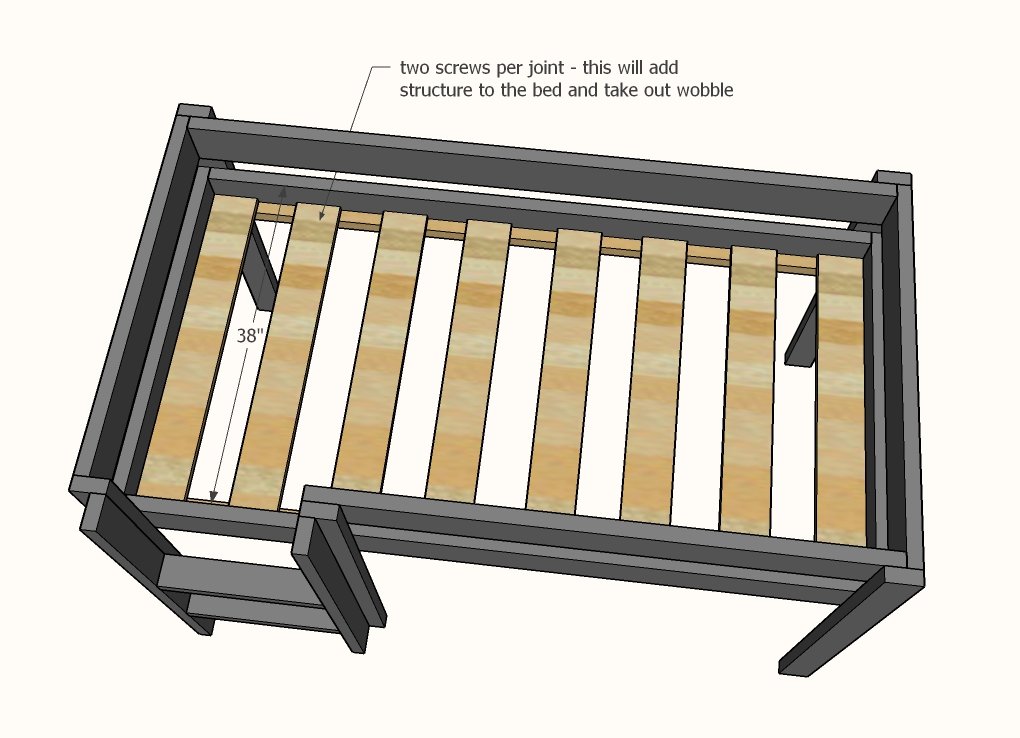
On final assembly add the cleats to the insides of the bed. Screw down with the shorter screws, two screws per end.
Step 10
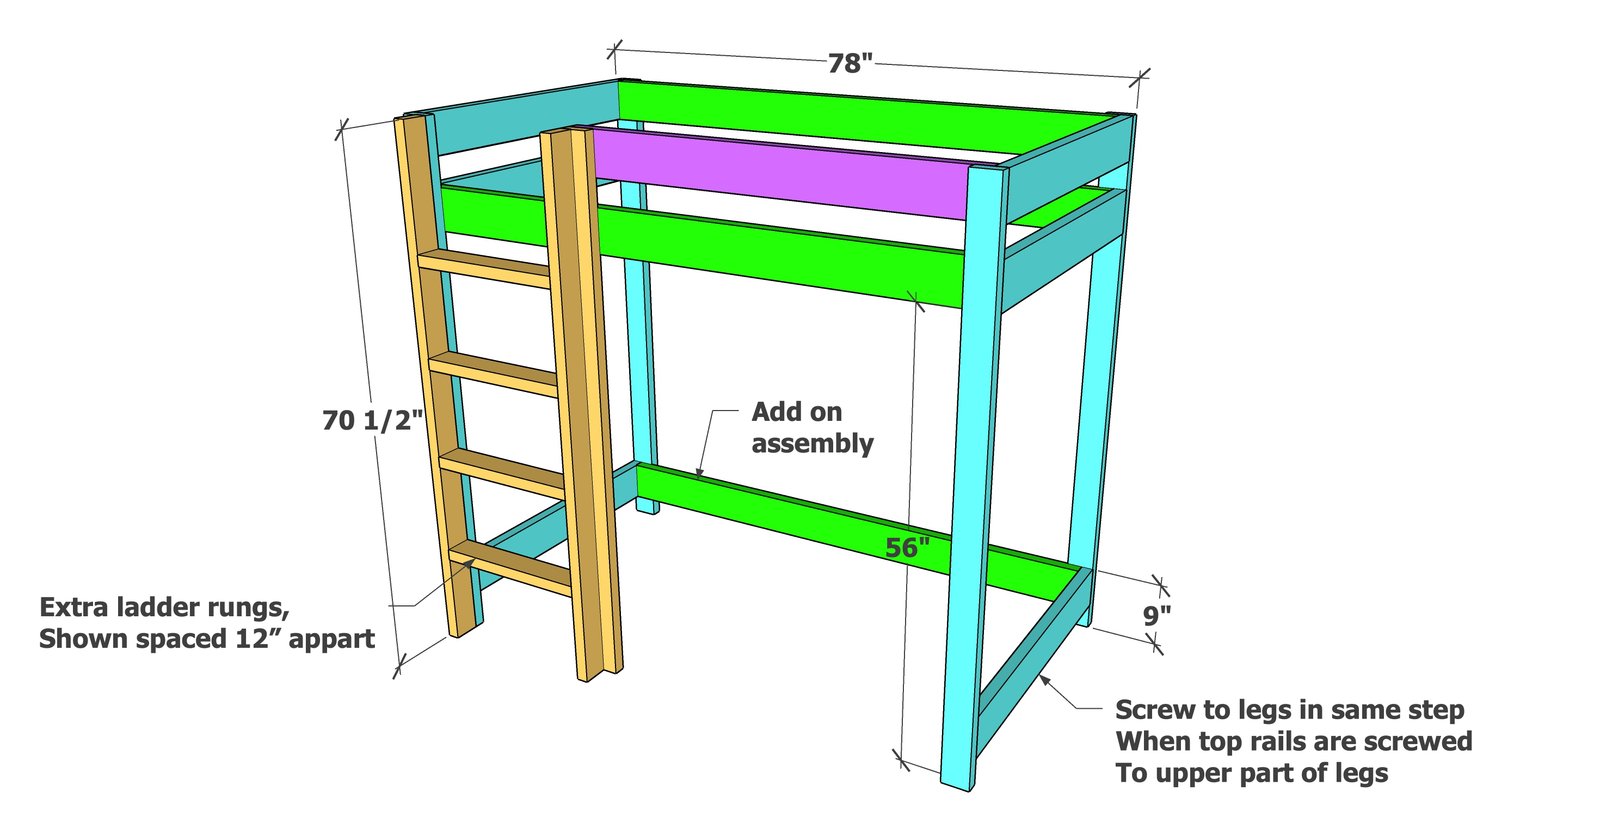
For the standard height loft bed, a few modifications will be necessary to support the bottom of the legs. The cut list and shopping list are correct, add as shown in this diagram.
Finishing
Sand all surfaces, starting with a medium grit and finishing with fine. Wipe off the dust, fill any holes or gaps with wood filler, and sand smooth once dry. Apply primer if you're painting, then finish with your choice of paint or stain and seal with a durable clear topcoat. For outdoor projects, use exterior-rated primer, paint or stain, and sealer so the piece stands up to the weather.
Source (temporary): https://www.ana-white.com/woodworking-projects/essential-loft-bed-adjustable-heights