Essential Two Step Stool
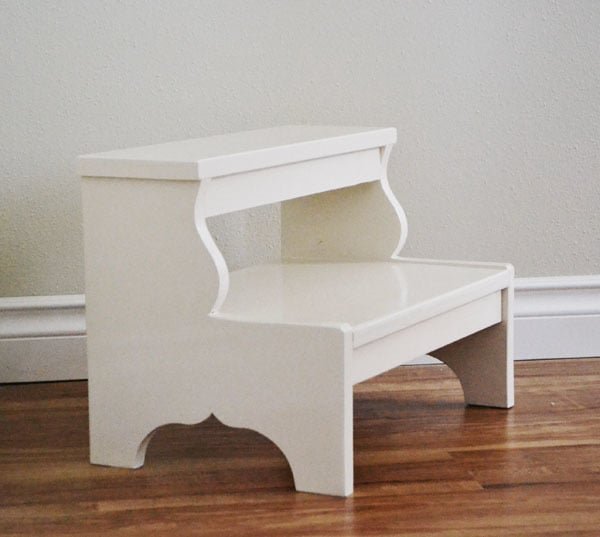
Easy two step stool plans from - I built this stool over 10 years ago, and it's still strong and sturdy! The kids carry it from room to room, use it many times every single day. I cannot believe how well it held up. What I love about this stool is it is beautiful, so it looks great in any room, but ads necessary function. Scroll down for the completely with lots of reader photos and build photos!
Specifications
| Project type | Stools |
|---|---|
| Room | Bathroom |
| Style | Children's and Kid's Room Furniture and Toy Plans |
| Difficulty | Starter Projects |
| Estimated cost | Under $20 |
Dimensions
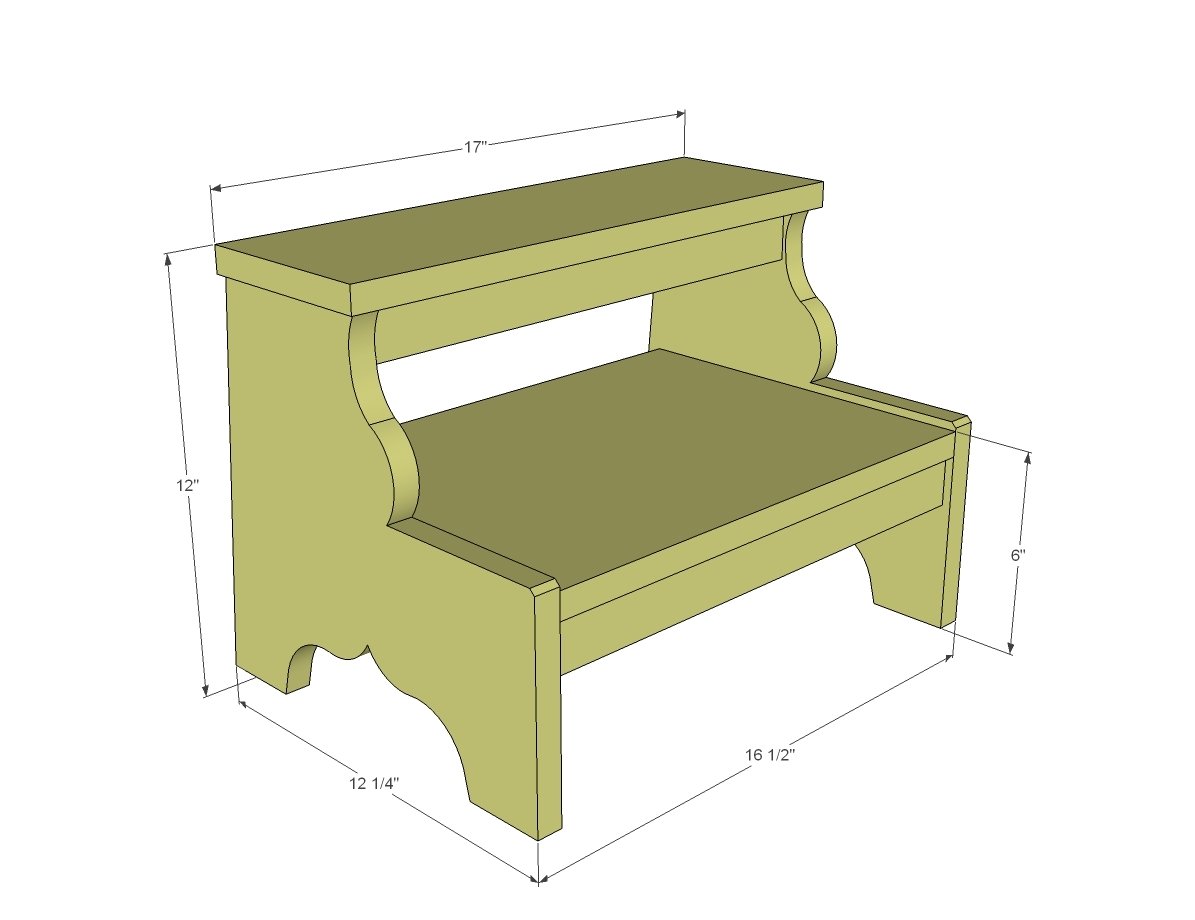
Use the size-specific shopping and cut lists below.
Shopping List
- 4 feet of 1x12 boards
- 18" of 1x6 boards
- 6 feet of 1x2 boards
- I used 1-1/4" pocket hole screws and 1-1/4" brad nails and wood glue
Cut List
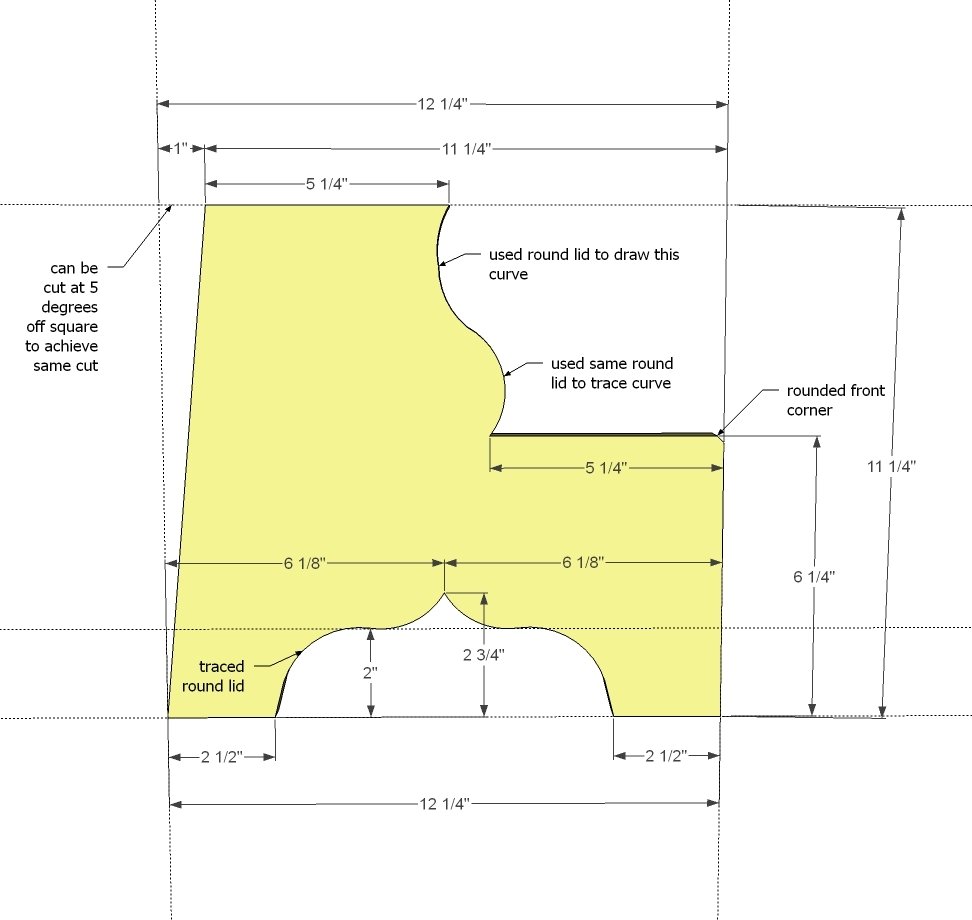
- 2 - 1x12 @ 12-1/4" - long point measurement, one end is cut at 5 degrees off square (sides)
- 1 - 1x6 @ 17" (top step)
- 4 - 1x2 @ 15" (supports)
- 1 - 1x12 @ 15" (bottom step)
Tools
- measuring tape
- square
- pencil
- safety glasses
- hearing protection
- kreg-jig
- drill
- jigsaw
- compound miter saw
- nailer
- sander
Step-by-step Instructions
Step 1
Take the two side pieces and clamp them together. Use the measurments in the diagram to find the points and draw the curves. I used a jar lid to help me get the curves right. Then I carefully cut the sides out with a jigsaw, using a wood blade, and going slow, making sure my blade didn't bevel as I cut.
Step 2
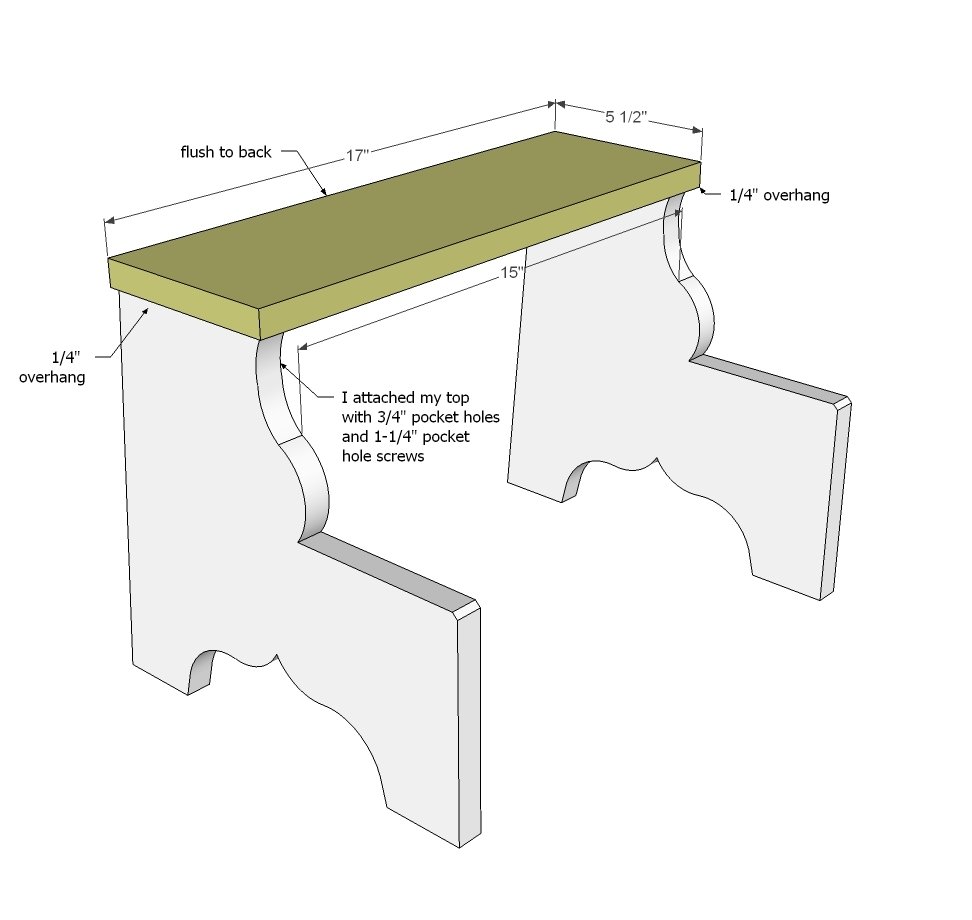
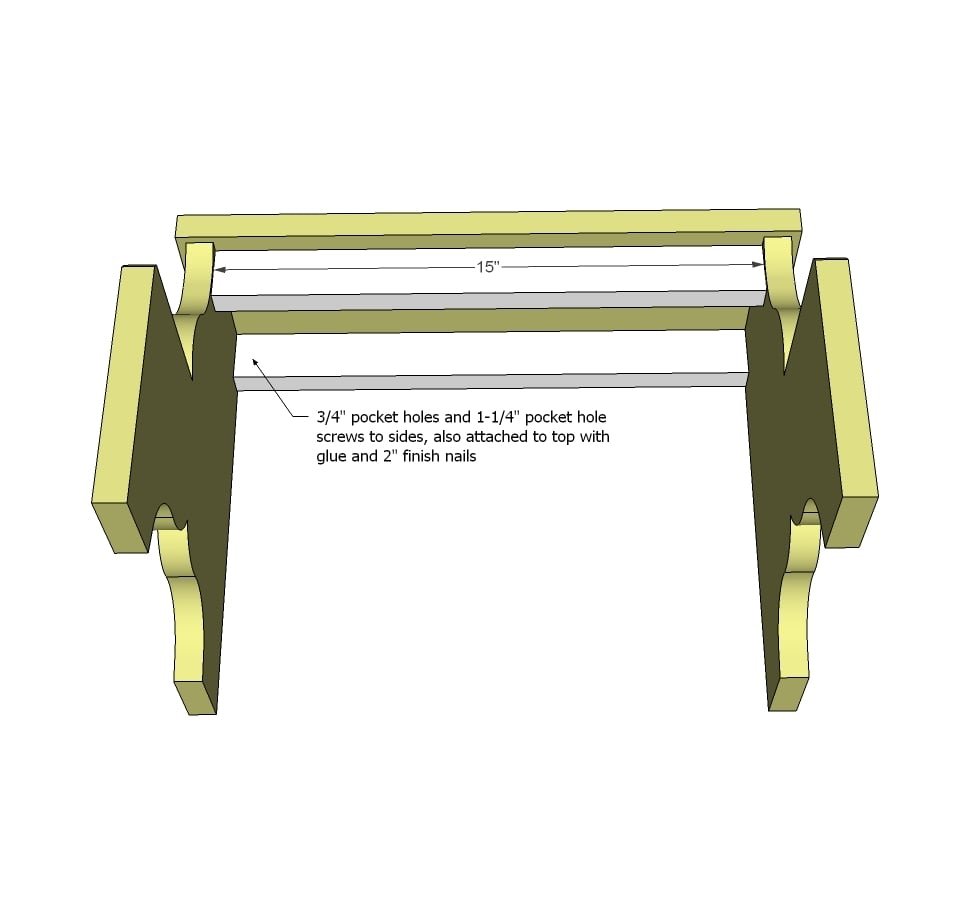
NOTE: The order of assembly in these instructions is more friendly to pocket hole users. If you use a different type of assembly for joints, you may wish to alter the order of assembly. The first thing I did was drill 2 pocket holes (3/4" setting) on each inside top of the sides (REMEMBER THEY ARE IN MIRROR!!!) and attached the top step. Make sure you leave 15" between the two sides, as all the other boards are cut 15" in width.
Step 3
Working down from the top, I then added the two top supports.
Step 4
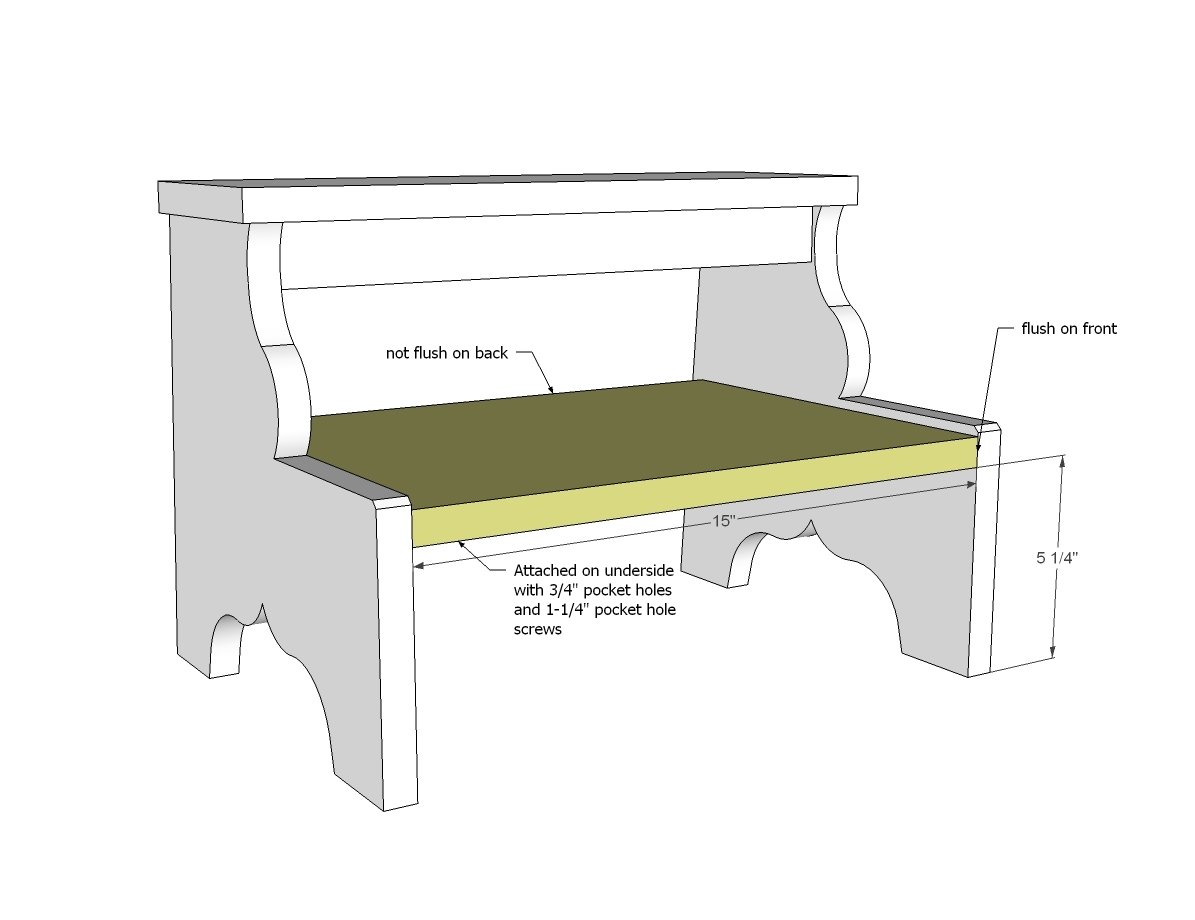
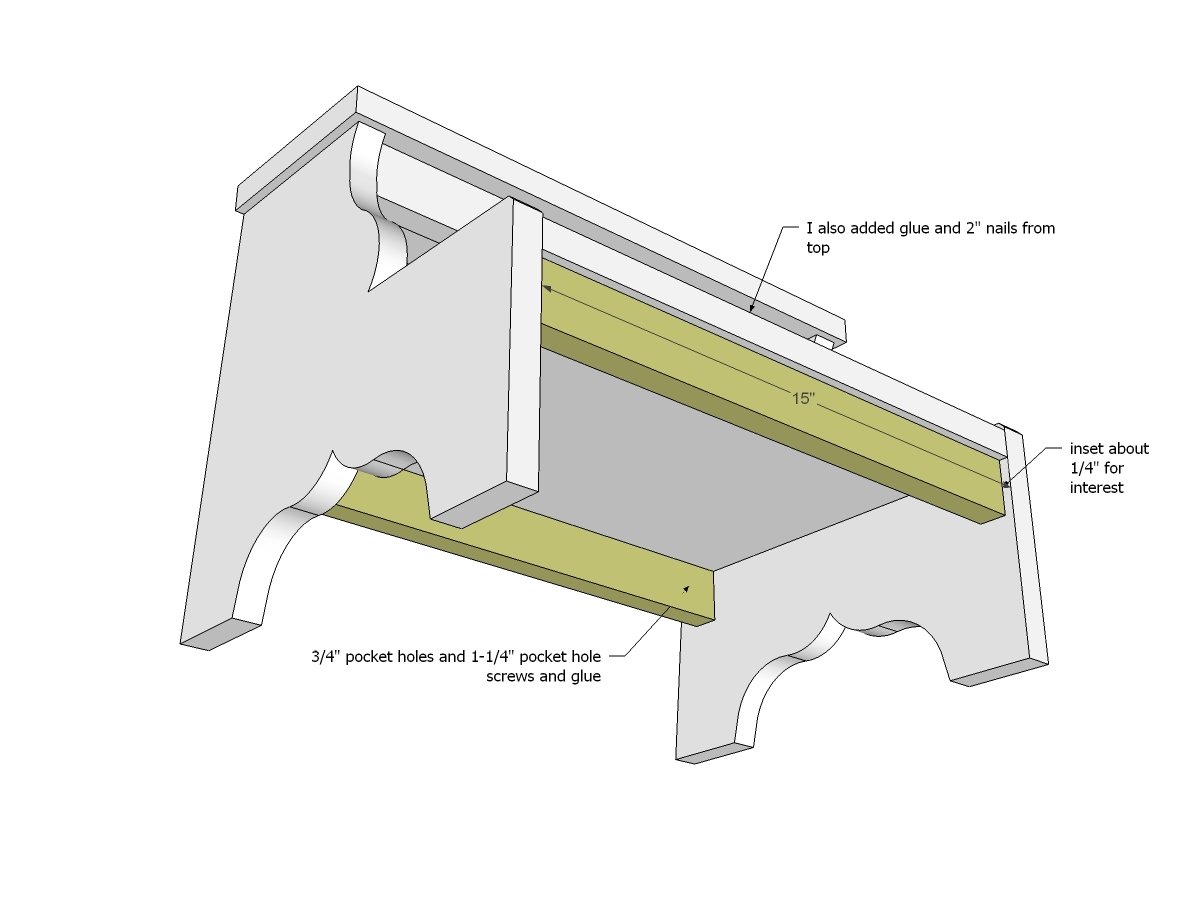
And then I added the bottom step - it's just a 1x12.
Step 5
Finishing
Sand all surfaces, starting with a medium grit and finishing with fine. Wipe off the dust, fill any holes or gaps with wood filler, and sand smooth once dry. Apply primer if you're painting, then finish with your choice of paint or stain and seal with a durable clear topcoat. For outdoor projects, use exterior-rated primer, paint or stain, and sealer so the piece stands up to the weather.
Source (temporary): https://www.ana-white.com/woodworking-projects/essential-two-step-stool