Essential Wood Outdoor Chair Frame for Standard Chair Cushion
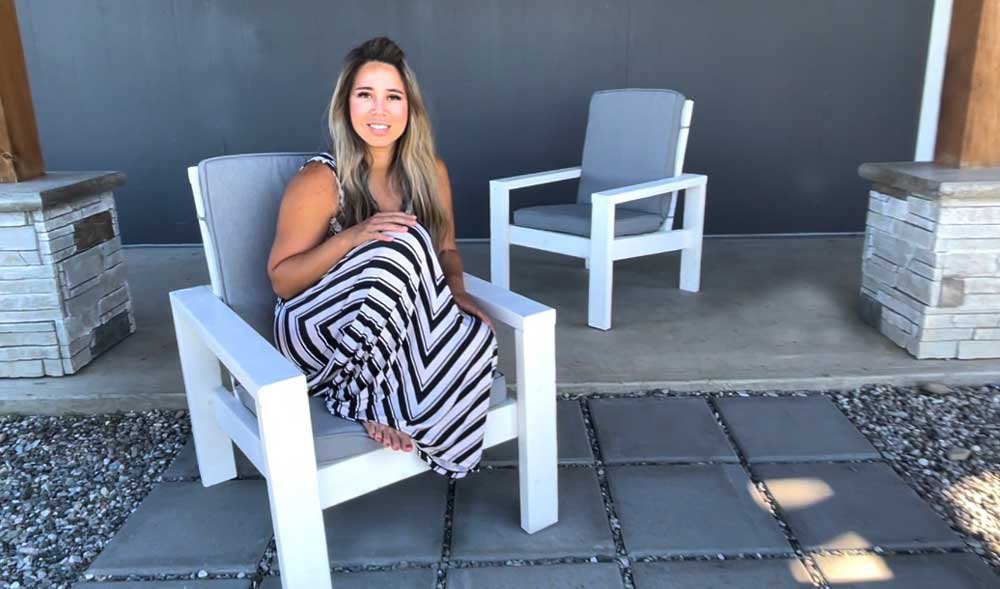
Build your own outdoor chairs from - step by step diagrams, shopping and cut lists, and video tutorial. Related: Essential Outdoor Chair in Deep Seat Cushion Size Plans
Specifications
| Project type | Outdoor Seating, Lounging and Accents |
|---|---|
| Room | Outdoor |
| Difficulty | Beginner Projects |
Dimensions
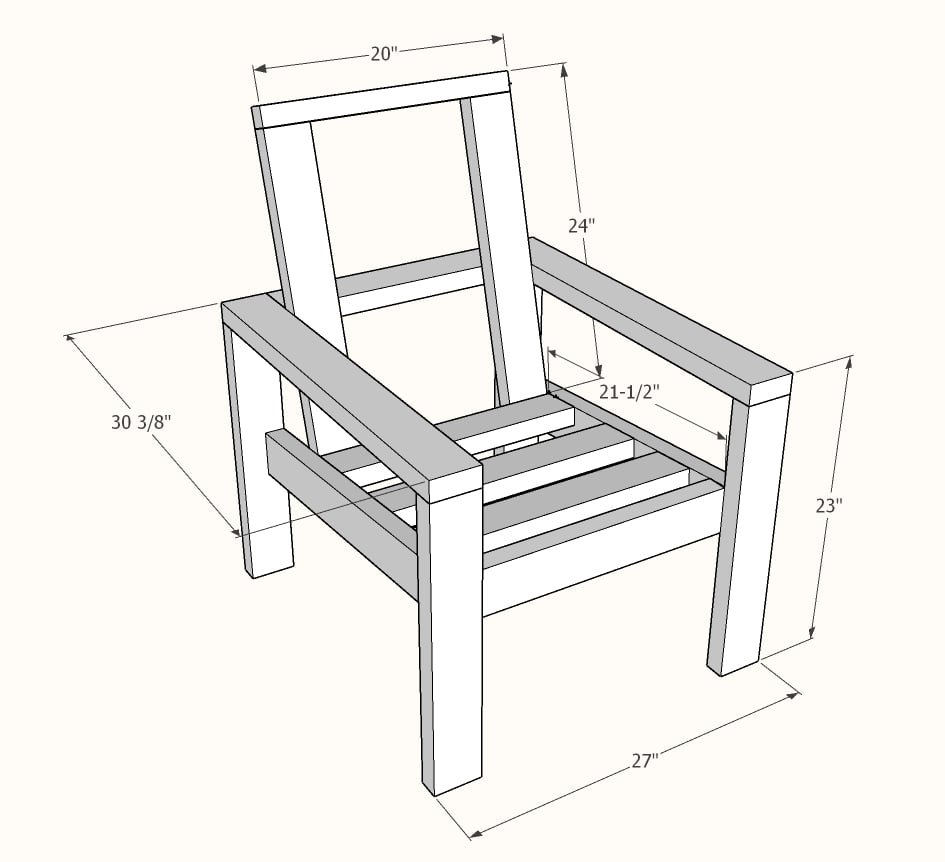
Use the size-specific shopping and cut lists below.
Shopping List
- 4 - 2x4 @ 8 feet long
- 1 - 2x2 @ 20" long
- 50 - 2-1/2" to 3" long - self tapping star bit screws for exterior use
- outdoor appropriate stain
- standard seat cushions ( I used these from Lowes )
Cut List
4 - 2x4 @ 21-1/2" - legs
2 - 2x4 @30-3/8" - arm rests
2 - 2x4 @ 27-1/2" both ends cut at 5 degrees off square, long point to short point measurement, ends ARE parallel
5 - 2x4 @ 20" - or width of seat cushions
2 - 2x4 @ 26" - back - can be modified to match the height of seat back cushion
1 - 2x2 @ 20" - back top - matches the width of the seat cushions
Tools
- measuring tape
- pencil
- kreg-jig
- drill
- compound miter saw
- sander
Step-by-step Instructions
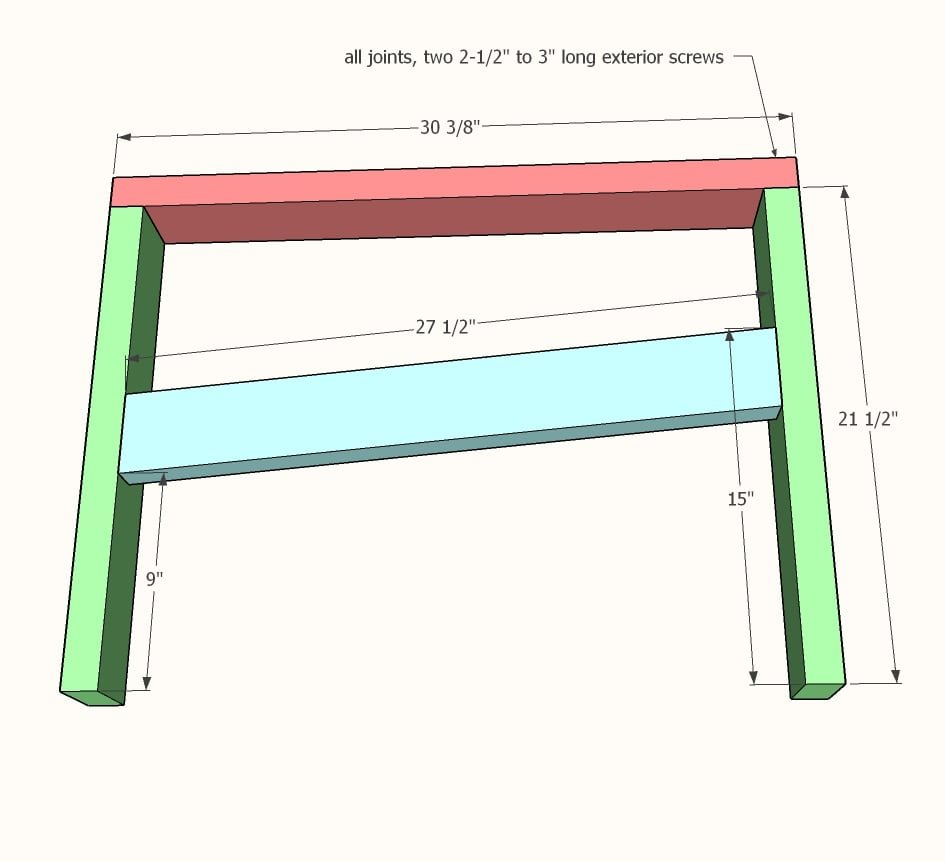
Assemble one arm by attaching the armrest to two legs.
Then measure out the placement of the seat stringer and attach to the legs. Use two screws per each joint.
Step 2
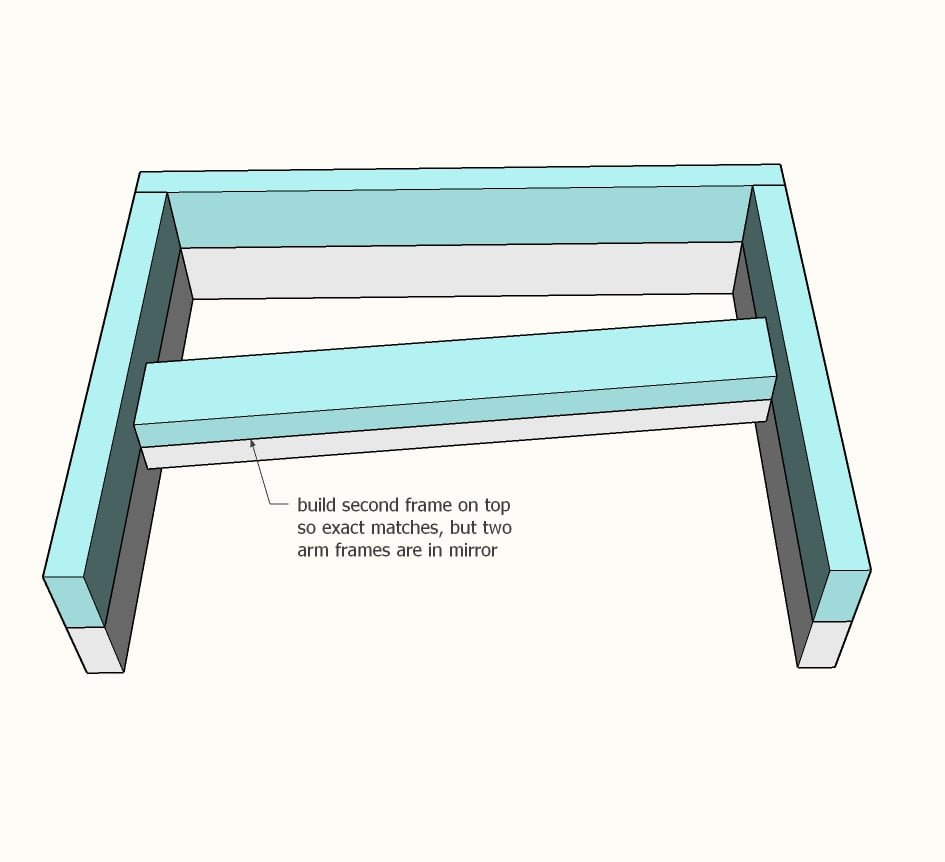
The second arm frame needs to be built identical to the first, but in mirror. The easiest way is to build right on top of the first arm frame, with the seat stringers matched up.
Step 3
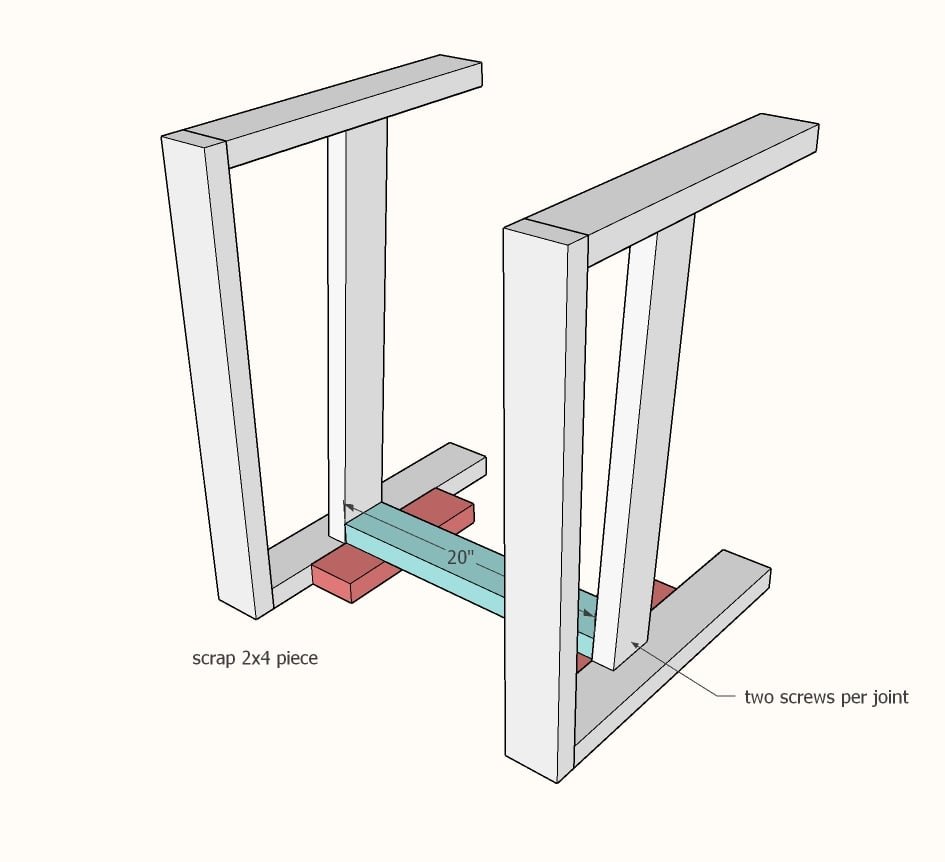
Chair front - with the chair sides positioned so the seat stringer high side is down, place some blocking on the work surface and attach one of the 2x4 @ 20" to the seat stringers. Use two screws per joint.
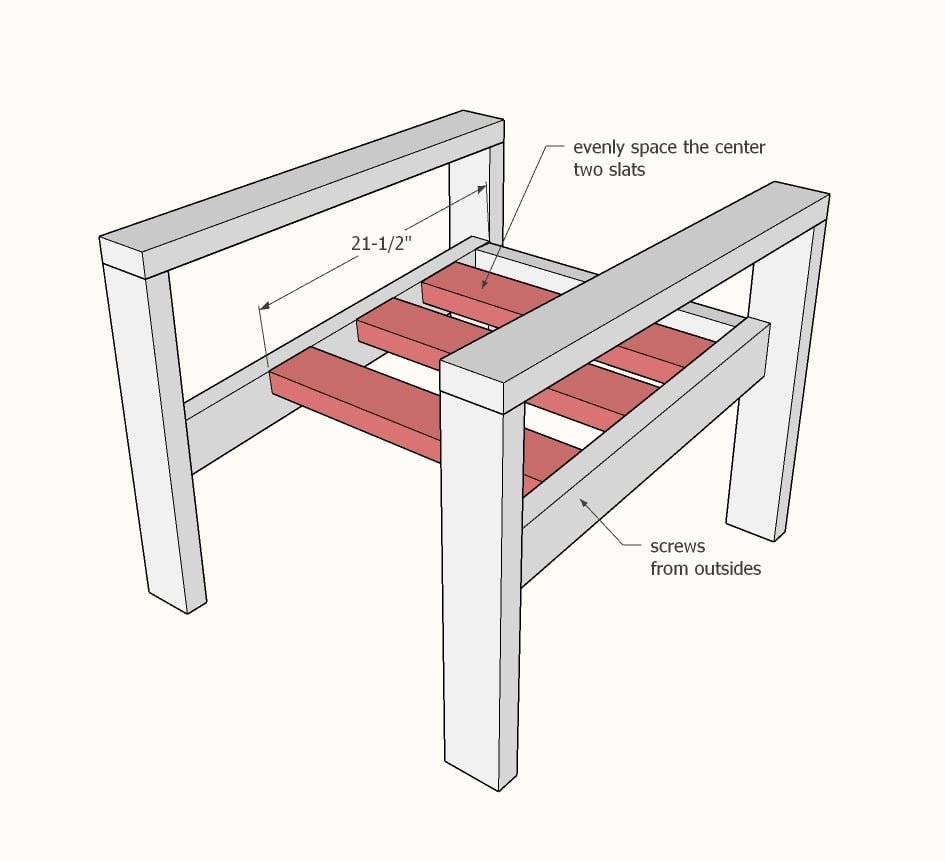
Rotate the chair and add the seat slats.
I recommend adding the back slat first, measured out for your seat cushions - 21-1/2" was good for my cushions even though the cushions are 20" - because I was accounting for the back cushion and the depth. Once you have the back slat placed, the two center slats are just placed with even spacing (you can eyeball this). Two screws per joint.
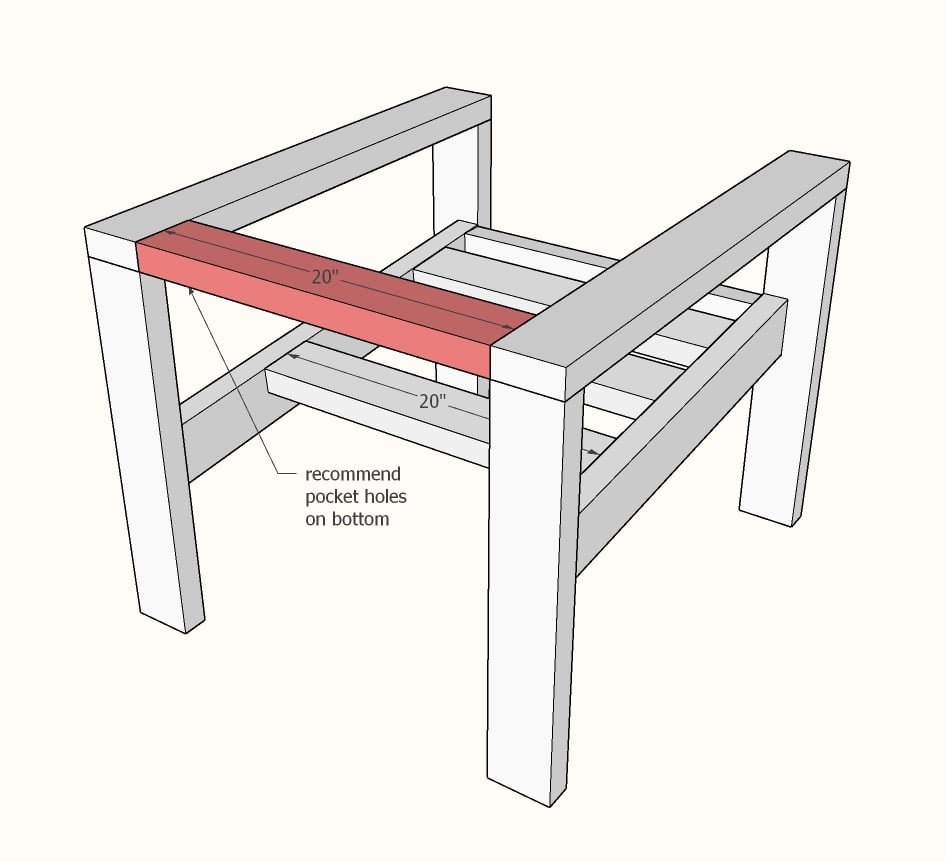
For the back piece, the easiest way to attach is with a Kreg Jig.
Set for 1-1/2" thick materials, and drill two pocket holes on each end. Attach with 2-1/2" long screws (yes you can use the star bit screws, but the Kreg Screws are preferred).
Step 6
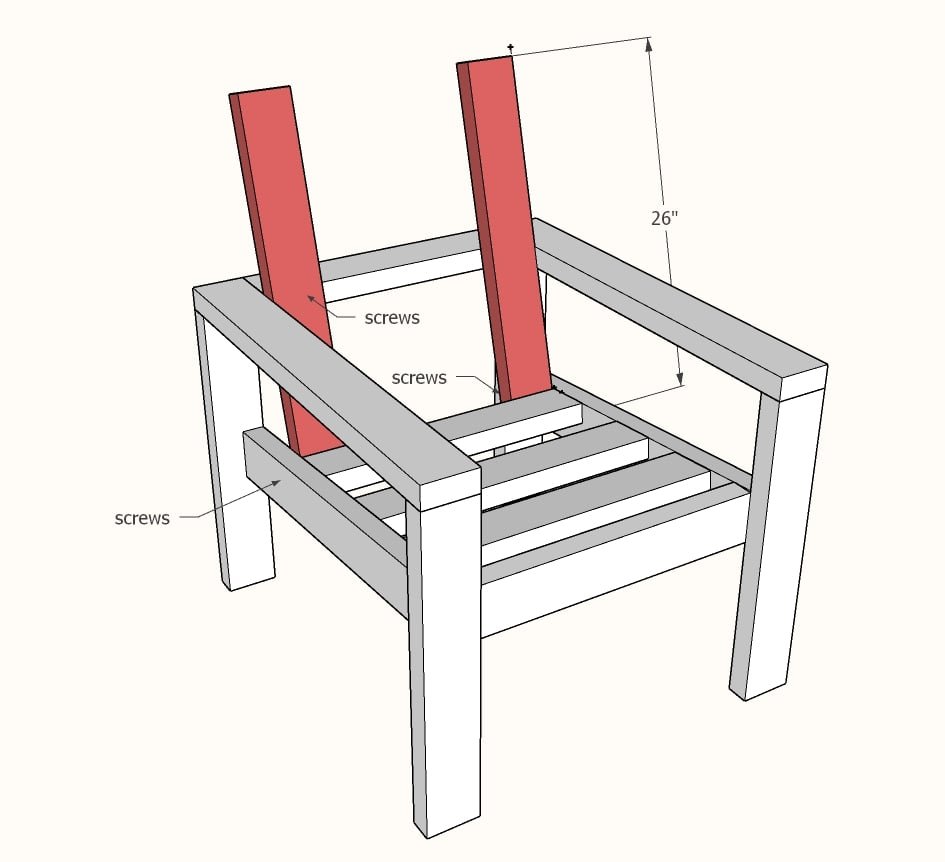
If using a different size cushion, place the cushion in the chair frame now, and measure and cut the back supports to fit your cushions. Remember that a 2x2 that is 1-1/2" wide will be added to the top in the next step. Position the back rest pieces and attach in three points - to the sides, the back rest and the back slats. These back rest pieces add considerable strength to the chair.
Step 7
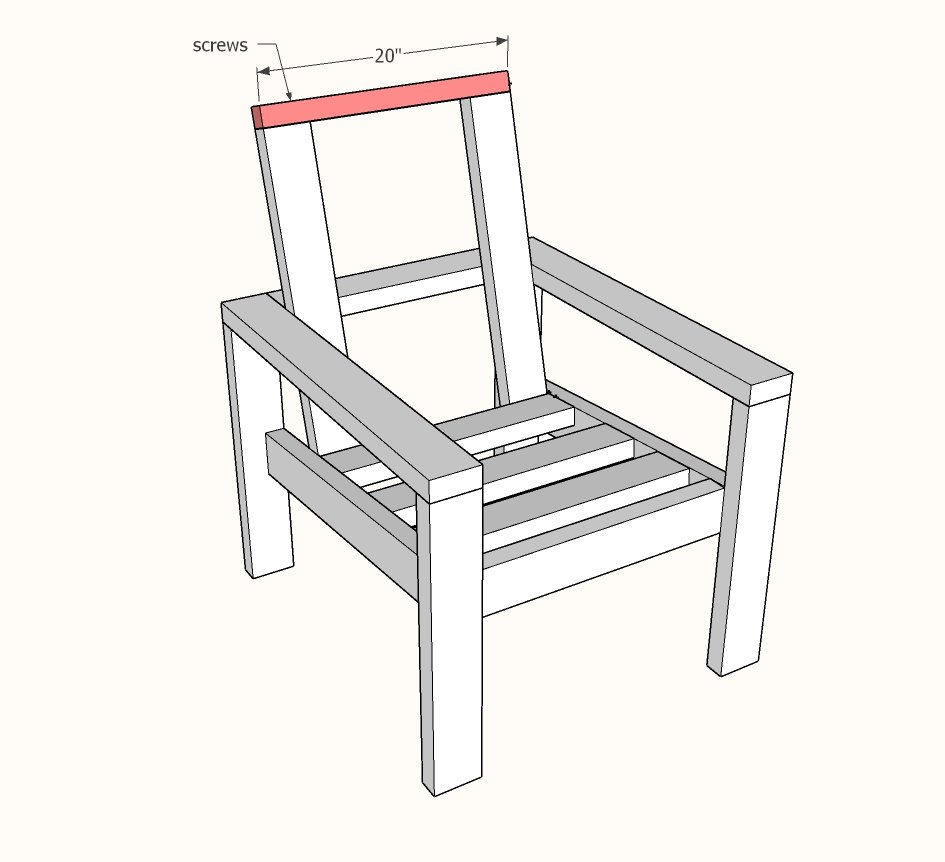
Add the 2x2 on the top with two screws per joint.
Step 8
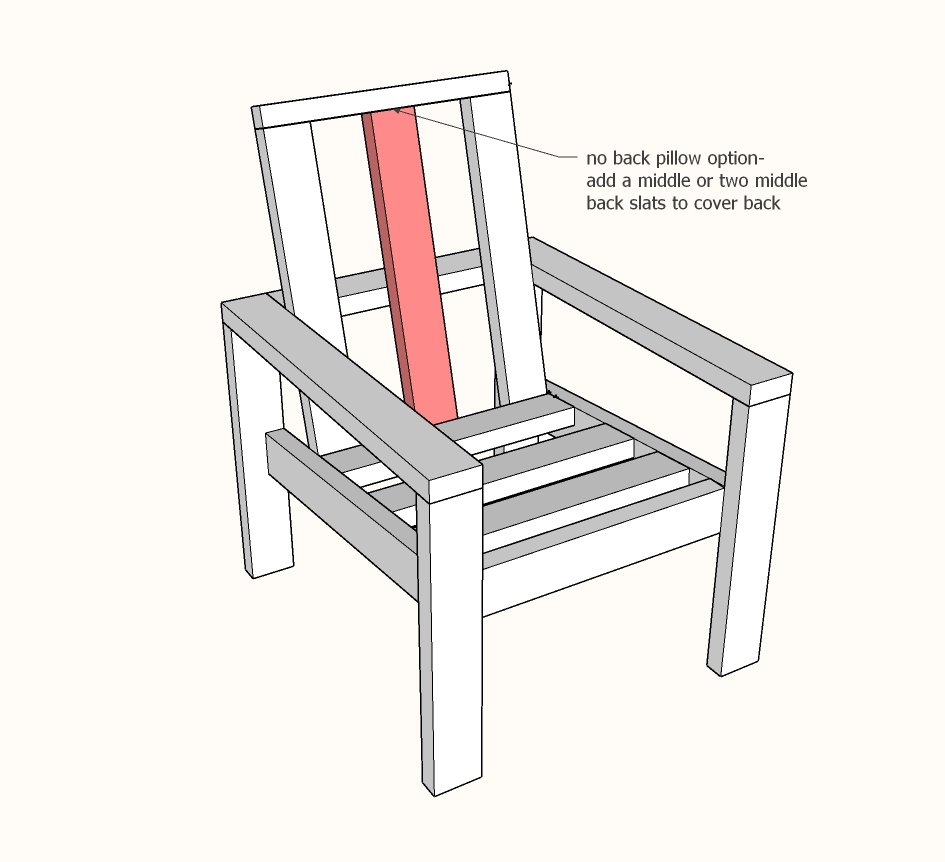
For no back, or back cushions needed extra support, additional back slats can be easily added.
Finishing
Sand all surfaces, starting with a medium grit and finishing with fine. Wipe off the dust, fill any holes or gaps with wood filler, and sand smooth once dry. Apply primer if you're painting, then finish with your choice of paint or stain and seal with a durable clear topcoat. For outdoor projects, use exterior-rated primer, paint or stain, and sealer so the piece stands up to the weather.
Source (temporary): https://www.ana-white.com/woodworking-projects/essential-wood-outdoor-chair-frame-standard-chair-cushion