Extra Long Buffet Cabinet with Drawers
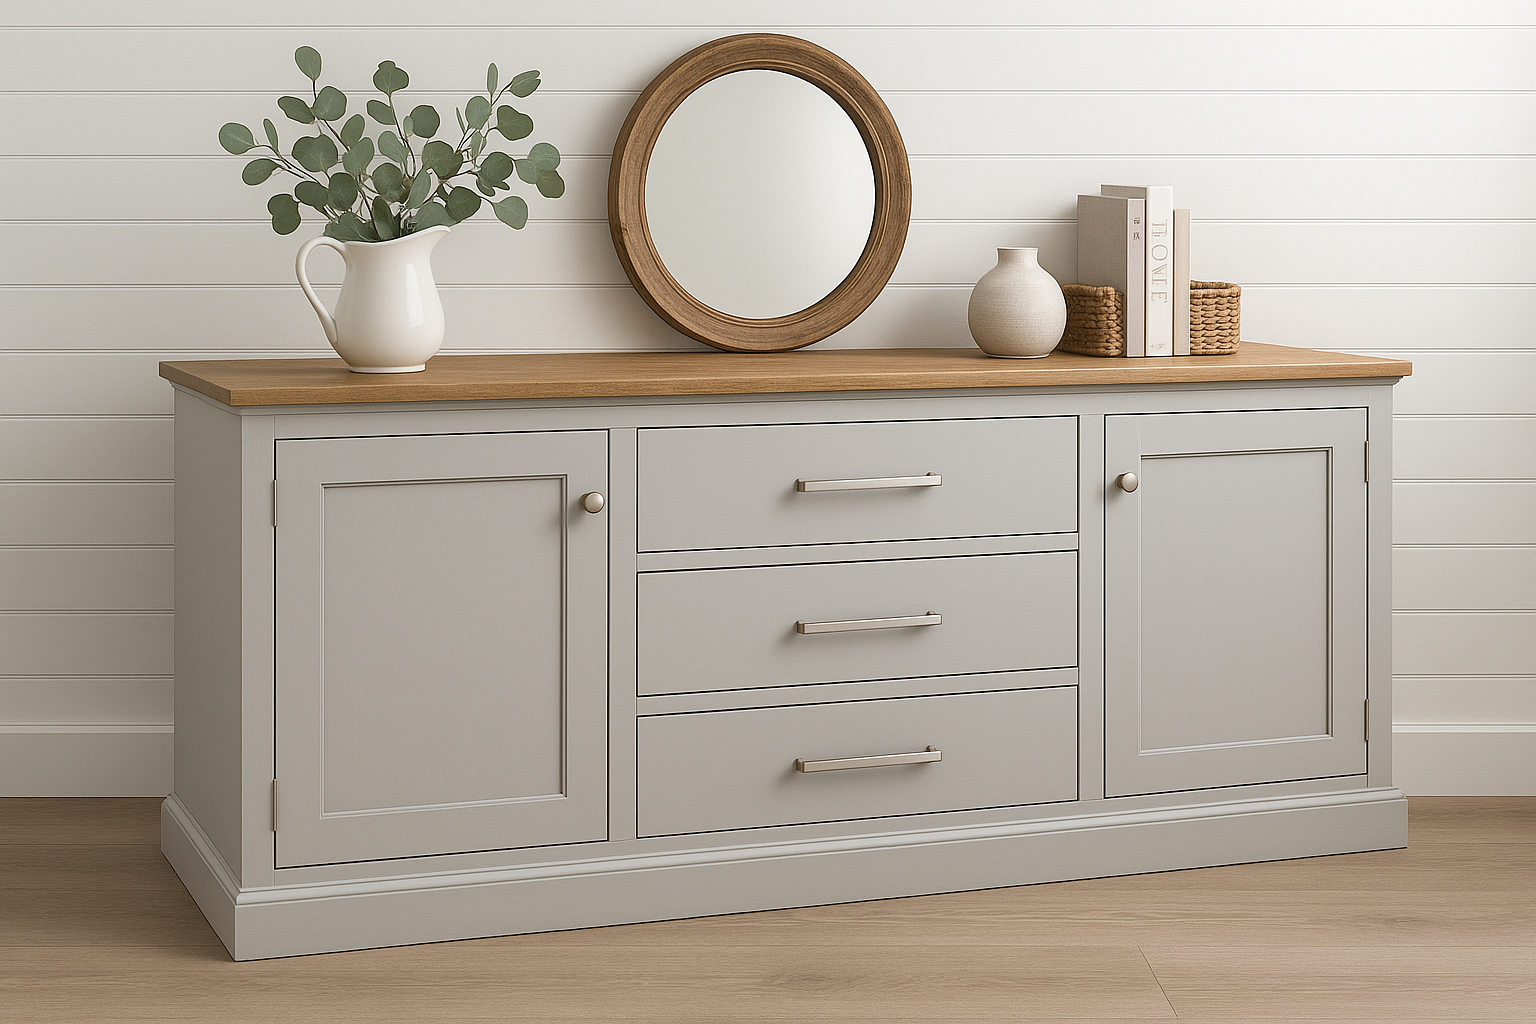
Build this gorgeous extra-long sideboard with! Featuring a sturdy frame, inset drawers, and a classic wood top, this project includes step-by-step instructions, real build photos, and easy-to-follow diagrams to guide you through the process. Designed to look high-end, this piece is perfect for a dining room, entryway, or living space. Customize the finish —paint or stain to match your style. Whether you're going for modern farmhouse or timeless traditional, this cabinet is sure to shine. include: • Real project photos • Beginner-friendly build techniques • Paint or stain any color • Durable wood top
Specifications
| Project type | Media and Entertainment Centers |
|---|---|
| Room | dining room |
| Style | Cottage Style Furniture Plans |
| Difficulty | Intermediate |
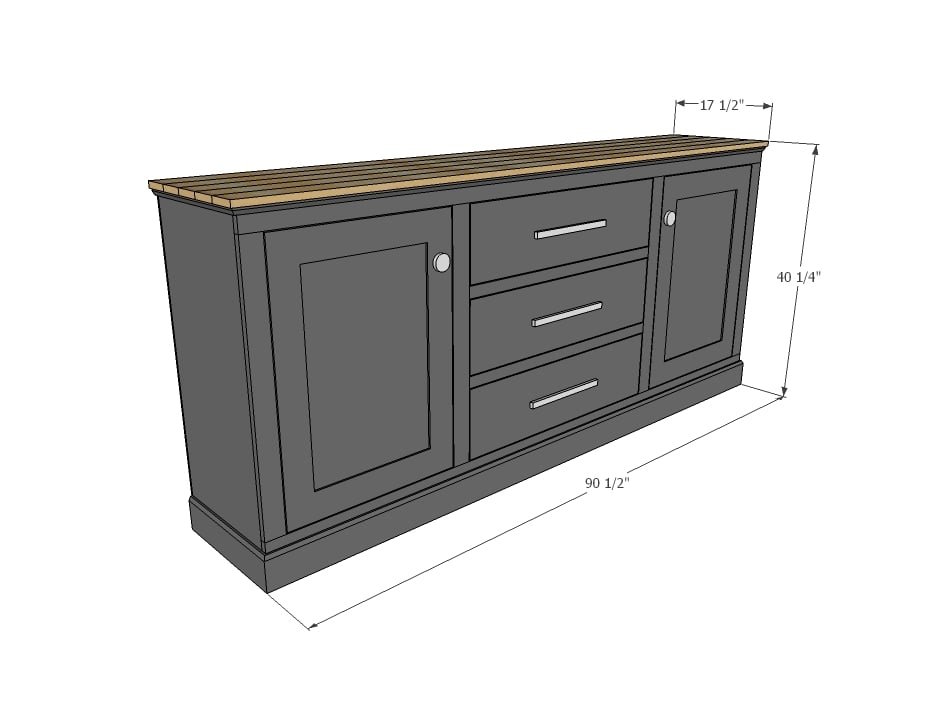
Dimensions
Use the size-specific shopping and cut lists below.
Shopping List
- 2 - sheets of 3/4" plywood cut into strips 15-3/4" wide (for a total of 6 strips)
- 1 - 1/4" plywood or other hardboard for the back
- 3 - 1x3 @ 8 feet long
- 1 - 1x6 @ 8 feet long
- 1 - 1x2 @ 8 feet long
- 8 - 1x4 @ 8 feet long (includes 1x4s for the doors)
- 3 - 1x8 @ 8 feet long (could also use 1x6 for smaller drawers)
- 1 - 1x10 @ 10 feet long
- 4 inset hinges
- 3 sets of 14" drawer slides
- 3 handles and 2 knobs
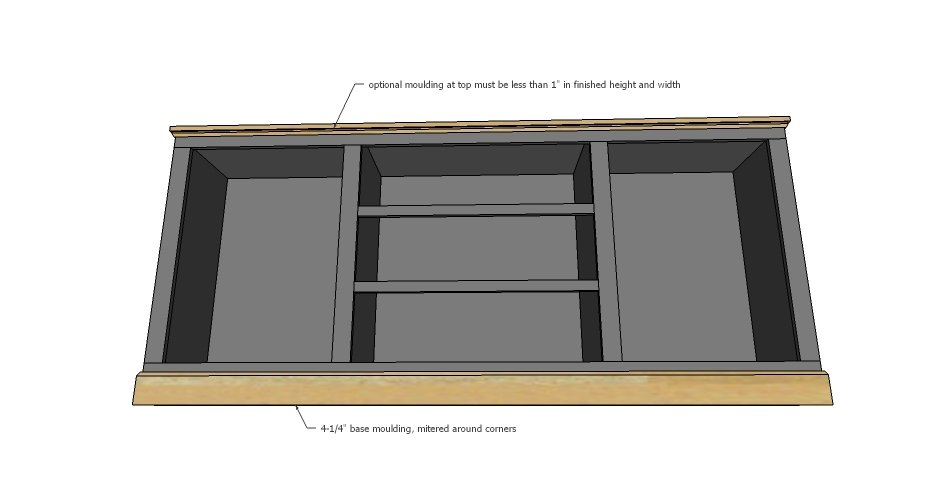
- 12 feet of 4-1/4" base moulding
- 12 feet of 3/4" moulding (for top)
Cut List
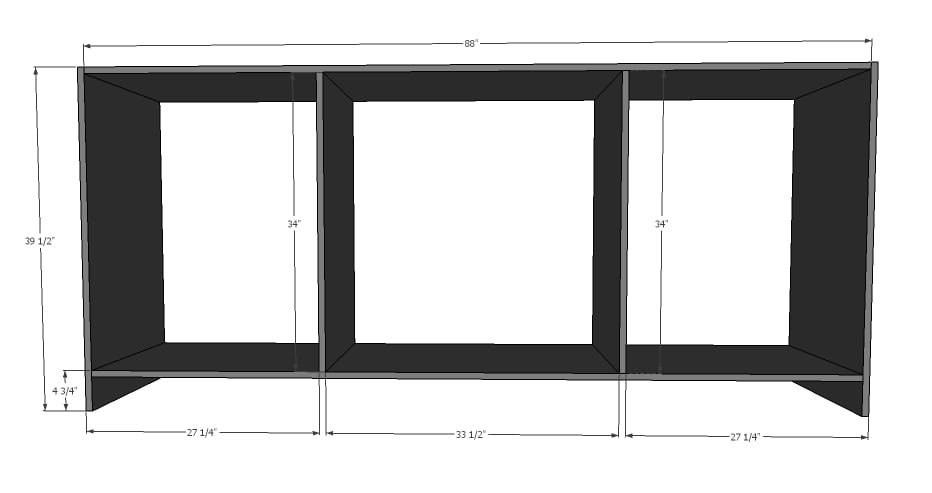
- 2 - 3/4" plywood @ 15-3/4" x 88" (top and bottom)
- 2 - 3/4" plywood @ 15-3/4" x 39-1/2" (sides)
- 2 - 3/4" plywood @ 15-3/4" x 34" (dividers)
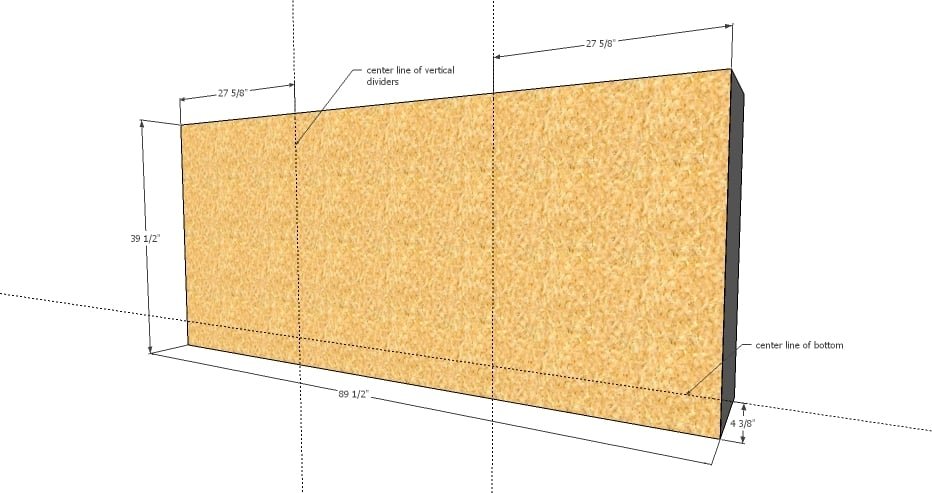
- 1 - 1/4" plywood @ 89-1/2" x 39-1/2" (back)
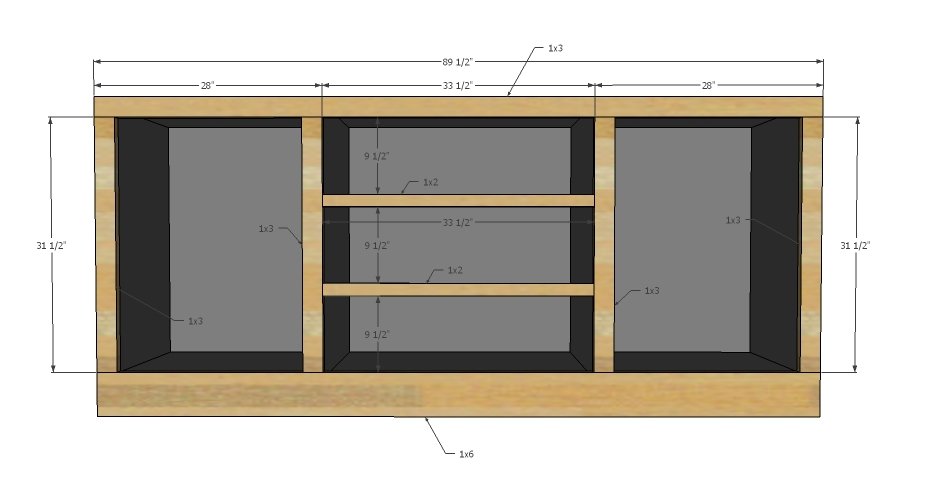
- 1 - 1x3 @ 89-1/2" (face frame top)
- 1 - 1x6 @ 89-1/2" (face frame bottom)
- 4 - 1x3 @ 31-1/2"(face frame stiles)
- 2 - 1x2 @ 33-1/2" (face frame drawer trim)
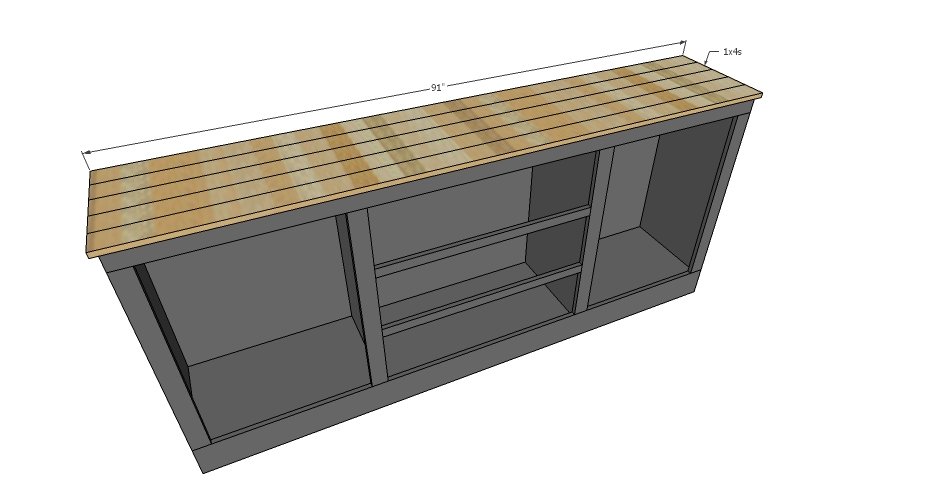
- 5 - 1x4 @ 91" (top)
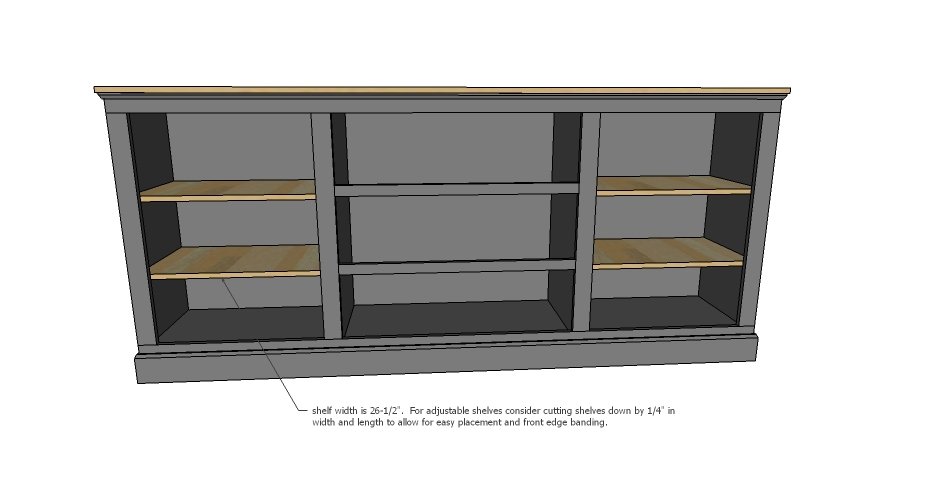
- 4 - 3/4" plywood @ 26-1/2" (shelves)
- 6 - 1x8 @ 31" (drawer front/back - could also use 1x6)
- 6 - 1x8 @ 14" (drawer sides - could also use 1x6)
- 3 - drawer bottoms inset fit are 12-1/2" x 31" or for lighter loads 1/4" plywood could be used on the drawer bottoms (outset is 32-1/2" x 14")
- 3 - 1x10 @ 33-1/4" drawer faces
- Doors are made to fit with 1x4s (see last diagram)
Tools
- measuring tape
- square
- pencil
- safety glasses
- hearing protection
- kreg-jig
- drill
- compound miter saw
- table saw
- nailer
- sander
- shelf pin jig
Step-by-step Instructions
Step 1
Build the basic frame for the cabinet. This is a much bigger task than it looks because this project is so big. Take your time, use clamps, use glue. Adjust for square by taking opposing diagonal measurements of the outside corners and checking to see if they diagonals are the same. Adjust until the diagonals match and your project is square.
Step 2
Let's get the back on while the project is square. Attach with glue and 3/4" nails or staples.
Step 3
Build the face frame first, separately. The attach the face frame to the front of the cabinet with 1-1/4" nails and glue.
Step 4
Cover the top with wood planking - this will add to the overall look and make the top solid wood. You can nail and glue down with 1-1/4" nails (the nail heads will show) or use 1-1/4" screws from the underside.
Step 5
Step 6
Add shelves either fixed, or with a Kreg Shelf Pin Jig.
Step 7
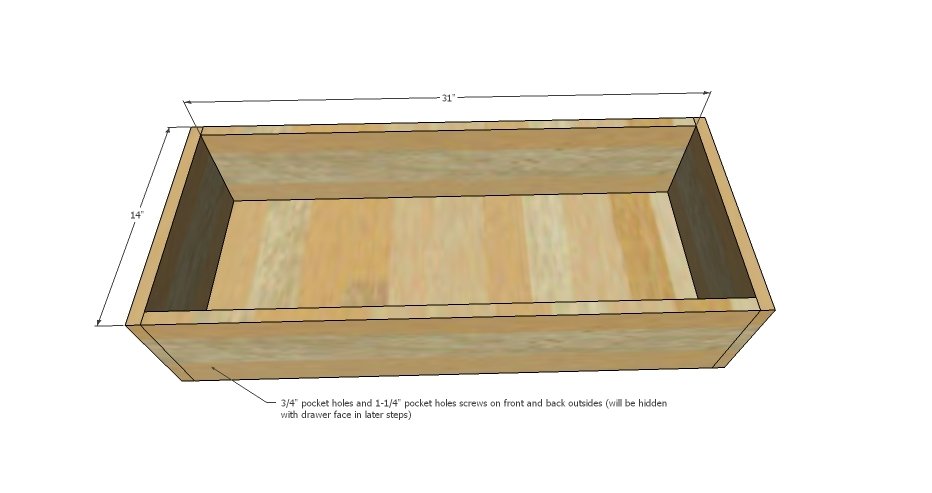
Build drawers to fit inside of cabinet and your drawer slides. Measurements shown are for drawer slides that require 1" clearance total.
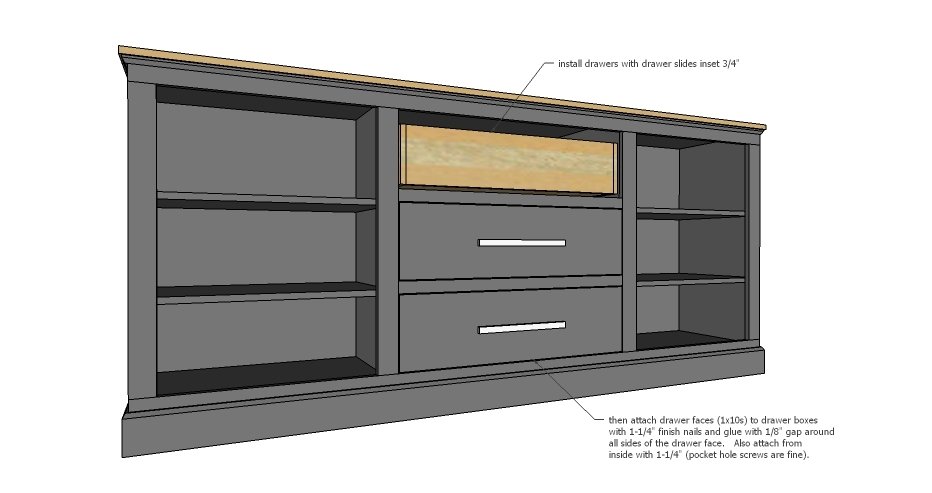
Install drawers inside the cabinet, inset 3/4" to allow for the drawer faces.
Attach drawer faces to drawer boxes with 1-1/4" nails and glue. Avoid nailing where you will place hardware. Pull drawer out and add a few screws from the back side.
Step 9
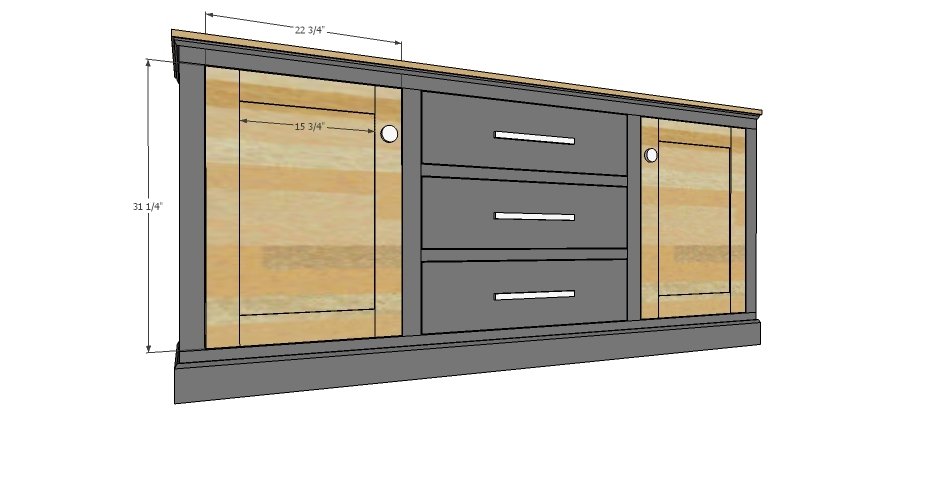
Build doors to fit openings - as shown it's just a 1x4 frame with 1/2" plywood inset (here's a simple tutorial on how to build simple frame and panel doors ) Attach with inset hinges or surface mount exposed hinges. Check out how Jaime attached her door hinges here and what type she used. You may also need to add a magnetic clasp to keep the doors closed.
Finishing
Sand all surfaces, starting with a medium grit and finishing with fine. Wipe off the dust, fill any holes or gaps with wood filler, and sand smooth once dry. Apply primer if you're painting, then finish with your choice of paint or stain and seal with a durable clear topcoat. For outdoor projects, use exterior-rated primer, paint or stain, and sealer so the piece stands up to the weather.
Source (temporary): https://www.ana-white.com/woodworking-projects/extra-long-buffet-cabinet-drawers-free-plans