Extra Tall Bar Stool
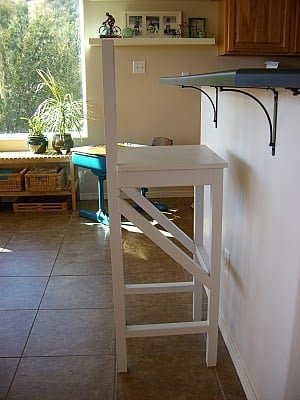
An extra tall bar stool with cross bracing for added support.
Specifications
| Project type | Stools |
|---|---|
| Room | dining room |
| Style | Cottage Style Furniture Plans |
| Difficulty | Intermediate |
| Estimated cost | Under $20 |
Dimensions
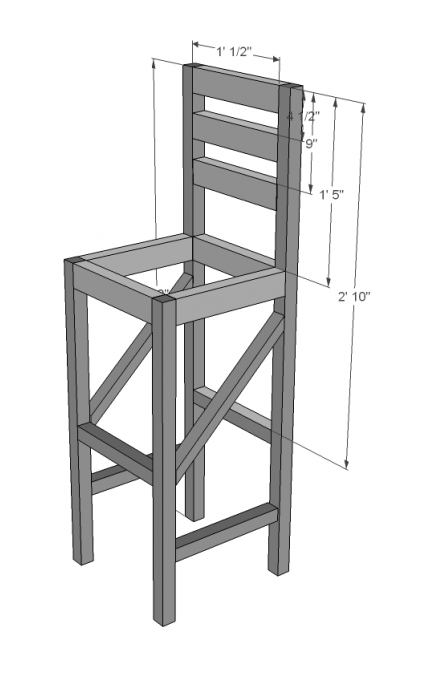
Use the size-specific shopping and cut lists below.
Shopping List
3 – 2×2 @ 8 feet long
1 – 2×3 @ 8 feet long
1/2″ thick solid wood or plywood for seat
2 1/2″ screws
wood glue
finishing supplies
Tools
- measuring tape
- square
- pencil
- safety glasses
- hearing protection
- drill
- compound miter saw
- sander
- level
- countersink drill bit
Step-by-step Instructions
Step 1
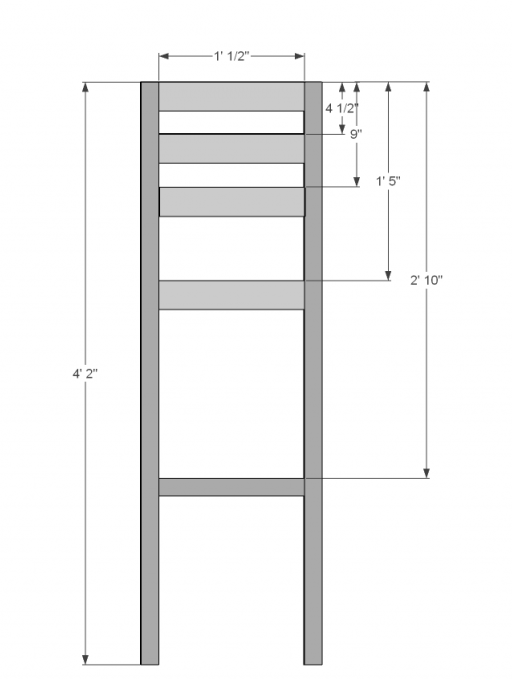
Build on a flat surface. Assemble the back of the stool using the 50 inch legs. Predrill all holes, glue, and countersink screws. Attach 3 of the 2×3 (12.5 inches) boards for the backrest with centered screws. Attach the 2×3 seat rest board with the screw towards the top. Do not center this screw as you will have another screw coming into this board and you don’t want them to hit. Attach the 2×2 back foot rest with screws in the center of the board. Be sure to square up every single angle and adjust screws as needed.
Step 2
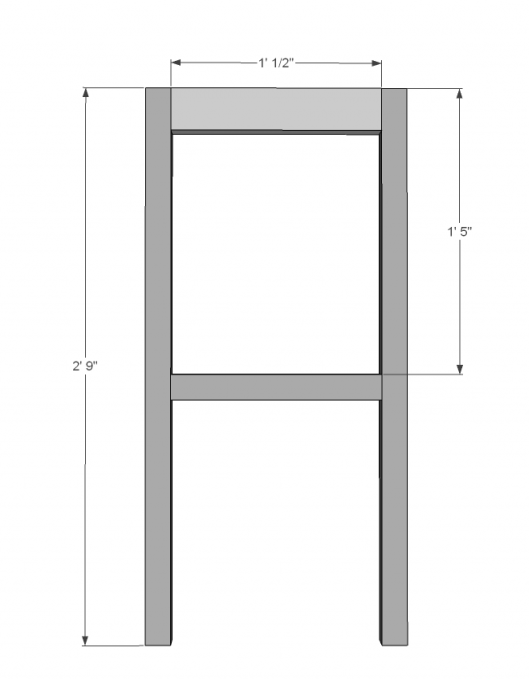
Assemble the front of the stool using the 33 inch legs. Predrill all holes, glue, and countersink screws. Attach the 2×3 seat rest board with a screw towards the top. Attach the 2×2 front foot rest with a screw in the center of the board. Be sure to square up every single angle and adjust screws as needed.
Step 3
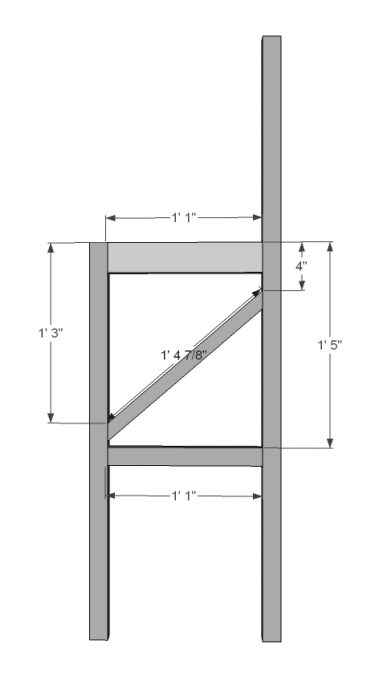
You will need to attach your back and front pieces together now Predrill all holes, glue, and countersink screws. Using a 2×3 (13 inches)board, attach this for the side of the seat rest. Put screws in towards the bottom so you don’t hit your other screws. Attach the 2×2 (13 inches) flat side rest. Be sure to measure and measure again before cutting your mitered 45 degree angled piece. This piece is important for stability. Attach it under your side seat rest and above the side flat footrest. Repeat to complete other side. Be sure to square everything up and do this on a level surface. You may need to twist, push or pull things to get it square and make sure you tighten your screws.
Step 4
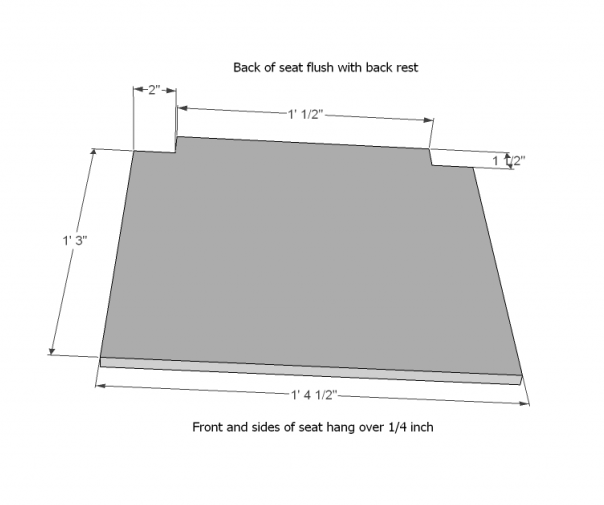
Assemble your seat. I cut mine out of a solid piece of pine. I got 4 seats out of a board that was 18 inches wide by 6 feet long. You could use plywood or just use 1×4 boards to make a seat. The front and side edges of the seat overhang by 1/2 inch. The back is flush with the backrest. You will have to notch out the board to go around the back legs. Attach with screws down through the seat and countersink. You could use right angle brackets attached to the bottom of the seat and inside of the seat rest boards if you want to avoid holes in the seat.
Finishing
Sand all surfaces, starting with a medium grit and finishing with fine. Wipe off the dust, fill any holes or gaps with wood filler, and sand smooth once dry. Apply primer if you're painting, then finish with your choice of paint or stain and seal with a durable clear topcoat. For outdoor projects, use exterior-rated primer, paint or stain, and sealer so the piece stands up to the weather.
Source (temporary): https://www.ana-white.com/woodworking-projects/extra-tall-bar-stool