Extra Wide Console Bookcase
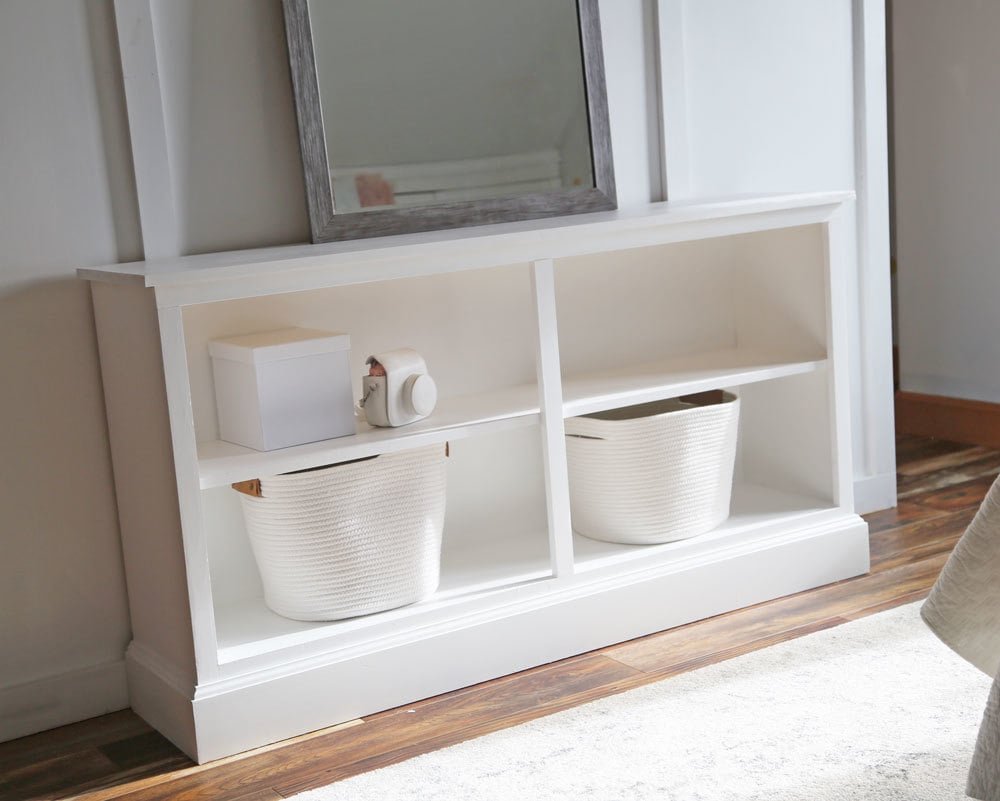
The height of a console or sofa table with all the storage of a bookcase. Great for a media console too! We love this white bookcase, and you can build it yourself too, with free
Specifications
| Project type | Media and Entertainment Centers |
|---|---|
| Room | Storage Solutions |
| Style | Farmhouse Furniture |
| Difficulty | Intermediate |
| Estimated cost | $50 - $100 |
Dimensions
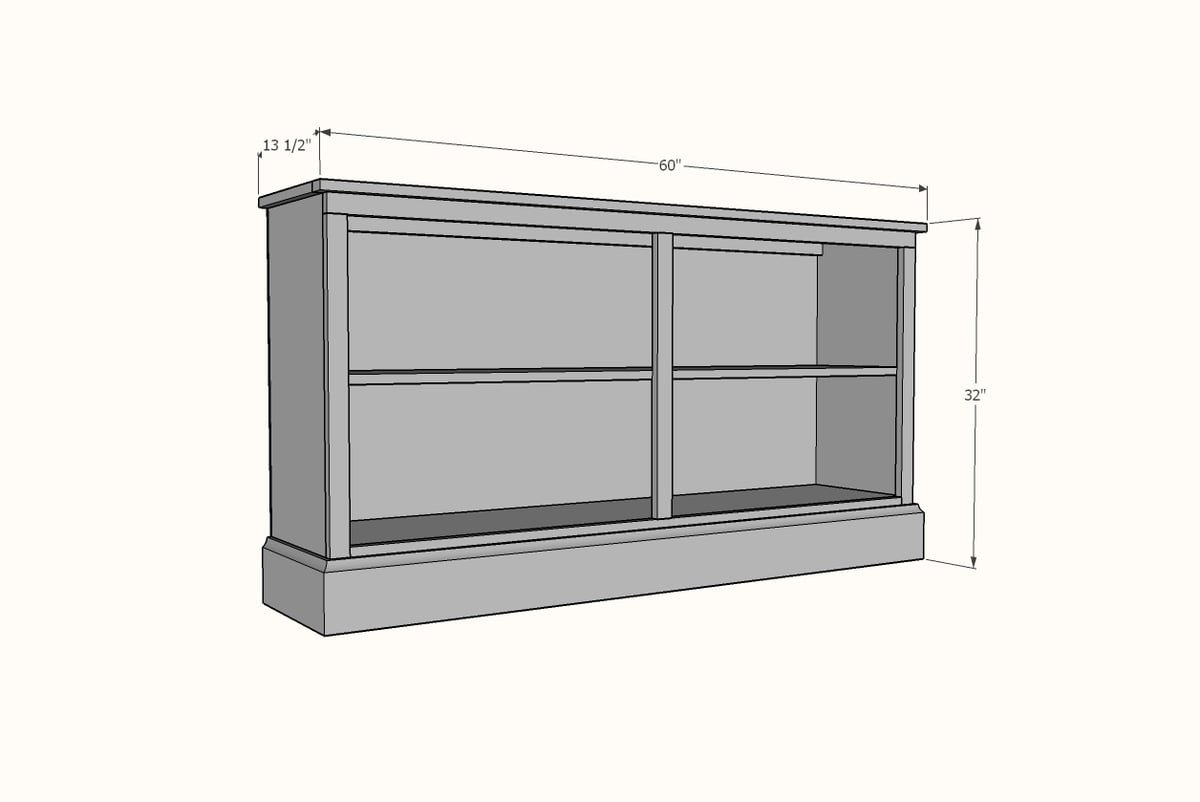
Use the size-specific shopping and cut lists below.
Shopping List
2 - 1x12 @ 8 feet long (or you can use 3/4" plywood ripped into strips 11-1/2" wide)
1 - 1x12 @ 5 feet long (or you can use 3/4" plywood ripped into strips 11-1/2" wide)
4 - 1x2 @ 8 feet long
1 - 5-1/4" tall baseboard @ 8 feet long
1 - 1/4" plywood full sheet (for the back, optional or can substitute other materials)
Cut List
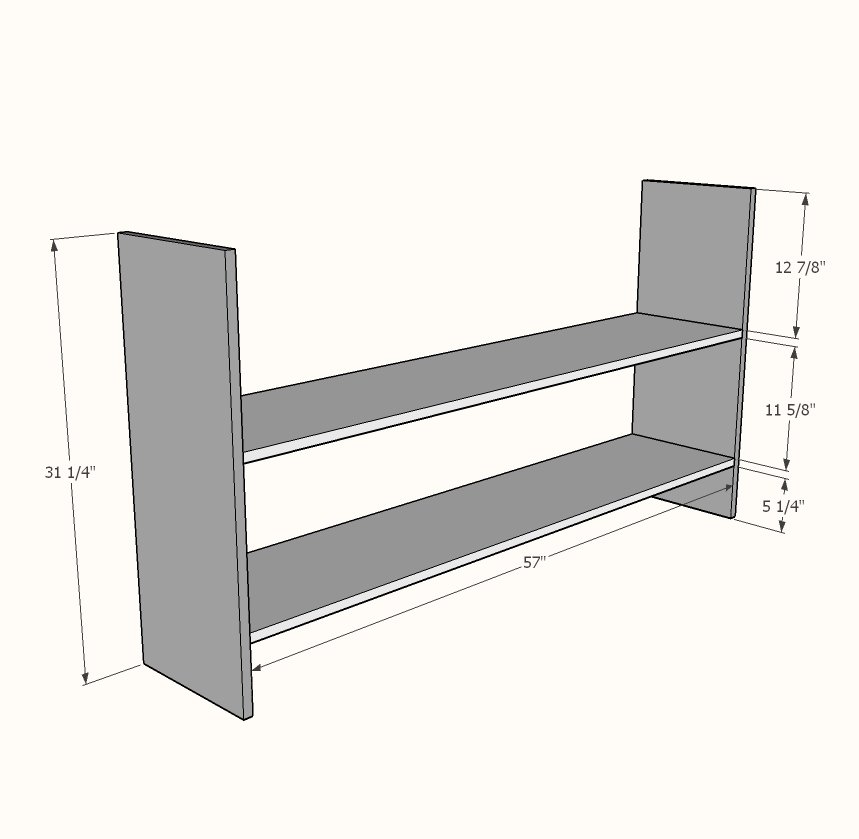
2 - 1x12 @ 31-1/4" - sides
2 - 1x12 @ 57" - shelves
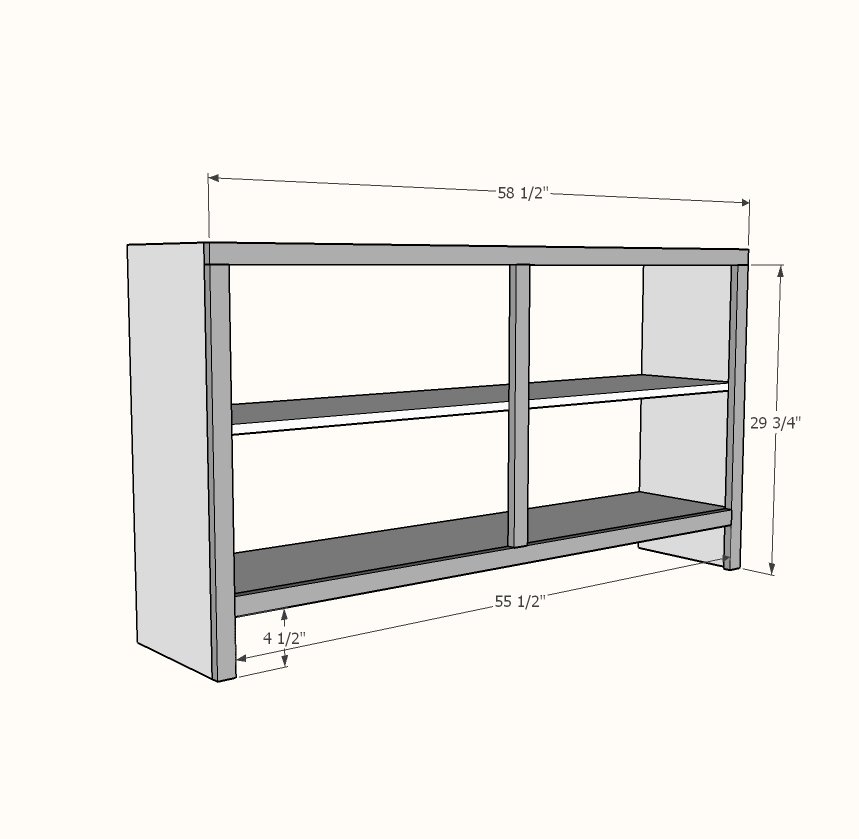
2 - 1x2 @ 29-3/4" - face frame sides
1 - 1x2 @ 58-1/2" - face frame horizontal top
1 - 1x2 @ 55-1/2" - face frame horizontal bottom
1 - 1x2 @ 23-3/4" - face frame center support
1 - 1x2 @ 57" - back support
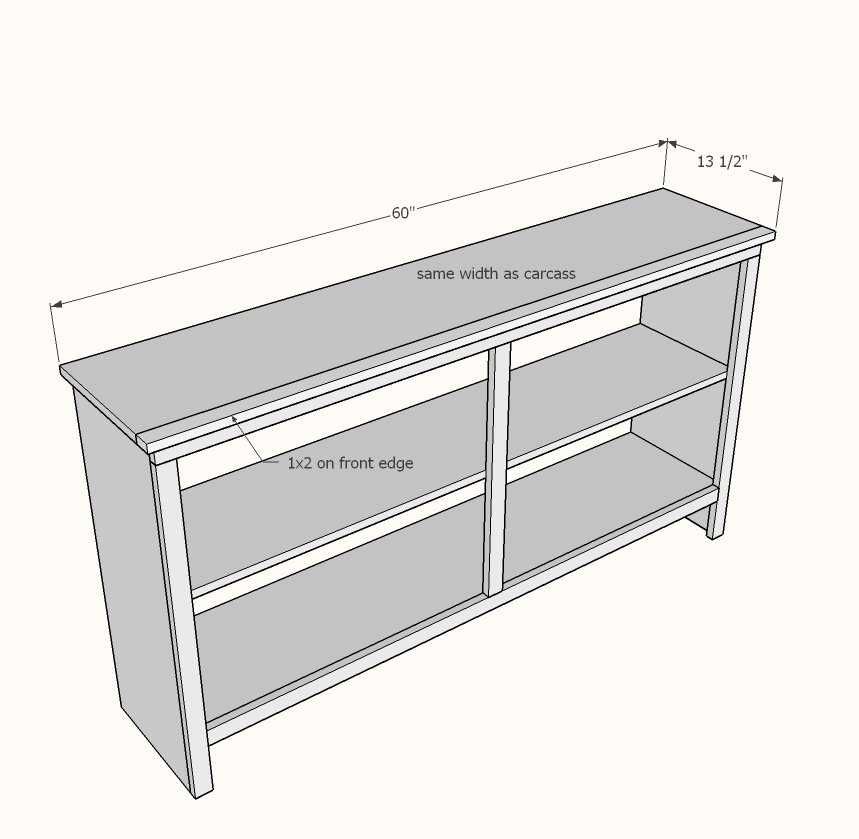
1 - 1x12 @ 60" - top
1 - 1x2 @ 60" - top
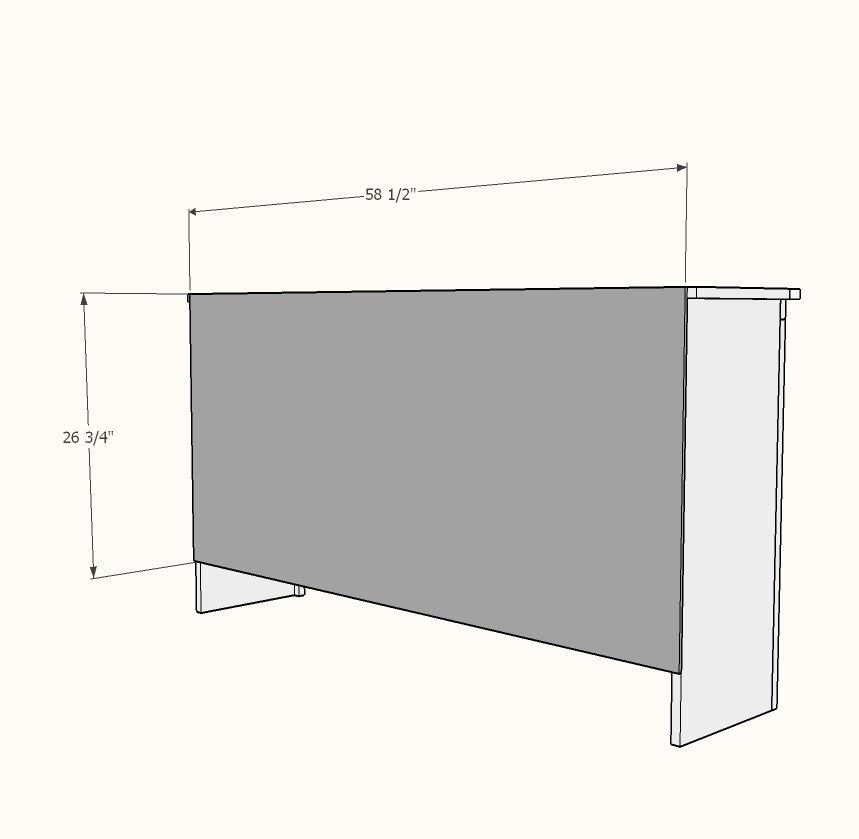
1 - 1/4" plywood @ 58-1/2" x 26-3/4" - back (optional)
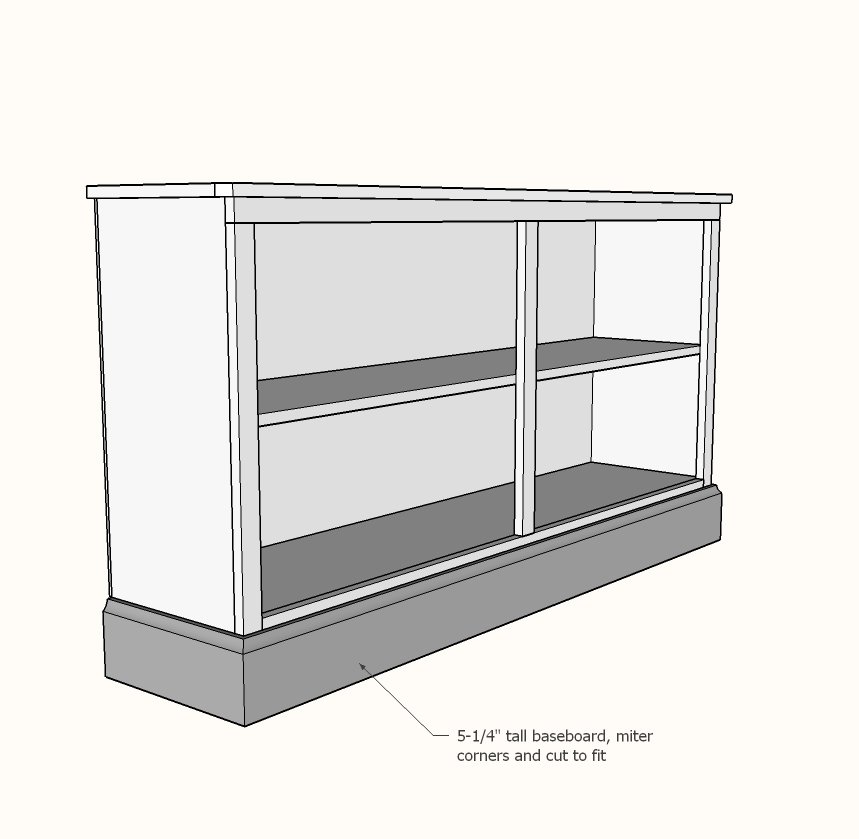
5-1/4" baseboard cut to fit
Tools
- measuring tape
- square
- pencil
- safety glasses
- hearing protection
- kreg-jig
- drill
- circular saw
- compound miter saw
- nailer
- sander
Step-by-step Instructions
Step 1
Drill 3/4" pocket holes on each end of the two shelves. Attach to the sides with 1-1/4" pocket hole screws.
Step 2
Build the face frame with 3/4" pocket holes and 1-1/4" pocket hole screws first. Then attach the face frame to the 1x12s with 1-1/4" brad nails and wood glue. Make sure you attach the center vertical piece of the face frame to the middle shelf. NOTE: The center vertical piece of the face frame is to keep the center shelf from sagging. If you customize the size to a shorter width, you may not need this center support piece.
Step 3
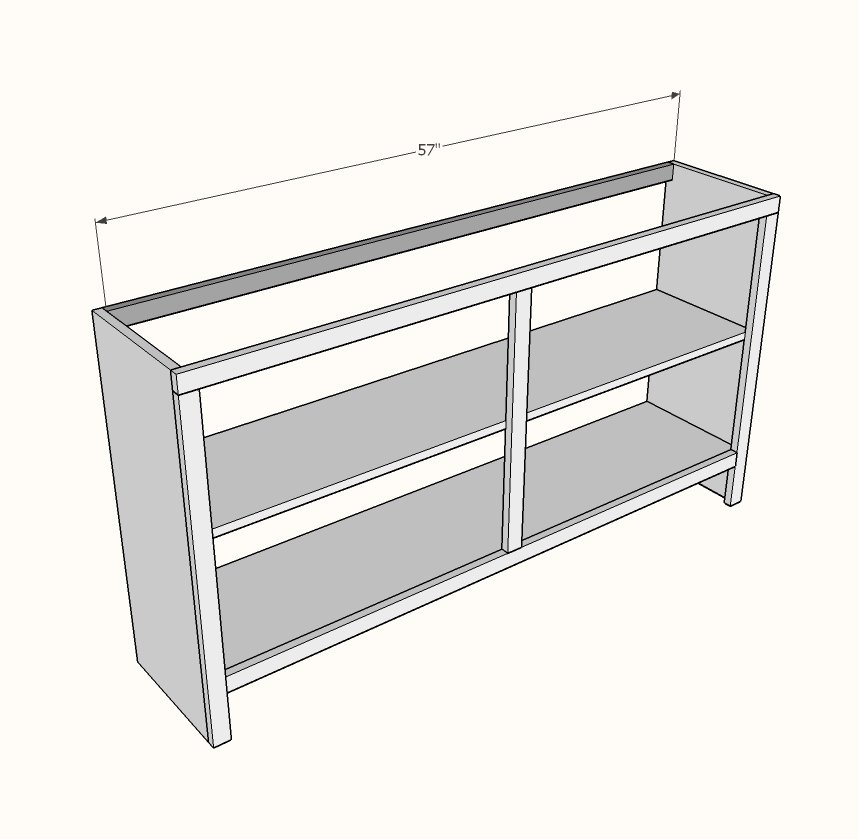
Attach back support with 3/4" pocket holes and 1-1/4" pocket hole screws.
Step 4
Attach top to front 1x2 trim with 3/4" pocket holes and 1-1/4" pocket hole screws. Then glue and nail entire top to the bookcase with 1-1/4" brad nails.
Step 5
Miter cut the baseboard trim to fit the bottom.
Attach with 1-1/4" brad nails and wood glue. NOTE: Depending on your baseboard thickness, the brad nails may be a little long. 1" brad nails would be more suitable if you have on hand, but if you didn't want to buy different nails, the 1-1/4" nails will work just fine.
Finishing
Sand all surfaces, starting with a medium grit and finishing with fine. Wipe off the dust, fill any holes or gaps with wood filler, and sand smooth once dry. Apply primer if you're painting, then finish with your choice of paint or stain and seal with a durable clear topcoat. For outdoor projects, use exterior-rated primer, paint or stain, and sealer so the piece stands up to the weather.
Source (temporary): https://www.ana-white.com/woodworking-projects/extra-wide-console-bookcase