Extra Wide Media Base for the Modular Playroom Storage Wall
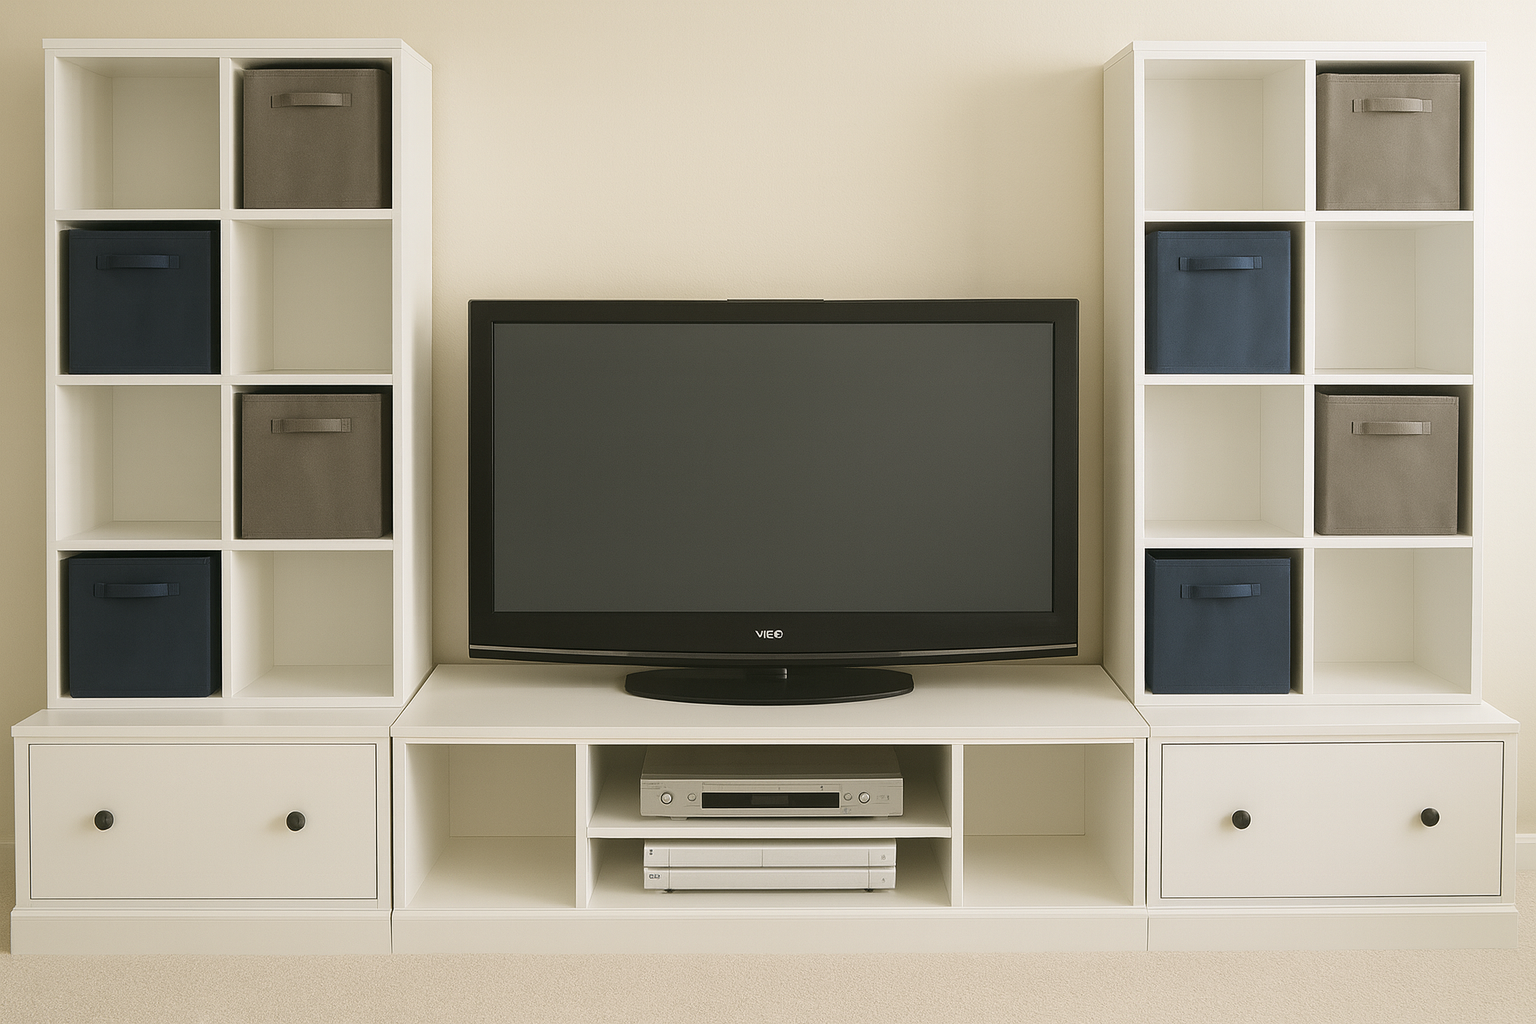
Modular Playroom Storage Collection – Media Base Unit ( ) Complete your custom media wall with this Media Base Unit, designed to perfectly coordinate with the side tower and hutch pieces from our Modular Playroom Storage Collection of. This clean-lined, built-in style base anchors your TV setup while offering generous storage below for electronics, consoles, and media. With adjustable cubbies and a wide top surface, it combines practical organization with a seamless, modern farmhouse aesthetic. Whether you're creating a cozy family room or a stylish playroom setup, all pieces in this collection are designed to work together effortlessly. Build just the base or pair it with matching hutches and towers for a full wall system—all using our detailed. Design image rendered from plans Built and tested by Shanty2Chic.
Specifications
| Project type | Cubby Project Plans |
|---|---|
| Room | Storage Solutions |
| Difficulty | Intermediate |
| Estimated cost | $20 - $50 |
Dimensions
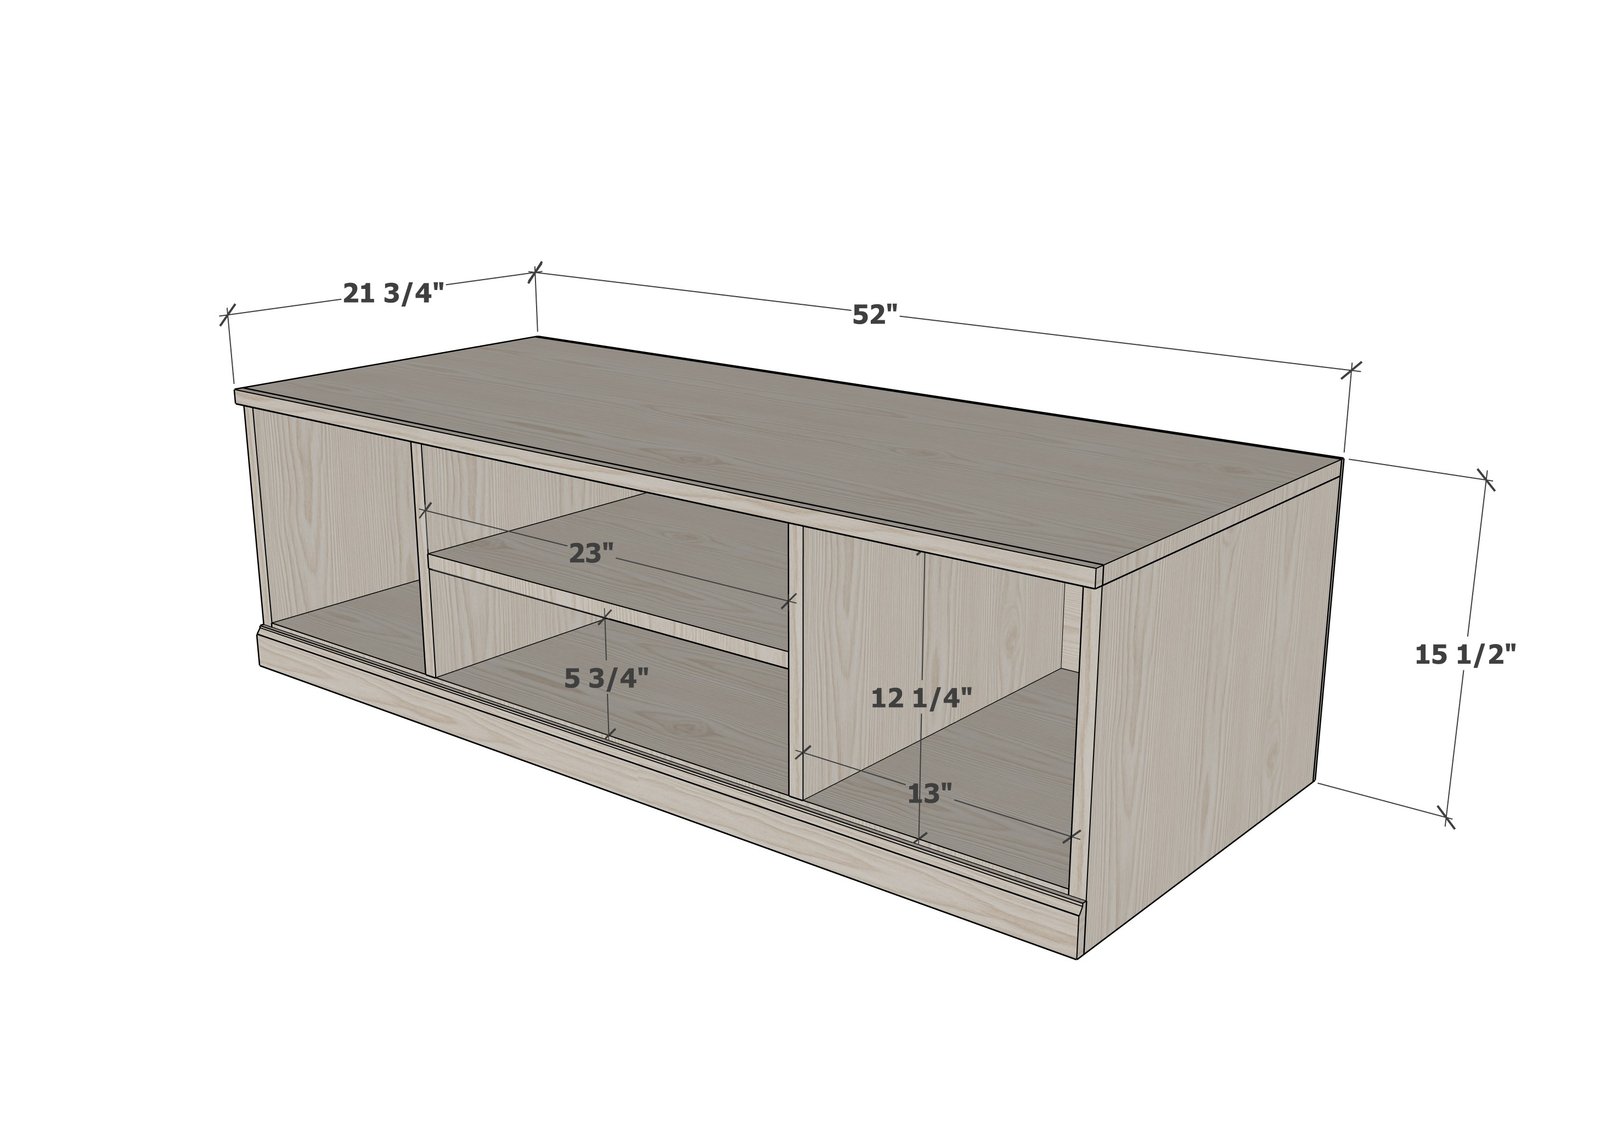
Use the size-specific shopping and cut lists below.
Shopping List
- 1 sheet 3/4″ Hardwood Plywood or MDF (estimate), rip into strips 21" wide
- 1x2 - 6 feet long
- 1-1/4" pocket hole screws
- 3/4" and 1-1/4″ Brad Nails
- 1/4″ Plywood for the backs
- Base Moulding, 2 1/4″ overall height, at least 52″ long
- 3/4" nosing, at least 52" long
- Edge banding for finishing raw plywood edges if staining
- Wood Filler
- Sand Paper
- Wood Glue
- Finishing Supplies (Paint, Stain, etc)
Cut List
- 1 – 3/4″ plywood ripped into 21" width @ 23″ (Center Shelf)
- 2 – 3/4″ plywood ripped into 21" width @ 12 1/4″ (Vertical Cubby Dividers)
- 1 – 3/4″ plywood ripped into 21" width @ 52″ (Top)
- 2 – 3/4″ plywood ripped into 21" width @14-3/4″ (Sides)
- 1 – 3/4″ plywood ripped into 21" width @ 50 1/2″ (Bottom Shelf)
- 1 – 1/4″ plywood ripped into 21" width @ 52″ x 15 1/2″ (Back)
- 2 – 1×2 @ 13″ (Cubby Top Trim Pieces)
- 1 – 1×2 @ 23″ (Center Top Trim Piece)
- 1 – 2 1/4″ Base Moulding @ 52″ (Base Moulding)t
Tools
- measuring tape
- square
- pencil
- safety glasses
- kreg-jig
- circular saw
- table saw
- nailer
- sander
Step-by-step Instructions
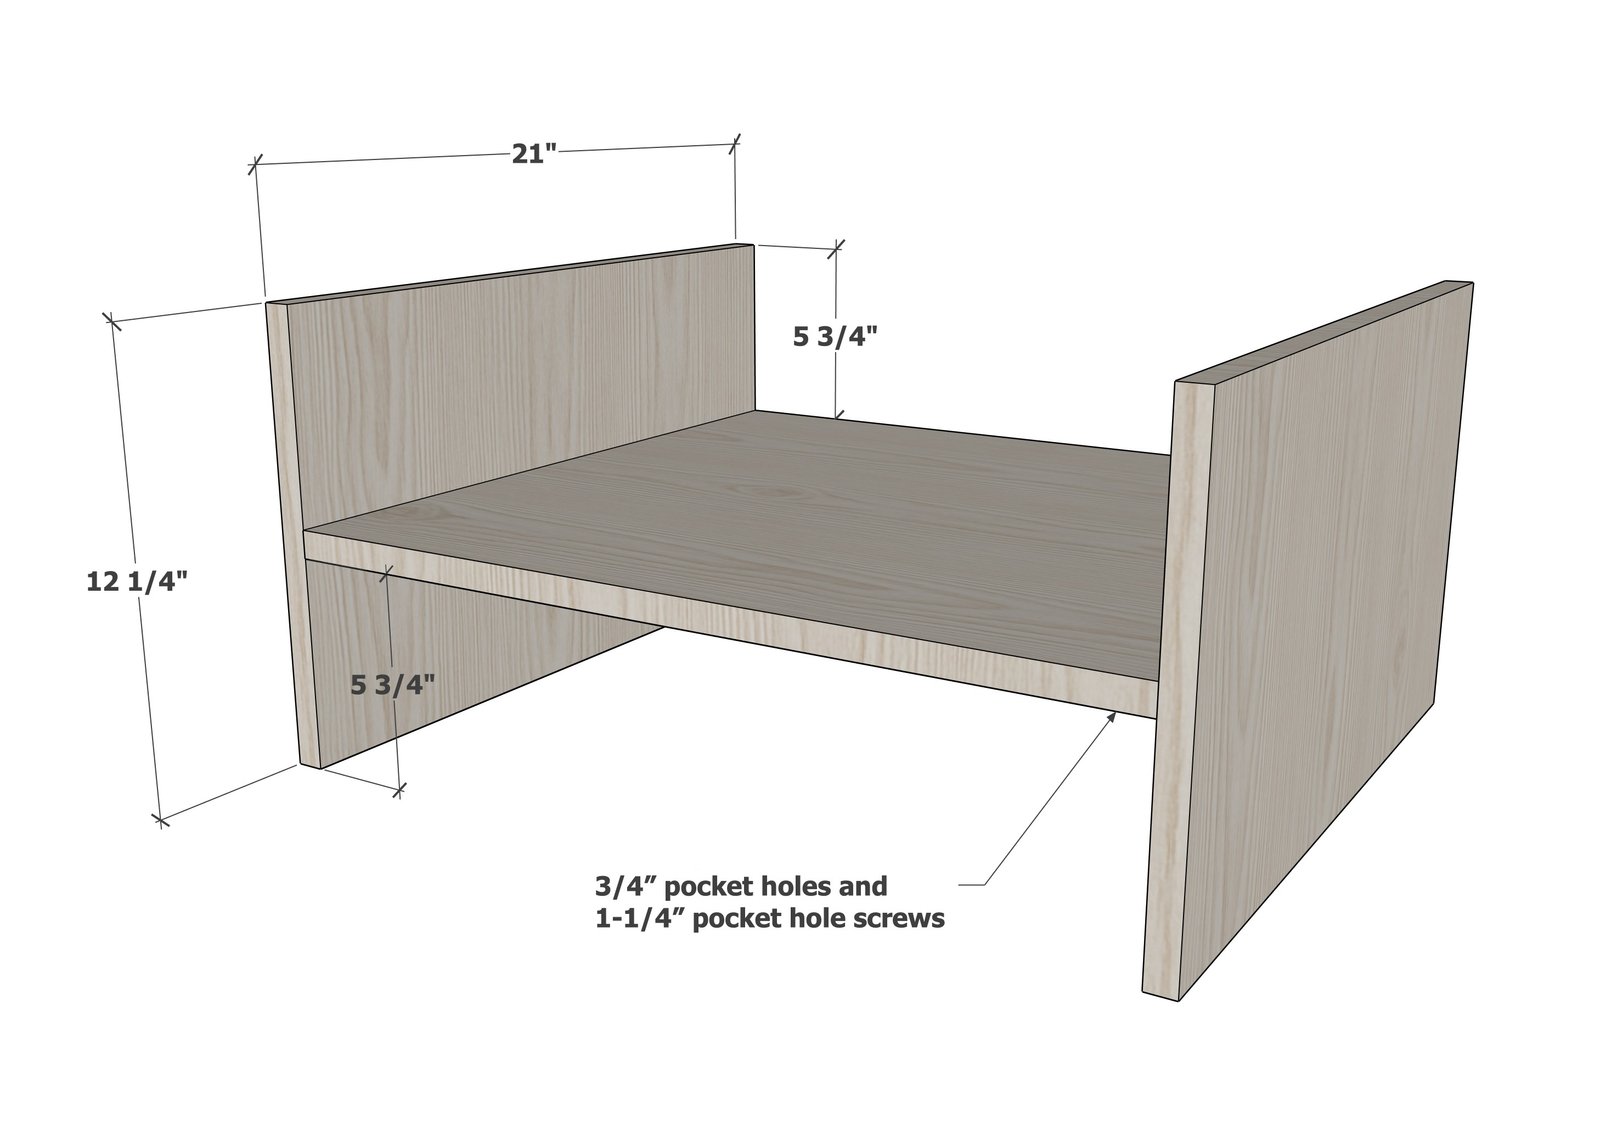
Drill 3/4" pocket holes on each end of the 23" long shelf, on the bottom, three holes per 21" side.
Drill three 3/4" pocket holes facing upward on the vertical divider pieces, for attaching to the top in next steps. Attach the shelf to the vertical dividers, as shown, with 1-1/4" pocket hole screws.
Step 2
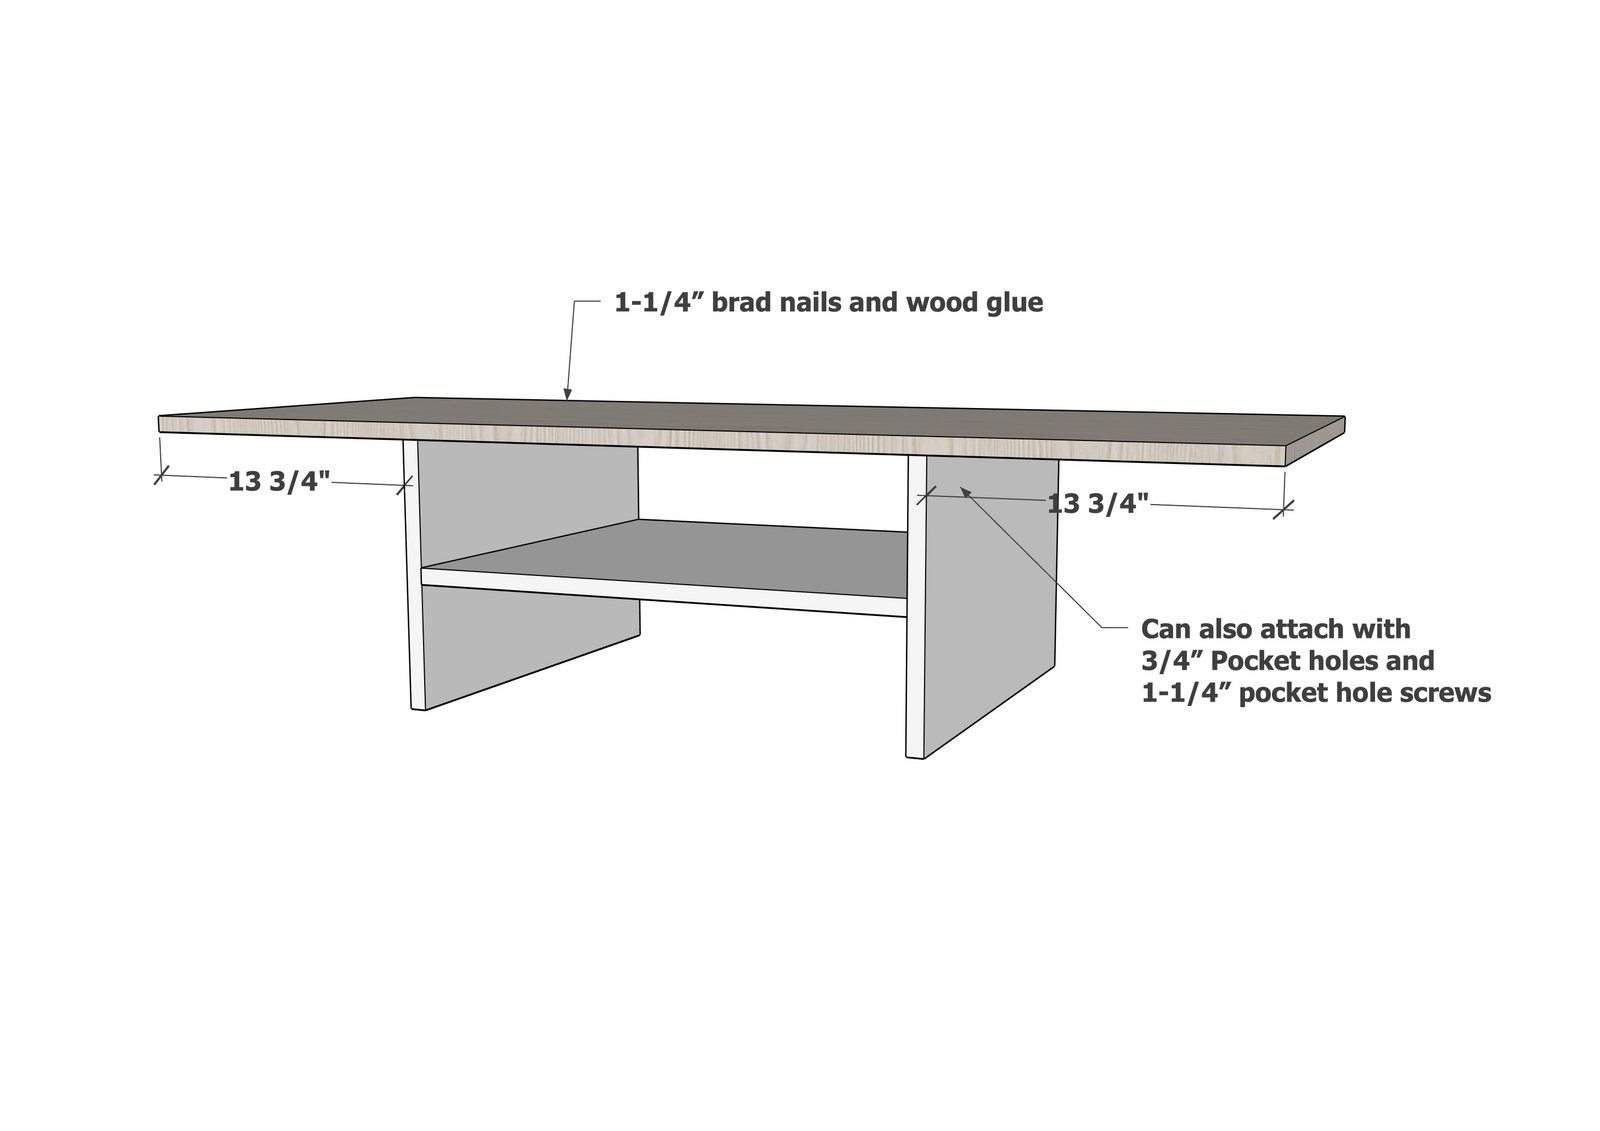
Attach the shelving part from step 1 to the underside of the top with 1-1/4" pocket hole screws. Carefully measure placement for 13-3/4" space on each end. This is best done upside down, using gravity to your advantage.
Step 3
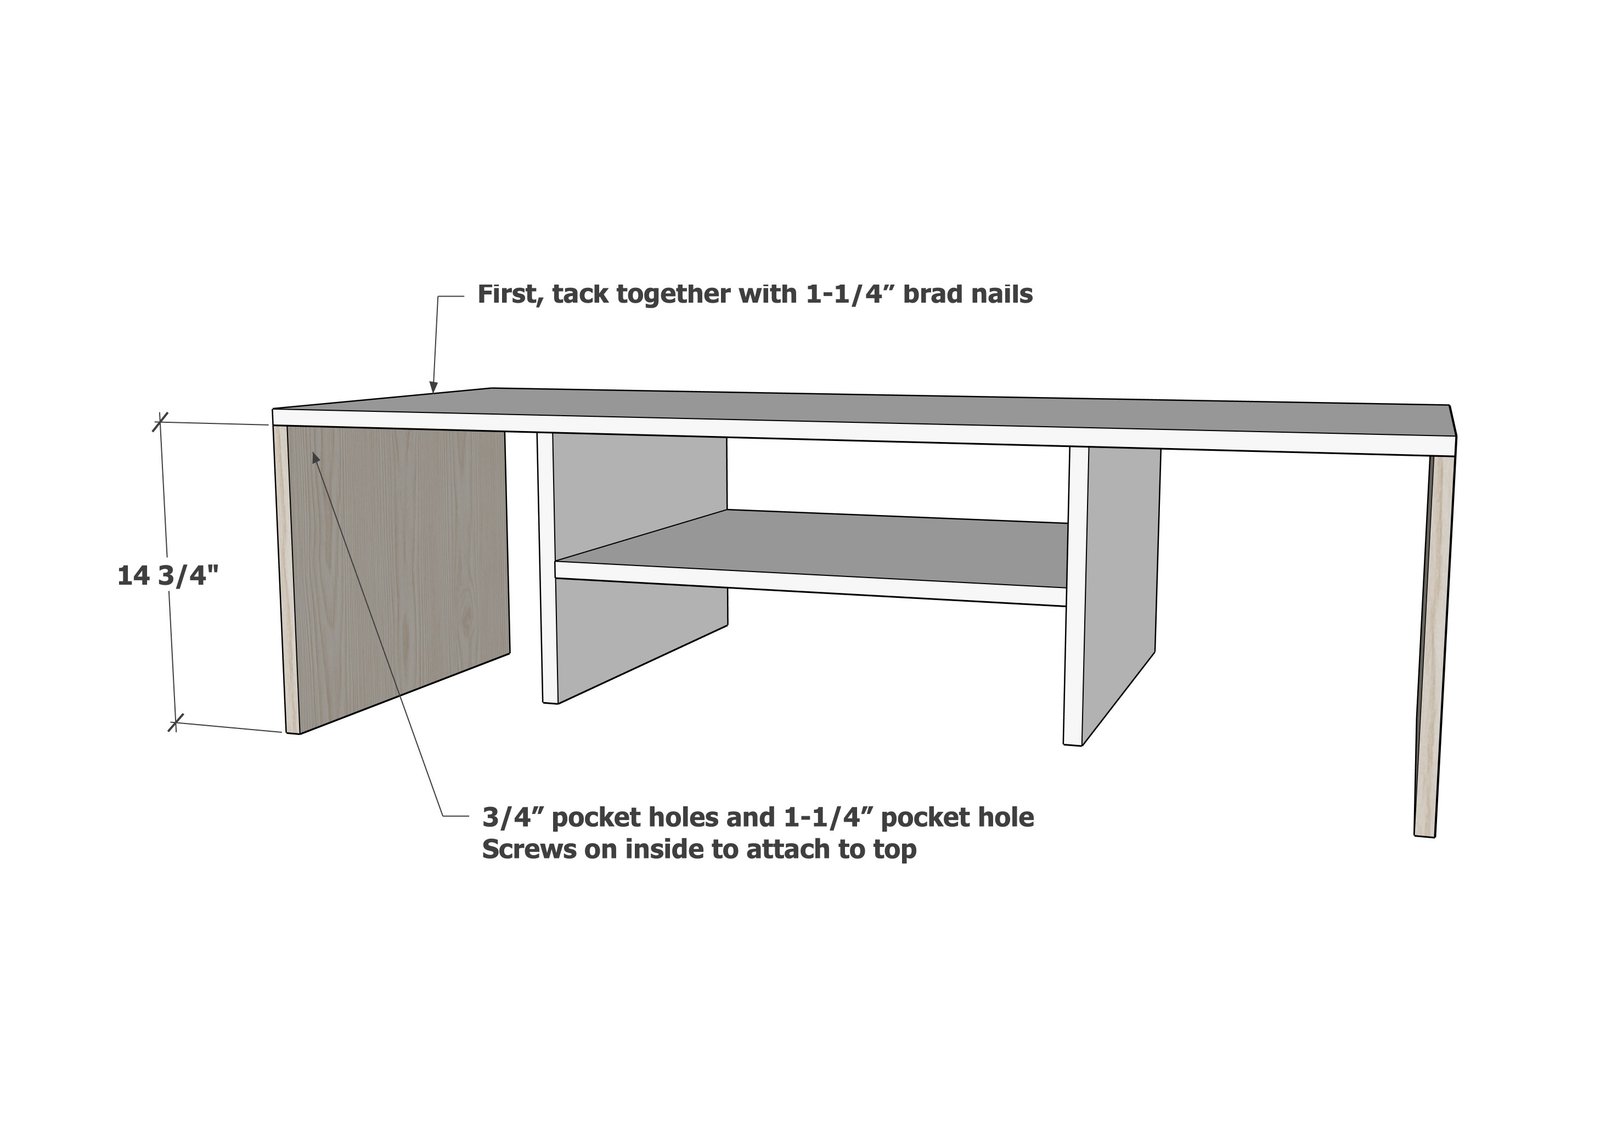
Drill three 3/4" pocket holes on the top edges of the side. First, tack in place with brad nails to keep from slipping as you attach. Then screw together with 1-1/4" pocket hole screws. This is best done upside down. Place pocket holes on insides for a stand alone unit, on outsides if you are adding side units that will cover.
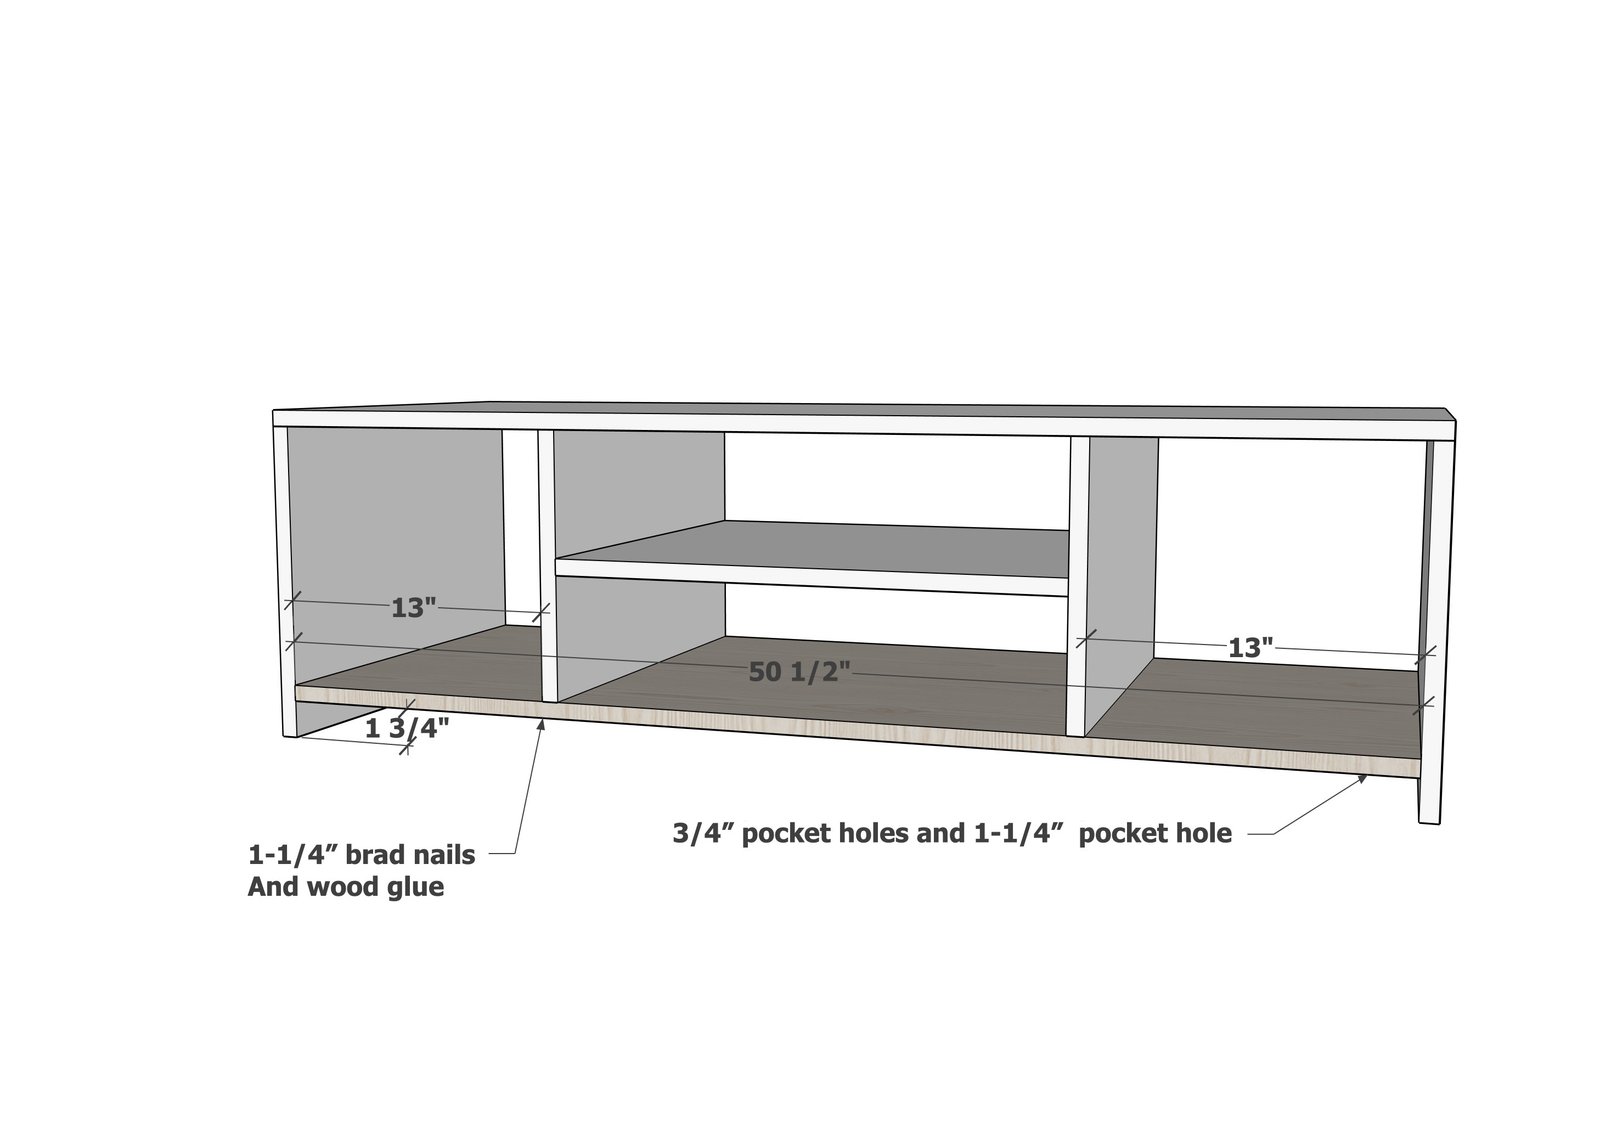
Drill 3/4" pocket holes on each end of the bottom shelf.
Attach to the side with 1-1/4" pocket hole screws. Nail and screw to the vertical dividers.
Step 5
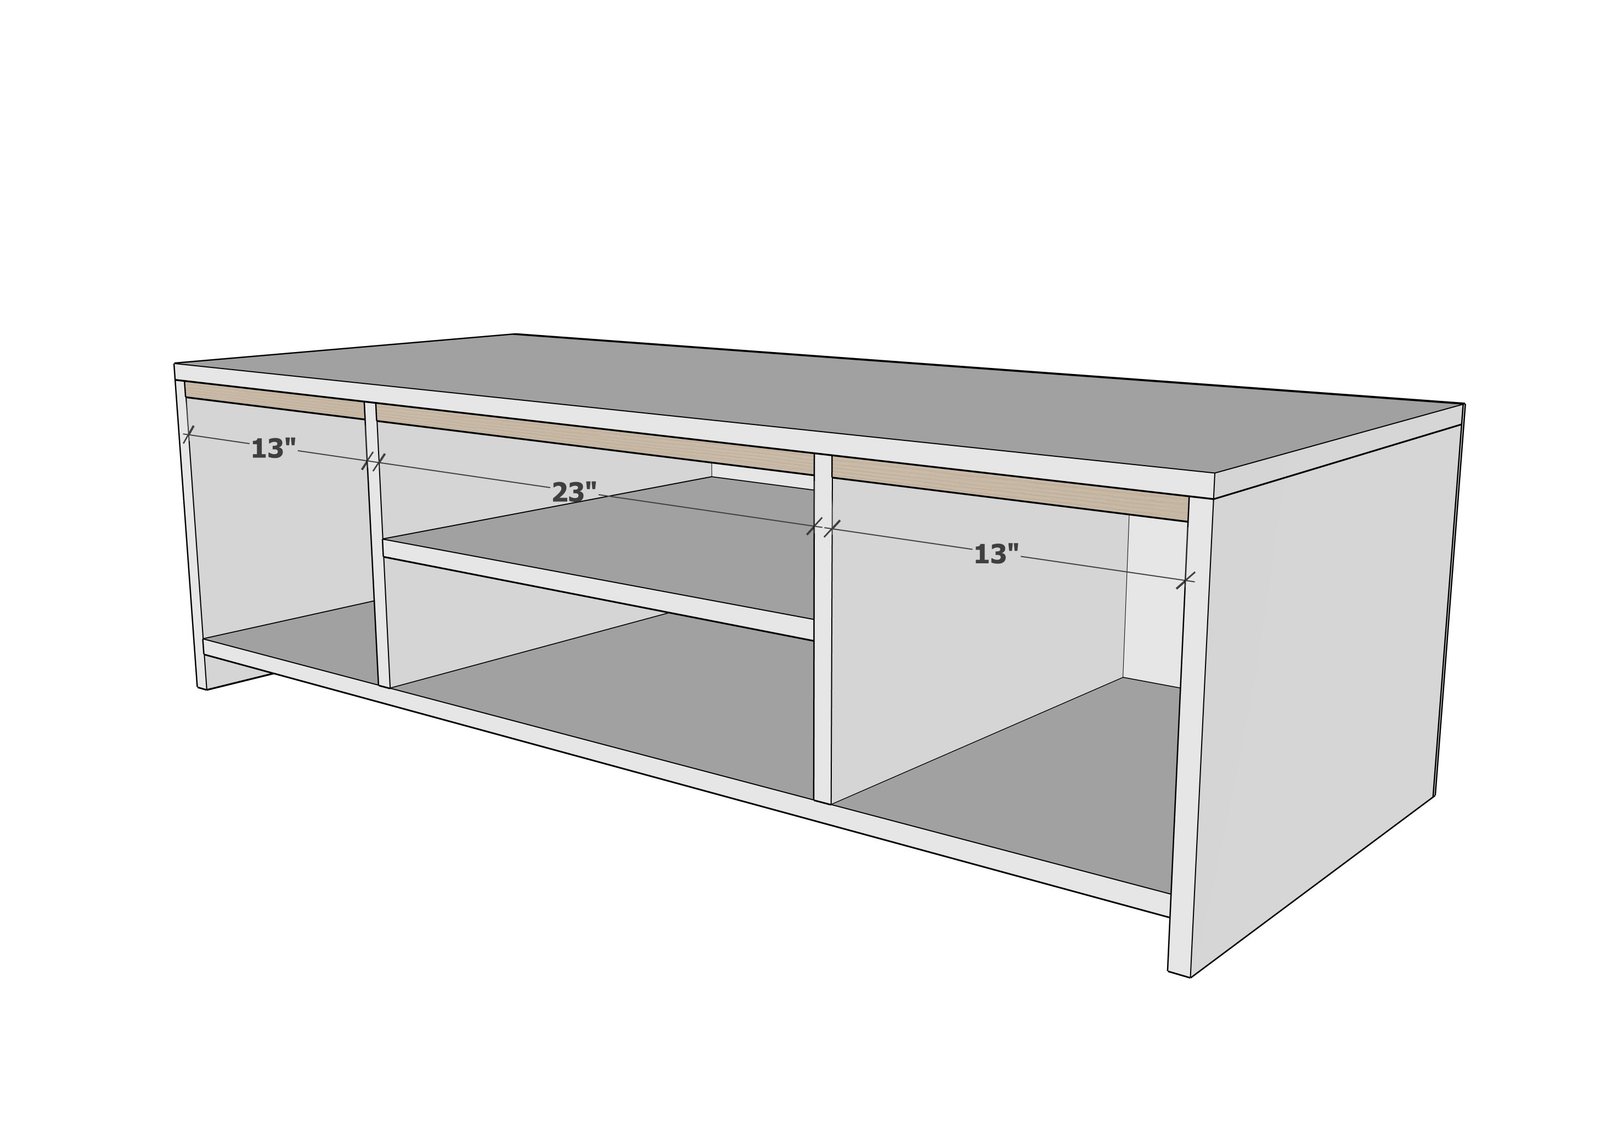
Use 1-1/4" brad nails to attach 1x2 pieces to the insides.
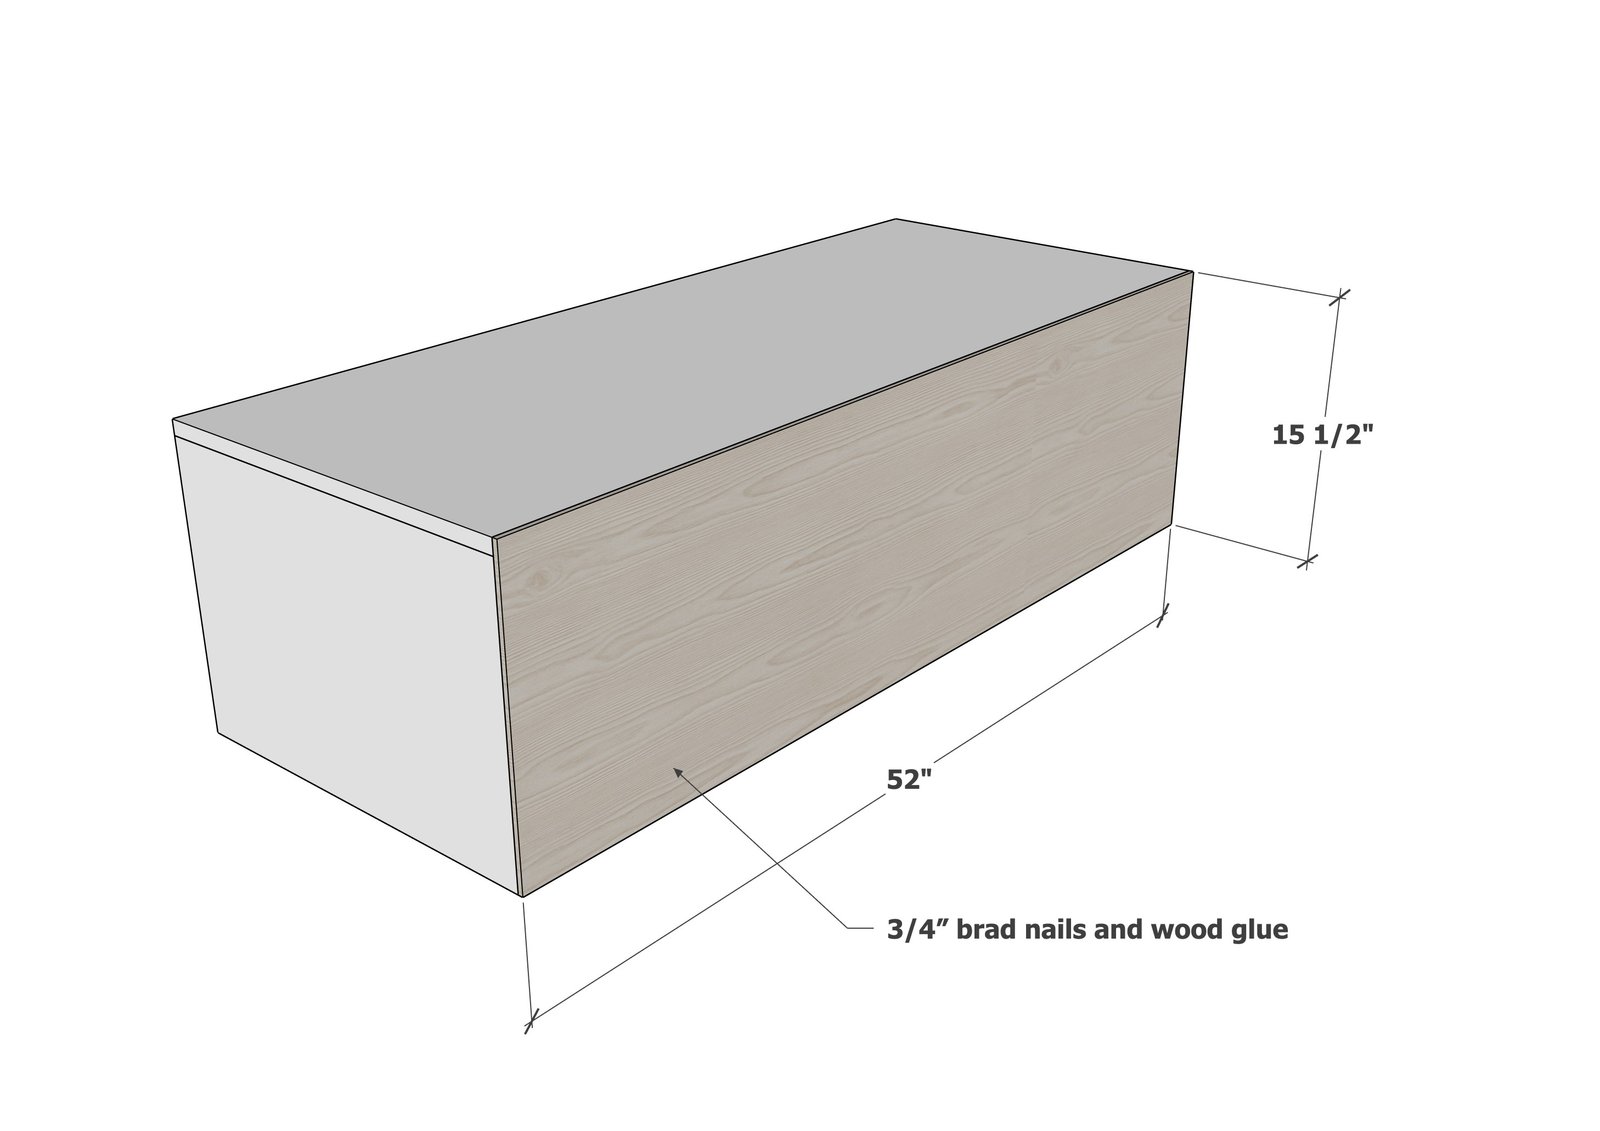
Carefully cut the back piece so it is very square.
Apply glue to back edges of the media cabinet, and attach back plywood with 3/4" brad nails. Make sure all outside edges are perfectly flush.
Step 7
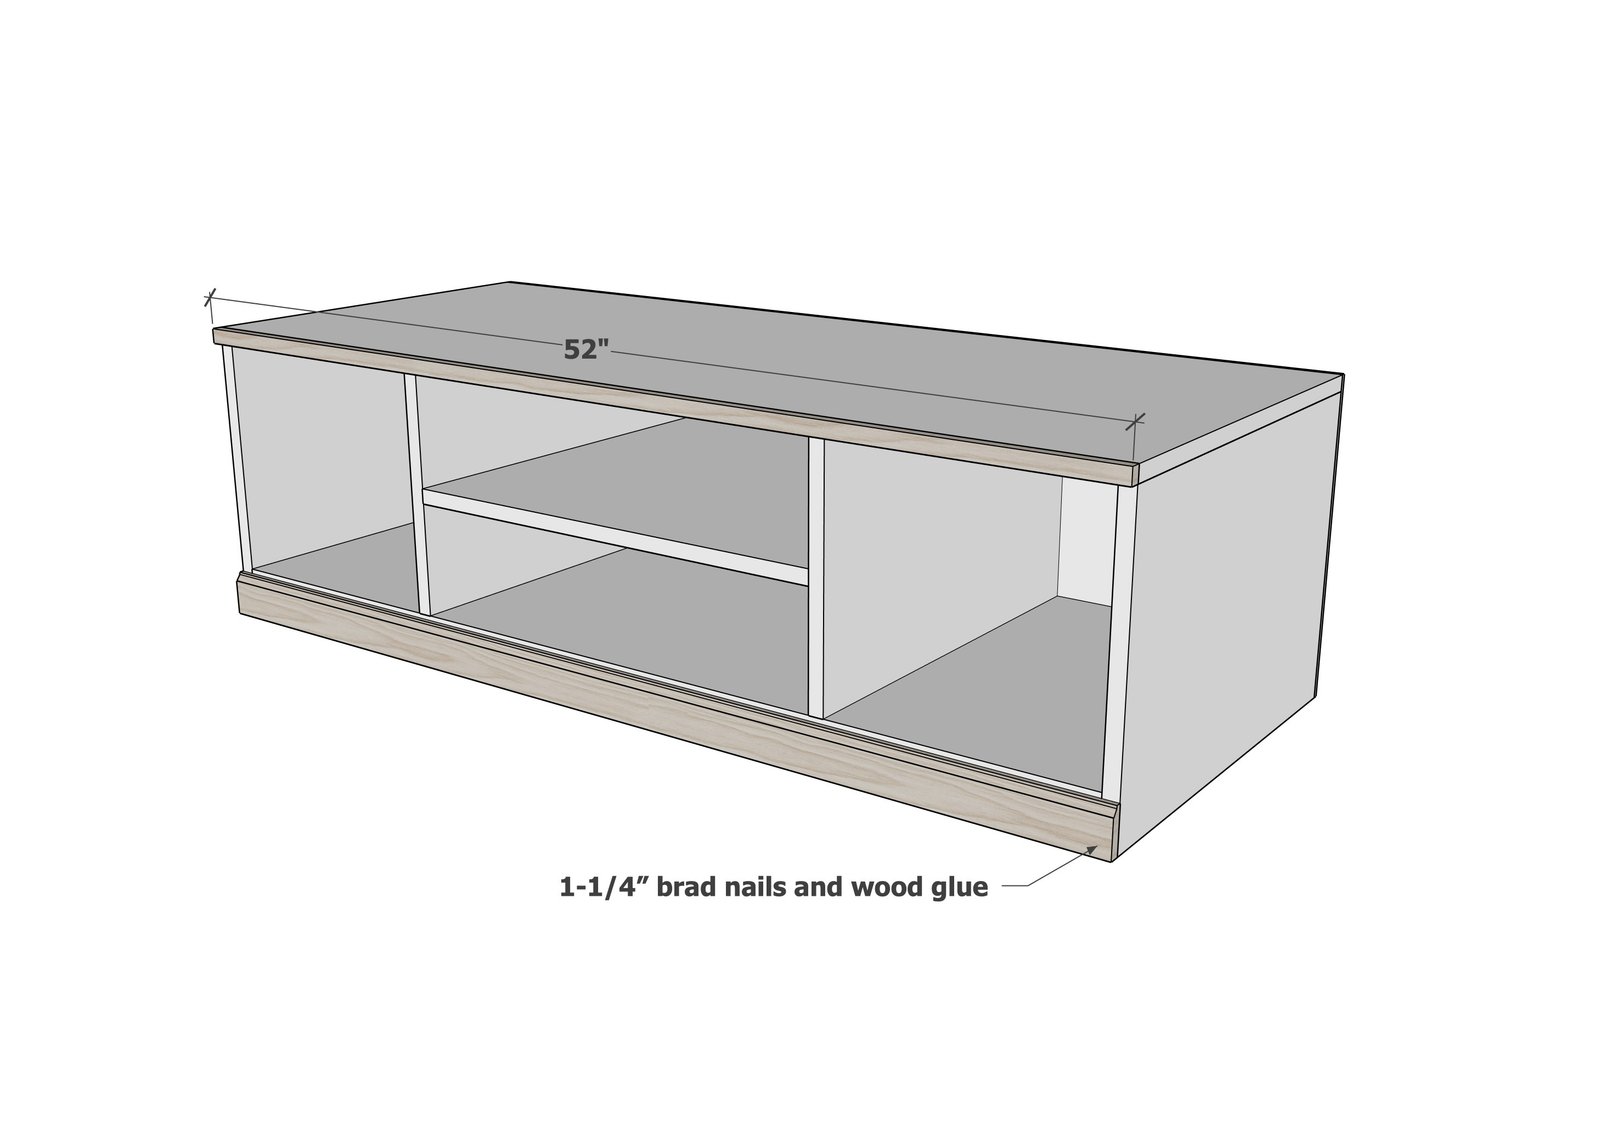
Measure and cut base moulding and nosing to fit. Attach with glue and brad nails.
Finishing
Sand all surfaces, starting with a medium grit and finishing with fine. Wipe off the dust, fill any holes or gaps with wood filler, and sand smooth once dry. Apply primer if you're painting, then finish with your choice of paint or stain and seal with a durable clear topcoat. For outdoor projects, use exterior-rated primer, paint or stain, and sealer so the piece stands up to the weather.
Source (temporary): https://www.ana-white.com/woodworking-projects/extra-wide-media-base-modular-playroom-storage-wall