Face Frame Base Kitchen Cabinet Carcass
How to build your own kitchen cabinet base plans from
Specifications
| Project type | Kitchen Cabinet Plan, Accessories and Serving |
|---|---|
| Room | kitchen |
| Style | Farmhouse Furniture |
| Difficulty | Intermediate |
Dimensions
Use the size-specific shopping and cut lists below.
Shopping List
3/4" cabinet plywood (PureBond shown) ripped into 22 1/2" widths
1x4 boards (can be pine) for bottom supports and top supports
1x2 boards for face frames in wood species matching cabinet plywood
1/4" plywood for backs if desired and also can be used to finish off exposed kitchen cabinet ends and ripped into strips to finish off toekick after cabinet installation
1 1/4" pocket hole screws
Cut List
( click to expand )
Tools
- measuring tape
- square
- pencil
- hearing protection
- kreg-jig
- circular saw
- nailer
- sander
- level
Step-by-step Instructions
Step 1
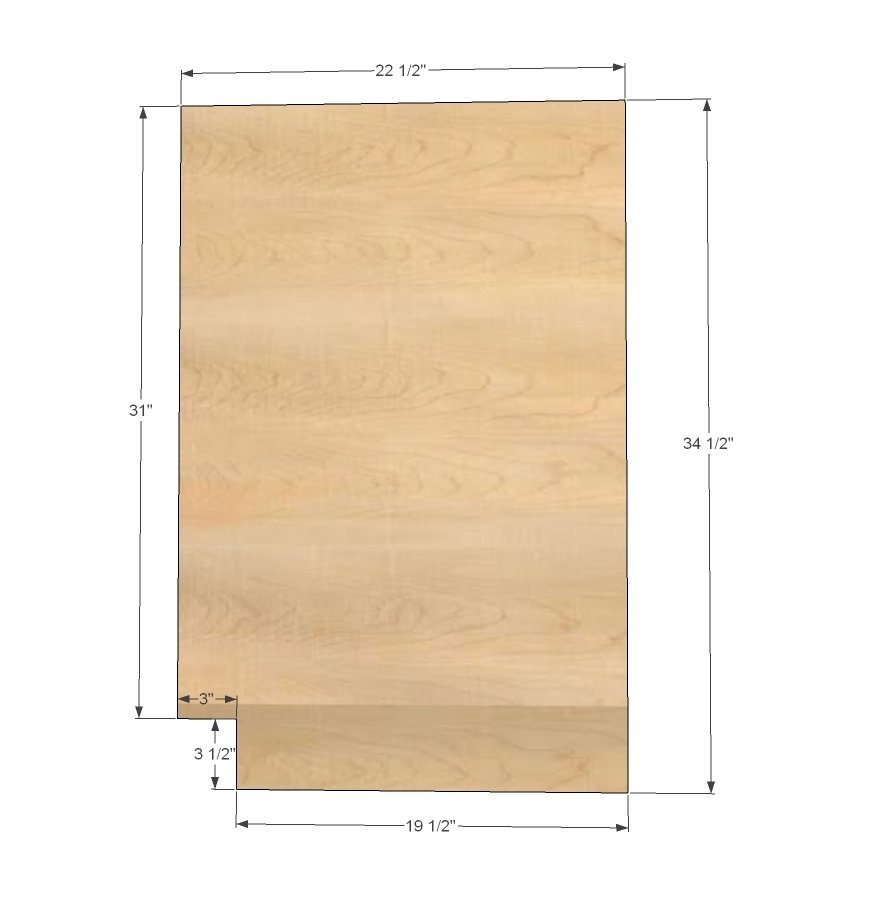
Rip plywood into 22 1/2” wide strips. Save the leftover scrap piece, you can use it as a support board in step 3, or use it to make corner bracing. For each base cabinet, you will need two sides. Cross cut the 22 1/2” strips down to 34 1/2”. Notch out toekick with jigsaw. NOTE: If you wish to attach face frames with pocket holes, drill 3/4” pocket holes on inside front edges of the sides.
Step 2
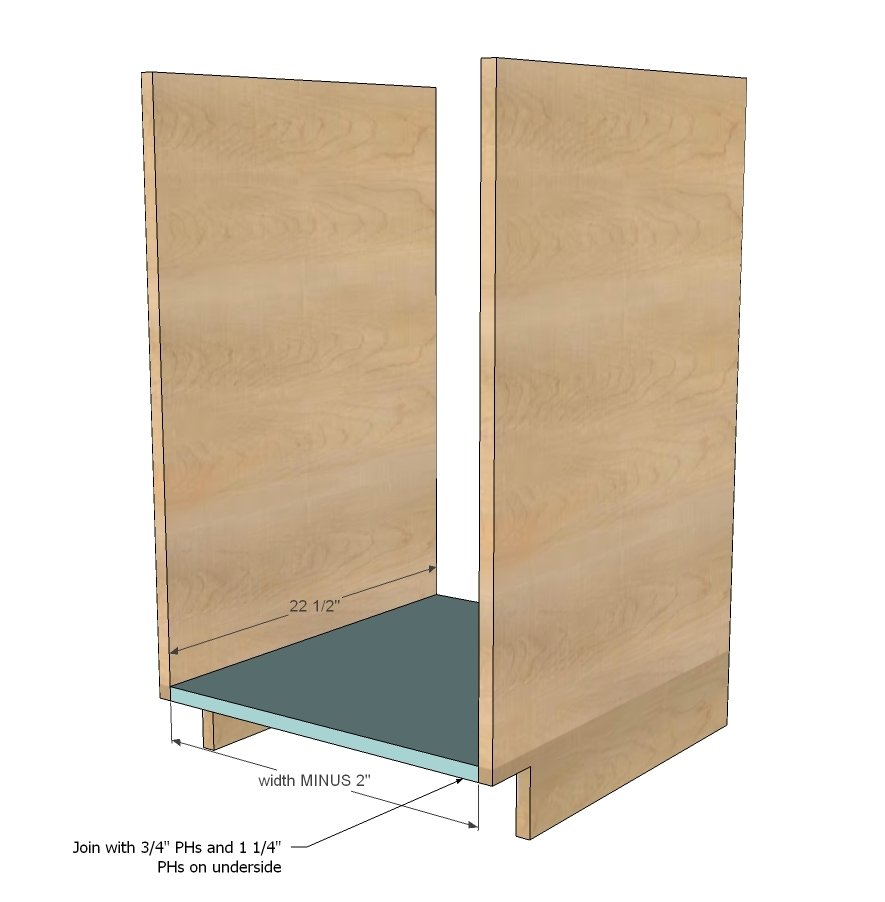
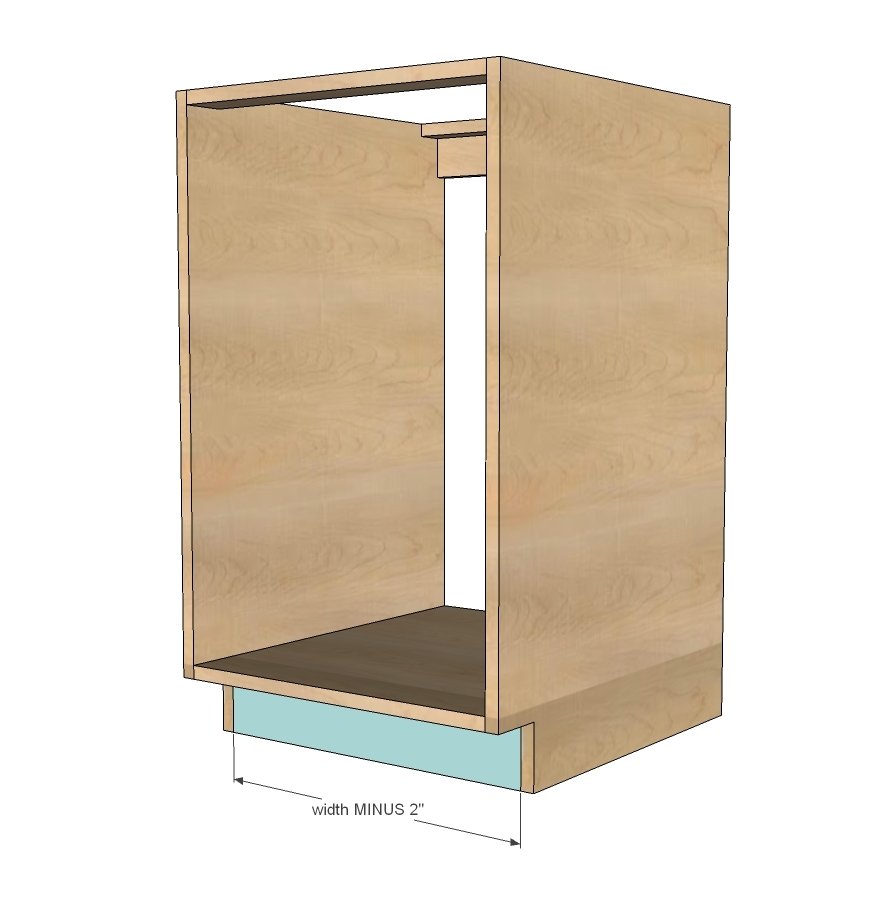
Cut shelves from 22 1/2” wide strips. You will need at minimum a bottom shelf. You can cut additional shelves as well. For all fixed shelves, drill 3/4” pocket holes on 22 1/2” long sides and attach to sides with 1 1/4” pocket hole screws. Note that your carcass is 1/2” less in overall width than your desired finished cabinet dimensions. NOTE: for face frames attached with pocket holes, also drill 3/4” PHs facing forward for attaching face frames in later steps on underside of bottom shelf.
Step 3
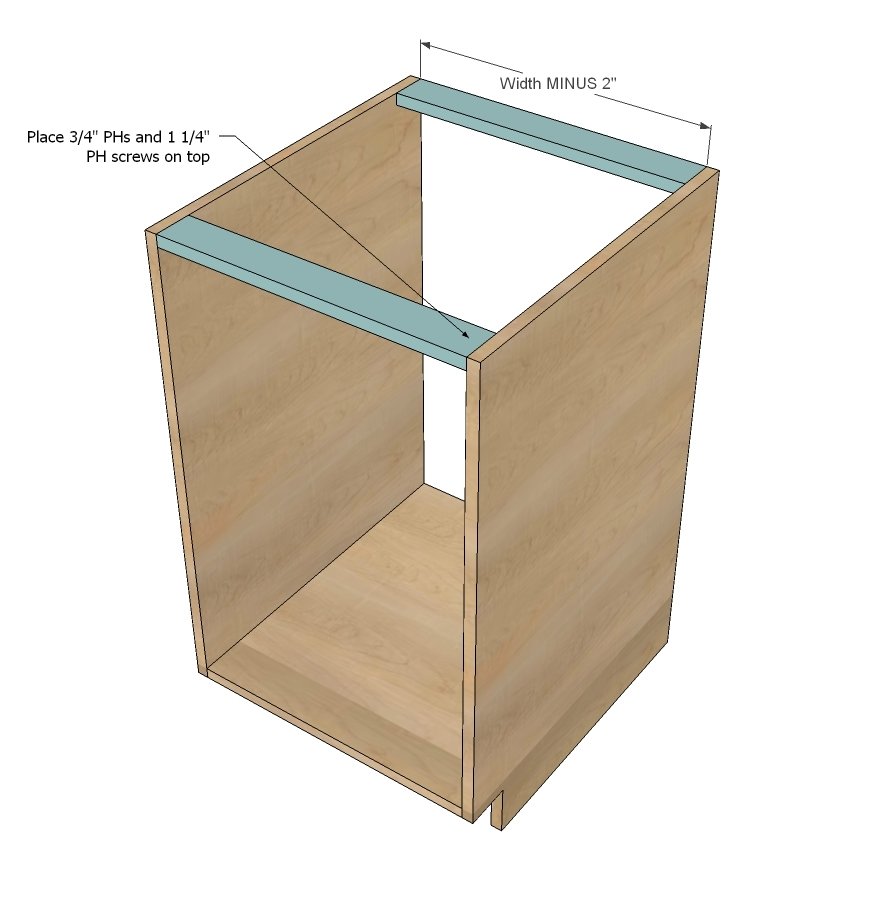
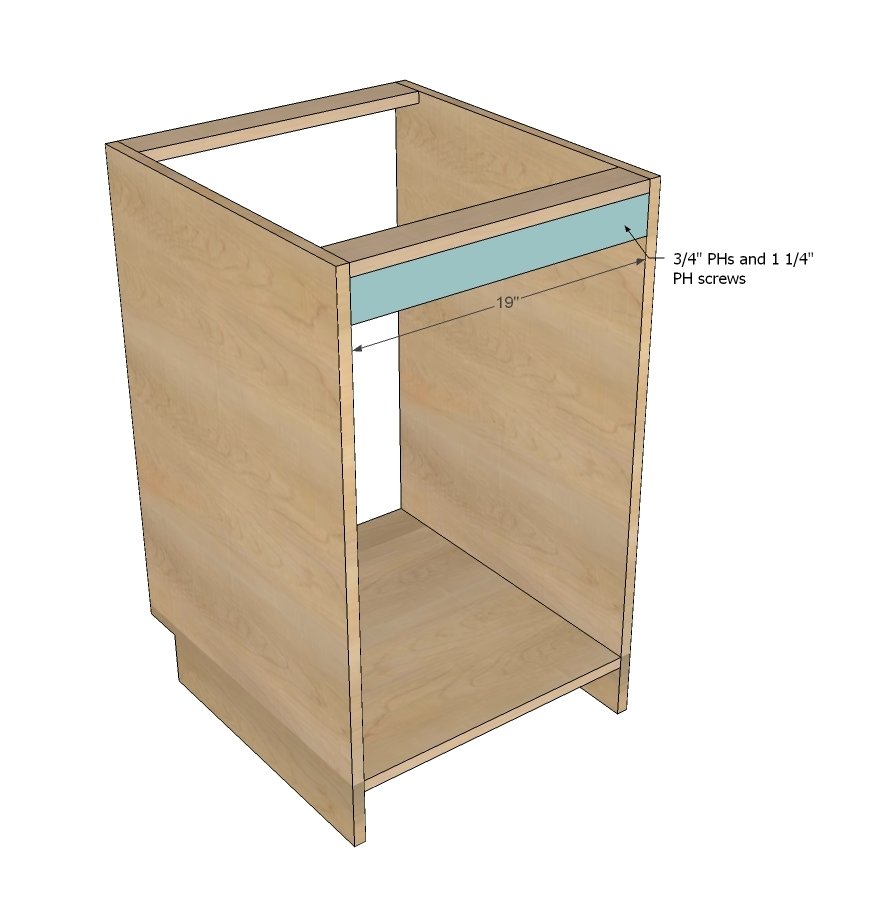
You can use the scrap plywood strips here. This just helps you square up your cabinet and gives you something to attach countertop plywood to. Place 3/4” pocket holes and 1 1/4” pocket hole screws to top - they will get covered in later steps. NOTE: For attaching face frame with pocket holes, also drill 3/4” pocket holes facing forward on top of front support.
Step 4
You can again use scrap plywood here. Also attach to top support. You will use this board to attach base cabinet to wall, and it also helps square up the back of the cabinet. A back can be attached, but it may be easier to wait to attach the backs until after you install drawers or shelves.
Step 5
Step 6
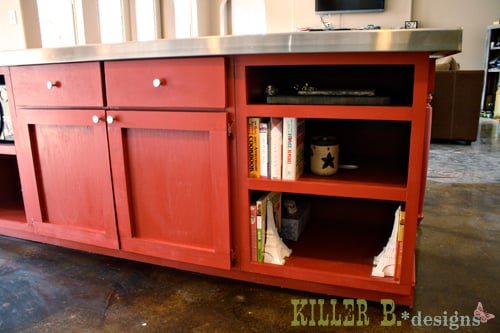
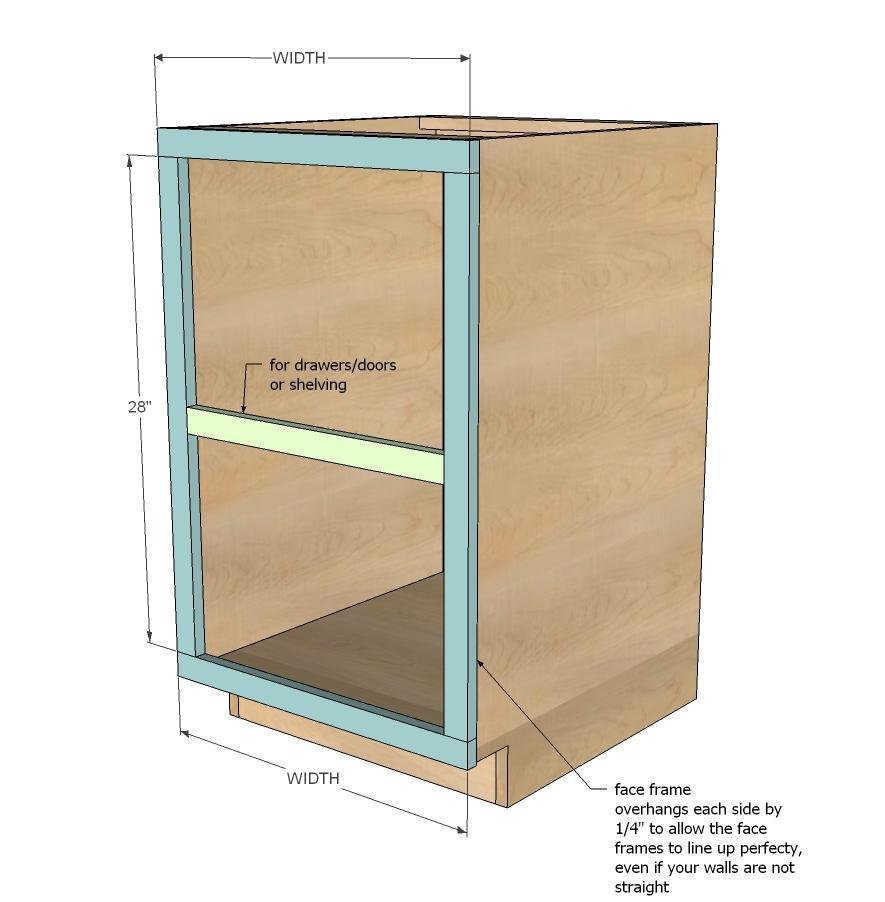
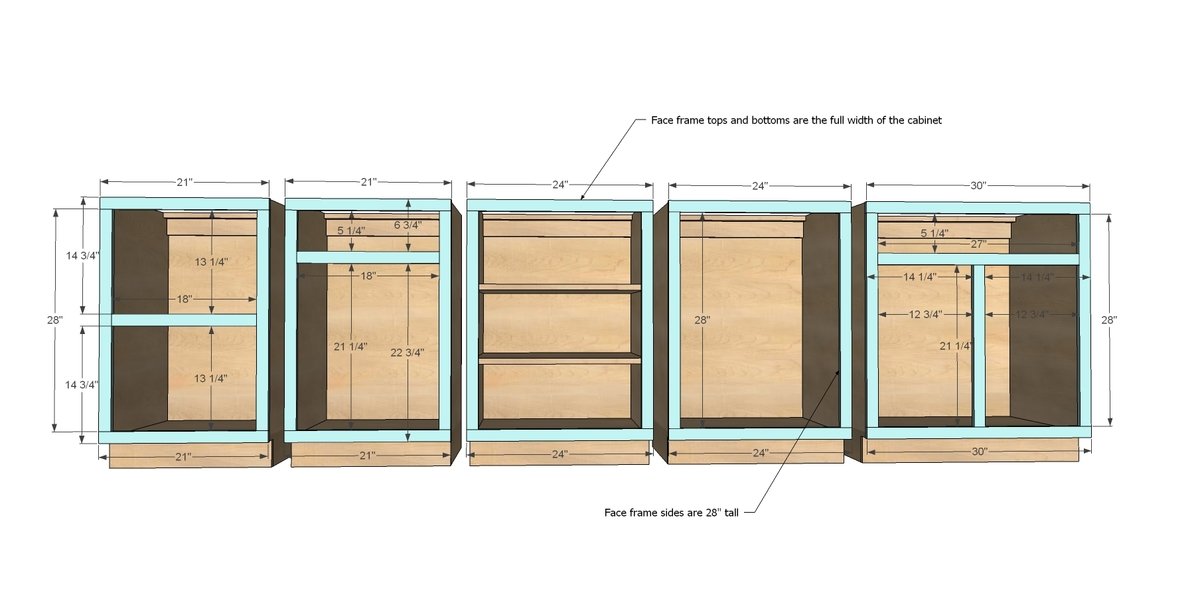
Build face frames first with pocket holes and glue. If you have trouble with wood splitting, try setting pocket holes for 1/2” stock and using 1” pocket hole screws. Note that your face frames are 1/2” wider than the carcass, or the desired with of your cabinet. This gives you some wiggle room when you install the cabinets to get your face frames to line up perfectly level. For end cabinets, you can also finish off ends with 1/4” plywood if desired (ie if you were using Melamine for carcasses and Maple for face frames and doors, you would finish off ends and toe kick with maple hardwood plywood to hide all Melamine) I love how Brooke finished off her kitchen island ends with beadboard.
Step 7
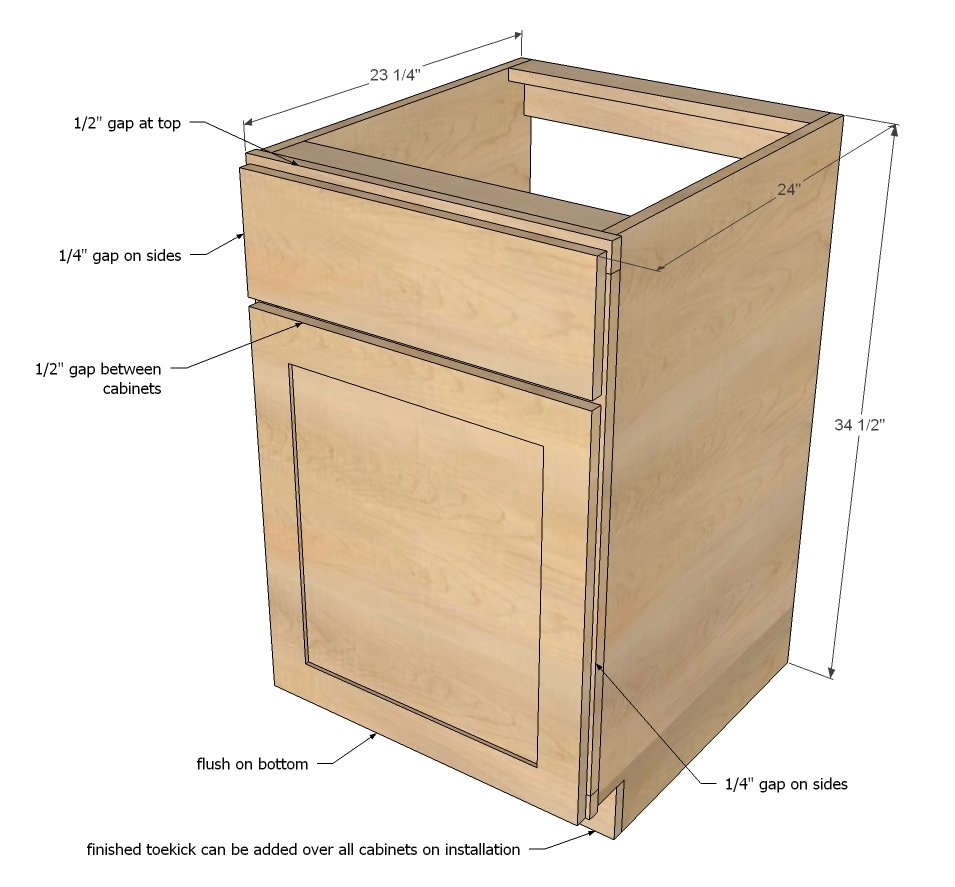
To give you an idea of the placement of face frame boards for drawers/doors here is the diagram I sent Brooke.
Step 8
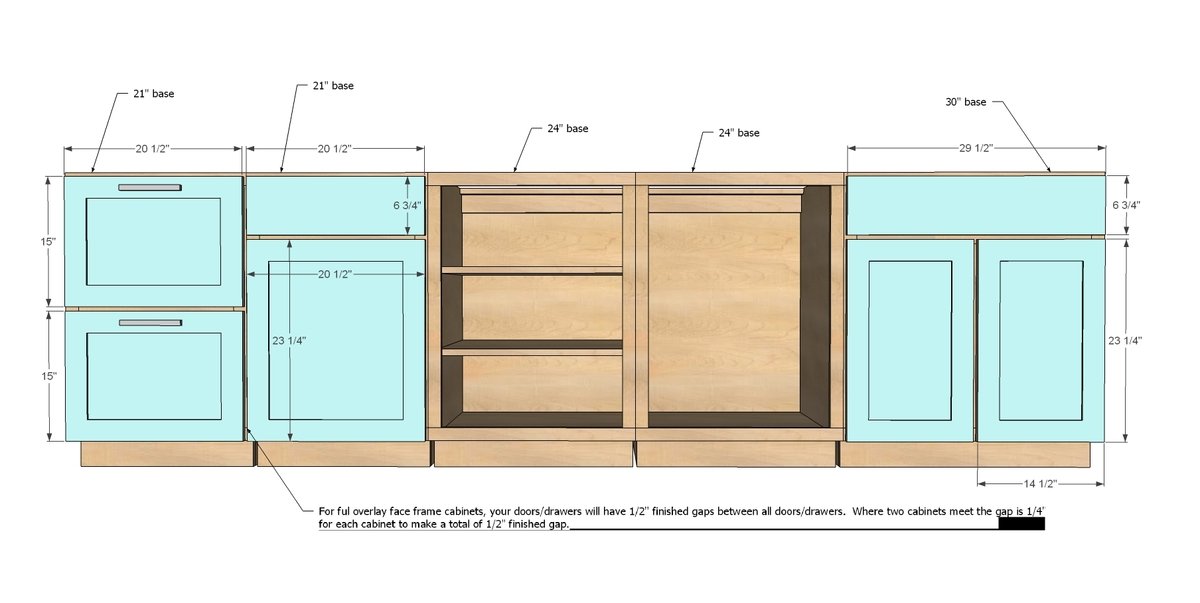
And then here is the diagram I sent Brooke for the door sizes. You'll want a finished reveal gap of 1/2" between everything for full overaly doors/drawers, so between cabinets, that's 1/4" per cabinet, but between doors/drawers on the same cabinet it's 1/2" gap. I'll get into this more when we do plans for drawers and doors and accessories and of course wall cabinets.
Finishing
Sand all surfaces, starting with a medium grit and finishing with fine. Wipe off the dust, fill any holes or gaps with wood filler, and sand smooth once dry. Apply primer if you're painting, then finish with your choice of paint or stain and seal with a durable clear topcoat. For outdoor projects, use exterior-rated primer, paint or stain, and sealer so the piece stands up to the weather.
Source (temporary): https://www.ana-white.com/woodworking-projects/face-frame-base-kitchen-cabinet-carcass