Fancy Arch Bed
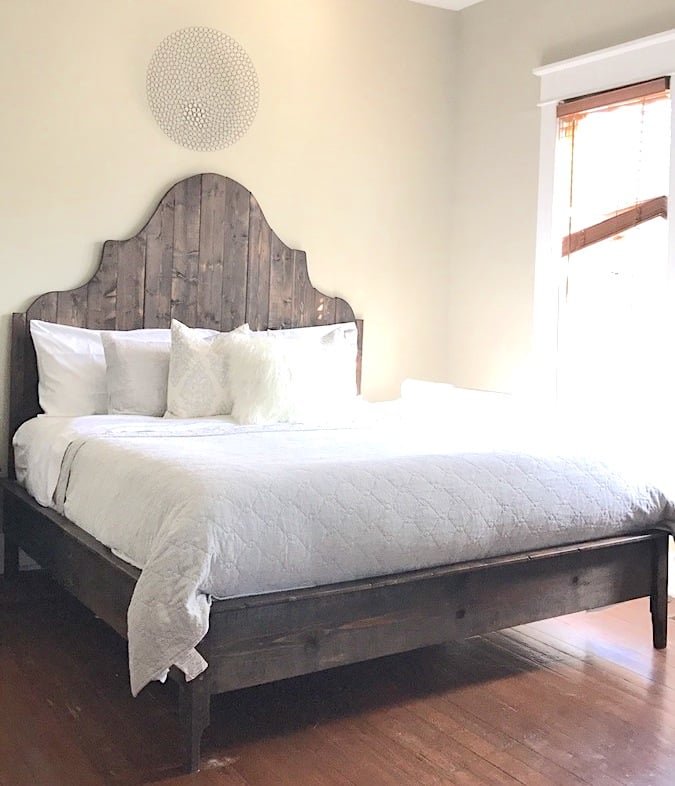
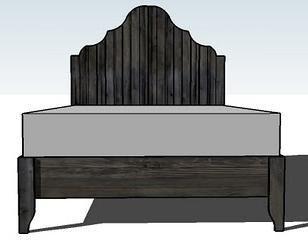
This fancy arched bed will make a glamorous statement in your bedroom! Plans are for queen sized bed. with diagrams from
Specifications
| Project type | Beds and Bed Frames |
|---|---|
| Room | Bedroom |
| Style | Cottage Style Furniture Plans |
| Difficulty | Advanced |
| Estimated cost | $100-$150 |
Dimensions
Use the size-specific shopping and cut lists below.
Shopping List
- 14 – 1×4 Boards, 8′ Long Furring Strips are the cheapest, but select good straight boards
- 12 – 1×3 Boards, 8′ Long Furring Strips are cheapest
- 2 – 1×2 Boards, 8′ Long Furring Strips are cheapest
- 2 – 1×10, 8′ Length
- 1 – 1×10, 6′ Length
- 1 – 1×8, 6′ Length
- 1 - 2×6, 8′ or Stud Length
- 2″ Screws (self tapping star bit)
- Wood Glue
- Wood Filler
Cut List
CUT LIST for the HEADBOARD
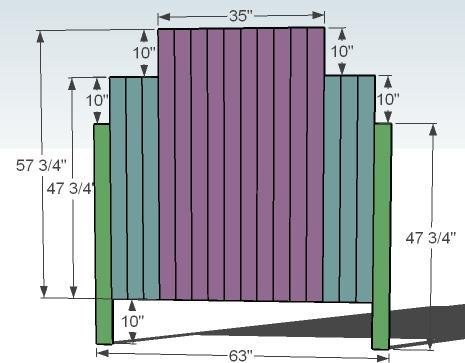
- 10 – 1×4 @ 57 3/4″ (Panel Pieces)
- 8 – 1×4 @ 47 34″ (Legs)
- 2 – 1×2 @ 8″ (Leg Support Pieces)
CUT LIST FOR THE BED FRAME
- 2 – 1×10 @ 81 1/2″ (Side Rails)
- 1 – 1×10 @ 60″ (Foot Rail)
- 1 – 1×8 @ 60″ (Headboard Rail)
- 2 – 1×4 @ 17 1/2″ (Outer Leg)
- 2 – 1×2 @ 8″ (Inner support leg)
CUT LIST FOR THE PLATFORM
- 1 – 2×6 @ 60″ (Center Support)
- 12 – 1×3 @ 60″ (Slats)
Tools
- measuring tape
- square
- pencil
- safety glasses
- hearing protection
- kreg-jig
- drill
- sander
Step-by-step Instructions
Step 1
PANEL With a Kreg Jig™, join all of the panel board together, starting in the middle and working your way out. Make sure you alternate the grain of the boards (look at the end edges and alternate bark side up, bark side down) so that the panel doesn’t warp to one side. Try to keep the bottoms flush as you create this panel. But when you put the final two boards on (the green boards) check for square by taking a square from the outermost corners of the green boards to the opposite dimensional on the opposite green board. For those of you who do not have a Kreg Jig™, it is possible to use 1x2s glued and nailed to the back in a perpendicular direction to hold your boards together (use 1 1/4″ nails) but you will run into an issue of not being able to keep the boards connected at the top edges (where the top curves, see below diagram).
Step 2
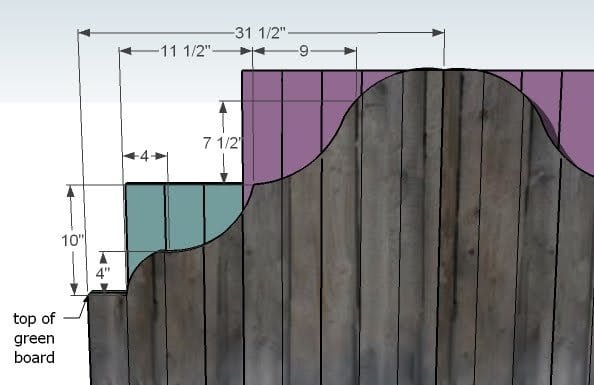
SCALLOPED PATTERN Using the Measurements shown above, mark the points listed from the coordinates shown. Then from each point draw an arch between those points (alternating up and down as shown in the pattern). You can use a variety or round objects, I use lids, buckets, and even take to freehand when necessary. When you are happy with the pattern, carefully cut one side, SAVING YOUR PIECES. Then take the scraps and use them to draw the pattern on the other side of the headboard. Cut the other side of the headboard to match.
Step 3
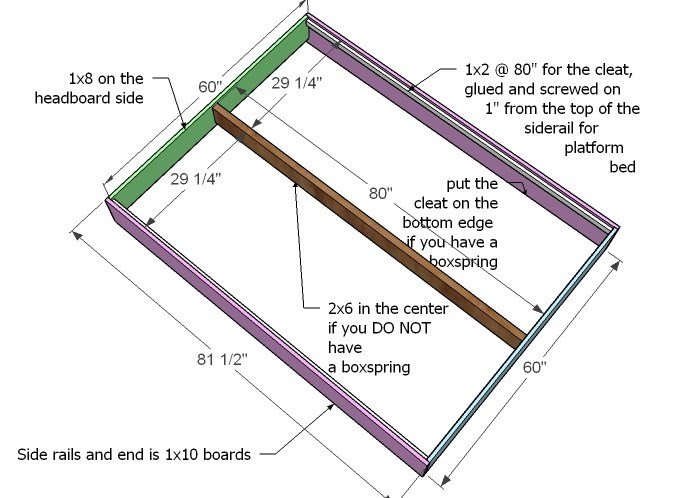
BED FRAME You can click images for a larger view. Begin by building your box of 1x10s and the 1×8 for the front. Keep top edges flush (simply build the box upside down, with the 1×8 coming up shy 2″ on it’s end). Use 2″ screws and glue. Flip over and add the cleats. If you have a box spring, fasten the cleats flush with the bottom edge of the siderails). If you DO NOT have a box spring, build as shown above, fastening your cleats 1″ from the tops of the siderails, and also the center support (the 2×6 board) 1″ from the top of the top and bottom boards, as shown above. The above view is a TOP VIEW for platform installation. Use 2″ screws and glue for the 2×6, 1 1/4″ screws and glue for the cleats.
Step 4
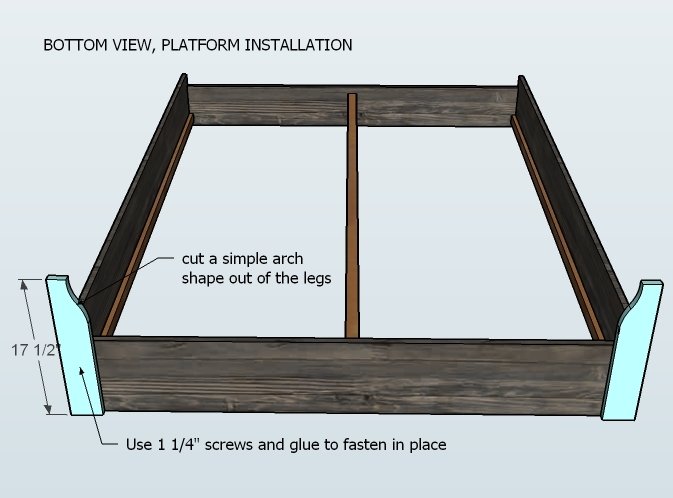
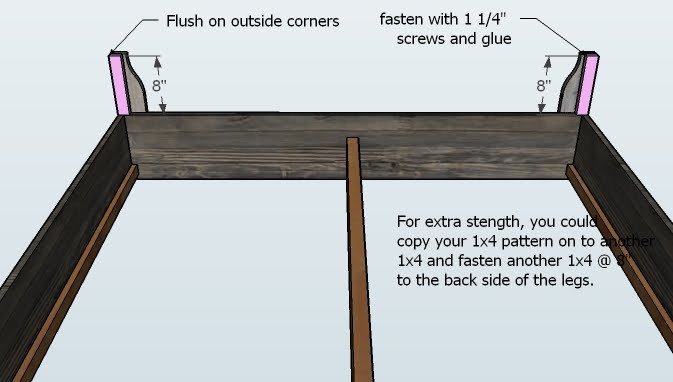
LEGS Cut an arch shape out of the legs as shown above. Then fasten with 1 1/4″ screws and glue to the end of the bed, as shown above, keeping outside and top edges flush.
Step 5
Step 6
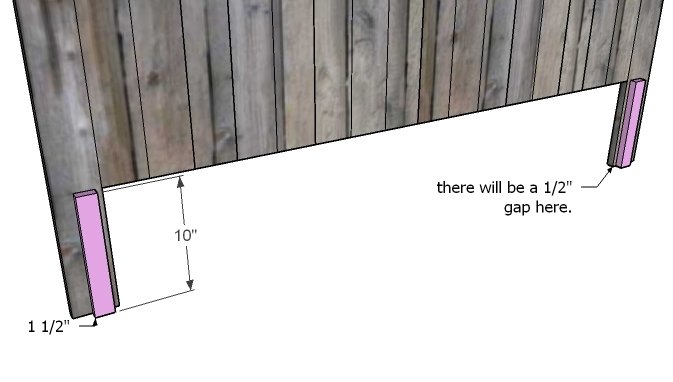
HEADBOARD LEG SUPPORTS Use 1 1/4″ screws or nails to fasten the headboard leg support sin place as shown above.
Step 7
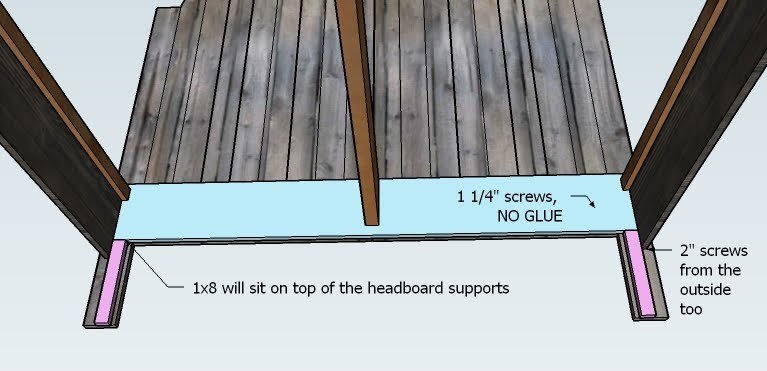
ASSEMBLY Assembly is super simple. Simply place the bed frame in line with the headboard, lining up the 1×8 frame board with the headboard leg supports. You can use 1 1/4″ screws, but you could also purchase bolts, nuts and washers to make the bed super easy to disassemble.
Step 8
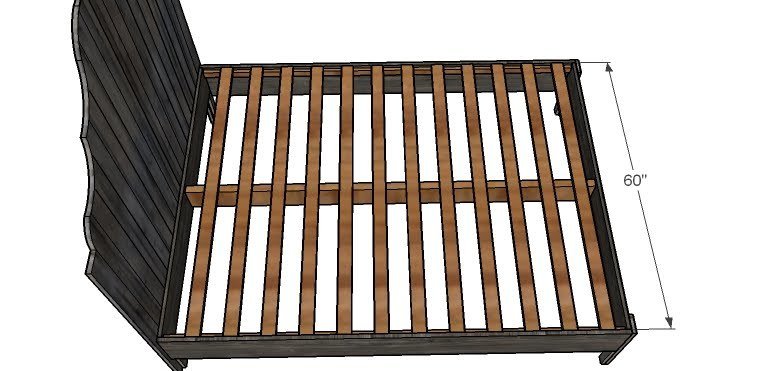
SLATS If you choose the platform installation, lay the slats on top of the side rails and screw down. Do not use glue in this step.
Finishing
Sand all surfaces, starting with a medium grit and finishing with fine. Wipe off the dust, fill any holes or gaps with wood filler, and sand smooth once dry. Apply primer if you're painting, then finish with your choice of paint or stain and seal with a durable clear topcoat. For outdoor projects, use exterior-rated primer, paint or stain, and sealer so the piece stands up to the weather.
Source (temporary): https://www.ana-white.com/woodworking-projects/fancy-arch-bed