Fancy Closet Tower
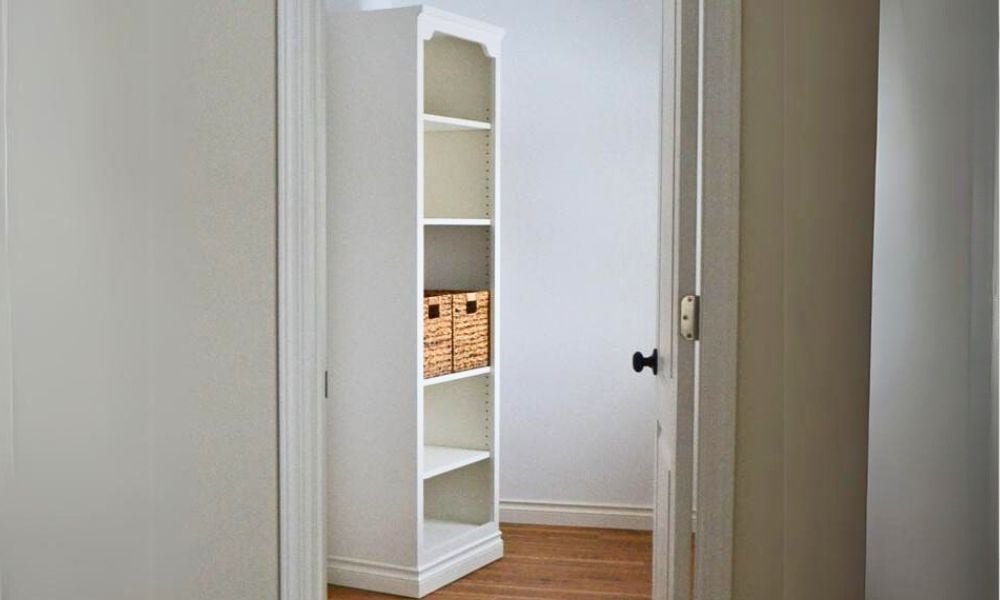
This beautiful closet tower is like a piece of furniture in the closet. Simply add closet rods to complete the closet. We love that this tower sits on the floor for easy installation. from
Specifications
| Project type | Bookshelf and Bookcase Plans |
|---|---|
| Room | Bedroom |
| Style | Cottage Style Furniture Plans |
| Difficulty | Intermediate |
| Estimated cost | $50 - $100 |
Dimensions
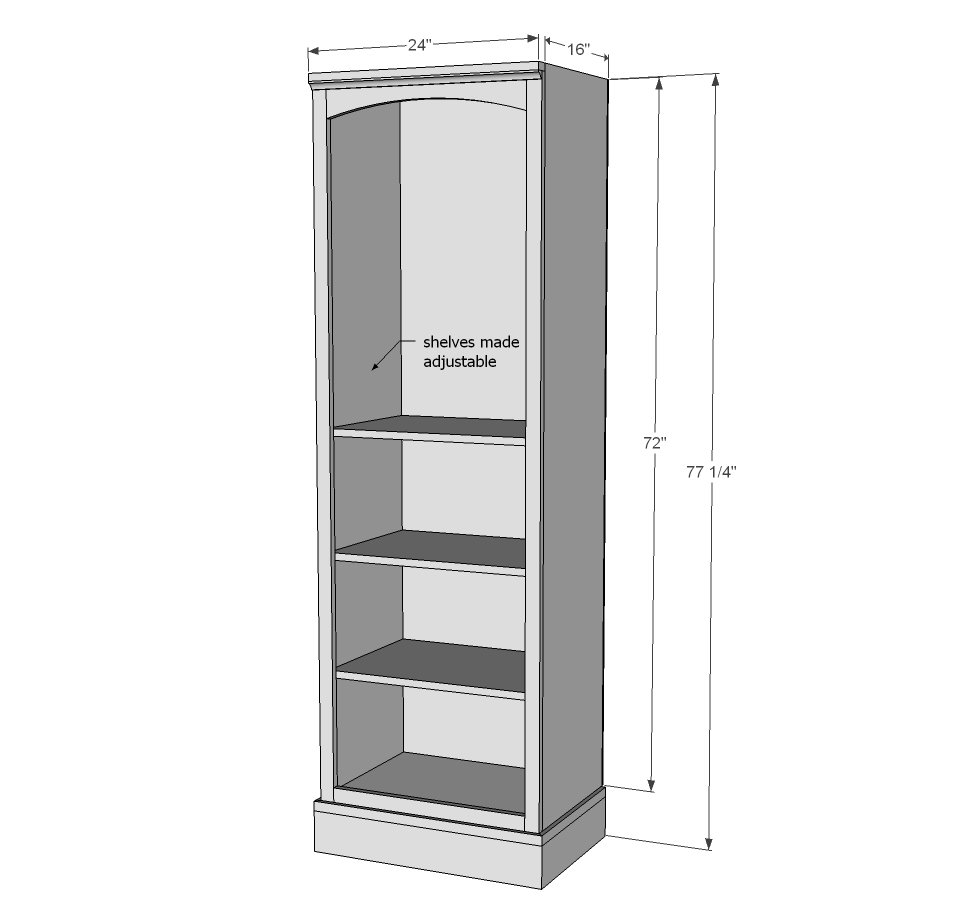
Use the size-specific shopping and cut lists below.
Shopping List
- 1 - full sheet 3/4" plywood cut into three strips 15-3/4" wide and 8 feet long (you'll need more for additional shelving - this will only cover the tower)
- 1 - full sheet of 1/4" plywood (you won't need this if you do fixed shelves, but if all of your shelves are adjustable like mine, you will need the back for support)
- 2 - 1x2 @ 8 feet long (I used poplar)
- 1 - 1x4 @ 2 feet long (I used pine for my header)
- 1 - 2x2 @ 8 feet long
- 1 - 3/4" x 3/4" inside corner moudling for trimming out header (optional)
- about 6 feet of base moulding
- 1-1/4" pocket hole screws (recommended) or 2" self tapping wood screws
- 1-1/4" brad nails for attaching face frame
- 3/4" nails for attaching back
- wood glue
- Shelf pins
- Plywood Edge banding and an iron
Cut List
MAIN CARCASS
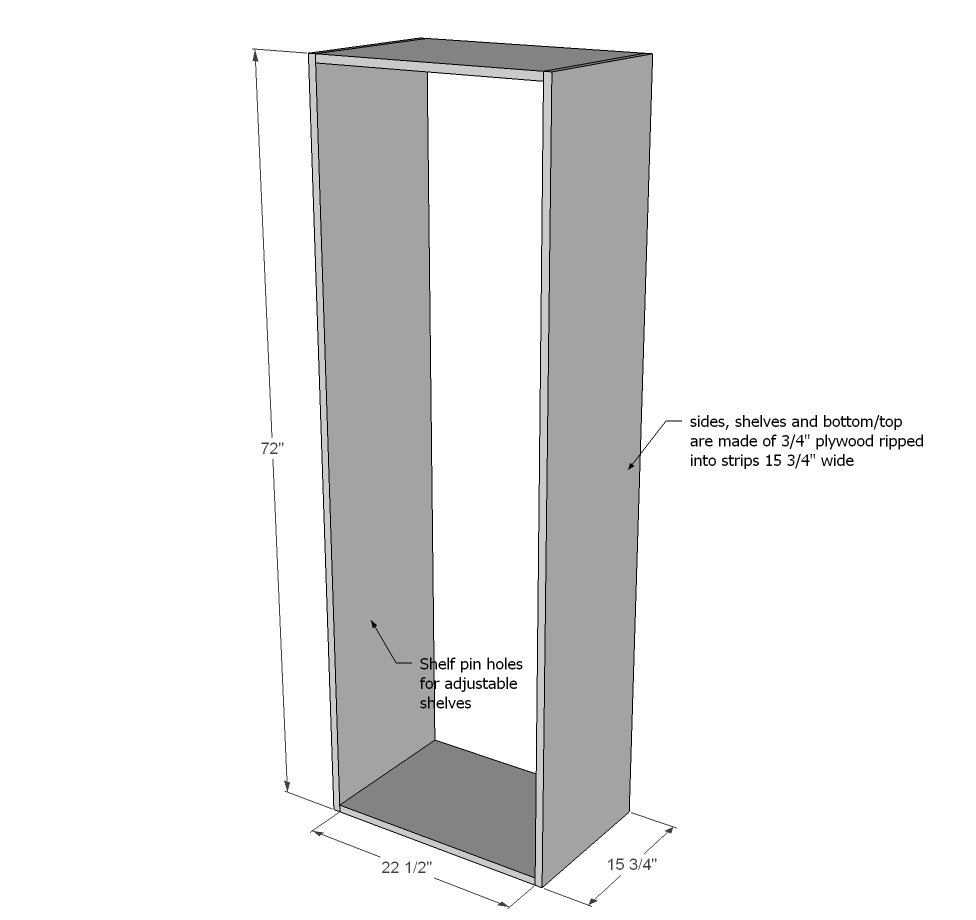
- 2 - 3/4" plywood @ 15 3/4" x 72" (sides)
- 6 - 3/4" plywood @ 15-3/4" x 22-1/2" (Shelves**, top and bottom)
- 1 - 1/4" plywood @ 24" x 72" (back)
FACE FRAME
- 1 - 1x2 @ 24"
- 2 - 1x2 @ 71 1/4"
- 1 - 1x2 @ 21"
- 1 - 1x4 @ 21"
BASE - Optional
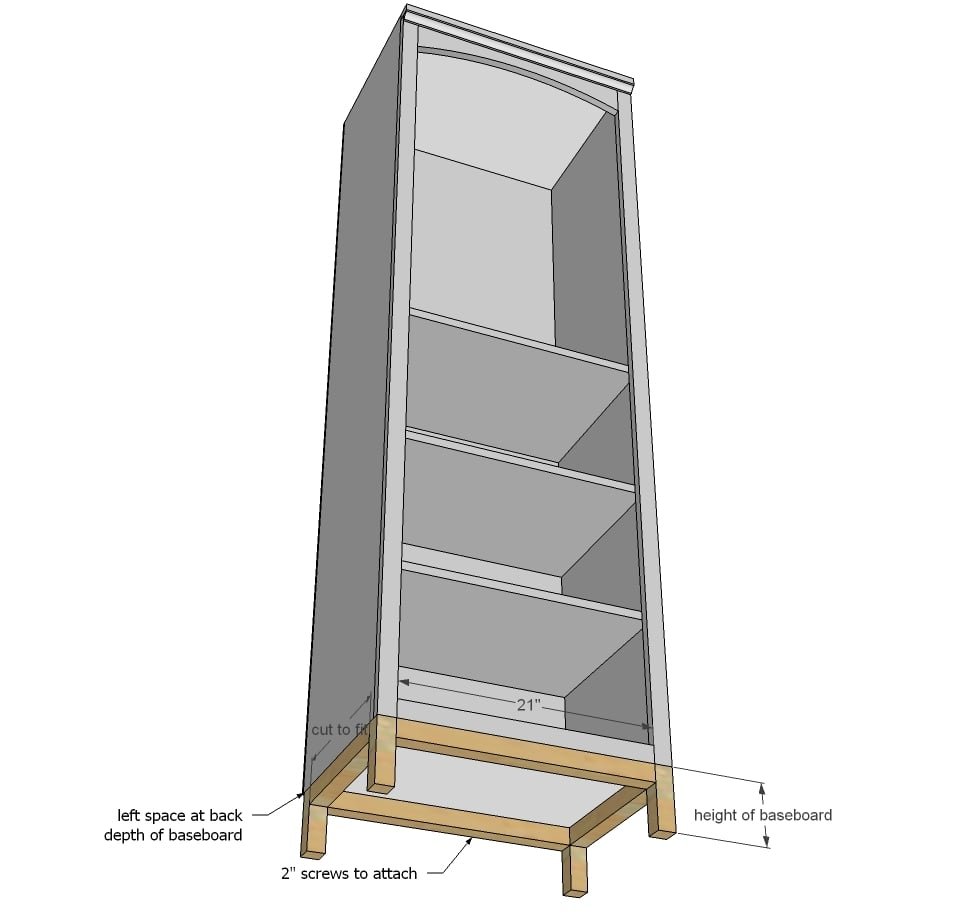
- 4 - 2x2 @ height of baseboard
- 2 - 2x2 @ 21"
- 2 - 2x2 @ outside depth of tower MINUS baseboard depth baseboard trim cut to fit
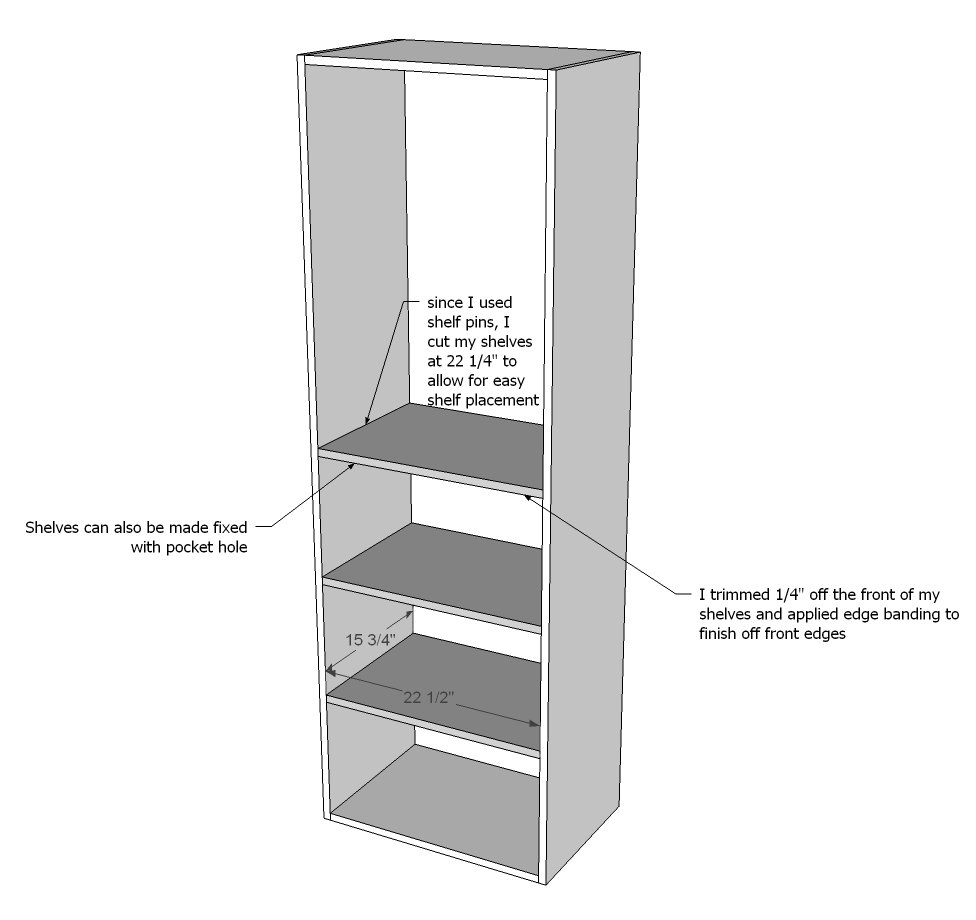
**For shelves that are adjustable with shelf pins (as mine are) you may need to trim the shelves down by 1/4" in width and depth to allow for edge banding and shelf pin spacing)
Tools
- measuring tape
- square
- pencil
- safety glasses
- hearing protection
- kreg-jig
- drill
- circular saw
- jigsaw
- nailer
- sander
Step-by-step Instructions
Step 1
Start by building the basic box - I used my Kreg Jig with 3/4" pocket holes and 1-1/4" pocket hole screws, placing pocket holes on the outsides (top and bottom of top and bottom).
Step 2
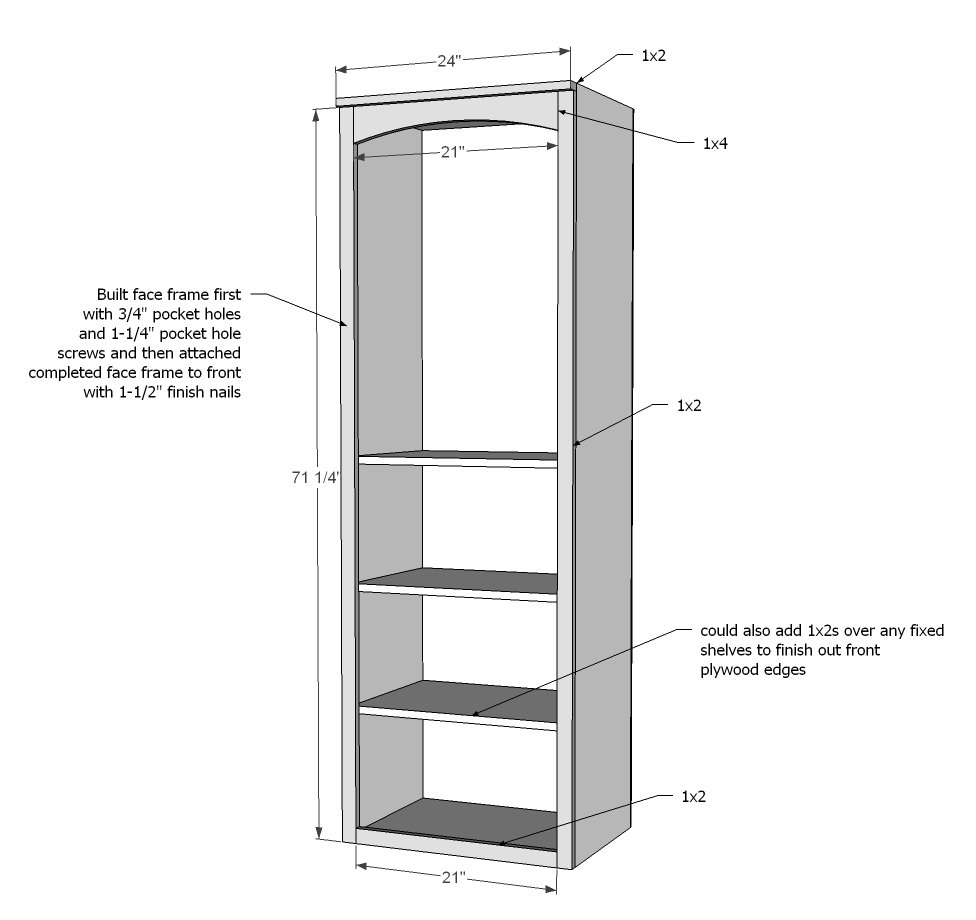
I used a shelf pin jig to drill shelf pin holes for adjustable shelves. If you do this, you will need to trim your shelves down so they fit the shelf pins (for my shelf pins this ended up being 1/4" in overall width) and also trimmed off 1/4" to allow for edge banding and easy shelf placement from the overall depth of the shelf. For fixed shelves, the shelves can be placed at any height. You will still need to do something to finish off the front plywood edges. For a painted finish, you can apply wood filler to the front plywood edge, sand, and paint. For a stained finish, edge banding is recommended (although I've seen lots of stained plywood edges on modern furniture an it's really works too!). Another option is to integrate 1x2s into the face frame that will cover the front plywood edges.
Step 3
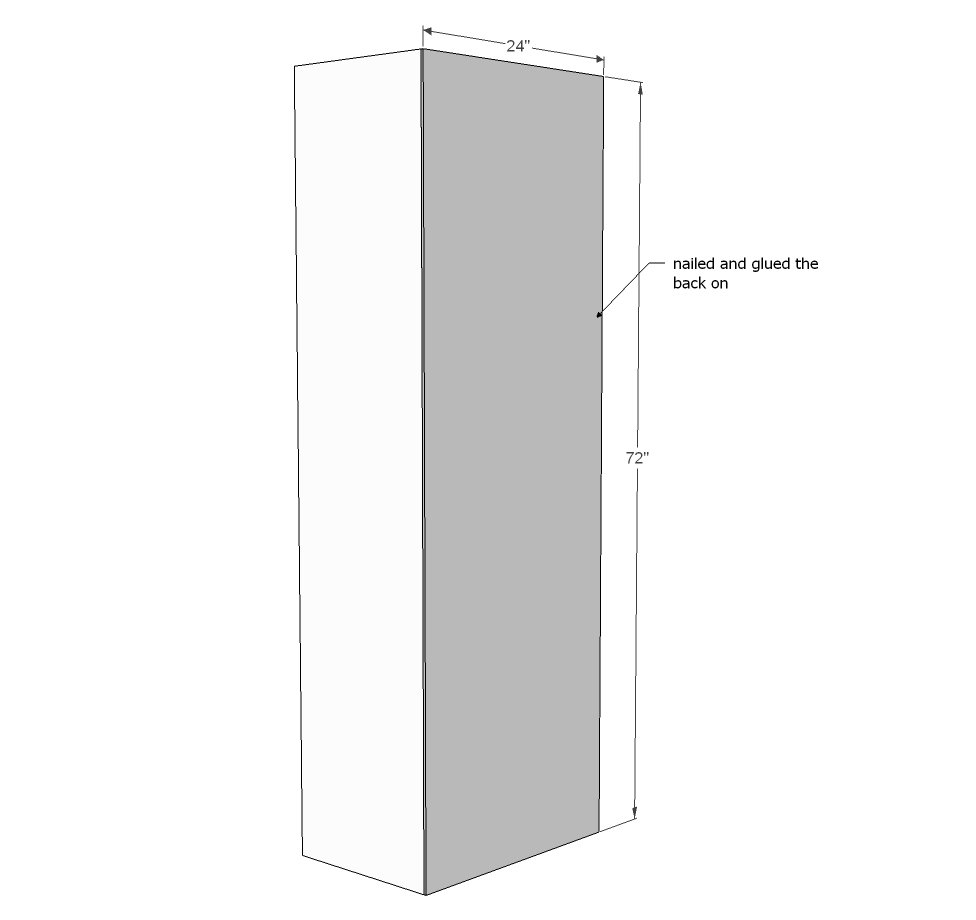
If you don't do fixed shelves, you will need a back to keep the tower from splaying out in the center. I attached my back with nails and glue.
Step 4
The face frame really helps make the front look nice and finish out the front plywood edges. I built my face frame first with pocket holes, and then attached the whole thing to the front of the tower with glue and finish nails.
Step 5
Step 6
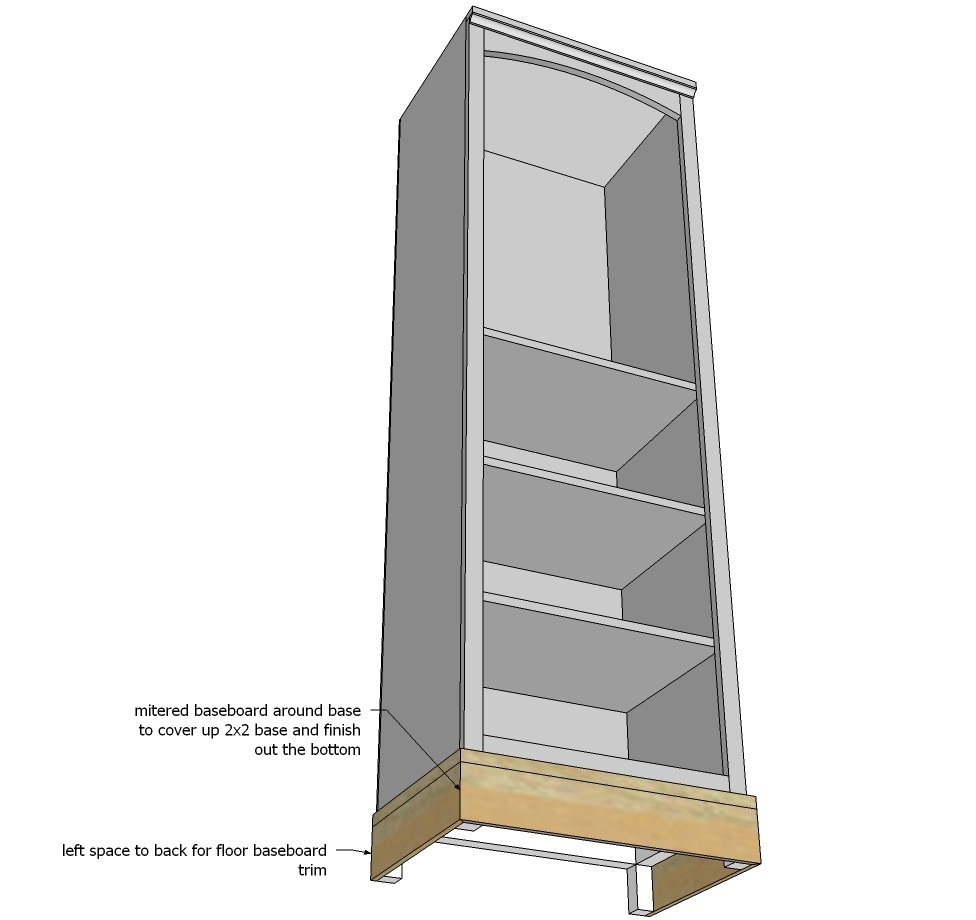
Then I trimmed out the base of the tower in matching baseboard to the closet baseboard, mitering corners and using a finish nailer and glue to attach to the 2x2 base. I also added the 3/4" x 3/4" inside corner moudling to the top header and cut the top header out with a jigsaw to add detail - but this is all just for decoration - not sturctural.
Finishing
Sand all surfaces, starting with a medium grit and finishing with fine. Wipe off the dust, fill any holes or gaps with wood filler, and sand smooth once dry. Apply primer if you're painting, then finish with your choice of paint or stain and seal with a durable clear topcoat. For outdoor projects, use exterior-rated primer, paint or stain, and sealer so the piece stands up to the weather.
Source (temporary): https://www.ana-white.com/woodworking-projects/fancy-closet-tower