Fancy X Farmhouse Table
Build the Fancy X Farmhouse Table from 2x4s and lumber for $65. A reader favorite, this table has been built thousands of times! We also have plans for a matching bench and lots more farmhouse furniture plans.
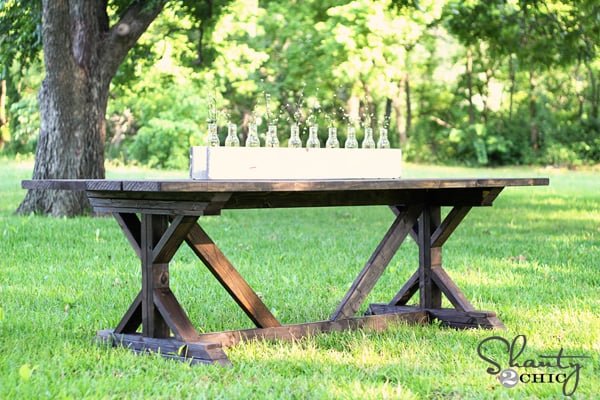
Specifications
| Project type | Dining Table Plans |
|---|---|
| Room | dining room |
| Style | Farmhouse Furniture |
| Difficulty | Intermediate |
| Estimated cost | $50 - $100 |
Dimensions
Use the size-specific shopping and cut lists below.
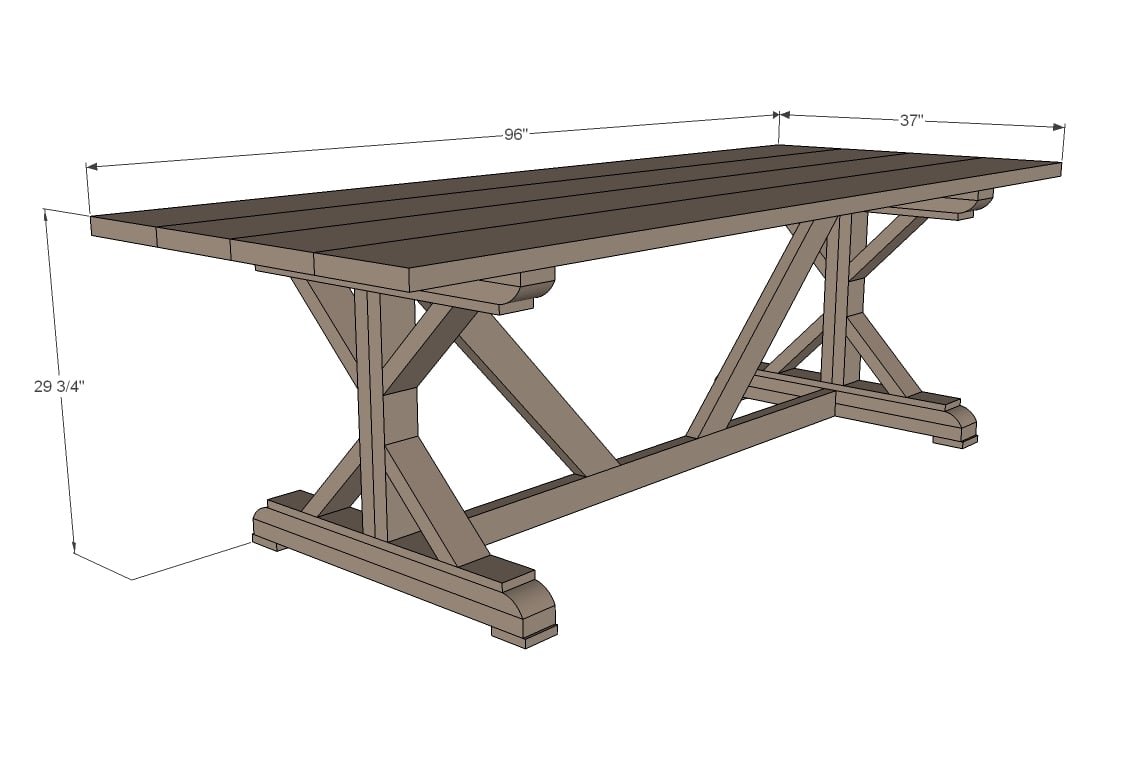
Shopping List
4 – 2x10 @ 8 feet long
7 – 2x4 @ 8 feet long
1 – 1x4 @ 12 feet long
3” self tapping wood screws
2 ½” pocket hole screws
2” finish nails
Cut List
ENDS
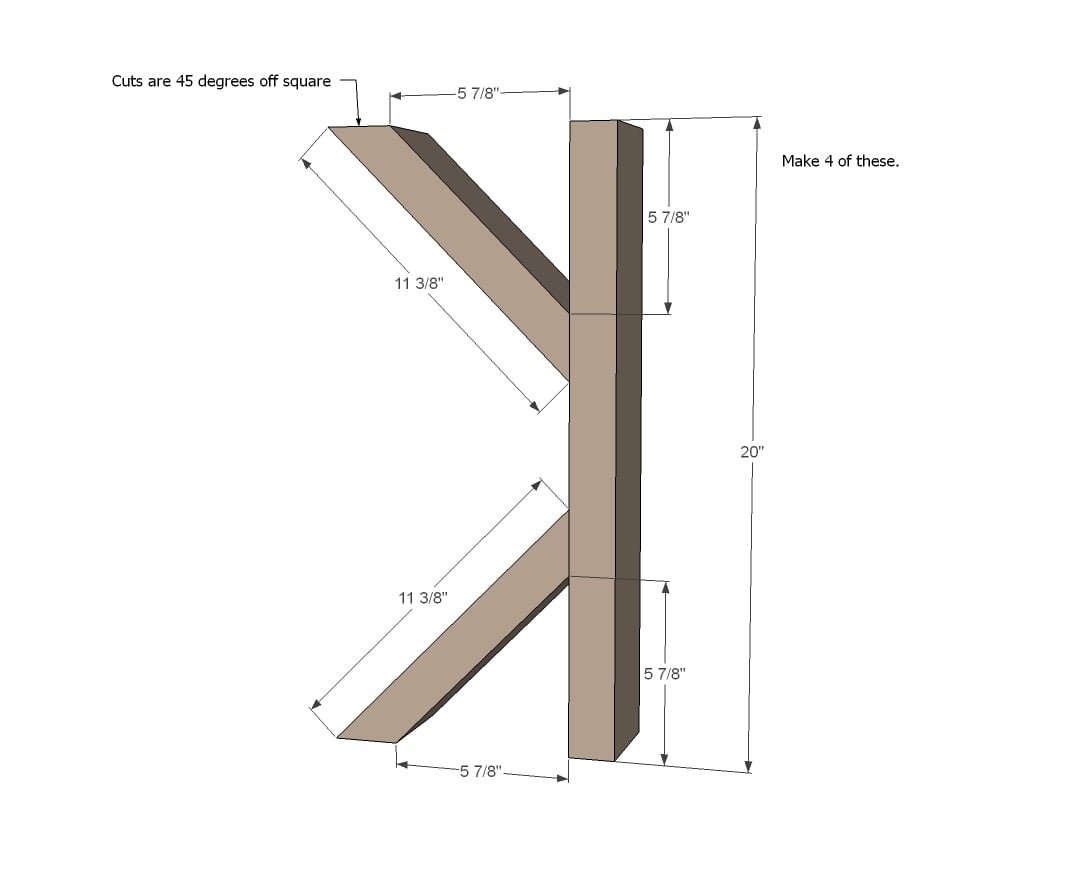
- 8 – 2x4 @ 11 3/8” (ends cut at 45 degrees off square, longest point measurement, NOT parallel)
- 4 – 2x4 @ 20”
- 4 – 1x4 @ 28 3/8” **
- 8 – 2x4 @ 32 5/8” CUT TO FIT **
- 4 – 1x4 @ 3 ½”
MAIN TABLE
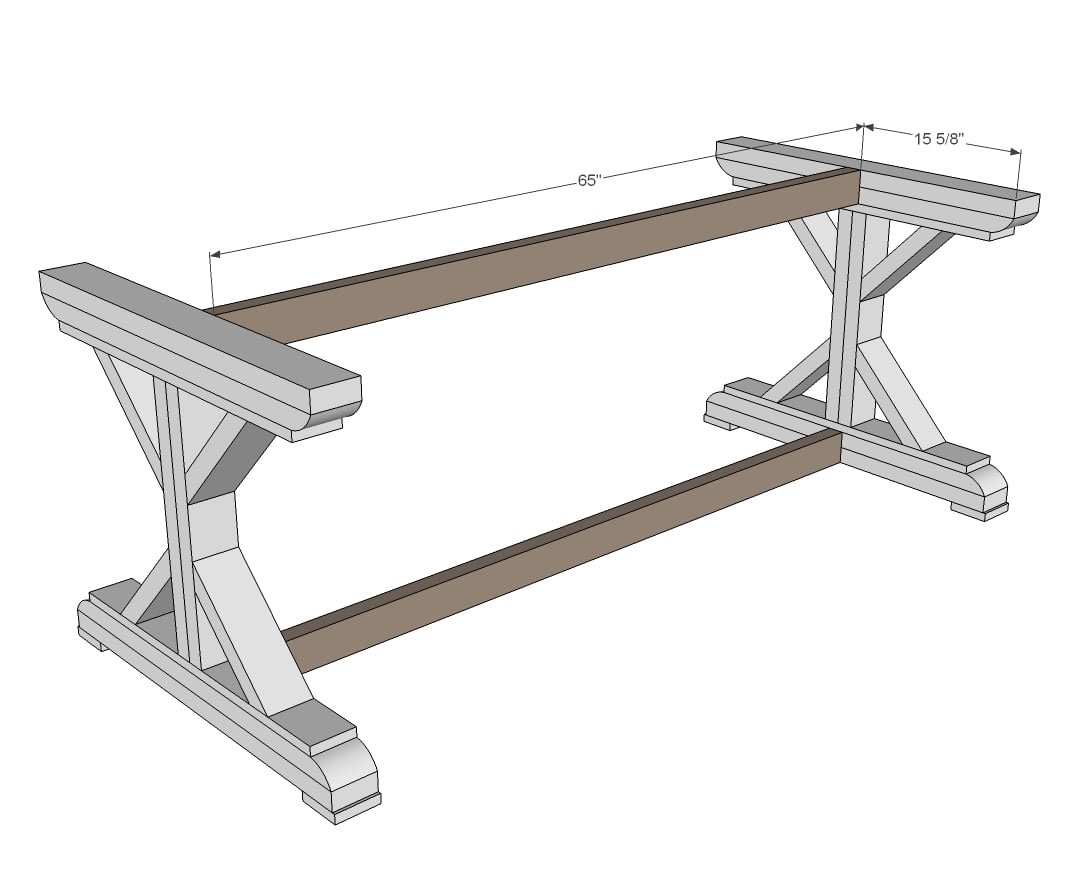
- 2 – 2x4 @ 65”
- 2 – 2x4 @ 30 3/8” (both ends cut parallel at 45 degrees off square)
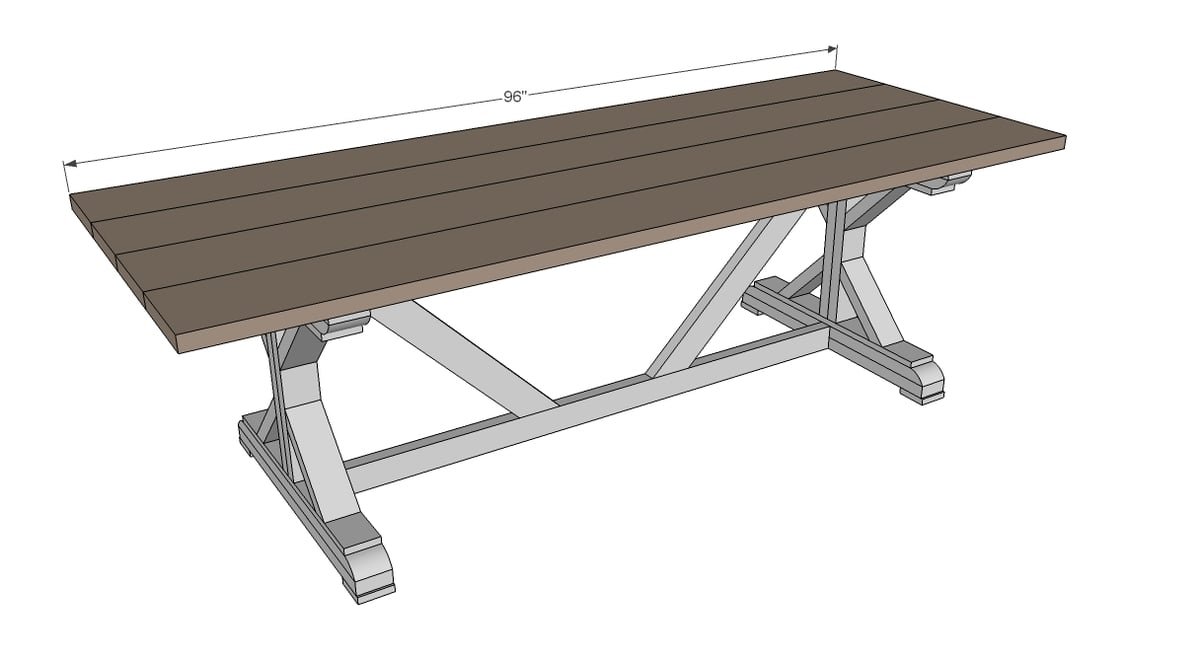
- 4 – 2x10 @ 96”
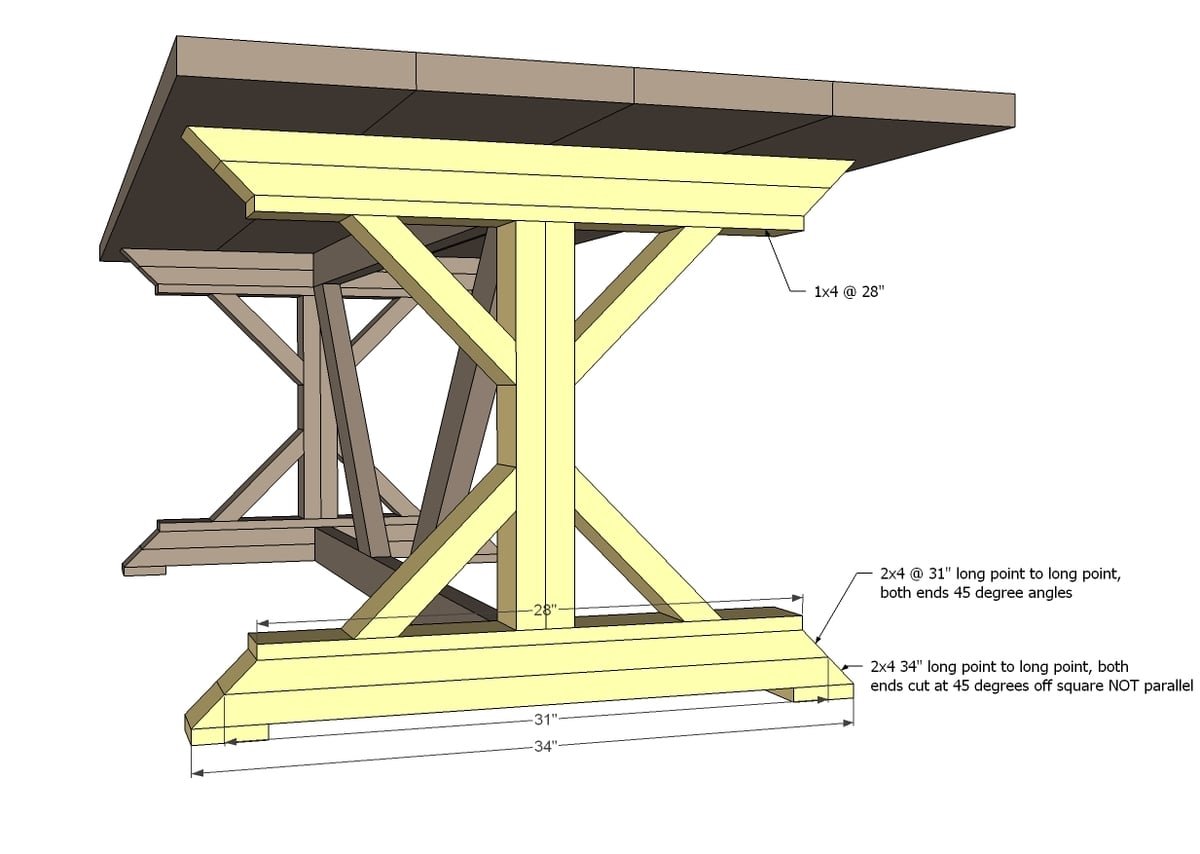
** For 45 degree cut tops and bottoms (easier) on the legs top and bottom (see steps 3-5 and step 10), replace these cuts with:
- 4 - 2x4 @ 31" (both ends cut at 45 degrees off square NOT parallel long point measurement)
- 4 - 2x4 @ 34" (both ends cut at 45 degrees off square NOT parallel long point measurement)
Step-by-step Instructions
Step 1
Build four of these. I’d simply countersink screws from the backs into the ends of the cross braces using 2-1/2" self tapping wood screws
Step 2
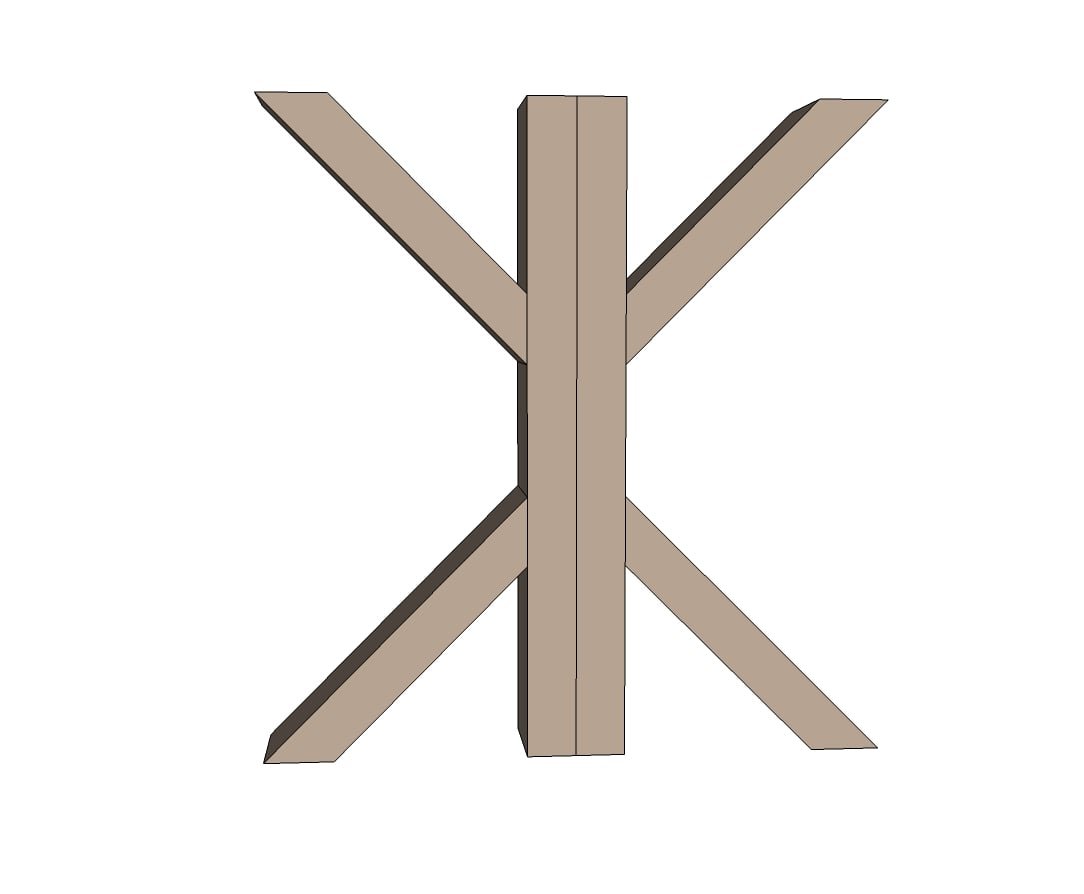
Then just attach two of the leg pieces together with glue and 2” finish nails from each side
Step 3
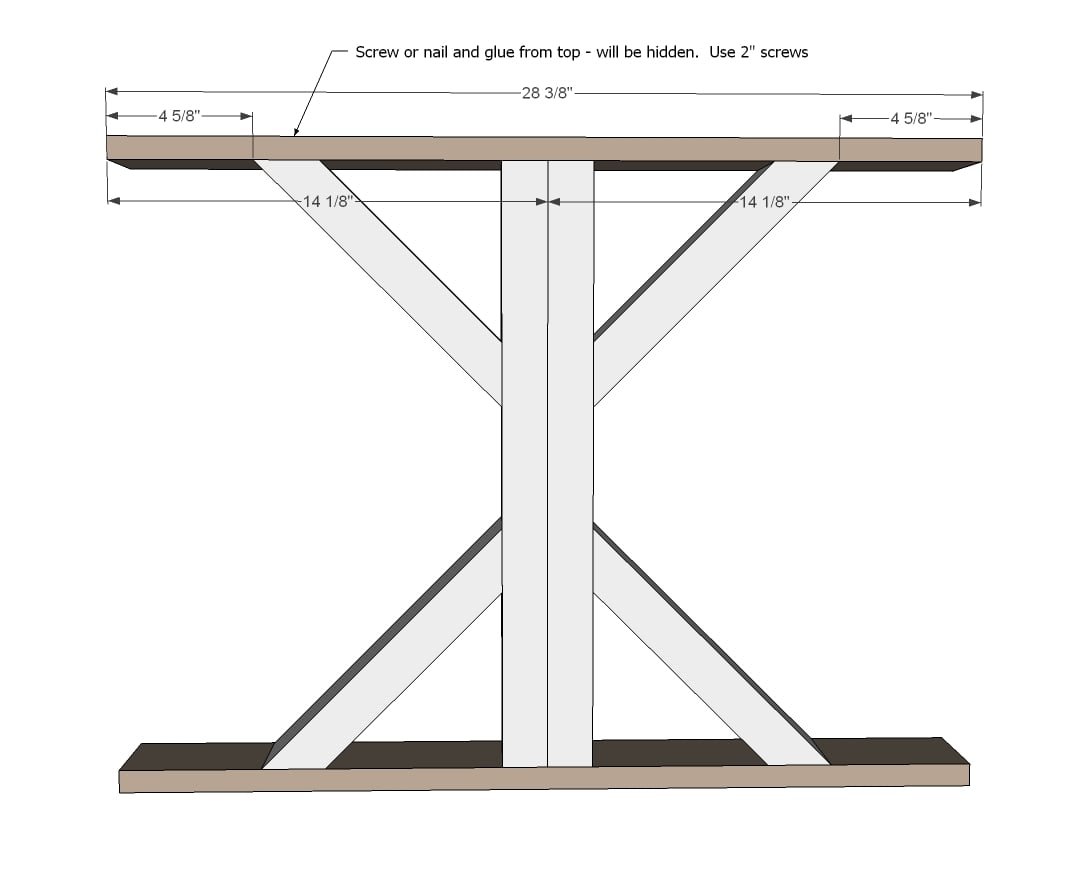
And add the top/bottom. You can use 2” screws or nails here and glue.
Step 4
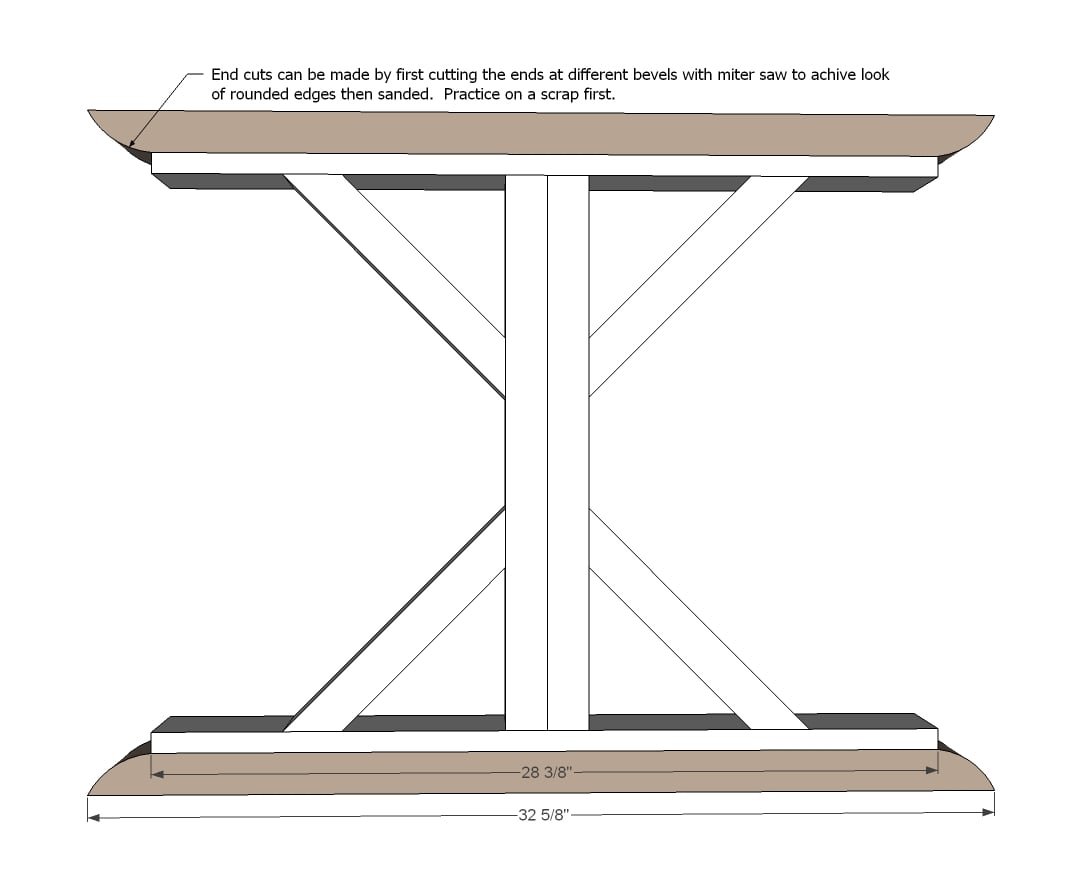
And then add the curved pieces. The ends may be a challenge – what I do is first cut a 2x4 32 5/8” long with both ends cut at 30 degrees off square, ends not parallel. Then make a second cut at 45 (or more if your saw cuts higher degree bevels) degrees off square and cut that same board 28 3/8” short point to short point.
Step 5
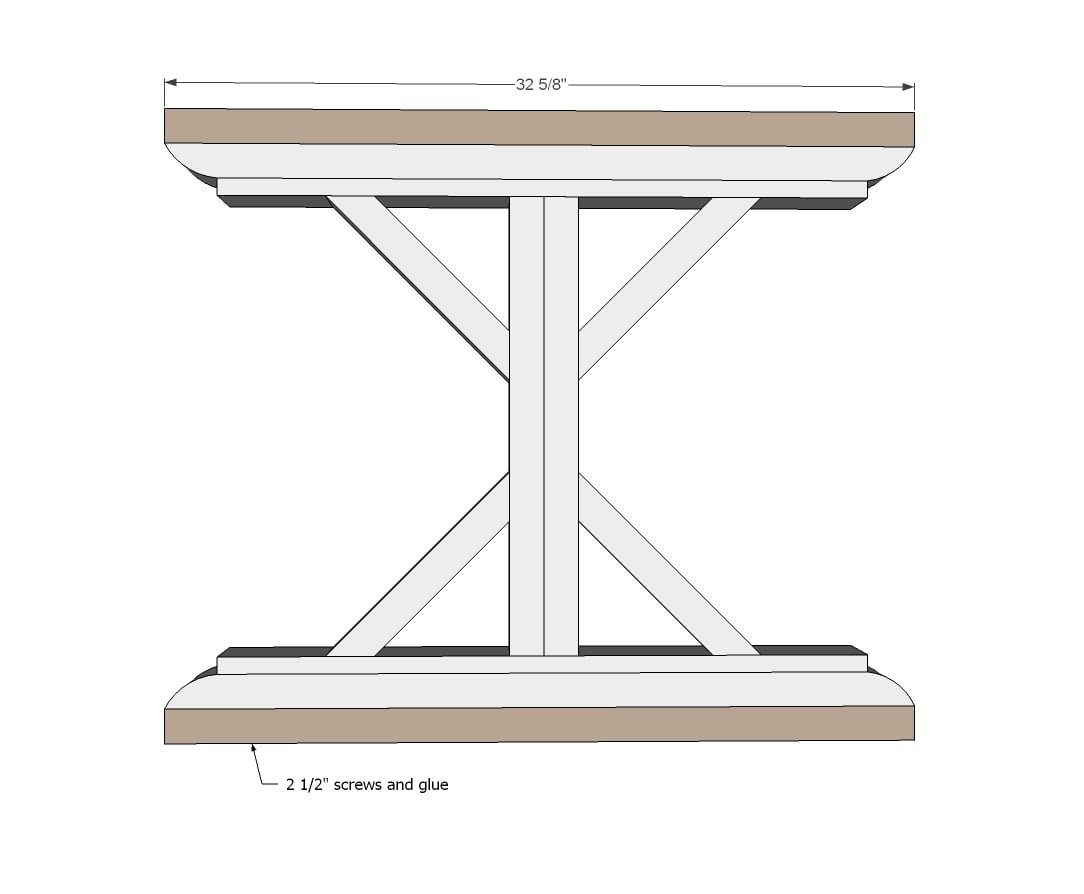
Repeat for the next layer of 2xs to build up your leg ends
Step 6
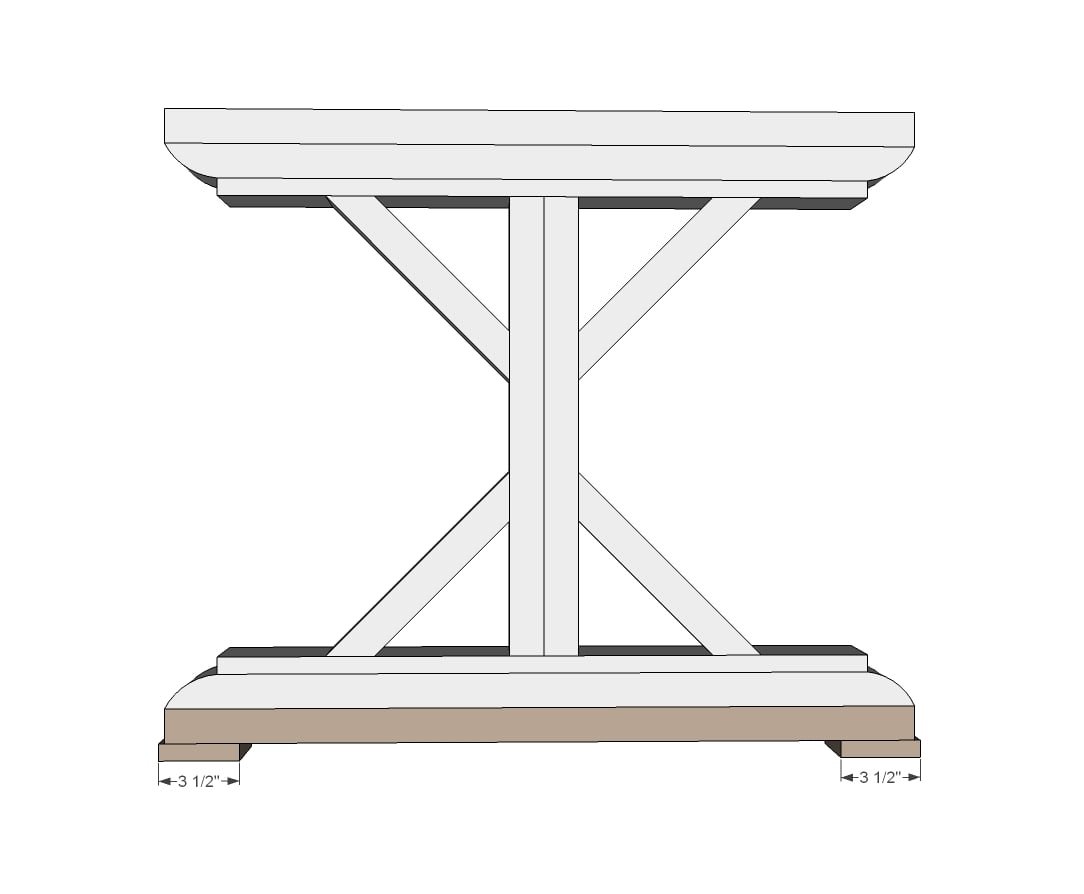
Followed by the little feet...
Step 7
I'd recommend 1 1/2" PHs and 2 1/2" PH screws here... hide on top and bottom edges
Step 8
The easiest way to attach cross braces is with pocket holes. But you will have to fill later with wood filler. An alternative is to glue and screw through the cross brace into the top and bottom 2x4s with longer screws.
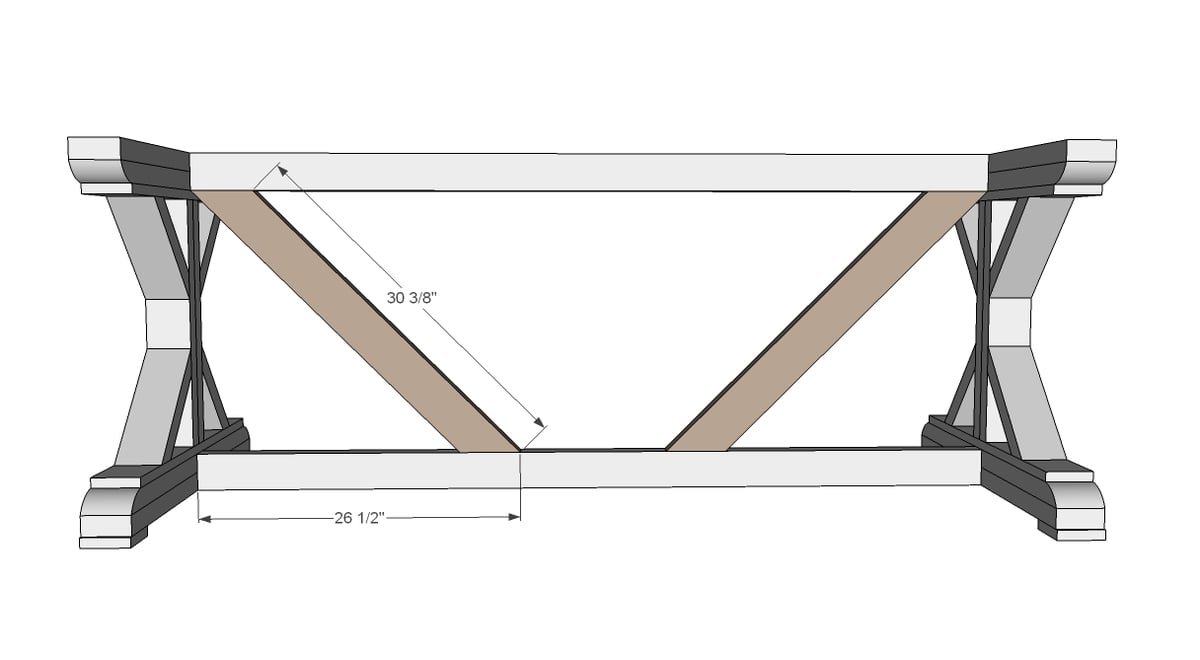
And finally the top! I recommend building the tabletop first with pocket holes and then attaching.
If you are using the table outdoors, leave a little space between the boards for water drainage.
Step 10
And for the alternate ends like Whitney did - just use 45 degrees off square cuts.
Step 11
For more photos and construction details, please stop over and visit Whitney at Shanty2Chic!
Finishing
Sand all surfaces, starting with a medium grit and finishing with fine. Wipe off the dust, fill any holes or gaps with wood filler, and sand smooth once dry. Apply primer if you're painting, then finish with your choice of paint or stain and seal with a durable clear topcoat. For outdoor projects, use exterior-rated primer, paint or stain, and sealer so the piece stands up to the weather.
Source (temporary): https://www.ana-white.com/woodworking-projects/fancy-x-farmhouse-table