Farmhouse Arch Nightstand
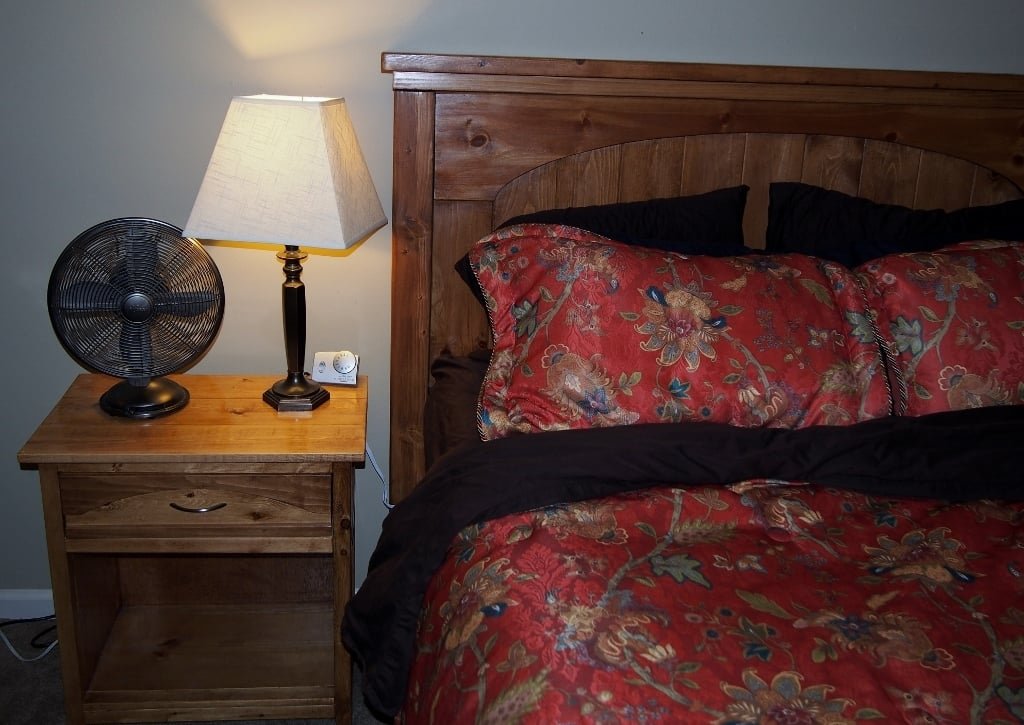
Build a nighstand to match the Farmhouse arch bed
Specifications
| Project type | Nightstands |
|---|---|
| Room | Bedroom |
| Style | Farmhouse Furniture |
| Difficulty | Beginner Projects |
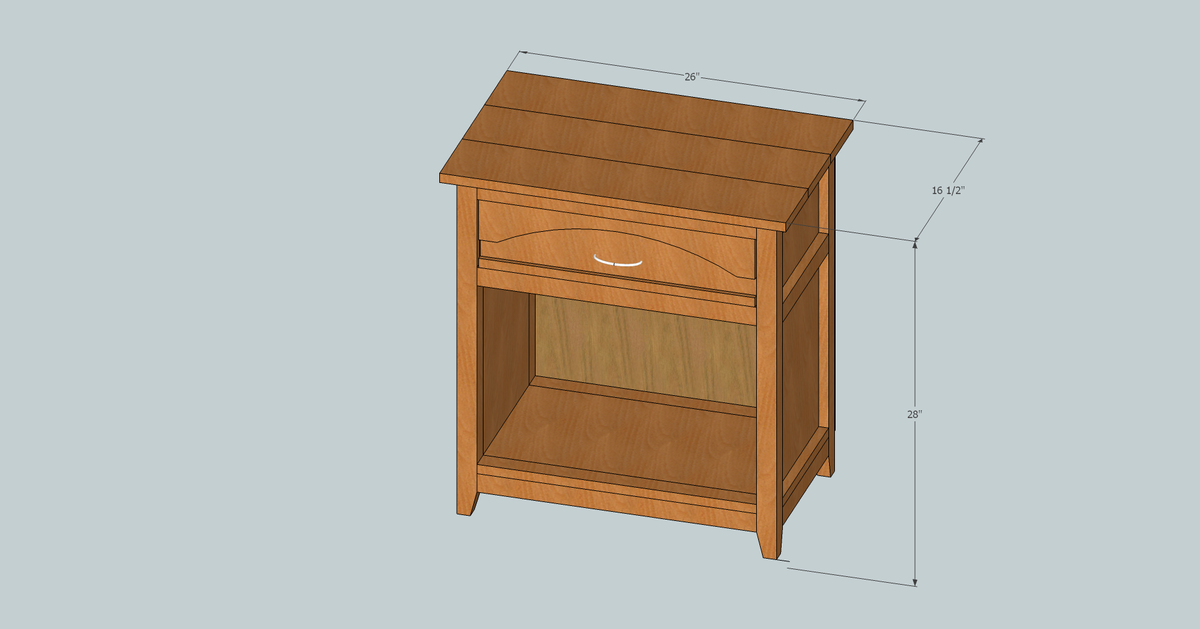
Dimensions
Use the size-specific shopping and cut lists below.
Shopping List
2 – 1x2 @ 8'
2 – 1x6 @ 8'
1 – 1x12 @ 8'
3 – 2x2 @ 8'
1 – 3/8 x 4" @ 2'
1 – 3/8 x 1" @ 2' (You may have to cut this on a table saw, I can't remember if I bought it or not. Actual dimensions should be 3/8 x 3/4".)
1 sheet – 1/8" plywood @ 24"x 24"
Drawer pull, whatever you prefer
Cut List
4 – 2x2 @ 27 ¼” (Leg) --See step one for profile cutting
2 – 2x2 @ 11 ¼” (Base Support Side)
6 – 2x2 @ 21” (Supports)
2 – 1x12 @ 23” (Side)
1 – 1x12 @ 24” (Base)
1 – 1x12 @ 19 ¼” (Drawer Bottom)
11 – 1x2 @ 11 ¼” (6xSide Trim, 2xDrawer Rails, 3xTop Supports) )
2 – 1x2 @ 21" (Front and Back Base Trim)
3 – 1x6 @ 26" (Top)
2 – 1x6 @ 20 ¾" (Drawer Front,Back)
2 – 1x6 @ 11 ½ " (Drawer Sides)
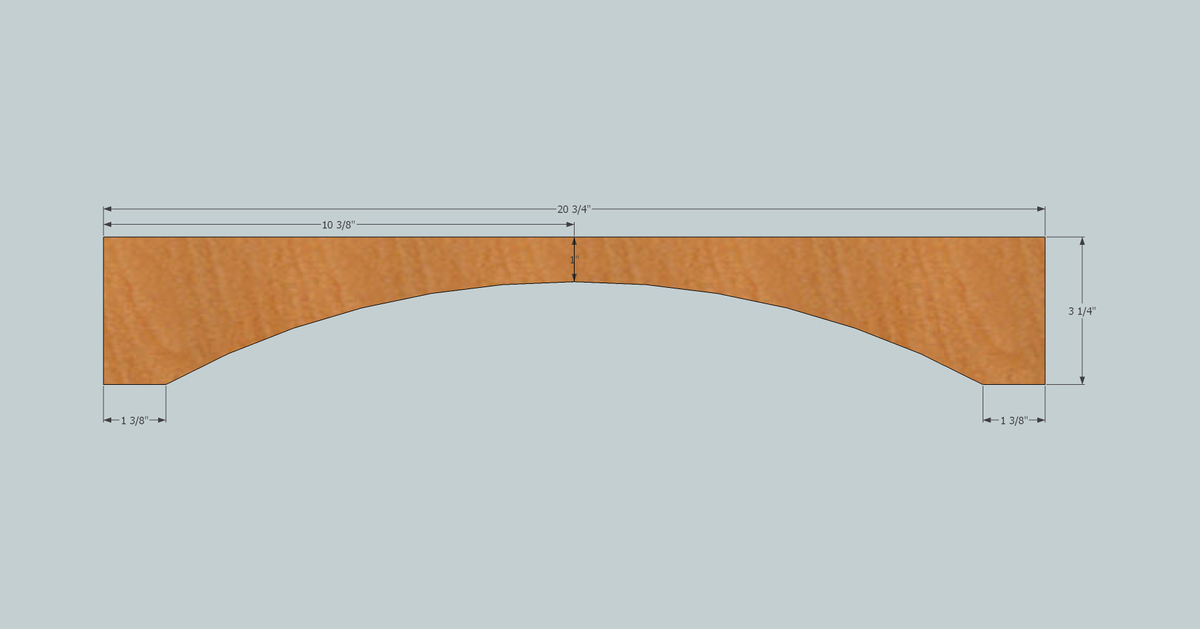
1 – 3/8 x 4" @ 20 ¾" (Drawer Top Trim)
1 – 3/8 x 1" @ 20 ¾" (Drawer Bottom Trim Optional)
Tools
- measuring tape
- square
- pencil
- kreg-jig
- drill
- compound miter saw
Step-by-step Instructions
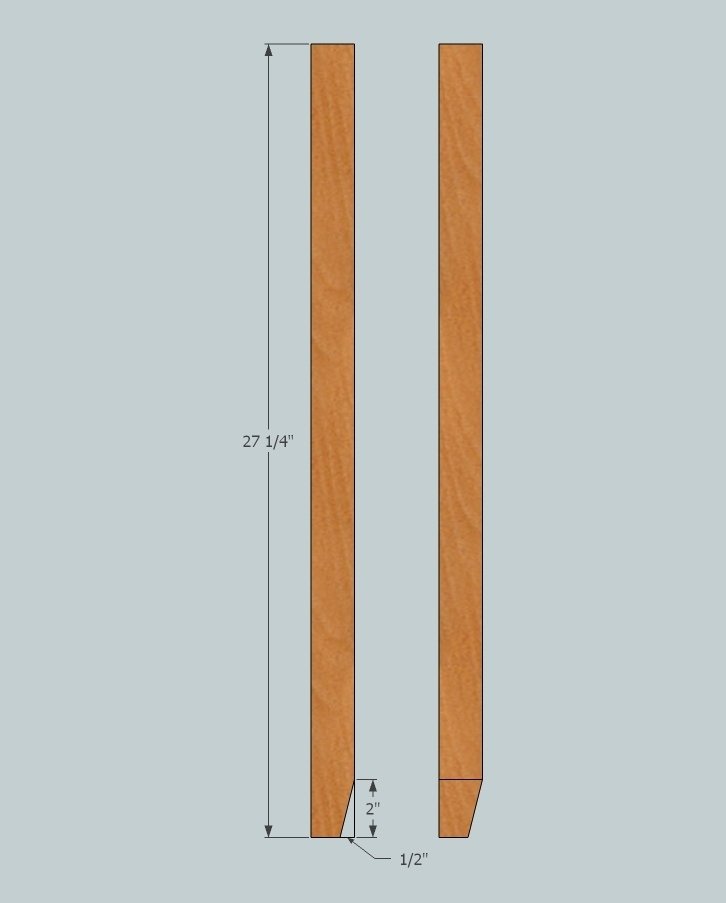
To cut the profile on the legs, mark a line from 1/2" on the bottom to 2" up the side.
Optionally, cut the profile on the next side, so that the leg has the same profile from the front and the side
Step 2
Assemble the sides using pocket holes to attach the sides to the legs. The side should be flush with the legs. Then add the base support, 2" from the bottom on the side. Note the 3/4" gap between the side and the support. This can be done easily by putting a scrap piece of material in the gap.
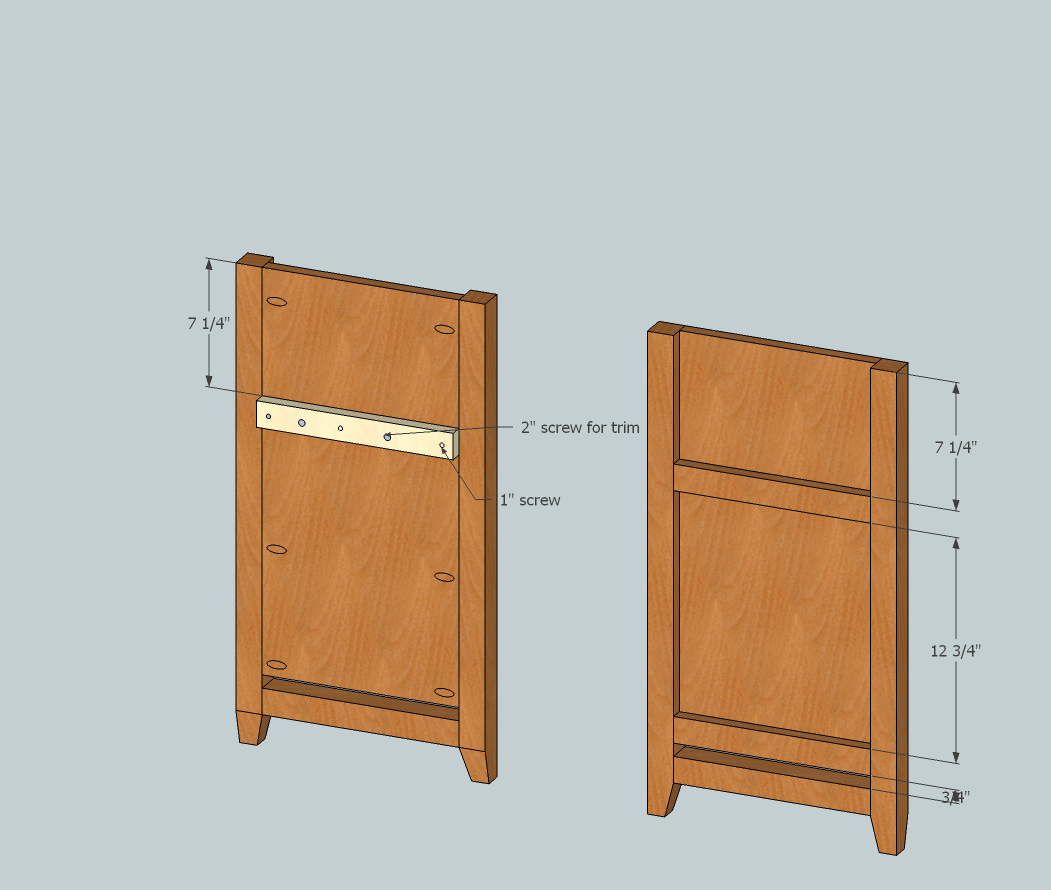
Add trim to the side with 1" screws from the inside. Maintain the gap at the bottom.
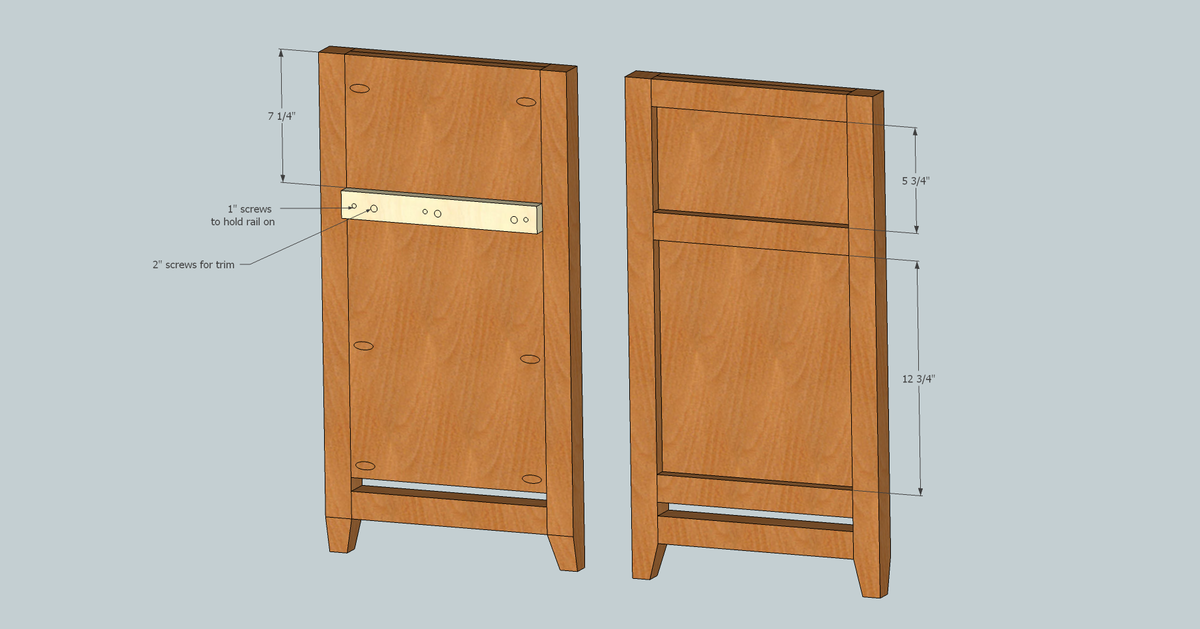
Attach the drawer rail to the inside of the side-unit, using 1" screws and glue. Then attach the outside trim using glue and 2" screws from the inside, through the drawer rail, the side, and into the trim. Note, pre-drill the holes for the 2" screws to prevent the rail from cracking.
Step 4
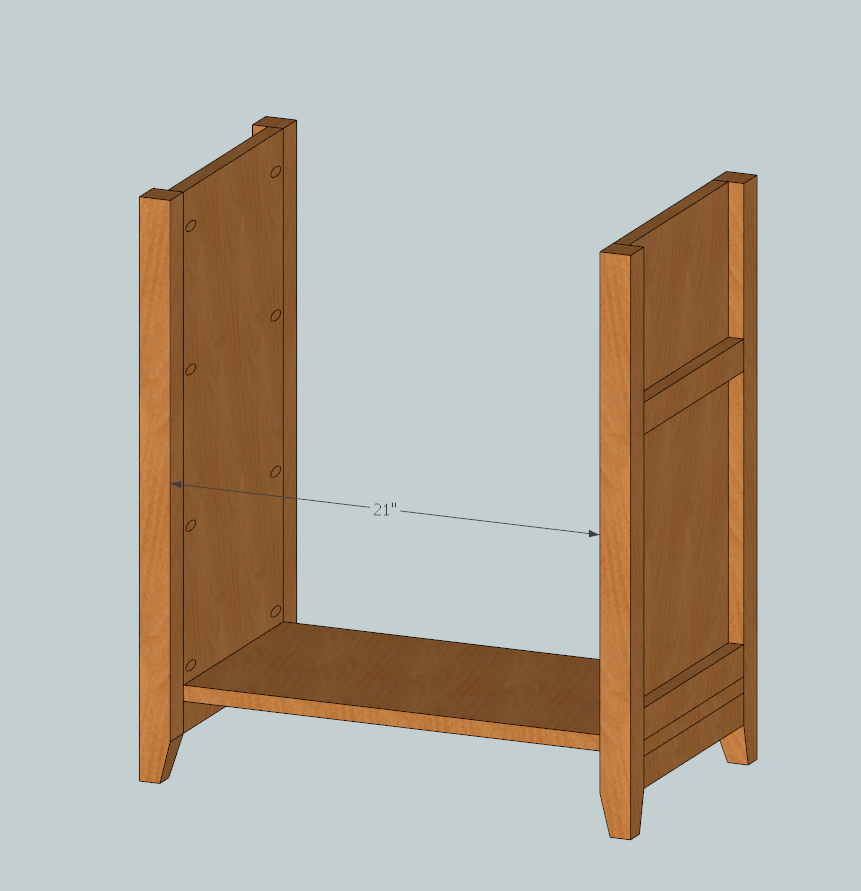
Begin to assemble the nightstand by sliding the base shelf into the gap on each side unit. Make sure that the distance between the two sides is 21" and the shelf is flush on the outside of the side. Glue the base shelf and put 2" screws through the bottom into the base.
Step 5
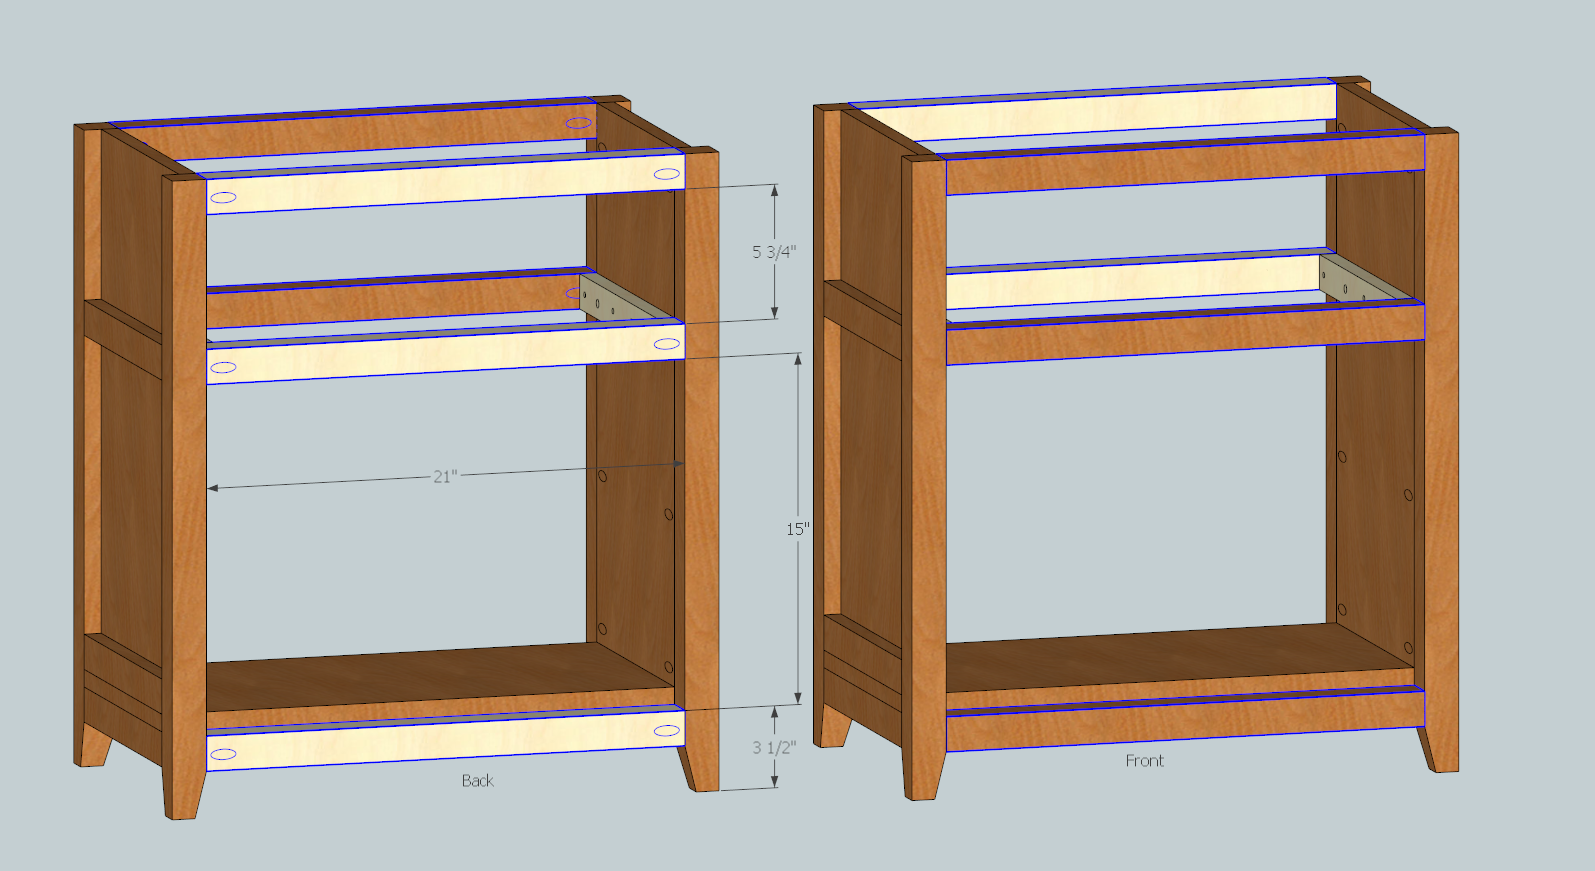
Step 6
Attach 3x top supports to the top using pocket hole screws on the bottom sides
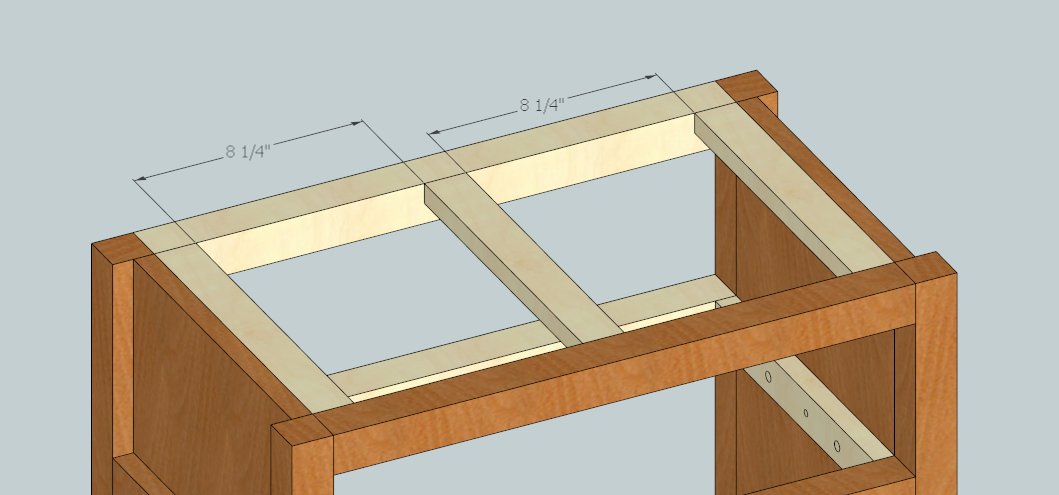
Step 7
Assemble top of nightstand using pocket holes, clamps, and glue. It's the right size to have a 1" margin on all sides.
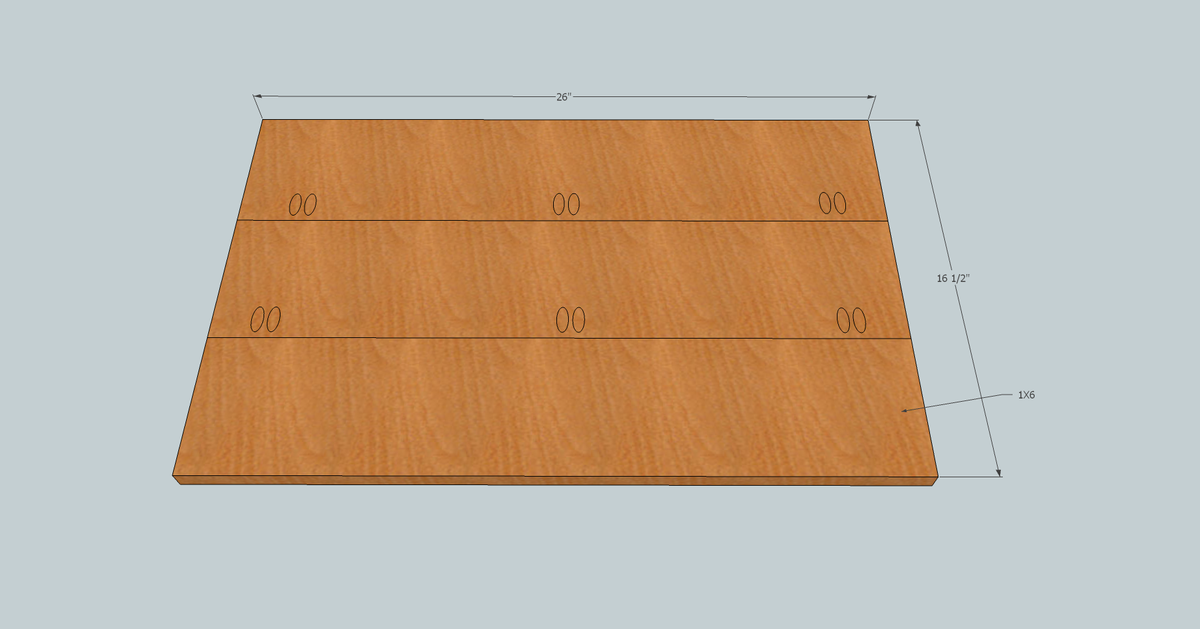
Attach the top to the stand with glue and 1" screws from the underside.
Also attach shelf trim to front and back at the bottom.
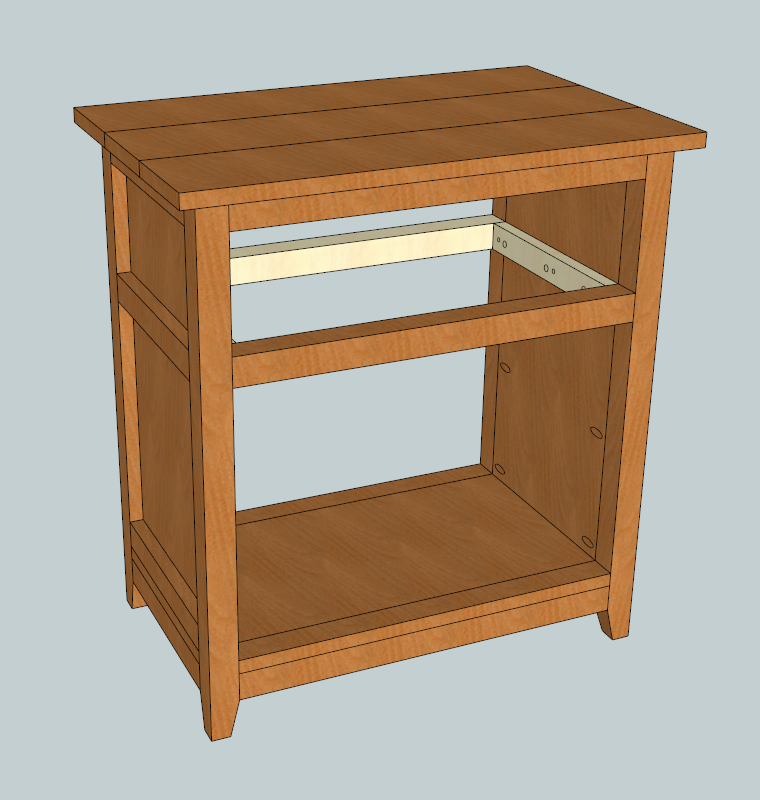
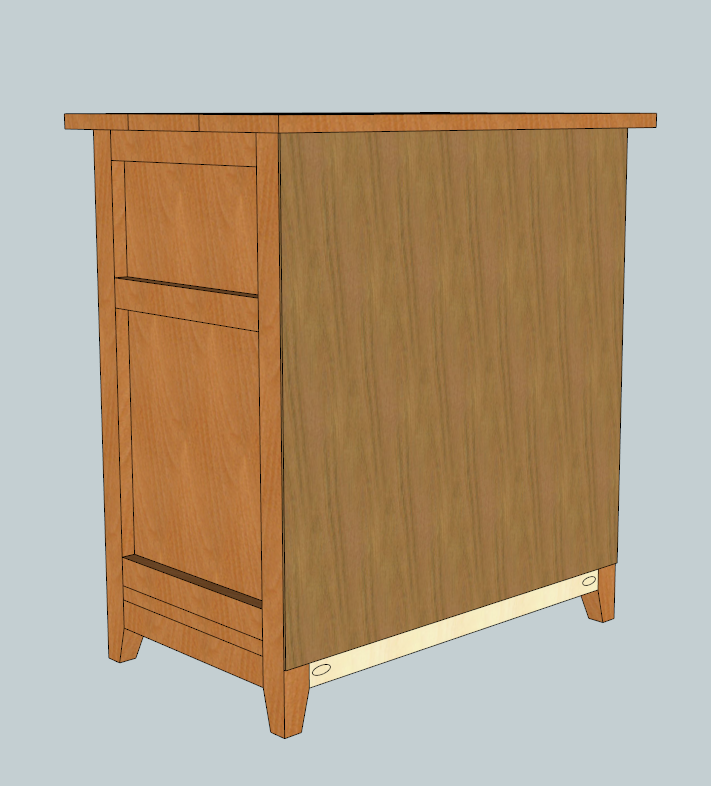
Step 9
Attach the back with finish nails
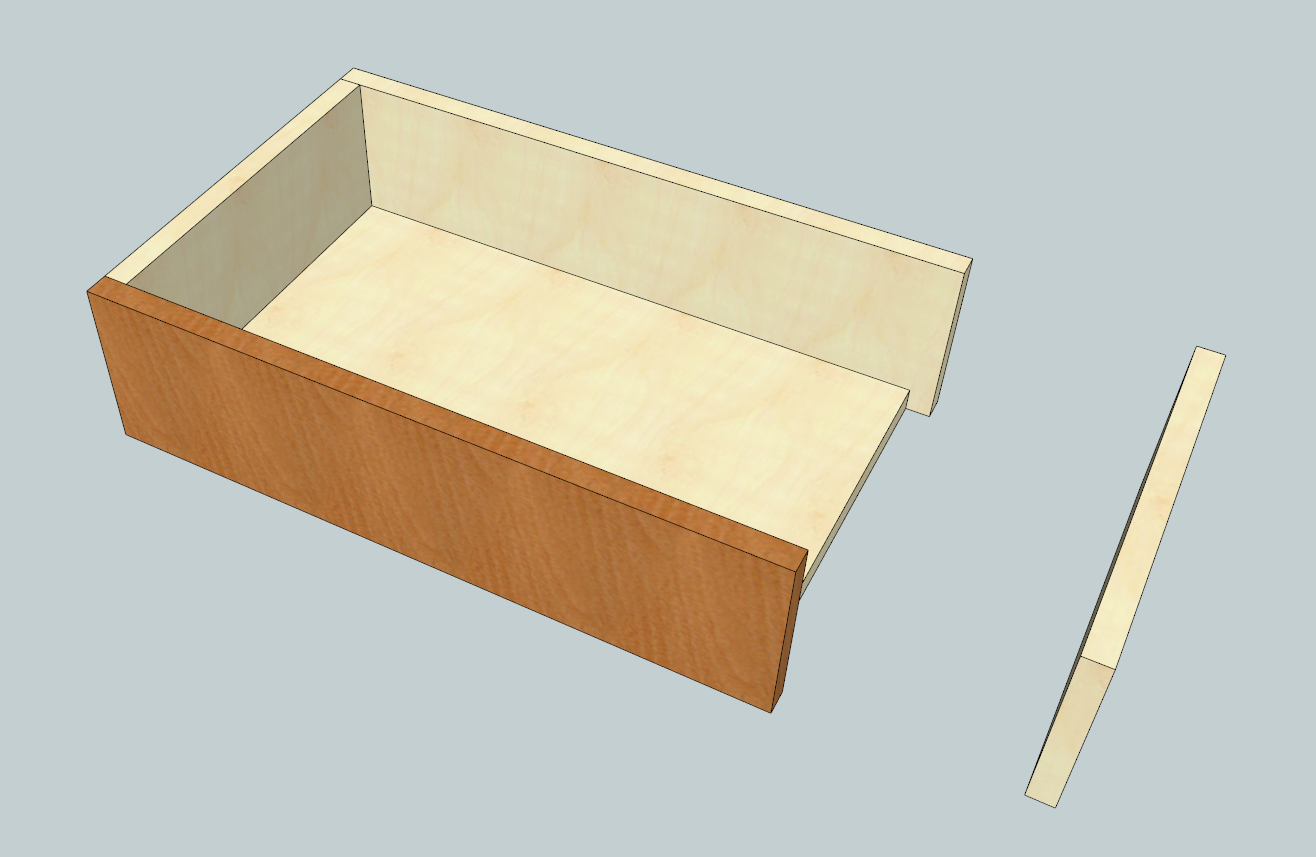
Step 10
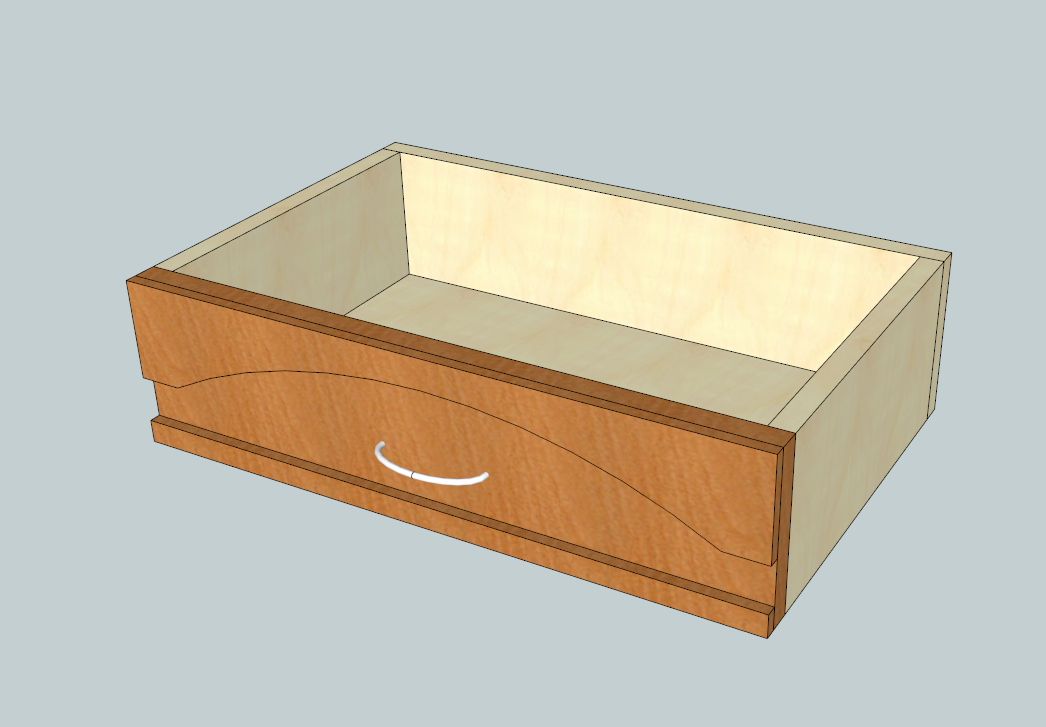
Now it's time to build the drawer. I just used countersunk screws and glue. I don't have any tricks for this.
Attach trim to the drawer using glue and finish nails.
Also attach drawer pull using screws
Step 12
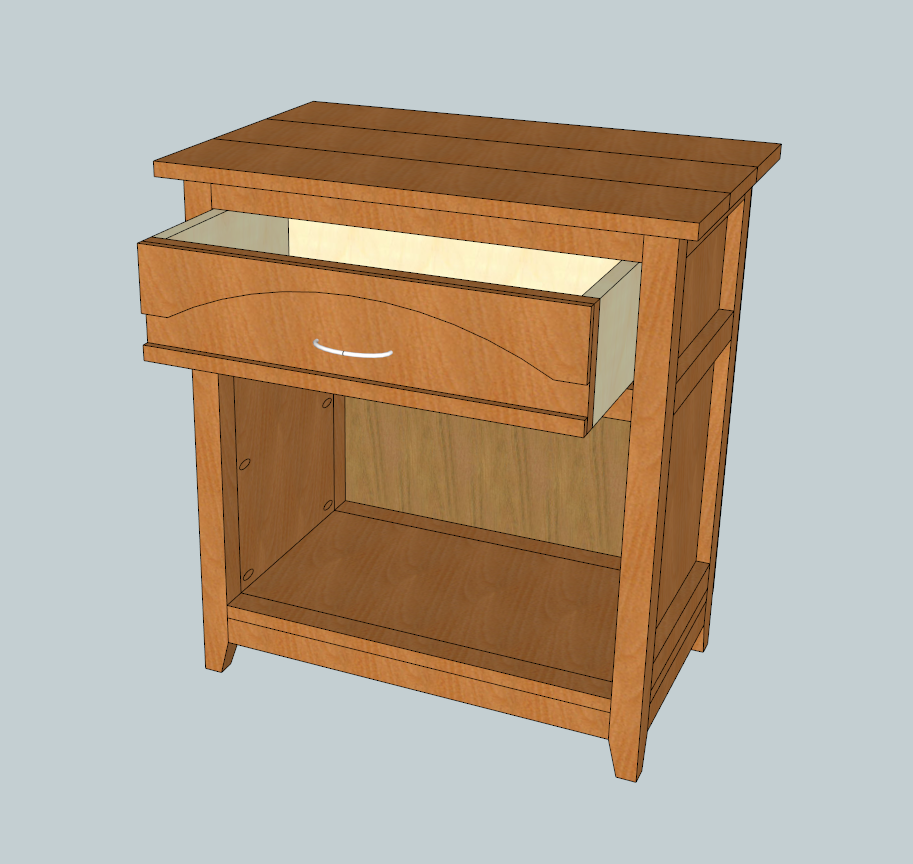
All done!
Step 13
Here's the measurements for the drawer trim. Cut it out with a jigsaw, scrollsaw, or bandsaw, whatever you have.
Finishing
Sand all surfaces, starting with a medium grit and finishing with fine. Wipe off the dust, fill any holes or gaps with wood filler, and sand smooth once dry. Apply primer if you're painting, then finish with your choice of paint or stain and seal with a durable clear topcoat. For outdoor projects, use exterior-rated primer, paint or stain, and sealer so the piece stands up to the weather.
Source (temporary): https://www.ana-white.com/woodworking-projects/farmhouse-arch-nightstand