Farmhouse Bed (California King Size)
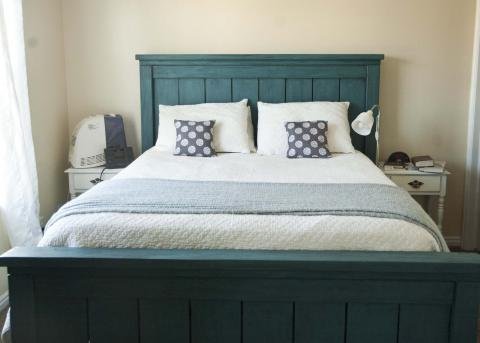
The blog favorite Farmhouse Bed, now in California King! This bed plan is a must read, as the construction is a tad different to accommodate no 4x4 posts and an easier method of joining the siderails with the headboard. Special thanks to JME Blog for their marvelous photos!
Specifications
| Project type | Beds and Bed Frames |
|---|---|
| Room | Bedroom |
| Style | Farmhouse Furniture |
| Difficulty | Intermediate |
| Estimated cost | $100-$150 |
Dimensions
Use the size-specific shopping and cut lists below.
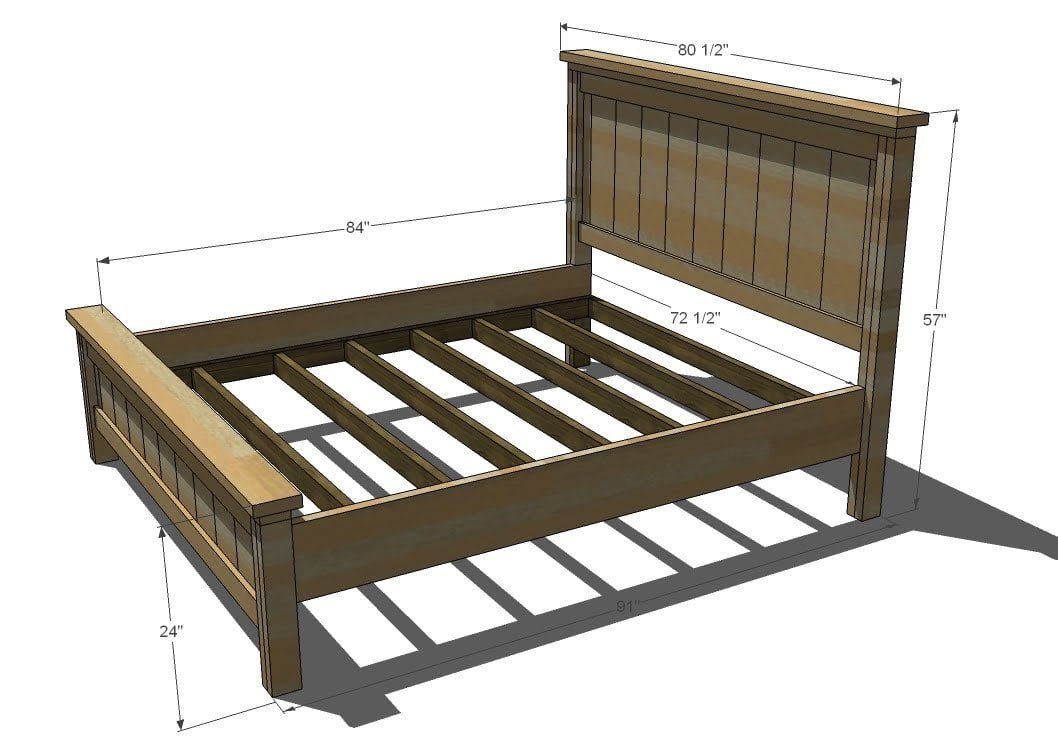
Shopping List
9 – 1×8 boards, 8′ Long
1 – 1×3 board, 8′ Long
2 – 2×6 board, 8′ Long or Stud Length (doesn’t matter)
13 – 2×4 boards, 8′ Long or Stud Length (doesn’t matter, you may need more or less depending on if you have a box spring or not)
3″ self tapping wood screws
2 1/2″ self tapping wood screws
2″ self tapping wood screws
1 1/4″ nails for a brad nailer
Cut List
Headboard
- 4 – 1×4 @ 72 1/2″ (Panel Trim)
- 2 – 1×3 @ 30″ (Ends of the Panel)
- 9 – 1×8 @ 30″ (Main boards in the Panel)
- 2 – 2×4 @ 34 1/2″ (Inner Leg for Headboard)
- 2 – 2×4 @ 54″ (Outer Leg for Headboard)
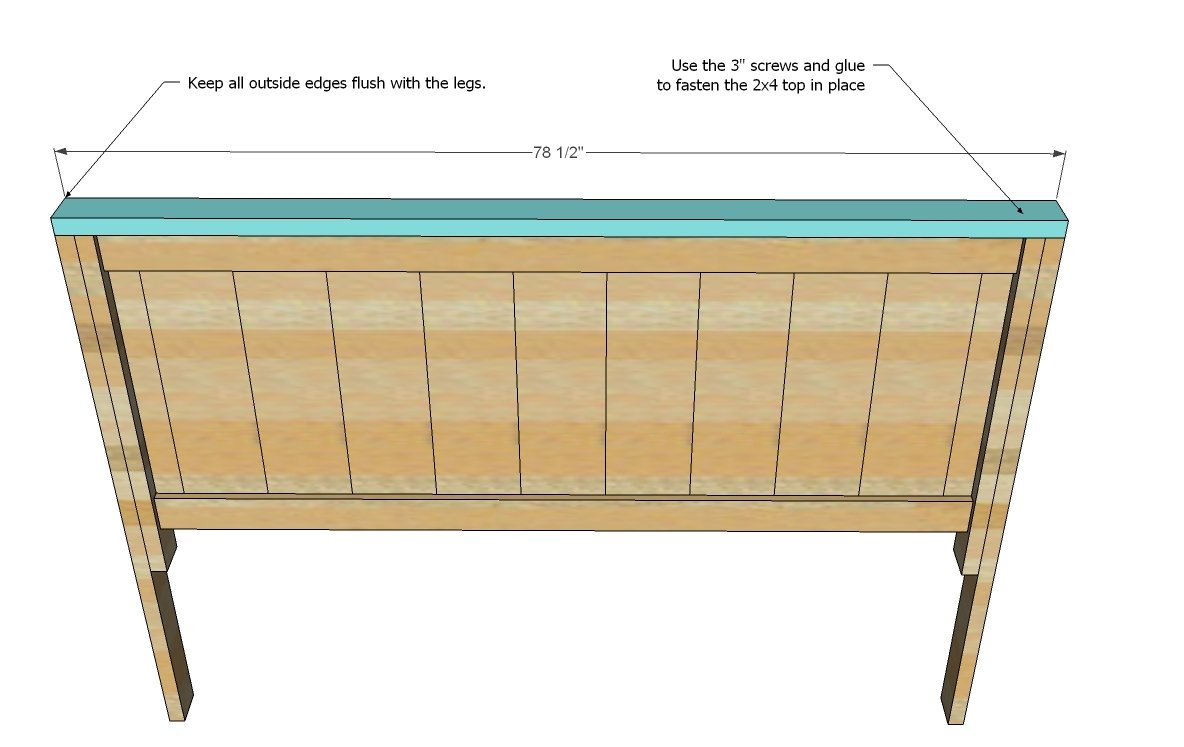
- 1 – 2×4 @ 78 1/2″ (Top of Legs and Panel for Headboard)
- 1 – 2×6 @ 80 1/2″ (Top of Headboard)
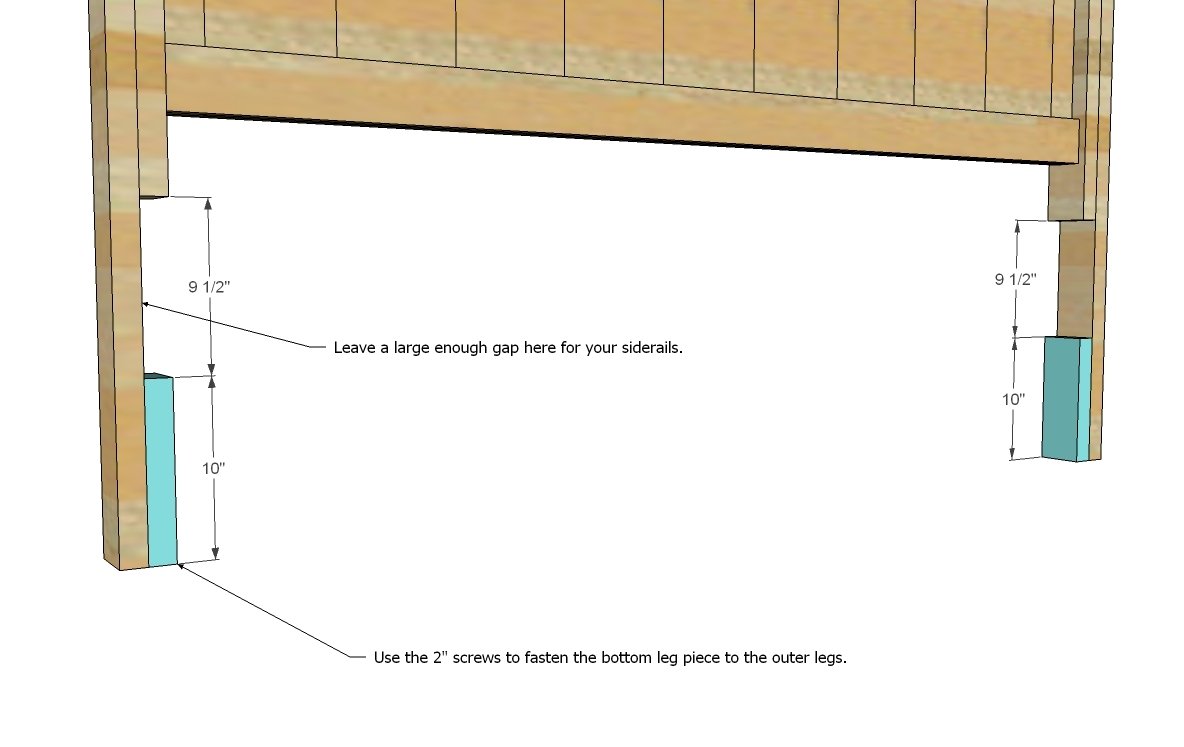
- 2 – 2×4 @ 10″ (Bottom Leg Piece for Headboard)
Footboard
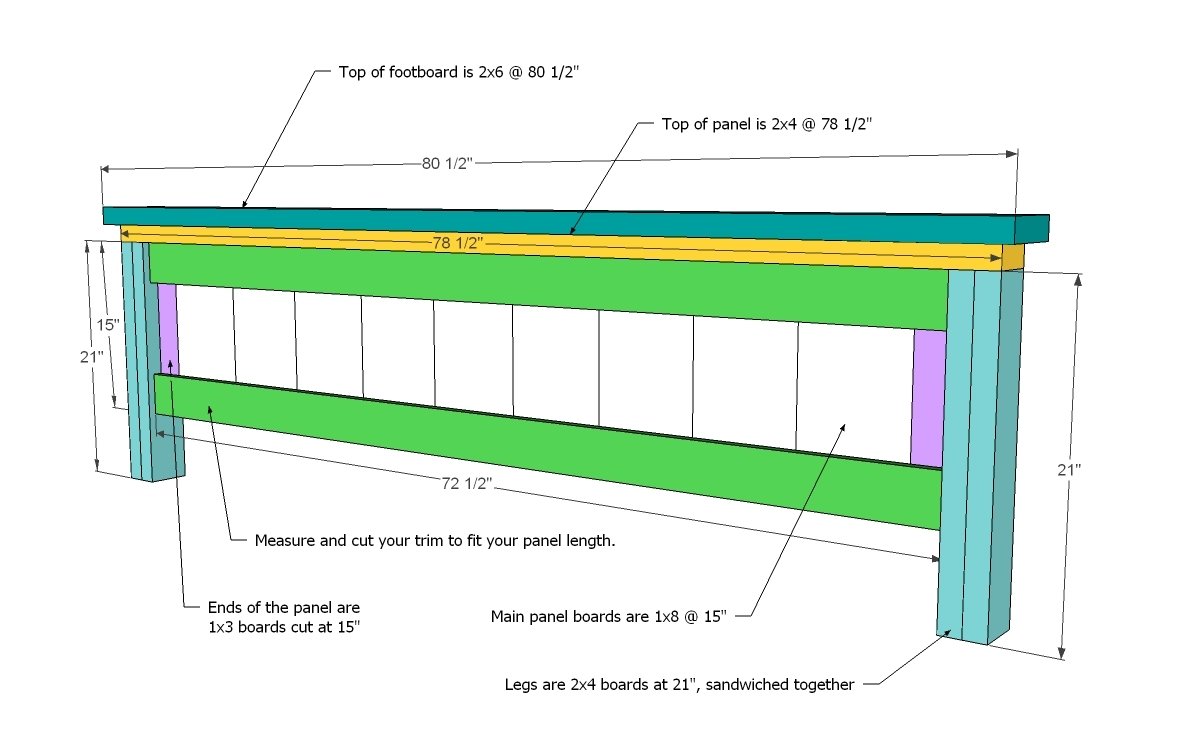
- 4 – 1×4 @ 72 1/2″ (Panel Trim)
- 2 – 1×3 @ 15″ (Ends of Panel)
- 9 – 1×8 @ 15″ (Main Boards in the Panel)
- 4 – 2×4 @ 21″ (Legs)
- 1 – 2×4 @ 78 1/2″ (Top of Legs and Panel for Headboard)
- 1 – 1×6 @ 80 1/2″ (Top of Headboard)
Siderails and Frame
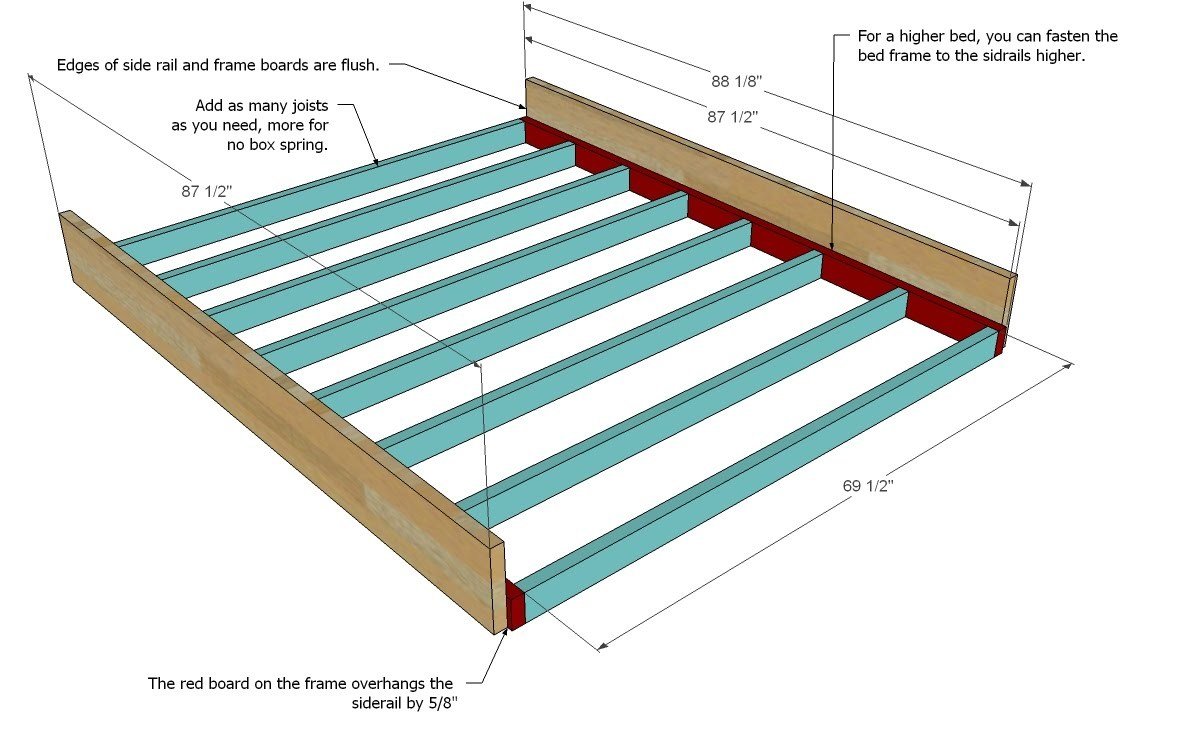
- 2 – 2×10 @ 87 1/2″ (Siderails)
- 2 – 2×4 @ 88 1/2″ (Side Cleats)
- 8 – 2×4 @ 69 1/2″ (Joists, you can use less if you have a box spring, may need more if your mattress is flimsy or you choose not to add plywood to top)
- Optional plywood on top of joists
Tools
- measuring tape
- square
- pencil
- hammer
- safety glasses
- hearing protection
- drill
- circular saw
- nailer
- sander
Step-by-step Instructions
Step 1
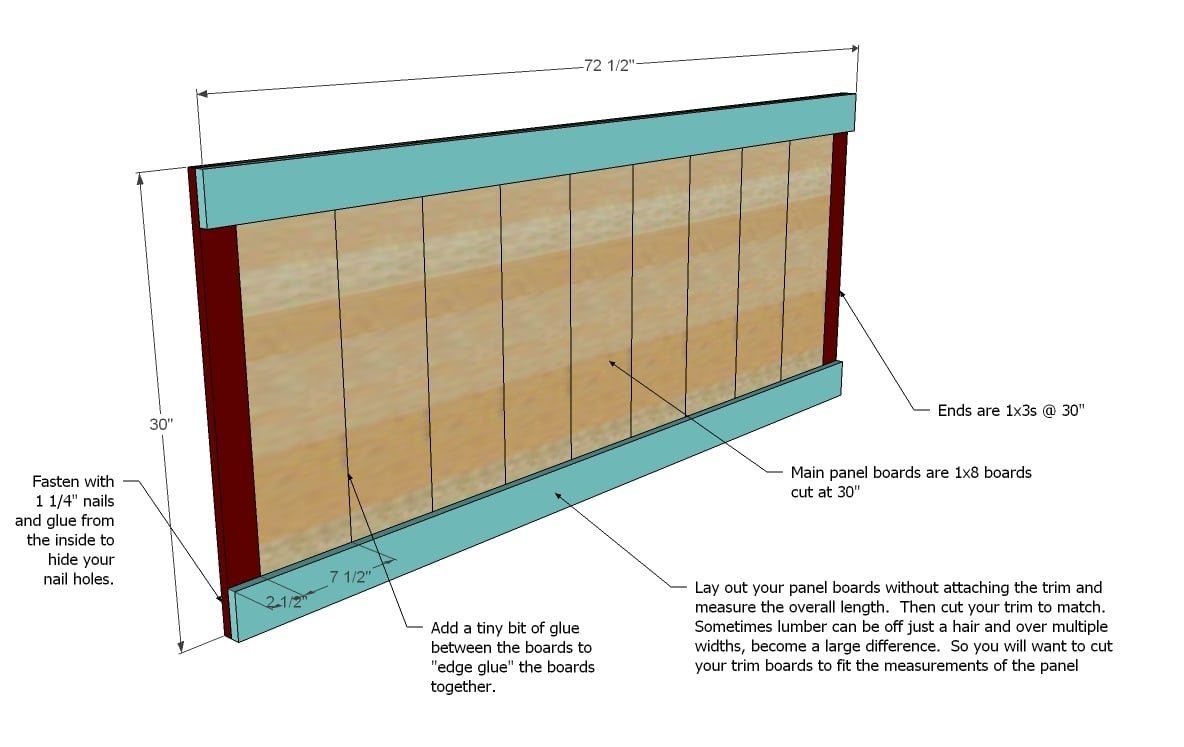
Front of Headboard Panel. Lay out the panel pieces on a clean level surface. Take a measurement of the total length and cut your trim boards to this measurement (approximately 78 1/2″). Then fasten the trim pieces to the panel as shown above. Use the 1 1/4″ nails and glue. Attach from the back to hide your nail holes.
Step 2
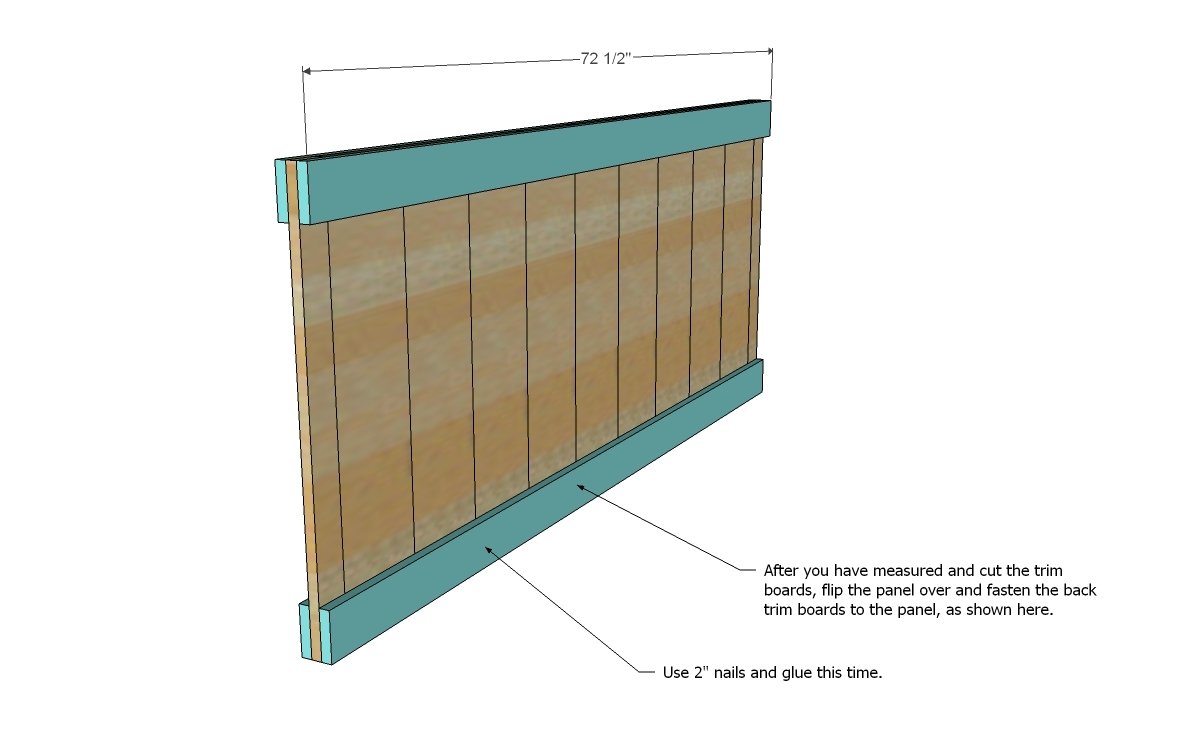
Back of Headboard Panel. In the same manner as step 1, fasten the back trim pieces to the headboard. This is shown above. Use glue and 2″ nails. This will be the back of the headboard, as your nail holes are showing.
Step 3
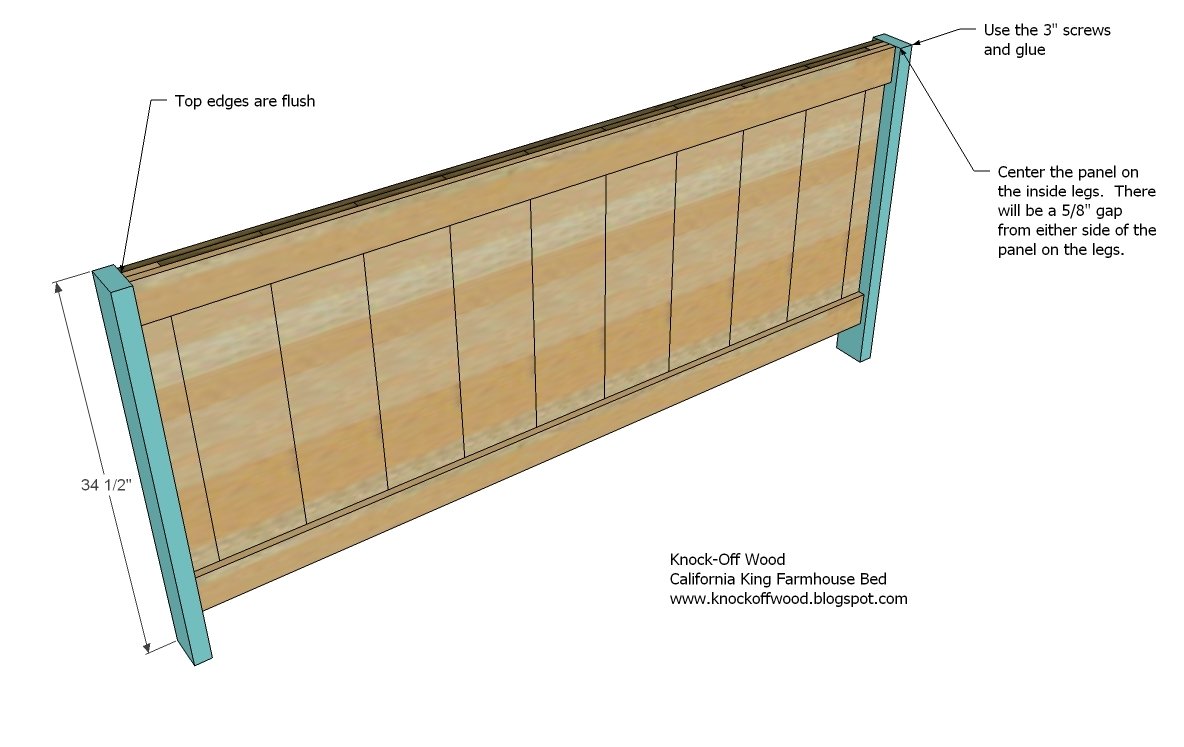
Inner Leg. Predrill and countersink your screws, attaching the inner leg to the headboard panel as shown above. Use glue and the 3″ screws.
Step 4
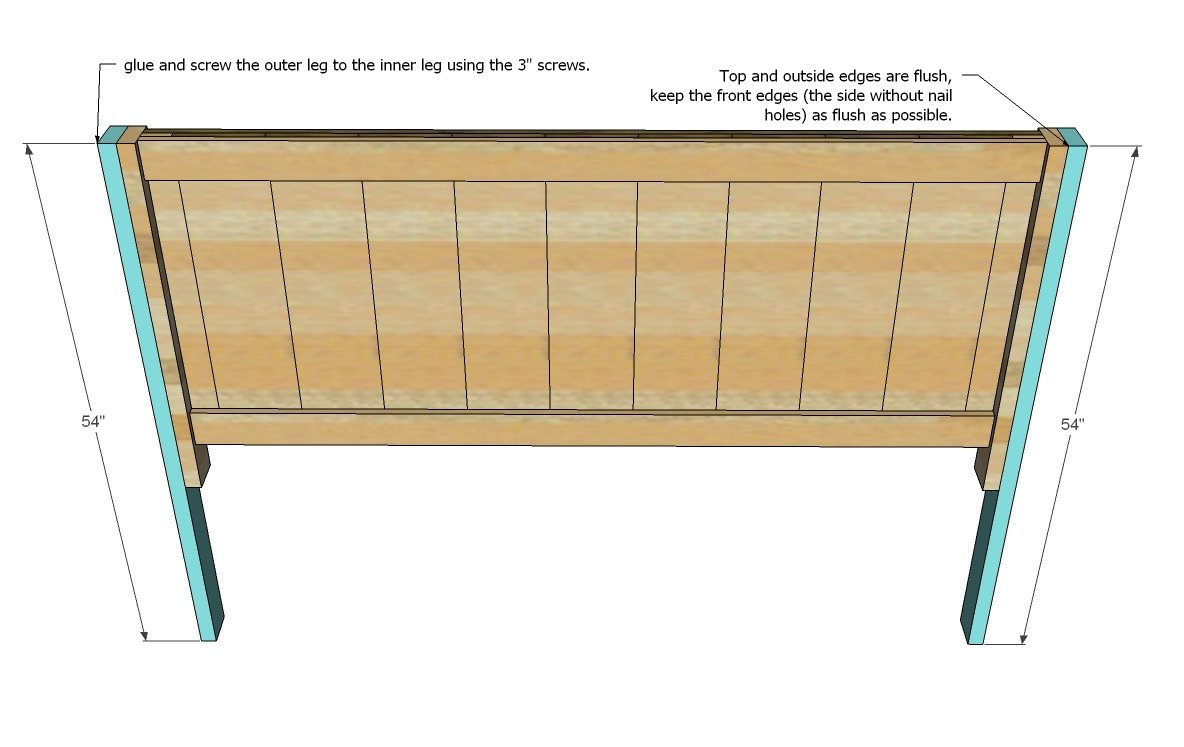
Outer Leg. Fasten the outer leg to the inner leg, using the 3″ screws and glue. Again, use the countersink bit. Keep top and outside edges flush.
Step 5
Step 6
Bottom Leg Piece for Headboard. Use the 2″ screws and glue to attach the bottom leg piece. Countersink your screws. You may need to shorten or lengthen the bottom leg piece, depending on the thickness of your side rails. Take a measurement of your side rails before cutting this piece.
Step 7
Footboard. Except for the changes in the legs as shown above, the footboard will be assembled just like the headboard. The footboard leg pieces are identical in size and there is not bottom leg piece.
Step 8
Siderails and Frame. Begin by building the frame using 3″ screws and glue. The above joists are shown spaced every 12″. You may need to add more if you are not using a box spring (standard maximum slat spacings is 6″), and you could possibly get away with less if you have a good box spring. Remember, king beds often have 2 box springs. After you have built the frame, attach the side rails to the frame. Keep the front edges flush. The bottom edge of the frame will overhang the siderails by 5/8″. Please note that you can adjust the height of the frame to suit your needs, higher for no boxspring, lower to accomodate a box spring.
Step 9
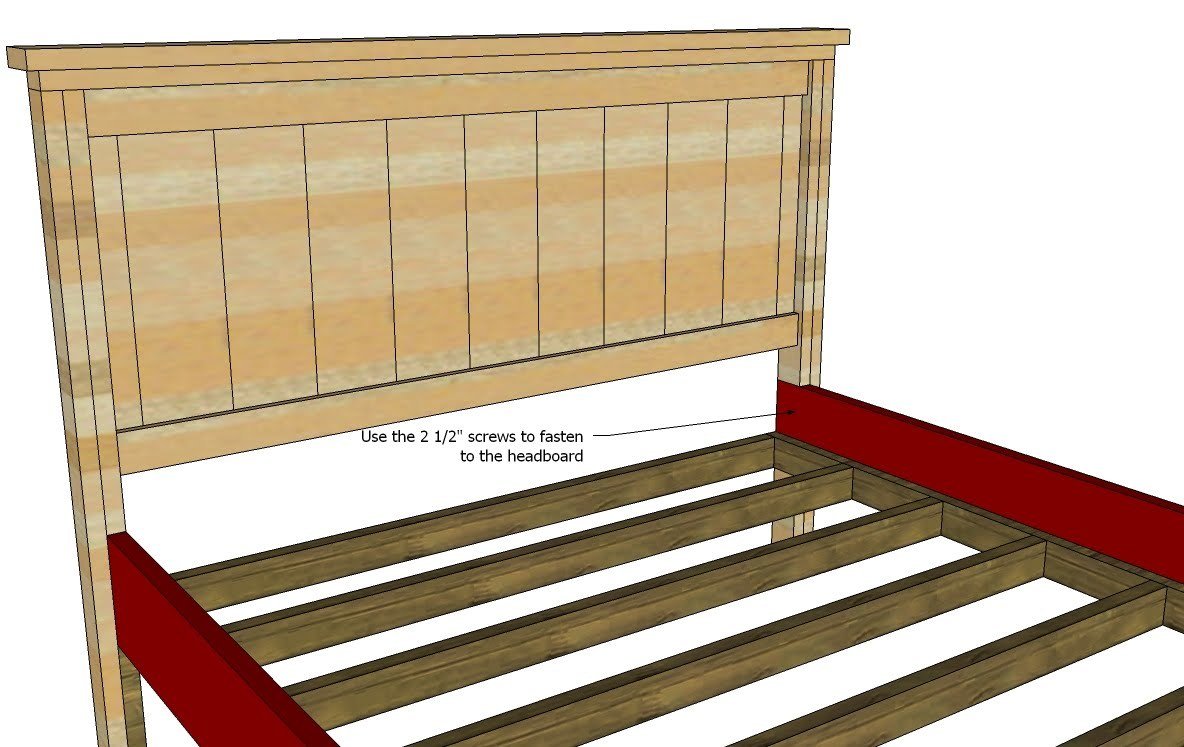
Attaching the siderails to the Headboard. You will only need a few screws on each side rail to attach the siderails to the frame because the bottom leg piece holds the weight. Predrill and countersink your screws, using 2 1/2″ screws. Do not use glue here.
Step 10
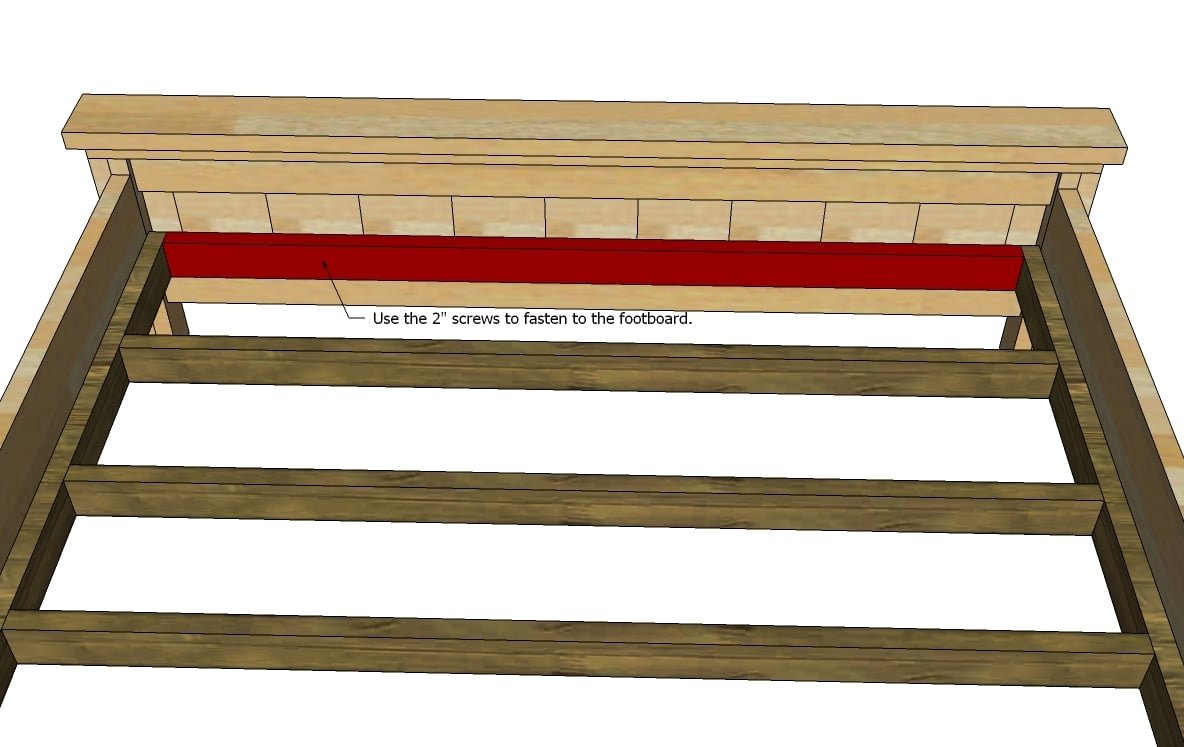
Attaching to the Footboard. Fasten the bottom frame joists directly to the footboard panel as shown here. Use the 2″ screws, but no glue.
Finishing
Sand all surfaces, starting with a medium grit and finishing with fine. Wipe off the dust, fill any holes or gaps with wood filler, and sand smooth once dry. Apply primer if you're painting, then finish with your choice of paint or stain and seal with a durable clear topcoat. For outdoor projects, use exterior-rated primer, paint or stain, and sealer so the piece stands up to the weather.
Source (temporary): https://www.ana-white.com/woodworking-projects/farmhouse-bed-california-king-size