Farmhouse Bed Canopy Modification (All Bed Sizes)
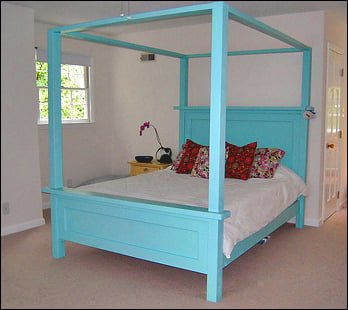
It's simple to add a canopy to our Farmhouse Bed plans. The solid wood beams are perfect for adding a touch of luxury to a bedroom space. This plan is built on top of our Twin Farmhouse Bed, Full Farmhouse Bed, Queen Farmhouse Bed, King Farmhouse Bed or California King Farmhouse Bed.
Specifications
| Project type | Beds and Bed Frames |
|---|---|
| Room | Bedroom |
| Style | Farmhouse Furniture |
| Difficulty | Intermediate |
| Estimated cost | Under $20 |
Dimensions
Use the size-specific shopping and cut lists below.
Shopping List
- 2 – 4×4 Posts, 8′ Length
- 4 – 2×4 Boards (stud or 8′ length)
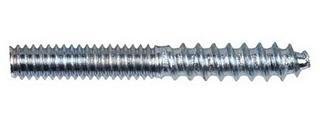
- 4 – Hanger Bolts, at least 5″ Long (see below)
- 4 – Angle Brackets (see below)
- 8 – 3″ wood screws Flat headed wood screws for the brackets, at least 1 1/2″ long
- wood glue
Cut List
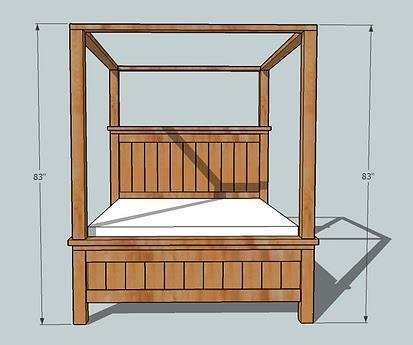
Measure your Headboard and Footboard heights. Find the difference between the two heights (should be about 37-1/2")
- Canopy Post, Headboard – 2 – 4×4 Posts @ 24″
- Canopy Post, Footboard – 2 -4×4 Posts @ 24" + difference between height of headboard and footboard (should be about 57-1/2" cut)
Tools
- measuring tape
- square
- pencil
- safety glasses
- hearing protection
- kreg-jig
- drill
- circular saw
Step-by-step Instructions
Step 1
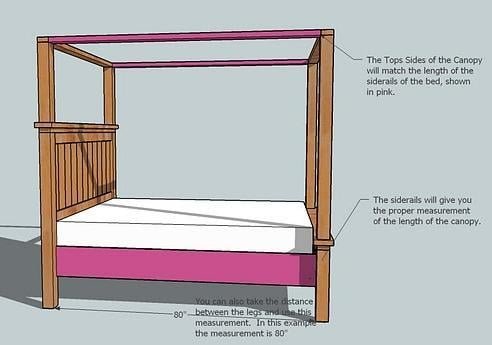
Canopy Sides are equal to the distance between the legs on the sides, as shown in the diagram above.
Step 2
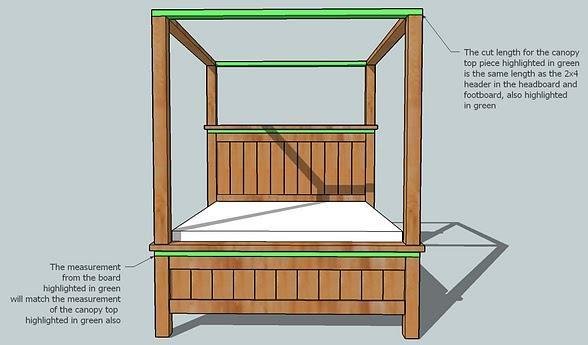
Canopy Top and Bottom are equal to the 2×4 header in the headboard and footboard as shown in the diagram above.
Step 3
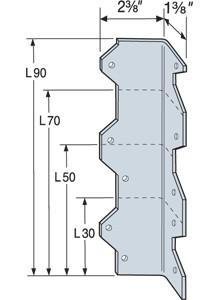
You will need 4 brackets like these (the L30 – should be less than 1 dollar each) These are available at most hardware stores. Just remember, the bracket needs to be less than 3 1/2″ wide and less than 1 1/2″ high, like the L30 bracket from Simpson Strong
Step 4
You will also need 4 Hanger Bolts, like these
Step 5
Step 6
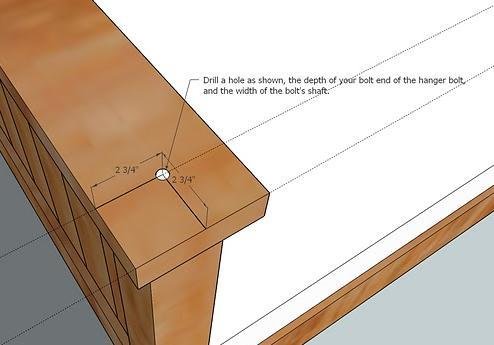
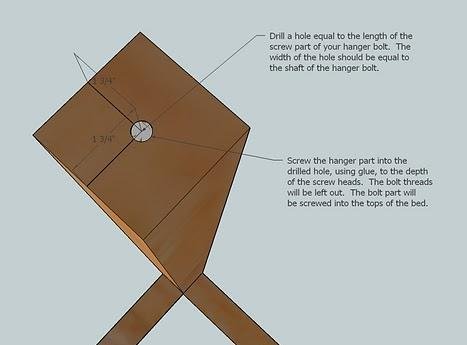
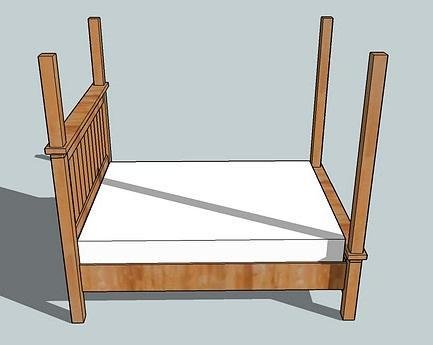
Drill holes in the Canopy Posts. The holes will be in the center of the bottom of the posts. Drill the hole to the depth and width of your hanger bolts, wood screw end. Screw the hanger bolt into the canopy post, using glue to hold in place.
Step 7
Screw the posts into the headboard and footboard holes. Tighten until snug, but do not break the glue hold in the posts. Adjust the posts so that they line up with the legs. This is shown above.
Step 8
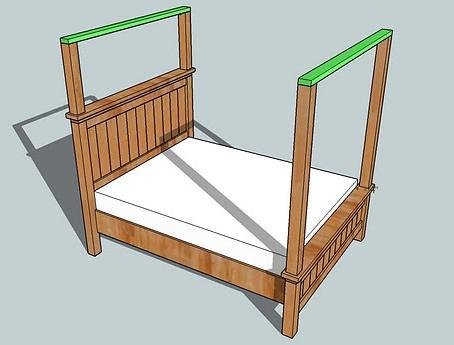
Screw the canopy top ends in place, as shown above. Use at least 3″ screws. I recommend predrilling the screw holes first before attempting assembly.
Step 9
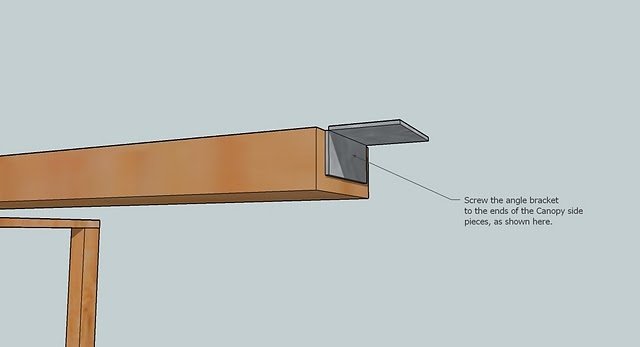
Screw the Brackets to the Canopy Sides. The diagram shown above details how to screw the brackets to the remaining canopy top sides. Predrill your screw holes before fastening. Use a flat headed screws.
Step 10
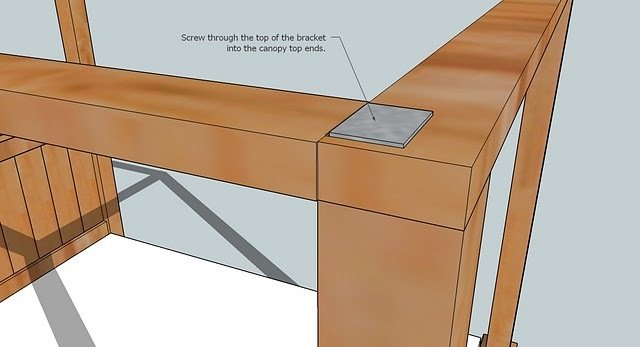
Attach the Canopy Top Sides. Predrill your holes first. Rest the Canopy top sides on the Canopy Ends with the bracket. Screw in place, as shown above. There should be no visible screw holes. Sand and finish as desired. You may wish to finish the canopy unassembled, then bring it into your bedroom and assemble the prefinished pieces. I am not making any guarantee of the structure or safety of this plan. Use at your own risk.
Finishing
Sand all surfaces, starting with a medium grit and finishing with fine. Wipe off the dust, fill any holes or gaps with wood filler, and sand smooth once dry. Apply primer if you're painting, then finish with your choice of paint or stain and seal with a durable clear topcoat. For outdoor projects, use exterior-rated primer, paint or stain, and sealer so the piece stands up to the weather.
Source (temporary): https://www.ana-white.com/woodworking-projects/farmhouse-bed-canopy-modification-all-bed-sizes